Table of Contents

Subscribe to Our Youtube Channel
Related Manuals for bluBathworks blu-stone Series

Summary of Contents for bluBathworks blu-stone Series
- Page 1 ™ Installation Guide BT0102 BT0305 BT0104 BT0105 BT0305N15 BT0110L BT0305N17 BT0110R BT0203 BT0402 BT0207 BT0402N17 BT0402N16 BT0304 BT0406 BT0408 BT0304N17 2017-06 1 866 907 0122 blubathworks.com...
-
Page 2: Installation Requirements
Product Support at 1.866.907.0122 (09:00 – 17:00hrs PST) or email technical@blubathworks.com North America Blu Bathworks Inc. 188 Smithe Street,Vancouver, BC, Canada, V6B 6A9 T +1.604.299.0122 F +1.604.299.0125 Please refer to blubathworks.com for warranty, terms & conditions under warranty & procedure for warranty service. 2017-06 1 866 907 0122 blubathworks.com... - Page 3 • Connect the bathtub drain to the waste. Hook up the water to the faucet. Check that all connections are waterproof. NOTE: The faucet cannot be installed on the bathtub. The tub filler must be mounted either in the wall or a freestanding floor-mounted tubfiller. Read the manufacturer’s instructions for installation details. 2017-06 1 866 907 0122 blubathworks.com...
-
Page 4: Installation Instructions
Attach the drain body nut on the drain body and tighten until the nut and washer have created a seal with the bottom of the bathtub. * DO NOT overtighten - wear protection - two people recommended 2017-06 1 866 907 0122 blubathworks.com... - Page 5 Apply a bead of tub and tile caulk around the edge of the base. (Fig. 6) • Carefully set tub into position (Fig. 7) and connect the drain hardware (previously installed). Finish the installation of the tail piece. top of the tub bottom of the tub flat 2017-06 1 866 907 0122 blubathworks.com...
- Page 6 5. Apply a clear silicone bead where the tub and wall finish meet at the flange location **Blu Bathworks recommends TF.BTSB Tile Flange (Sold separately) Silicone above & below lip DETAIL I DETAIL I (exploded) 2017-06 1 866 907 0122 blubathworks.com...
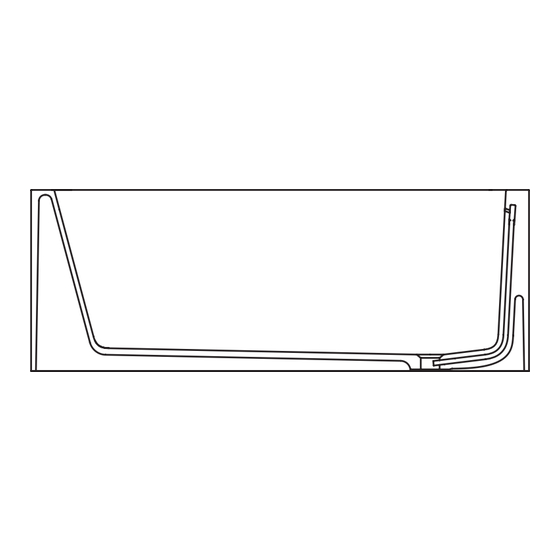
- Page 7 ALCOVE INSTALLATION EXAMPLES BT0102 · BT0104 · BT0105 (only BT0110L/R) 2017-06 1 866 907 0122 blubathworks.com...
-
Page 8: Standard Cleaning
For more extensive repairs, send a photograph of your blu·stone product to Blu Customer Service ™ (technical@blubathworks.com), who will inform you as to the most appropriate methods to use. limited warranty Blu Bathworks’ (“Blu”) warranty on blu·stone products covers all defects in materials and manufacturing for a period of five (5) ™... - Page 9 Acrylic Freestanding Bathtub Installation Guide BT8002B16 BT8001 BT8002B18 BT8005 BT8004B16 BT8004B18 BT8006B15 BT8007 BT8006B17 2017-03 1 866 907 0122 blubathworks.com...
- Page 10 Product Support at 1.866.907.0122 (09:00 – 17:00hrs PST) or email technical@blubathworks.com North America Blu Bathworks Inc. 188 Smithe Street,Vancouver, BC, Canada, V6B 6A9 T +1.604.299.0122 F +1.604.299.0125 Please refer to blubathworks.com for warranty, terms & conditions under warranty & procedure for warranty service. 2017-03 1 866 907 0122 blubathworks.com...
- Page 11 8. Connect the bathtub drain to the waste. Hook up the water to the faucet. Check that all connections are tested and not leaking water. 9. The waste and overflow can then be attached to the trap from below the floor. 2017-03 1 866 907 0122 blubathworks.com...
-
Page 12: Installation Procedure
The bathtub is leveled via a water level at the intended local installation area. • Raise the bathtub up to 3½" with 4x4 peices of lumber so you can have access from the bottom of the bathtub. 2017-03 1 866 907 0122 blubathworks.com... - Page 13 Note: any remaining protective packaging should be removed only after the bathtub installation and other construction work in the bathroom is fully finished. 2017-03 1 866 907 0122 blubathworks.com...
- Page 14 Slide tail piece nut over tail piece towards flanged end. • Place flange washer on top of tail piece. • Connect tail piece assembly to waste drain. • trap *** Island Tub Drain Installation Refer to BTWaste.RN/BTWasteCI.RN Installation Guide provided by installer 2017-03 1 866 907 0122 blubathworks.com...
- Page 15 5. Apply a clear silicone bead where the tub and wall finish meet at the flange location **Blu Bathworks recommends TF.BTSB Tile Flange (Sold separately) Silicone above & below lip DETAIL I DETAIL I (exploded) 2017-03 1 866 907 0122 blubathworks.com...
- Page 16 Alcove Installation Examples BT8001 60" 60" [1524] [1524] 32" 32" [813] [813] 60" 60" [1524] [1524] 32" 32" [813] [813] 2017-03 1 866 907 0122 blubathworks.com...
- Page 17 • Waste Drain (provided) • 1 ½" Female Adapter* • 1 ½" ABS Pipe* (cut to length) • 1 ½" ABS Trap* * Provided by plumber 2017-03 1 866 907 0122 blubathworks.com...
- Page 18 If the previous steps did not help to enhance the gloss finish, you can use a car polish wax on the area using a soft cloth; spread • small amounts over the area in need of refinishing. Remove excess polish and wax with a clean cloth. Allow the wax to dry; repeat as necessary until shine is restored. 2017-03 1 866 907 0122 blubathworks.com...
- Page 19 ™ Installation Guide SB8080 SB9090 SB8120 SB9120 SB8150 SB9150 SB8250 SB9250 2018-01 1 866 907 0122 blubathworks.com ® ®...
- Page 20 Product Support at 1.866.907.0122 (09:00 – 17:00hrs PST) or email technical@blubathworks.com North America Blu Bathworks Inc. 188 Smithe Street,Vancouver, BC, Canada, V6B 6A9 T +1.604.299.0122 F +1.604.299.0125 Please refer to blubathworks.com for warranty, terms & conditions under warranty & procedure for warranty service. 2018-01 1 866 907 0122 blubathworks.com ®...
-
Page 21: Preparing The Location
3. Place the shower base into position. 4. Note: Ensure the cut edge is installed against the wall to ensure the smooth edges are exposed. 2018-01 1 866 907 0122 blubathworks.com ®... -
Page 22: Recommended Tools
Min. 31½" x 31½" or 35½" x 35½" Optional customizable length [800 x 800 or 900 x900] Recommended Tools Level Mortar/Plaster or Silicon Handsaw Tape Measure Mastic for floor leveling 2018-01 1 866 907 0122 blubathworks.com ®... - Page 23 Surface-mount Assembly R-L Refer to detail 1 on page 8 According to the drain installation manual by the drain manufacturer (2" Drain not included) Silicon 2018-01 1 866 907 0122 blubathworks.com ®...
- Page 24 2018-01 1 866 907 0122 blubathworks.com ®...
- Page 25 Recessed Assembly R-L Refer to detail 1 on page 8 According to the drain installation manual by the drain manufacturer (2" Drain not included) Silicon 2018-01 1 866 907 0122 blubathworks.com ®...
- Page 26 2018-01 1 866 907 0122 blubathworks.com ®...
- Page 27 We do not recommend using this product at water temperatures exceeding US / Canada maximum hot water temperature regulations of 150°F / 65°C, respectively. The Manufacturer shall not be liable for any damages that may result from the improper use of the product. 2018-01 1 866 907 0122 blubathworks.com ®...
- Page 28 For more extensive repairs, send a photograph of your blu·stone product to Blu Customer Service ™ (technical@blubathworks.com), who will inform you as to the most appropriate methods to use. limited warranty Blu Bathworks’ (“Blu”) warranty on blu·stone products covers all defects in materials and manufacturing for a period of five (5) ™...
Need help?
Do you have a question about the blu-stone Series and is the answer not in the manual?
Questions and answers