Table of Contents
Advertisement
Quick Links
Advertisement
Table of Contents

Subscribe to Our Youtube Channel
Related Manuals for Medeli AKX10


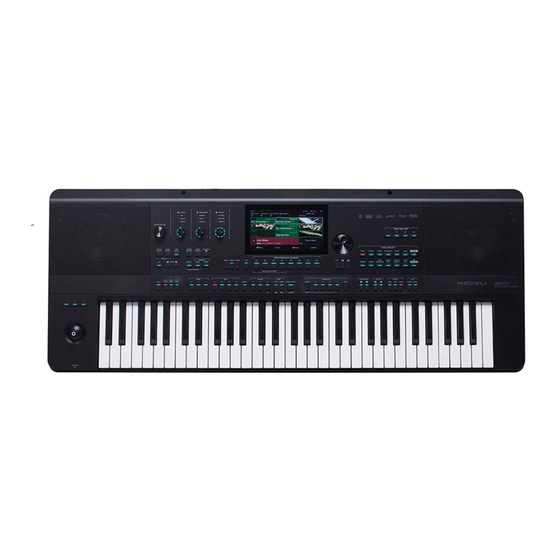
Summary of Contents for Medeli AKX10
- Page 1 AKX10_OM05_EN_190816.indd 1 2019/8/16 13:37...
- Page 2 INFORMATION FOR YOUR SAFETY! THE FCC REGULATION WARNING (for USA) PRECAUTIONS PLEASE READ CAREFULLY BEFORE PROCEEDING This equipment has been tested and found to comply with the limits for a Class B digital device, pursuant to Part 15 Please keep this manual in a safe place for future refer- of the FCC Rules.
-
Page 3: Table Of Contents
Contents Panel & Display Style Recording ............42 ............5 Basic Parameters of Styles ........43 Panel ................5 Further Editing a Style ..........48 Main Display ..............7 Recording your Performance as a New Style ..58 Listen to the Edited Style ......... 59 Setup ................ - Page 4 Contents Clear Performance Memory ......... 97 Using Vocoder ............136 Using Vocal Harmony ..........137 View Basic Information ..........97 Add the Bank to “My Favorites” ........98 Scale Tuning ............138 Freezing the Settings............ 99 Master Tuning ............. 138 Saving, Deleting, and Renaming a Performance Memory Scale Tuning ...............
-
Page 5: Panel & Display
Panel & Display Panel MASTER VOLUME KNOB Adjust the master volume. SELECT BUTTON Select the GROUP KNOBS effect combinations sequentially. GROUP KNOBS Adjust the parameter of corresponding function. STYLE SELECT BUTTON Enter the STYLE SELECT menu. SONG SELECT BUTTON Enter the SONG SELECT menu. USB DEVICE BUTTON Enter the USB DEVICE menu. - Page 6 Panel & Display ONE TOUCH SETTING 31 M1-M4 (O.T.S.1-O.T.S.4) BUTTONS Call up the panel settings that match the current style. 32 PHRASE PAD SELECT BUTTON Enter the PHRASE PAD menu. 33 PHRASE PAD 1, 2, 3, 4 BUTTONS Start the percussion and melodic phrases playback. 34 PHRASE PAD STOP BUTTON Stop the percussion and melodic phrases playback.
-
Page 7: Main Display
Panel & Display Main Display The color LCD touch screen shows basic information on all current settings at a glance. Settings can be adjusted by touching the screen. Voice Displays Voice name and octave Use to select the voices of each part (L, R1, R2, and R3), for data of each part. -
Page 8: Setup
Setup This section contains information about setting up your instrument and preparing to play. Power Supply Connecting the Adapter First, make sure the instrument ON/OFF switch is set to OFF and and set the master volume level to minimum. Connect the AC adapter to the power supply jack on the rear panel. Plug the power adapter into an AC outlet. -
Page 9: Connecting A Footswitch/Expression Pedal
Setup Connecting a Footswitch/Expression Pedal This section will show you how to connect footswitches and pedals to take control of multiple instrument functions. Connecting a Footswitch An external footswitch can be plugged into the sustain jack to be used to turn sustain on or off. When pressed on, you will have a natural sustain as you play. -
Page 10: Connecting External Equipment
Setup Connecting External Equipment Connecting Audio Equipment The [LINE OUT] jack send the instrument signal output to external audio equipment such as a keyboard amplifer, stereo sound system, mixing console, or recording interface. When audio equipment is connected to the instrument, you can use the [MASTER VOLUME] knob to adjust the overall output volume. -
Page 11: Basic Operation
Basic Operation Selection Operation The selection menus include: voice selection, style selection, song selection, phrase pad bank selection, performance memory selection, and others. Bring up the selection menus by pressing them on the touch screen or by pressing the panel buttons shown below. Using the Voice Selection menu as an example, follow these steps to choose a file: 1. -
Page 12: Using The Soft Keyboard
Basic Operation Using the Soft Keyboard To name or rename a file, press the soft keyboard button at the bottom right corner of the screen. 1. Deleting characters Press the delete button to delete the previous character in the input field. To delete all the characters in the input field at once, press and hold the delete button. -
Page 13: Settings Operation
Basic Operation Settings Operation The instrument has a touch screen from which you can directly select files, adjust parameters, and change settings. These operations can also be made using the [DATA DIAL] and [</>] buttons. When adjusting parameter values, press the [<] and [>] buttons simultaneously to reset the parameter value. To return from the current menu to the previous one, press the [EXIT] button. - Page 14 Basic Operation 3. DATA Some parameters (like “Fade In Time”) feature a combo box. There are three ways to adjust the parameter: • Press the up/down arrow button on the touch screen. • Use the [DATA DIAL]. • Use [</>] buttons. In some menus like “Mixer”...
-
Page 15: Shortcut
Basic Operation Shortcut + Although the instrument has many interfaces, there is a way to quickly bring up the interface you need just by using [SHORTCUT+] button. 1. Press and hold the [SHORTCUT+] button. 2. Press other buttons while holding the [SHORTCUT+] button. For example, hold [SHORTCUT+] and press the [A.B.C. -
Page 16: Voices
Playing Voices The instrument features a variety of realistic voices, divided into several categories according to their tonal characteris- tics. Playing Voices Turning on the Part Switch, Selecting and Playing a Voice Press the the [R1] button to turn it on. There are two ways to select voices: •... -
Page 17: Add A Voice To "My Favorites
Playing Voices Add a Voice to “My Favorites” Get quick access to your favorite voices by adding them to “My Favorites”: Press the “Add to Favorites” star icon button at the bottom. A star will appear to the right of the selected voice name. Press the button again to remove it from “My Favorites”. -
Page 18: Playing Voice Demo
Playing Voices Playing Voice Demo Press “Demo” on the Voice selection menu to start playing a demo of the selected voice. Press the “Demo” again to stop The button is disabled if there isn’t a voice demo for the selected voice. Playing Two or Three Voices Simultaneously The instrument allows two or three different voices to be layered together to create a fuller, richer sound. -
Page 19: Playing Different Voices With Both Hands
Playing Voices Playing Different Voices with Both Hands This instrument supports up to 4 parts simultaneously, one for the left hand and three for the right hand. First, turn the upper (R1-R3) parts on. To set a voice for the left hand, make sure the [L] button is turned on. Select a lower (left hand) voice by pressing the [VOICE SELECTION] button. -
Page 20: Using Keyboard Latch
Playing Voices Using Keyboard Latch When you turn the Latch function on, the layer voice will continue playing after you remove your hand from the keyboard. Select the part you want to latch in the “Latch” options. • All Off: The Latch function will not apply to any voice layers •... -
Page 21: Using Transpose And Octave To Change Pitch
Playing Voices You can turn off the keyboard response to get the same volume no matter what velocity you play. Do this by unselecting the “ON” button to turn the keyboard touch response OFF in the “Keyboard” menu. Press “Flat Velocity”, and a menu box will appear. Use the DATA DIAL, the [</>] buttons, or touchscreen to set this parameter. -
Page 22: Adding Effects To Voices
Playing Voices You can also shift the pitch of a specific part or track up or down by full octaves. Octave shift is not available for style and song modes. Use the Octave Shift as follows: Press the [Octave <] / [Octave >] buttons to edit the octave of selected part. Press to select a part. -
Page 23: Using The Joystick To Adjust Pitch And Voice
Playing Voices • Insert Effect: Press the “Insert” button to add an effect to the Voice. There is a wide selection of insert effects available. Some of them can enrich the sound, for example, try adding distortion to the guitar voice, or use some effects to make your performance more realistic like adding delay to an electronic piano. -
Page 24: Editing Voices
Playing Voices Editing Voices The voice edit function enables you to create your own voices by editing parameters of existing voices. You can save up to 512 User Voices and recall them from the USER voice tab. Select a voice to edit. Press the “Edit” button on the Voice Selection display to call up the Voice Edit menu. Editable Parameters The parameters you can edit are categorized into four tabs at the top of the menu. - Page 25 Playing Voices Keyboard Tab This menu contains “Keyboard”, “Velocity”, and “Play mode” parameters. Keyboard Right Octave Determines the default octave shift of the edited voice when used as any of -2~+2 the RIGHT 1-3 keyboard parts. Left Octave Determines the default octave shift of the edited voice when used as the -2~+2 LEFT keyboard part.
- Page 26 Playing Voices Effect Tab This menu contains “Global Effect”, “Insert Effect”, “EQ” and Part Effect parameters. Reverb Level Adjust the reverb depth. 0~127 Chorus Level Adjust the chorus depth. 0~127 Low Frequency Adjust the Voice Low Frequency level. 32 Hz~2.0 KHz Low Gain Adjust the Voice Low Gain level.
-
Page 27: Saving The Edited Voice
Playing Voices Control Tab This menu contains “Modulation” and “Voice Control” parameters. Modulation Vibrato Depth Determines the strength of the vibrato effect. 0~127 Add Vibrato by moving the Joystick up. Voice Control IFX ON/OFF Control the IFX effect in real time by moving the Joystick up or down. Different IFX have different preprogrammed parameters for the Joystick. - Page 28 Playing Voices When you are finished editing, save your settings to User Voice as follows: Press “Save”. Enter a name for your edited voice in the soft keyboard. Press “OK” to save edited voice as a User Voice. Now, you can find the new voice you saved in the “User” menu. AKX10_OM05_EN_190816.indd 28 2019/8/16 13:37...
-
Page 29: Saving, Deleting Or Renaming A User Voice
Playing Voices Saving, Deleting or Renaming a User Voice You can delete, rename or save a User Voice to USB device from the “User” menu. Select a User Voice. Then, press the “Menu” icon at the bottom right corner to bring up the menu. Press the “Delete”... - Page 30 Playing Voices If the name you entered is same as an existing file, a pop up will remind whether you want to overwrite the existing voice. Press the “Save User” button to bring up the soft keyboard. Rename the voice and save it as a new User Voice. Press the “Save USB”...
- Page 31 Playing Voices You can also delete multiple files. Press the “MulSel” button on the bottom left and switch it to “Multi-select”. The “Re- name” button will be replaced by a “Select All” button. Now, you can touch multiple file names to select them or press “Select All” to select all the files in the directory. Tips: You can add a User Voice or a Voice saved in a USB device to “My Favorites”...
-
Page 32: Auto Accompaniment
Auto Accompaniment The instrument has a huge selection of various musical styles that put a full backing band at your fingertips. All you have to do is to play chords. With auto accompaniment, even a solo performer can enjoy the experience of playing with a full band or orchestra. -
Page 33: Playing The Percussion Tracks Of A Style
Auto Accompaniment Playing the Percussion Tracks of a Style The percussion track is a significant part of a style. You can generally identify the style of music by listening to its percus- sion track. Press the [START/STOP] button. The style will immediately start with only the percussion track. When the [A.B.C.] button is turned off and the [SYNC START] button is turned on, the percussion track will start when you play the keyboard. -
Page 34: Add A Style To "My Favorites
Auto Accompaniment Tips: • If you press the [SYNC STOP] button to turn on the Sync Stop function, the automatic accompaniment will automatically stop when you release the chord. • The preset tempo of each style is displayed above the style name. The tempo will change according to the style you select. -
Page 35: Chord Basics
Auto Accompaniment The default chord split point is F#3, which is the same as the left hand split point. However, two split points can be set to different positions as needed. To set two split points at the same time, press “Chord + Left” to turn it on. Now these two split points will change synchro- nously. - Page 36 Auto Accompaniment The root note, also known as the tonic, is the most important note in a chord. It stabilizes the sound by determining the “mode” of the chord, fixing the composition of the other notes in the chord.The name of the chord structure depends on the interval of each note above the root note in the chord.
- Page 37 Auto Accompaniment Multi-fingered Multi-fingered mode only detects multi-fnger chords. Let’s take for example a chord with root C and introduce fngering according to a chord chart or chord dictionary. Fingered The default chord detect mode of this instrument is Fingered. You can either use Single Finger or Multi-finger. Chord Dictionary The instrument built-in chord dictionary provides complete finger positions of almost every chord.
-
Page 38: Setting Chord Detect Mode
Auto Accompaniment Press the chord type and use the touch screen, DATA DIAL, or the [</>] buttons to select a chord type. The correct chord fingering will appear on the keyboard, and the chord notes will appear on the music staff. Tips: There are always variations to chord fingering and construction. -
Page 39: Style Playback
Auto Accompaniment Style Playback Style Variations There are many preprogrammed variations of automatic accompaniment. • INTRO [1] - [3] An Intro is usually used at the beginning of the music. This instrument features three built-in Intro sections. Press one of the INTRO [1] - [3] buttons before starting style playback. The INTRO button LED light will light up. Press the [START/ STOP] button or play a chord on the keyboard (if SYNC START is enabled) to start playing the Intro pattern. - Page 40 Auto Accompaniment • [SYNC START] Start Style playback when playing the keyboard. When A.B.C. is turned off, turn on the [SYNC START] button, The Style will start playing when you press any key. When A.B.C. and SYNC START are both turned on, the Style playback will be triggered by playing a chord in the keyboard chord detect area.
-
Page 41: Adjusting The Tempo
Auto Accompaniment • [O.T.S. Link] O.T.S. Link is very useful feature. When you play different styles and switch the main sections, the O.T.S. function will apply the preset parameters of the main patterns for your performance. The instrument has four Main Patterns: Main A, Main B, Main C, and Main D, corresponding to O.T.S. 1, O.T.S. 2, O.T.S. 3, O.T.S. -
Page 42: Metronome
Auto Accompaniment Tips: The Style tempo is displayed above the Style name. When you select a different Style, the tempo will also change. To switch between different Styles while using automatic accompaniment without changing the tempo, you can turn on “Tempo Lock” in the “Style & Song” menu to fix the current tempo. Tap Tempo is equally effective in Song mode. -
Page 43: Basic Parameters Of Styles
Auto Accompaniment Percussive A channel consisting of percussion accent phrases Drum A basic part of the accompaniment style, the drum channel contains foundational phrases Bass The bass channel contains bass phrases that match the accompaniment style Chord 1 Chord channel 1, generally contains some rhythmic phrases Chord 2 Chord channel 2, generally contains some rhythmic phrases Chord 3... - Page 44 Auto Accompaniment In the Tempo Adjustment pop up, there is an “Only apply to current section” option. If you only want to change the tempo of the current section, select this option. Most of the sections have a uniform tempo. If you do not turn on the “Only apply to current section” switch, the tempo of all the other sections will be synced to your new tempo after you confirm.
- Page 45 Auto Accompaniment Channel Selection When the editing section is Intro or Ending, a “Channel Selection” button will appear at the top. Press it to select Channel 1~8 or Channel 9~16. If the editing section is not Intro or Ending, the “Channel Selection” button will not appear. In this case, you can only edit or record the section in Channel 9~16.
- Page 46 Auto Accompaniment Channel Voice Selection Change the channel voice as follows: Press the voice name of the channel you want to change to enter the Voice Selection menu. The Voice Selection menu will only display all selectable voices of this channel. Unsupported voices will be hidden. For example, you can only select percussion voices for the Perc and Drum channel, and only bass voices for the Bass channel.
- Page 47 Auto Accompaniment This channel will only play when you use Major chords. This channel will only play when you use Minor chords. This channel will play whether you use Major or Minor chords. This channel does not respond to chords. The parameter options available are related to the current edited section: •...
-
Page 48: Further Editing A Style
Auto Accompaniment Channel Pan Press the pan value. Then, press the Up and Down arrows, use the [DATA DIAL], or use the [</>] buttons to adjust the pan value. Further Editing a Style Get into deep editing for your Style recording! Press the “Edit” buttons at the right of each channel to access detailed parameter menus. - Page 49 Auto Accompaniment Press the “Quantize” button at the list to bring up a pop up window. Press the quantize accuracy to bring up a list. Select an accuracy amount and the notes will be quantized accordingly. To optimize your accuracy, set Quantize to the shortest note value in the channel. For example, if eighth notes are the shortest in the channel, set eighth notes as the Quantize accuracy.
- Page 50 Auto Accompaniment Press the velocity value. Then, press the Up and Down arrows, use the [DATA DIAL], or use the [</>] buttons to adjust the velocity percentage. Set the velocity percentage above 100% to increase the overall velocity of the channel. Set it below 100% to decrease the velocity.
- Page 51 Auto Accompaniment When a major chord changes to a minor chord, the original notes in the scale will become lower. When a minor chord changes to a major chord, the original notes in the scale will become higher. The following is a brief overview of the general usage of “Note Trans”: Bypass Suitable for percussion Channel Melody...
- Page 52 Auto Accompaniment Acoustic instruments have a note limit determined by a real range. This parameter limits the root position in a chord which shifts down an octave in the current channel. 4. Retrigger Rule Press “Retrigger Rule” to bring up a list of retrigger rules. By adjusting this parameter, you can determine how notes in the current channel respond to chord changes.
- Page 53 Auto Accompaniment Editing Each Note of the Style With the powerful Event List function, you can edit each note of channel; this is very helpful for detailed modification of your style. Press “Event List” of Edit to enter the event list interface. In the event list menu, each row displays events in the current channel.You can see information about each note played.
- Page 54 Auto Accompaniment 2. Edit the Event Parameters Press the “Data” button to edit the data of the event. Edit different parameters corresponding to different event types: • NOTE: This event changes the note velocity. • CTRL: This event changes the controller parameters. 3.
- Page 55 Auto Accompaniment 5. Delete All Notes of the Same Pitch Select a NOTE event, then press the “Delete note” button to delete all the notes of the same pitch as the note you selected. Note! After you delete the notes of the same pitch, the deleted content cannot be recovered after the edited style overwrite the previous style.
- Page 56 Auto Accompaniment Press the double arrows to scroll between pages. 8. Exit Event List Press panel [EXIT] button to return to the Style Recording menu. You can save your changes there. Clear Press the “Edit” button and then select “Clear”. Press “OK” in the pop up window to clear the channel content. Note! After you delete the notes of the same pitch, the deleted content cannot be recovered after the edited style overwrite the previous style.
- Page 57 Auto Accompaniment Press the Style name to enter the Style Selection menu. Select a Style from the different tabs and categories. Press the [EXIT] button to confirm your selection and return to Copy From popup. Press the section name to bring up the section list. Then, select one as the section source. Press the channel number to bring up the channel list.
-
Page 58: Recording Your Performance As A New Style
Auto Accompaniment Recording your Performance as a New Style Besides editing the existing music content, you can also record your own performance as a Style channel. Create a blank style Press the “New” button. Set a time signature new Style and press “OK” to confirm. Press the [... -
Page 59: Listen To The Edited Style
Auto Accompaniment Start record Press the RECORD button. The button will change to START and await recording. Play the keyboard, press the START button, or press the panel [START/STOP] button to start recording. The screen button will change to “Stop”. The current style section will playback in a loop while recording, and the notes you play will overdub the existing music content of the channel. -
Page 60: Saving Edited Style
Auto Accompaniment Saving Edited Style Press the “Save” button on the lower right and enter name of the style. Save the new User Style after pressing “OK”. You can locate the new User Style you saved in the User tab. Setting Style O.T.S. - Page 61 Auto Accompaniment The O.T.S. settings menu allows you to set each detailed parameter of the O.T.S. • Part ON/OFF: Turn on/off the Parts (R1, R2, R3, L) • Voice: Select a Voice for each Part. • Volume: Set the Volume for each Part. •...
-
Page 62: Saving, Deleting Or Renaming The User Style
Auto Accompaniment Saving, Deleting or Renaming the User Style User Styles can be deleted, renamed, or saved to a USB storage device. Press the “User” tab and select a user style. Press the “Menu” button to call up the menu. Press the “Delete”... - Page 63 Auto Accompaniment Press the “Save User” icon to enter a new name with the soft keyboard. Press “OK” to save the new Style to User tab. Press the “Save USB” icon and enter a new name with the soft keyboard. Press “OK” to save the new Style to a USB device.
-
Page 64: Song And Audio
Song and Audio Playing Song and Audio This instrument features various classic music to listen to. You can also play audio files (WAV / MP3 / AAC / m4a formats) from a USB device through the built-in speakers. Selecting Songs You can select preset songs one of the two following ways: •... - Page 65 Song and Audio Here’s how to play the keyboard in the main melody voice while a song is playing: Press the “Style & Song” button below to enter the Style & Song menu. You can also enter the Style & Song menu via Global Setting.
-
Page 66: Operating Song Playback
Song and Audio Operating Song Playback Select Song Play Mode There are three ways to change playback mode: The default song play mode is: Order. In this play mode, the songs in the current group will be played in order and stop automatically after the last song is played. -
Page 67: Add Songs To "My Favorites
Song and Audio Enter the “Style & Song” menu through “Global Setting”. Press “Song Play Mode” and select a mode from the pop up list by using DATA DIAL or [</>] button. REWIND and FAST FORWARD Pressing the [REW] or [FF] button allows you to jump to a certain measure of a song during playback. The Song play position will be visible. -
Page 68: Audio Playback
Song and Audio Press the “My Favorites” tab to access the songs you saved. You can remove one or more of the songs in this menu anytime. Audio Playback Press the “USB” tab to display all the songs and audio files saved on the external device. Press a file name to select Press the [START/STOP] button to start playing the audio. - Page 69 Song and Audio Use the “play/pause” button in the player to play or pause the audio. When the audio is playing or paused, you can press the “Rewind” or “Fast forward” arrows to rewind or fast forward in seconds. Press and hold either arrow to rewind or fast forward quickly. Press the “Audio Playback Mode”...
-
Page 70: Real-Time Audio Processing
Song and Audio Real-time Audio Processing The instrument has powerful real-time audio processing functions. Audio playback has a vocal remover, tempo change, and transpose functions that let you do karaoke and other create other possibilities for your live performance. Vocal Remover The Vocal Remover eliminates the human voice part of the audio in real time. -
Page 71: Song Recording And Audio Recording
Song and Audio Audio Transpose Use the Audio Transpose function to raise or lower the audio pitch in real time in without changing the tempo. There are two ways you can do this in real time: Press “Audio Transpose” in the audio player and adjust the transpose pitch by using the [DATA DIAL] , [</>] buttons, or using the touch screen The adjustment range is -5 ~ +6. - Page 72 Song and Audio Here is how to set the recording parameters during the ready state: • Record other keyboard parts Turn on the Part switch on the panel to set the recorded parts. • Recording the Style If you need to record the Style, check the “Rec Style” box to turn it on. After that, the Style channels will be recorded as notes.
- Page 73 Song and Audio Turn on the metronome at any time during the recording to assist your performance. The metronome sounds will not be recorded. Press “Stop” in the menu or press the [START/STOP] button on the panel to stop recording. The LED light will go off. If you also recorded a Style, press the “Ending”...
- Page 74 Song and Audio Multi Track Recording Each Song contains 16 separate tracks, and you can record each track individually, building a song track by track Press the “Song” button to enter the song recording menu. Press the track name to bring up the track list and select the part you want to record. Then you can do some preparation for recording.
- Page 75 Song and Audio Press the “RECORD” button in the menu to get ready for recording. Now you can still make adjustments you need before beginning. Press the “START” button in the menu to start recording your performance. When you are fnished, press the “STOP” button in the menu to stop recording. After that, you can play or view your User Songs.
-
Page 76: Editing A Recorded Midi Song
Song and Audio Editing a Recorded MIDI Song The song editing function allows you to adjust the volume, pan, and quantization of MIDI songs. You can also delete a track. Press the “Edit” tab to enter the track editing menu of the current User Song. From here you can edit the MIDI song tracks. - Page 77 Song and Audio Quantize Press “Quantize” to bring up the quantization pop up. Select the quantization accuracy then press “OK” to quantitize the notes in the current track. For best results, set the accuracy to the shortest note in the currently track. For example, if the shortest note in the track is an eighth note (1/8), quantize the track to 1/8 .
- Page 78 Song and Audio Reset the Editing Press the “Reset” button to reset all your edits. The track parameters will be restored to their previous values. Save Your Edits Press the “Save” button to call up the saving popup, then press “OK” to apply your changes to the current User Song. Note! If you exit the song editing menu before saving, all changes made will be lost.
-
Page 79: Audio Recording
Song and Audio Audio Recording This instrument has real-time audio recording, allowing you to save your performance to a USB storage device in real time. All the sounds from this instrument can be recorded as audio, including external audio sources such as Mic In and Aux In. -
Page 80: Saving, Deleting And Renaming The User Song
Song and Audio The instrument supports 90 minutes of recording. The recording time information appears at the top of the Main display. When recording time exceeds 87 minutes, the recording time will flash to remind you. At the 90 minute mark, the record- ing will automatically stop and the audio file will automatically be saved. - Page 81 Song and Audio Press “Delete” and then confirm to delete the currently selected User Song. Press “Rename” to bring up the soft keyboard and enter a new name to rename the currently selected User Song. Press “OK” to confirm. If the new name you entered already exists, an alert will pop up to ask you to enter another name for the currently select- ed User Song again.
- Page 82 Song and Audio Press “Save USB” bring up soft keyboard and enter a new name to save the currently selected User Song to a USB device. Press “OK” to confirm. Press the “USB” tab to view the new song you just saved to the USB device. Tips! You can add your favorite preset songs to “My Favorites”.
-
Page 83: Phrase Pad
Phrase Pad A Phrase Pad is a short rhythmic sequence or sequence of phrases. Similar types of sequences are combined to form a Phrase Pad Bank. The instrument has more than 180 Phrase Pad Banks, each containing four sequences.These sequences vary in style and length, so experiment with them to find the sequences right for your performance. -
Page 84: Stop Playing Phrase Pad
Phrase Pad Stop Playing Phrase Pad Press the [STOP] button to stop all Phrase Pads playback. The LED lights will all go out. If several Phrase Pads are playing at the same time, hold [STOP] and press one of them at the same time, it will be stopped immediately. -
Page 85: Album
Album The instrument Album feature helps you make the most of the panel settings to play songs. When you find and select a song in the Album, the instrument automatically sets the best setting for this song. You can also save your panel settings as new Album and export it to USB storage to save or share. Selecting an Album and Playing the Keyboard Press “Album”... -
Page 86: Add Or Delete An Album
Album Press the “My Favorites” tab at the top right to see the Album you have marked. In this menu, you can also delete favorites at any time. Add or Delete an Album Add a User Album You usually need to adjust the instrument panel settings details to play various songs. By using the Album function as follows, you can quickly add your panel settings to a User Album, rename them, and then call them up with a simple search. -
Page 87: Delete A User Album
Album The Album you just added will appear in the User list. Whenever you need to play the song with the same settings, simply select the Album. Delete a User Album You can delete the currently selected item by clicking the “Delete” icon. Press “OK” in the pop up window and the Album will be deleted. - Page 88 Album Enter the Album name you want to search for. Search matches will appear in the column to the left. Use the up and down arrows to scroll through the list. Press the name of the Album to select it. AKX10_OM05_EN_190816.indd 88 2019/8/16 13:37...
-
Page 89: Demo
Demo This instrument is preset with 3 Demos which give an overview of the musical properties and features/functions of the instrument. Press the [STYLE SELECT] and [SONG SELECT] buttons at the same time to enter the Demo menu. The Demo music will begin immediately. -
Page 90: Mixer
Mixer This instrument has a powerful and intuitive mixer interface, allowing you to easily adjust the volume balance across all the audio channels of the entire instrument. Press the [MIXER CONSOLE] button to bring up the mixing console interface. Adjusting Volume and Pan on Keyboard Parts Adjust the volume balance and channel pan as follows: Press the “Master”... -
Page 91: Turn On/Off Insert Effect (Ifx)
Mixer Press and hold a volume slider and move it up or down to adjust the volume of that part. You can also use the [DATA DIAL] or [</>] buttons to adjust the volume. To adjust the left/right pan of a part, press the circular knob to bring up a combo box. Adjust the pan value by pressing the arrowa, using the [DATA DIAL] or [</>] buttons. -
Page 92: Adjusting Volume Of Style, Phrase Pad And Song
Mixer Press the [INSERT] button on the panel to turn the IFX on or off for the current part. Tips! Refer to the section on IFX for more detailed information. Adjusting Volume of Style, Phrase Pad and Song Adjust the Style, Phrase Pad and Song volumes in the mixer while playing the keyboard to balance their volume with the keyboard. -
Page 93: Control Channel Volume Of Style
Mixer Press the microphone “FX” to turn the microphone effect on or off. Tips! Refer to the section on microphone for more detailed information. Control Channel Volume of Style Adjust the volume balance of each Style channel as follows: Press the “Style” tab to enter the control interface. Use the volume faders to adjust channel volumes. -
Page 94: Control Song Track Volume
Mixer You can also solo or mute certain channels according to your preference. To hear a channel played solo, press the “S” button to turn it on. Press it again to turn it off. Press the “M” button to mute the channel. Press it again to turn it back on. Control Song Track Volume Adjust the volume balance between each track of Song as follows: Press the “Song”... - Page 95 Mixer Use the volume faders to adjust each track’s volume. You can also solo or mute certain tracks according to your preference. To hear a track played solo, press the “S” button to turn it on. Press it again to turn it off. Press the “M”...
-
Page 96: Performance Memory
Performance Memory The Performance Memory feature lets you access your saved performances on the fly. Save panel settings to a Perfor- mance Memory button, then instantly recall your custom panel settings by pressing a single button (M1-M8). The instrument has 60 Performance Memory Banks, each of them with 8 memories. Selecting a Bank and a Performance Memory Selecting a Performance Memory Bank Each Performance Memory is stored in a bank. -
Page 97: Save Settings As A Performance Memory
Performance Memory Save Settings as a Performance Memory Save your current panel Settings as Performance Memory as follows: Select a Performance Memory Bank in which to save your settings. Press and hold the [STORE] button on the panel and press one of the [MEMEORY] buttons to save the current panel settings to that Memory. -
Page 98: Add The Bank To "My Favorites
Performance Memory Press “OK” to confirm and close the window. Add the Bank to “My Favorites” Add a selected bank to “My Favorites” as follows: Press the “Add to Favorites” icon. A star will appear on the selected bank. Press it again to remove the bank from “My Favorites”. -
Page 99: Freezing The Settings
Performance Memory Freezing the Settings Depending on your performance, you may want to keep special settings. Use the settings freeze to retain the locked items of the current setting when you switch to another memory. In the selection menu, press the “Freeze” icon to bring up a pop up window, then press to select which items to lock. Press “OK”... - Page 100 Performance Memory Rename all the Banks in this instrument to facilitate their accessibility. Press the “Save User” icon to bring up a soft keyboard. Enter a new name and press “OK” to save the new memory bank to the User tab. Press the "Save USB"...
-
Page 101: Sorting User Performance Memory Banks
Performance Memory Press the “Delete” icon to bring up a pop up and press “OK” to delete the memory bank. Tips! The preset memory banks cannot be deleted. You can use the clear function to clear them, and the empty memory banks will always remain in the preset directory. -
Page 102: Dsp Effects
DSP Effects This instrument has powerful DSP effects divided into several module categories which will greatly enrich the acoustics of the instrument and your playing. Press the [GLOBAL SETTING] button on the panel to bring up the selection menu. Press the “DSP Effect” button to enter the effects menu. - Page 103 DSP Effects Select an effect from the effect preset list. There are many preset effects for each type of effect. Press the arrows to scroll through the effects types and presets. Press to select the effect from the list and the effect will be applied immediately. Press “OK” to close the pop up menu. In the Global Effect selection pop up, press “Reverb”...
-
Page 104: Adjusting Effect Level
DSP Effects Adjusting Effect Level In the Global Effect settings menu, press the level number and adjust the global Reverb and Chorus levels, and the Reverb and Chorus levels of the keyboard parts. Use the up and down arrows on the touch screen, the [DATA DIAL] or [</>] buttons. -
Page 105: Saving And Selecting User Global Effect
DSP Effects Saving and Selecting User Global Effect After you adjust an effect, you can save the modification as a User Effect. After adjusting the parameters, press “Save” and select a location to save the User Effect. Press the User Effect number to select the location you want your effect to be saved. Press “OK” to return to the Global Effects selection menu. -
Page 106: Insert Effect
DSP Effects Insert Effect Press “Insert Effect” to bring up the settings menu. Insert Effect only applies to specific parts. Select an Insert Effect for each keyboard part and view the current effect used by a Style or Song. Tips! The Insert Effect settings are similar to those of Global Effect. -
Page 107: Adjusting Eq Parameters
DSP Effects Adjusting EQ Parameters You can adjust the EQ of 7 fixed frequencies. 50Hz Mid 1 150Hz Mid 2 400Hz Mid 3 1KHz Mid 4 3KHz Mid 5 7KHz High 15KHz Different equalization presets have different parameters. Use the frequency fader to adjust the value up or down. Saving and Selecting User EQ If you made adjustments in global equalization, you can save it as your own User EQ. -
Page 108: Loudness Eq
DSP Effects Press a number to select the save location, the press “OK” to return to the Global EQ menu. To apply the User EQ, turn the User EQ option on and select an EQ. Loudness EQ This instrument has a loudness balance function. For some music types, it can be used to emphasize low or high fre- quencies at low or high volumes. -
Page 109: Channel Eq
DSP Effects Channel EQ Channel equalization is an effect applied to keyboard, meant to change the keyboard voice. Press “Channel EQ” to bring up the channel equalization settings menu. Press the value to adjust the high or low gain of the Keyboard parts. -
Page 110: Turn On/Off Compressor
DSP Effects Turn ON/OFF Compressor Press “Compressor” switch to turn the Compressor on/off. Adjusting Compressor Parameter Adjust the threshold and pregain levels of the low, medium, and high frequency ranges. The threshold sets the input volume at which the compressor starts to work. The pregain sets the gain of the input signal before entering the com- pressor. -
Page 111: Keyboard Part Effects
Keyboard Part Effects This instrument has a powerful effects for the keyboard parts. Try adding these effects to your performance for some creative inspiration. There are three kinds of effects: Harmony, Arpeggio and Slicer. Press the [GLOBAL SETTING] button on the panel to bring up the menu. Press the “Part Effect” button to enter the set- tings menu.The R1 part effect is turned on by default. -
Page 112: Select And Turn On Harmony
Keyboard Part Effects Press the part name and select the part to which to add the harmony effect. If you need to listen during editing, turn on the “Arp/Harmony” option and the corresponding Part button on the panel. Press the voice name to change the voice of the current keyboard part. Note! When you select a new voice, the part effect is set to the default type. -
Page 113: Harmony Types
Keyboard Part Effects Press the name of the part effect and select “Harmony” from the list. Now you can select the Harmony type for the current part. Press the harmony type name to bring up the selection list. Press to select a harmony type from the list, the diagram will appear in the pop up. Other effect options include Echo, Tremolo or Trill. -
Page 114: Harmony Adjustment Parameters
Keyboard Part Effects • Echo: A natural delay that simulates sound waves bouncing off hillside valleys. There are 4 Echo effects. Echo effects are not affected by chords. • Tremolo: The effect is a rapid repetition of single or multiple notes. There are 4 Tremolo effects. -
Page 115: Arpeggios
Keyboard Part Effects Arpeggios Arpeggio is a part effect that can help you build compelling performances. Arpeggios convert one or more keys you play on a keyboard into a series of notes that are played in chronological order according to certain settings. Arpeggios can be applied to all keyboard parts. Select and Turn On Arpeggio Select and turn on an arpeggio for the currently part as follows: In the part effect setting menu, Press “Arp/Harmony”... -
Page 116: Arpeggio Types
Keyboard Part Effects Select an arpeggio type for the current part. Press the arpeggio name to bring up selection list. Select an arpeggio and press [EXIT] to return to the settings menu. Press the [PART] button to turn on the arpeggio. Arpeggio Types •... -
Page 117: Arpeggio Parameter
Keyboard Part Effects • Step Step arpeggios are template-based arpeggios which follow complex rules are complicated. With this type of arpeggio, the system will number all the keys you play according to pitch (from low to high) or the order you played them. - Page 118 Keyboard Part Effects 2. Playing Parameter Sort switch When this switch is turned on, the current arpeggio will arrange the pitch from low to high. When the switch is turned off, the current arpeggio will arrange the note according to keys you play. Latch ON/OFF When this switch is turned on, the arpeggio played when keys are pressed will continue playing when the keys are released.
- Page 119 Keyboard Part Effects Alt 1 From the first octave you play, arpeggios are played from low to high until they reach the highest octave, and then from high to low. Alt 2 From the first octave you play, arpeggios are played from low to high until they reach the highest octave, and then from high to low.
-
Page 120: Saving User Arpeggios
Keyboard Part Effects Tips! When some arpeggio types or patterns are selected, some parameters are not available. This depends on their characteristics and application. Saving User Arpeggios Each preset arpeggio pattern in this instrument has a set of preset parameters. You can modify these parameters and save your settings as a User Arpeggio. -
Page 121: Slicer
Keyboard Part Effects Slicer Slicer is an effect applied to Voice that allows you to play notes with rhythmic filters and volume changes.This is a popu- lar effect in electronic music production. Select and Turn On Slicer Add a slicing effect to the keyboard voice as follows: Press “Slicer”... -
Page 122: Adjusting Real-Time Slicer
Keyboard Part Effects Adjusting Real-time Slicer In addition to using slicer patterns, you can also use a Real-time Slicer to produce regular note syncopation. Press to turn on the Real-time Slicer option. Press the slice interval value to select how fast you want to cut the sound. -
Page 123: Controllers
Controllers This instrument has powerful assignable controllers which give you flexibility over your performance. Press the [GLOBAL SETTING] button on the panel to bring up the selection menu. Click the “Controllers” button to enter the menu. Knobs The instrument has three multi-function knobs for use in adjusting several parameters in real time during a performance. When you rotate the knobs clockwise or counterclockwise, a light will indicate the function parameter value. - Page 124 Controllers The knob functions are assignable. Adjust them as follows: Press “Knob” to enter the knob settings menu. Press to select a knob. The available functions appear at the right. Select a Module, then select a function to assign to the knob.
-
Page 125: Resetting Knob Parameters
Controllers You have set a function for the currently selected knob. Press the [Knob Function] button on the panel to switch the function group. Resetting Knob Parameters Press the corresponding reset button [1] [2] [3] to bring up a pop up asking whether you want to reset the parameters of the selected knob. -
Page 126: Assign Buttons
Controllers Press a pedal and the function menu appears to the right. Select a module, then select a function. Press both the [<] and [>] buttons to reset the selected pedal to its default setting. Different pedal functions can be applied to different parts. Check the Part boxes to apply the current function to the parts you want to control in real time. - Page 127 Controllers Program the assign buttons as follows: Press “Switch” to enter the switch settings menu. Press one of the three the Switch buttons and the function menu appears to the right. Select a module, then select a function. Press both the [<] and [>] buttons to reset the selected button to its default setting. Different functions can be applied to different parts.
-
Page 128: Joystick
Controllers Joystick The instrument has a four-direction joystick.The joystick can be pulled any direction and will automatically return to the center position after being released. The default settings are: X- ← Pitch Bend Down X+ → Pitch Bend Up Y+ ↑ Modulation Y- ↓... -
Page 129: Setting The Pitch Bend Range
Controllers The joystick function can only be used on the keyboard part. Check the Part boxes to apply the current function to the parts you want to control in real time. Tips! When the joystick function is set to Voice Control, you can control the effect parameters of the current part. For more information, please refer to the “Voice Editing”... -
Page 130: Setting The Modulation Rate
Controllers Press the Pitch Bend range and set the maximum value of the keyboard part. You can then use the joystick to trigger Pitch Bend of playing notes. Setting the Modulation Rate You can set the Modulation rate of the keyboard by following steps: Press the function name of the upper direction and select the Modulation. -
Page 131: Microphone
Microphone This instrument is set up for a microphone connection. You can also add rich microphone effects to your voice and then record the music you play and sing. Press the [GLOBAL SETTING] button on the panel to bring up the selection menu. Press “Mic Setting” to enter the micro- phone settings menu. -
Page 132: Selecting Microphone Mode
Microphone Check the “Mic ON” box and adjust the volume as you speak into the mic. Adjust the volume balance between the microphone and the other parts in the master mixer interface. Selecting Microphone Mode There are two microphone modes: Talk and Vocal. “Talk”... -
Page 133: Adjusting Basic Microphone Parameters
Microphone Press the mode name to bring up the selection list. Press the “Vocal” button on the panel to switch to “Vocal Mode”. The microphone effects option will automatically turn on. Adjusting Basic Microphone Parameters Adjust the basic parameters of the microphone in the microphone settings menu. Gate Check the Gate option to turn the noise gate on or off. - Page 134 Microphone EQ in 2 Frequency Check the EQ option to turn the microphone equalizer on or off. Press the High gain or Low gain values to adjust the EQ frequencies. Compressor Check the Compressor option to turn the microphone compressor on or off. Press the Ratio, Threshold and Attack time values to adjust the compression parameters.
-
Page 135: Turn On And Select Mic Effects
Microphone Global Chorus Level Press the global chorus value to adjust the microphone chorus level. Turn On and Select Mic Effects Add rich microphone effects in Vocal mode. Press the “Vocal” button on the panel to turn the microphone effects on, or check the “Effect” option to apply the current- ly selected microphone effect. -
Page 136: Using Vocoder
Microphone Using Vocoder A vocoder is an effect which processes the microphone input sound to produce a robot-like vocal effect. You can trigger the vocoder with a keyboard part and use the pitch to process your voice. Add a vocoder to the microphone as follows: In Vocal mode, turn on the microphone effect option. -
Page 137: Using Vocal Harmony
Microphone Using Vocal Harmony Vocal Harmony is a effect which processes to the microphone input sound to produce a natural multi-part harmony. The harmony added to your singing will depend on the chord you are playing. Add a Vocal Harmony to your voice as follows: In Vocal mode, turn on the microphone effect option. -
Page 138: Scale Tuning
Scale Tuning Master Tuning The instrument has a tuning function which can adjust the overall pitch of the instrument. This feature is useful when you play with other instruments or when recording. Adjust the instrument tuning as follows: Press the “Split Point” button at the bottom of the main screen or the Voice selection menu to enter the keyboard settings menu. -
Page 139: Scale Tuning
Scale Tuning Press the “Master Tune” value to bring up the tuning knob. Adjust the tuning frequency by pressing the arrows, or by using the [DATA DIAL] or [</>] buttons. The instrument tuning range is 415.4 Hz~466.2 Hz. Scale Tuning Fine-tune every pitch within an octave with the scale tuning function. -
Page 140: Preset Temperament Introduction
Scale Tuning The preset tuning list appears on the left. Press the up and down arrows to scroll through the list and press a name to select a scale tuning. The pitch difference of the selected scale appears on the right. When you play the keyboard, you’ll feel the different scale effect. -
Page 141: Custom Scales
Scale Tuning Custom Scales In addition to using a preset scale, you can also create your own custom scale. Press the cent value above or below the key to bring up the adjustment knob. Press the arrows, or use the [DATA DIAL] or [</>] buttons to adjust the cent value of each note in the octave. - Page 142 Scale Tuning Press the “User” button to switch to the User Scale list. Select a User Scale to apply your customized scale tuning. AKX10_OM05_EN_190816.indd 142 2019/8/16 13:38...
-
Page 143: Midi I/O
MIDI I/O Expand the features of this instrument with the MIDI function. This section will briefly explain what MIDI is, what MIDI does, and how to use MIDI on this instrument. MIDI Introduction MIDI is an abbreviation of Musical instrument Digital Interface. Is the industry standard for musical data transmission. Electronic instruments can use MIDI to communicate with each other by sending and receiving compatible notes, control conversions, program conversions, and various types of MIDI data or messages. - Page 144 MIDI I/O Select an interface to receive the MIDI messages from the three options on the left. To set the detailed MIDI IN settings for the keyboard channel, press the “IN” button to bring up the settings menu. Press “All” to turn it on and all MIDI messages can be sent to the MIDI IN Group. AKX10_OM05_EN_190816.indd 144 2019/8/16 13:38...
-
Page 145: Midi Out Settings
MIDI I/O You can also send MIDI messages from the specified MIDI IN channel to a corresponding keyboard channel.The option to the left of the Part name controls whether MIDI IN notes make a sound. When an option to the left of the Chord is turned on, the input note in the specified channel can be detected as a chord. - Page 146 MIDI I/O When Soft Thru is turned on, the MIDI input signal received by the instrument will be automatically forwarded, so that one MIDI sending device can be connected to multiple MIDI receiving devices. AKX10_OM05_EN_190816.indd 146 2019/8/16 13:38...
-
Page 147: Usb Storage Devices
USB Storage Devices Connect a USB storage device to the instrument to save all kinds of data and files you created on the instrument. You can also read data from USB storage devices or import data and files to the instrument. You can also record your perfor- mance directly into the USB storage device with the audio recording function. -
Page 148: View Usb Storage Device Usage
USB Storage Devices View USB Storage Device Usage The connected USB storage device capacity will be displayed at the top. Makes sure your storage device has sufficient space. Formatting a USB Storage Device We recommend using this instrument to format a USB storage device before you use it. Press “Format”... -
Page 149: Execute Files
USB Storage Devices Execute Files Press “Execute” to run the file according to its specific type. For example, select a Voice file and execute, and the Voice will be applied. Saving, Deleting, and Renaming Files Files in the USB storage device may be deleted, renamed, or saved to the User File directory or USB storage device. Press the “Menu”... - Page 150 USB Storage Devices Press the “Rename” icon to bring up the soft keyboard. Enter a new name and press “OK” to rename the selected file. Press the “Save User” icon to bring up the soft keyboard. Enter a new file name and save the file to the User File directory.
-
Page 151: Utility Settings
Utility Settings The instrument Utility Settings can be adjusted as follows: Press the [GLOBAL SETTING] button on the panel to bring up the selection menu. Then press “Utility” to enter the set- tings menu. Basic Playing Settings Metronome Settings Using a Metronome can help you keep a steady tempo while playing. Press the “Config 1” tab in the Utility menu. Adjust three metronome features: Time Signature The numerator represents how many beats in each bar. -
Page 152: Fade In/Out Settings
Utility Settings Fade In/Out Settings Fade in time Sets how long the volume takes to go from minimum to maximum. Fade out time Sets how long the volume takes to go from maximum to minimum. Fade out hold time Sets how long it remains after volume reduce to 0. Tap Tempo Settings Style Trigger Turn the Style trigger function on/off. -
Page 153: Speaker Mode Settings
Utility Settings Speaker Mode Settings Always On Sets the speaker Always On. Always Off Sets the speaker Always Off. Auto When headphones are connected, the speaker will go off automatically. Display Theme Settings Set the instrument display theme by pressing the “Config 2” tab in the “Utility” menu. AKX10_OM05_EN_190816.indd 153 2019/8/16 13:38... -
Page 154: Adjusting Display Brightness
Utility Settings Adjusting Display Brightness Press the screen brightness value to adjust brightness of the instrument. Adjust the screen brightness to suit perfor- mance in very dark or very bright venues. Selecting High Contrast Mode This instrument has a high contrast display mode to accommodate players with amblyopia. Press the option to turn on the high contrast display mode. -
Page 155: System Settings
Utility Settings System Settings Press the “Config 3” tab to adjust other instrument system settings. Date & Time Set the year, month, day, hour, and minute. Auto Power Off Adjust the Auto Power Off function to set the time that the instrument will automatically power off after it is not operated. Set the time for 30 minutes, 60 minutes, or never. -
Page 156: Modify User And Device Name
Utility Settings Modify User and Device Name Change the instrument owner’s name here. Press the default name and change it using the soft keyboard. You can also modify the instrument’s device name. This name will be searched as the Bluetooth device name when your smart phone, computer, and other devices scan devices to establish a Bluetooth connection with this instrument. -
Page 157: Troubleshooting
Troubleshooting Problem Possible Cause and Solution The speakers produce a “pop” sound This is normal and is no cause for alarm. whenever the power is turned ON or OFF. There is no sound when the keyboard is The master volume may be set too low. Please adjust it to the appropriate played. -
Page 158: Specifications
Specifications Keyboard: 61 Electronic Organ Keys with Touch Response Touch Response: Soft1.2.3 / Normal 1.2 / Hard1.2.3 Display: 7”TFT, 800×480 colored TFT LCD with Touch Screen Theme and brightness setting Polyphony: Voices: 1100 Voices, 45 Drum Kits, 100 Acoustic Expression Voices 256 GM2 Voices, 9 Creative Expression Voices 512 User Voices Edit Function Keyboard Part:... - Page 159 Specification Real-time Controllers: 3 Assignable Knobs, 2 Assignable Pedal, Assignable Joystick (Pitch Bend, Modulation), 3 Assignable Buttons Mixer: Master Volume , Channel Volume, Pan,Track Mute or Solo Other Controllers: Volume Knob, Date Dial, </> Button, Exit, Transpose+/-, Octave+/-, Vocal Effect, Part Effect, Insert Effect, Sustain, Mono, Voices, Part Switch, O.T.S., Global Setting, Mixer Console, Short Cut, Tempo+/-, Metronome, Tap Tempo Internal Storage:...
-
Page 160: Voice List
Voice List Bank MSB Bank LSB Program Full Name Short Name Piano German Grand Piano 1 German Grand 1 German Grand Piano 2 German Grand 2 Real Bright Piano Real Bright Pno Mellow Grand Piano Mellow Piano Rock Piano Rock Piano Real Honky Tonk Real Honky Tonk Octave Grand Piano 1... - Page 161 Voice List Tremolo EP 2 Tremolo EP 2 Super Electric Piano Super E.Piano Stereo Clavi Stereo Clavi Phase Clavi Phase Clavi Classic Clavi Classic Clavi Wah Clavi 1 Wah Clavi 1 Chorus Clavi Chorus Clavi Wah Clavi 2 Wah Clavi 2 Massiness Electric Piano Massiness EP Wah Electric Piano...
- Page 162 Voice List Classic Drawbar Organ Classic Draw Org Bright Drawbar Organ Bright Draw Org 60's Organ 60's Organ Cool Drawbar Organ Cool Draw Org Vintage Organ 1 Vintage Organ 1 Vintage Organ 2 Vintage Organ 2 Live Church Organ Live Church Org Mellow Organ 1 Mellow Organ 1 Mellow Organ 2...
- Page 163 Voice List Rotary Puff Organ Rot Puff Org Jazz Puff Organ Jazz Puff Org Pop Puff Organ Pop Puff Org Accordion Musette 1 Musette 1 Real Accordion Real Accordion Sweet Harmonica Sweet Harmonica Soft Harmonica Soft Harmonica Real Tango Accordion Real TangoAccord Ballroom Accordion Ballroom Accord...
- Page 164 Voice List Solo Clean Guitar Solo Clean Gt Guitar Feedback 1 Gt Feedback 1 5th Distortion Guitar 5thDistortion Gt Velocity Steel Guitar Velocity Stel Gt Delay Guitar Delay Guitar Vintage Guitar 1 Vintage Guitar 1 Solo Jazz Guitar Solo Jazz Gt Rhythm Guitar Rhythm Guitar Jazz Lead Guitar 1...
- Page 165 Voice List Chorus Vintage Guitar Cho Vintage Gt Vintage Funk Guitar Vintage Funk Gt Overdrive Funk Guitar Odrive Funk Gt Chorus Wah Guitar Chorus Wah Gt Clean Vintage Guitar Clean Vintage Gt Dark Vintage Guitar Dark Vintage Gt Bright Vintage Guitar Brt Vintage Gt Soft Vintage Guitar Soft Vintage Gt...
- Page 166 Voice List Hammer Hammer Rubber Synth Bass Rubber Syn Bass Pop Bass Pop Bass Warm Synth Bass 2 Warm Syn Bass 2 Muted Pick Bass Muted Pick Bass Attack Pulse 2 Attack Pulse 2 Overdriven Finger Bass Over Finger Bass Distortion Finger Bass Dt Finger Bass Distortion Guitar &...
- Page 167 Voice List Bright Pulse Bass Brt Pulse Bass Octave Analog Bass Oct Analog Bass Power Analog Bass Powr Analog Bass Power Pulse Bass Powr Pulse Bass Wah Pulse Bass Wah Pulse Bass Chorus Pulse Bass Cho Pulse Bass Strings Real Strings Real Strings Classic Strings Classic Strings...
- Page 168 Voice List Bright Violin Bright Violin Chorus Violin Chorus Violin Cool Violin 2 Cool Violin 2 Slow Viola Slow Viola Dark Viola Dark Viola Bright Viola Bright Viola Violin & Viola Violin&Viola Chorus Viola Chorus Viola Harp & Viola Harp&Viola Cello &...
- Page 169 Voice List Sweet Trumpet Sweet Trumpet Sweet Trombone Sweet Trombone Sweet Muted Trumpet Sweet Mt Trump Live Tuba Live Tuba Live French Horn Live French Horn Wide French Horn Wide French Horn Real Brass Section Real Brass Pop Brass Section Pop Brass Jazz Trumpet Jazz Trumpet...
- Page 170 Voice List Echo Brass Echo Brass Funky Synth Brass Funky Syn Brass Warm Trumpet Warm Trumpet Bright Trumpet Bright Trumpet Chorus Trumpet Chorus Trumpet Double Trumpet Double Trumpet Trombone & Trumpet Tromb&Trump Tuba & Trumpet Tuba&Trumpet Resonant Trumpet Reson Trumpet French Horn &...
- Page 171 Voice List Rock Synth Brass Rock Syn Brass Pop Synth Brass 2 Pop Syn Brass 2 Dark Analog Synth Brass Dk Ana Syn Brs Bright Analog Synth Brass Brt Ana Syn Brs Warm Analog Synth Brass Warm Ana Syn Brs Chorus Analog Synth Brass Cho Ana Syn Brs Resonant Analog Synth Brass...
- Page 172 Voice List Chorus Flute Chorus Flute Warm Flute Warm Flute Slow Flute Slow Flute Whistle & Flute Whistle&Flute Piccolo & Recorder Picco&Record Pan Flute & Recorder PanFlute&Record Shakuhachi & Recorder Shaku&Record Clarinet & Recorder Clarinet&Record Flute & Recorder Flute&Record Blown Bottle & Recorder BlowBot&Record Dark Pan Flute Dark Pan Flute...
- Page 173 Voice List Martrix Lead Martrix Lead Hip Hop Lead 1 Hip Hop Lead 1 Hip Hop Lead 2 Hip Hop Lead 2 Bauble Lead Bauble Lead Super Analog Super Analog Octave Lead Octave Lead FireWire Lead FireWire Lead Analog Lead Analog Lead Blaster Lead Blaster Lead...
- Page 174 Voice List Soft Funky Lead 2 Soft Funky Ld 2 Wire Funky Lead Wire Funky Lead Soft Octave Lead Soft Octave Lead Tremolo Octave Lead Tremolo Oct Ld Calliope Octave Lead Calliope Oct Ld Big Octave Lead Big Octave Lead Bright Voice Lead Bright Voice Ld Delayed Voice Lead...
- Page 175 Voice List Cool Sweep Pad Cool Sweep Pad Wave Pad Wave Pad Poly Synth Pad 1 Poly Synth Pad 1 Poly Synth Pad 2 Poly Synth Pad 2 Bright New Age Bright New Age Dark Pad Dark Pad Mystery Pad Mystery Pad Cool Metallic Pad Cool Metal Pad...
- Page 176 Voice List Analog Itopia Pad Ana Itpia Pad Bright Itopia Pad 2 Brt Itpia Pad 2 Soft Itopia Pad 2 Soft Itpia Pad 2 Bright Bowed Pad 1 Brt Bowed Pad 1 Soft Bowed Pad 1 Soft Bowed Pad 1 Wah Bowed Pad Wah Bowed Pad Corrie Bowed Pad...
- Page 177 Voice List Real Marimba Real Marimba Real Celesta Real Celesta Live Vibraphone Live Vibraphone Jazz Vibraphone Jazz Vibraphone Music Box & Flute Music Box&Flute Cool Marimba Cool Marimba Live Xylophone Live Xylophone Live Celesta Live Celesta Live Glockenspiel Live Glocken Dream Music Box Dream Music Box Live Tubular Bells...
- Page 178 Voice List Synth Tom Synth Tom Rhythm Tom Rhythm Tom Electric Drum Electric Drum Live Steel Drums 1 Live StelDrums 1 Live Steel Drums 2 Live StelDrums 2 Agogo Bell Agogo Bell Cymbal SFX 1 Cymbal SFX 1 Cymbal SFX 2 Cymbal SFX 2 SFX &...
- Page 179 Voice List Electric Grand Piano Electric Grand Honky-tonk Piano Honky Tonk Electric Piano 1 E.Piano 1 Electric Piano 2 E.Piano 2 Harpsichord Harpsichord Clavi Clavi Celesta Celesta Glockenspiel Glockenspiel Music Box Music Box Vibraphone Vibraphone Marimba Marimba Xylophone Xylophone Tubular Bells Tubular Bells Dulcimer Dulcimer...
- Page 180 Voice List 1027 0 Synth Voice Synth Voice 1028 0 Orchestra Hit Orchestra Hit 1029 0 Trumpet Trumpet 1030 0 Trombone Trombone 1031 0 Tuba Tuba 1032 0 Muted Trumpet Muted Trumpet 1033 0 French Horn French Horn 1034 0 Brass Section Brass Section 1035 0...
- Page 181 Voice List 1079 0 Shamisen Shamisen 1080 0 Koto Koto 1081 0 Kalimba Kalimba 1082 0 Bag Pipe Bag Pipe 1083 0 Fiddle Fiddle 1084 0 Shanai Shanai 1085 0 Tinkle Bell Tinkle Bell 1086 0 Agogo Agogo 1087 0 Steel Drums Steel Drums 1088 0...
-
Page 182: Style List
Style List Full Name Short Name New Wave New Wave 8 Beat & 16 Beat Cool 8Beat Cool 8Beat Pop Rock 2 Pop Rock 2 Classic Pop Classic Pop Pop Rock 3 Pop Rock 3 Pop Rock 8Beat Pop Rock 8Beat Standard Rock Standard Rock 8Beat Pop Ballad... - Page 183 Style List EP Ballad EP Ballad Classic Funk Classic Funk New R&B Ballad New R&B Ballad Jay R&B Jay R&B Ballroom Gospel Swing 1 Gospel Swing 1 Rumba 1 Rumba 1 Gospel Gospel Pop Cha Cha 1 Pop Cha Cha 1 Funk 2 Funk 2 Tango 1...
- Page 184 Style List Ballad Country 3 Ballad Country 3 Mazurka Mazurka Bluegrass Bluegrass World 8Beat Country 8Beat Country Enka Ballad Enka Ballad Modern Country 2 Mod Country 2 Laendler Laendler Country Pop 2 Country Pop 2 Hawaiian Hawaiian Country Pop 3 Country Pop 3 Sirtake Sirtake...
-
Page 185: Song List
Song List Full Name Short Name Waltz For Piano In g-Sharp Waltz g-Sharp Minor Folk & Country Pretty Girl Ragtime Pretty Girl Christmas Sound Christmas Sound L' Arabesque L' Arabesque Long Long Ago Long Long Ago Austria Variation AU Variation Old Folks at Home Old Folk at Home Schos Doll's Dance No. -
Page 186: Phrase Pad List
Phrase Pad List Full Name Short Name Orcheatra Hit OrcheatraHit Keyboard Pattern Harp Arpeggio Harp Arpeggio Piano Beat Piano Beat Harp Glissando Harp Glissando Piano Arpeggio Piano Arpeggio Brass Pattern Piano Glissando Piano Glissando Big Band 1 Big Band 1 Latin Beat Latin Beat Big Band 2... - Page 187 Phrase Pad List Percussion Hip Hop DJ 4 Hip Hop DJ 4 Cymbals Cymbals Electric DJ 1 Electric DJ 1 Bells Bells Electric DJ 2 Electric DJ 2 Magic Bells MagicBells Electric DJ 3 Electric DJ 3 Arabic 1 Arabic 1 Electric DJ 4 Electric DJ 4 Arabic 2...
-
Page 188: Chord List
Chord List Chord Name Abbreviation Normal Voicing Display for root “C” Major 1+3+5 Sixth 1+(3)+5+6 Major seventh 1+3+(5)+7 Major seventh add sharp eleventh M7(#11) 1+(2)+3+#4+5+7 CM7(#11) Add ninth 1+2+3+5 C(9) Major seventh ninth M7(9) 1+2+3+(5)+7 CM7(9) Sixth ninth 6(9) 1+2+3+(5)+6 C6(9) Augmented 1+3+#5... -
Page 189: Part Effect List
Part Effect List Part Effect Category Name Arpeggio - Chord Chord 1 Arpeggio - Drums LatinSet Arpeggio - Basic Chord 2 R&BSet Down Chord 3 FunkSet Alt 1 Chord 4 JazzSet Alt 2 Chord 5 8BeatSet As Played Chord 6 SwingSet Random Chord 7... -
Page 190: Insert Effect List
Insert Effect List Effect Type Full Name Reverb Hall 1 Hall 2 Hall 3 Room 1 Room 2 Stage Modern Church Real Piano Tempo Delay Tempo Delay Tempo Echo Pan Delay Cross Delay Chorus Chorus 1 Celeste Symphonic GM Rotary 1 GM Rotary 2 Real Chorus Classic Flanger... -
Page 191: Controller Function List
Controller Function List Module Name Function Description Knob Sound Cutoff Turning right to make the voice brighter. Resonance Turning left to make the voice richer. Filter Changing the character of the voice. Attack Turning right to increase the duration of the voice attack. Decay Turning right to increase the duration of the voice decay. - Page 192 Controller Function List Style Start/Stop Pressing the pedal to start or stop the playing style. Sync Start Pressing the pedal to turn Sync Start on or off. Sync Stop Pressing the pedal to turn Sync Stop on or off. Fade In/Out Pressing the pedal to turn Fade In/Out on or off.
-
Page 193: Midi Implementation List
MIDI Implementation List Function Transmitted Recognized Remarks Basic Default Channel Changed 1-16ch Default × Mode Messages × Altered *********** × Note 0 - 127 0 - 127 Number True voice *********** 0 - 127 Velocity Note on ○ 90H, V=1-127 ○... - Page 194 AKX10_OM05_EN_190816.indd 194 2019/8/16 13:38...
- Page 195 AKX10_OM05_EN_190816.indd 195 2019/8/16 13:38...
- Page 196 AKX10_OM05_EN AKX10_OM05_EN_190816.indd 196 2019/8/16 13:38...
Need help?
Do you have a question about the AKX10 and is the answer not in the manual?
Questions and answers