Advertisement
Please completely read and understand the entire manual before using, assembling and/or
disassembling your remote controlled car.
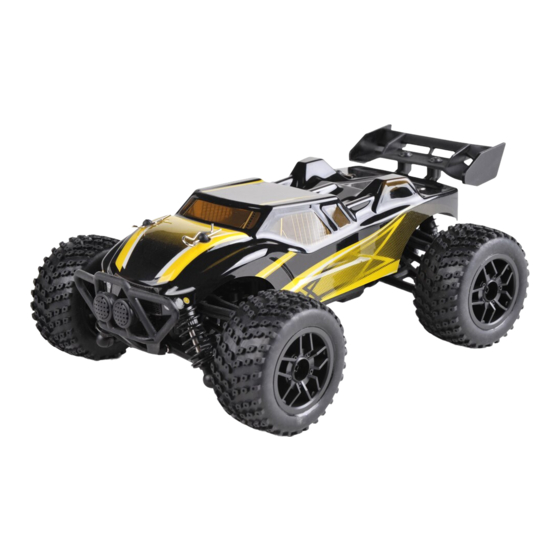
1/24TH SCALE FOUR WHEEL DRIVE ELECTRIC POWERED VEHICLES
ITEM NO.:2118
OFF-ROAD BUGGY
ITEM NO.:2128
OFF-ROAD TRUGGY
Technical Data: Off-Road Buggy
LENGTH
WIDTH
182mm
122mm
Technical Data: Off-Road Truggy
LENGTH
WIDTH
190mm
130mm
Technical Data: Off-Road Truck
LENGTH
WIDTH
168mm
133mm
Notification: This data is subject to change without the prior notice.
These are 1/24th scale hobby grade R/C cars which are ready to go where the big cars can not.
Because of a tiny size, the smallest of spaces are transformed into big adventures. There 1/24th
scale hobby buggy/truggy/truck are built in RTR version, equipped with 2.4Ghz radio system.
This product is not a toy. It is not intended for persons under 14 years of age, unless closely
supervised by an adult.
This manual is subject to change without prior notice.
HEIGHT
WHEELBASE WHEEL DIA. WHEEL SPAN
70mm
110mm
HEIGHT
WHEELBASE WHEEL DIA. WHEEL SPAN
72mm
110mm
HEIGHT
WHEELBASE WHEEL DIA. WHEEL SPAN
75mm
110mm
INSTRUCTION MANUAL
ITEM NO.:2138
OFF-ROAD TRUCK
46mm
19mm
48.5mm
24mm
49mm
25.5mm
READY TO RUN
GROUND
GEAR RATIO
CLEARANCE
22mm
1:9.06
GROUND
GEAR RATIO
CLEARANCE
25mm
1:9.06
GROUND
GEAR RATIO
CLEARANCE
25.5mm
1:9.06
Advertisement
Table of Contents

Subscribe to Our Youtube Channel
Summary of Contents for Haiboxing 2118
- Page 1 Please completely read and understand the entire manual before using, assembling and/or disassembling your remote controlled car. 1/24TH SCALE FOUR WHEEL DRIVE ELECTRIC POWERED VEHICLES INSTRUCTION MANUAL ITEM NO.:2138 ITEM NO.:2118 OFF-ROAD TRUCK OFF-ROAD BUGGY READY TO RUN ITEM NO.:2128...
-
Page 2: General Information
GENERAL INFORMATION This user's manual is designed for use with your vehicles and contains the instructions you will need to assemble, operate and maintain your vehicles. We know you are anxious to start driving, but it is very important that you take time to read the manual even if you are an experienced R/C driver. -
Page 3: Safety Information
SAFETY INFORMATION We want users to enjoy our RC vehicles and to operate them with care. Failure to operate your vehicle in a safe and responsible manner may result in injury to yourself, others or damage to property around you. Read and understand all instructions carefully before use and assembly/disassembly. - Page 4 GETTING FAMILIARIZED WITH YOUR 2.4GHz RADIO SYSTEM Bind/Mode A: Steering Wheel 1: Steering Trim 4: Power Switch 7: Throttle Reverse B: Trigger 2: Steering Reverse 5: Steering Dual Rate 8: Green Indicator C: Battery Case 3: Red Indicator 6: Throttle Trim 9: Bind/Mode button Steering Wheel: It proportionally operates the model s right and left steering control.
- Page 5 RUNNING YOUR CAR TURN ON THE RECEIVER ON YOUR CAR TURN ON THE RADIO CONTROLLER Bind/Mode The ESC/receiver switch is located on the bottom Switch on the power switch on the as shown in the picture. Switch on the ESC/receiver radio controller.
- Page 6 RUNNING YOUR CAR TO TUNE THE STEERING TRIM STEERING TRIM Gently pull the trigger to allow your car to run slowly. Meantime, tune the steering trim to allow the front wheels to be aligned. TO TUNE THE THROTTLE TRIM THROTTLE TRIM Throttle trim is used to set your idle speed.
-
Page 7: To Charge The Battery Pack
TO CHARGE THE BATTERY PACK Remove the batteries from the car. Use only the provided charger and charger box to charge the batteries of your cars. Load batteries onto the charger box. Connect the charger box with the charger as shown in the picture. It will be 2-2.5 hours before batteries are fully charged. -
Page 8: Troubleshooting
MAINTAINING YOUR CAR After running your car, the following procedures should be performed regularly and will help to maintain your car's performance. Inspect your car for any obvious damage. Check the gears for wear, debris or broken/slipping teeth. Check the wheels and tighten the wheel screws properly. Check for loose screws in the chassis. -
Page 9: Replacement Part List
REPLACEMENT PART LIST-1 25000 25001 25002 25003 Shocks Assembly/ Steering Suspension Arms/Steering Hubs/Rear Uprights Wings/Bumpers/Body Posts Chassis Links 25004 25005 25006 25007 Motor Mount/Battery Cover/ Dogbones/Diff. Small Bevel Gears+ Wheel Shafts+ Metal Diff. Gears/ Metal Outdrive Cups Aluminum Upper Deck Drive Pinion Gears Aluminum Bottom Plate 25008... - Page 10 REPLACEMENT PART LIST-2 25020 25021 25022 25023 Diff. Washers Brass Bushes (5*8*2.5mm) Ball Bearings (5*8*2.5mm) φ 5 .8*8.5*0.2 mm (12P) Diff. Complete 25024 25025 25026 25027 Li-ion Battery Charge Box/ Charger Charge Box/ Charger Brushed Motor (RC 180) (3.7v, 800mAH) 2P (Europen Standard Charger) (American Standard Charger) 25028...
- Page 11 REPLACEMENT PART LIST-3 24031R 18B01 18B02 28B01 Buggy Body (Red) Buggy Body (Green) Truggy Body ( Yellow) Truck Whees Complete 4P w/Decals w/Decals w/Decals 28B02 38B01 25050 25051 Truggy Body ( Green) Truck Body (Gray) Washer Head Self Tapping Washer Head Self Tapping w/Decals w/Decals Screws 2*6mm 20P...
- Page 12 Please completely read and understand the entire manual before using, assembling and/or disassembling your remote controlled car. Thank for purchasing our product. This product is an authentic remote controlled vehicle (RC vehicle). It is not a toy. Read and understand this instruction manual thoroughly before operating the vehicle. If you are not familiar with RC vehicles, we recommend that seek out RC experts for reliable advice.


Need help?
Do you have a question about the 2118 and is the answer not in the manual?
Questions and answers