Table of Contents
Advertisement
Advertisement
Table of Contents

Related Manuals for Itho Daalderop Smartboiler Mono

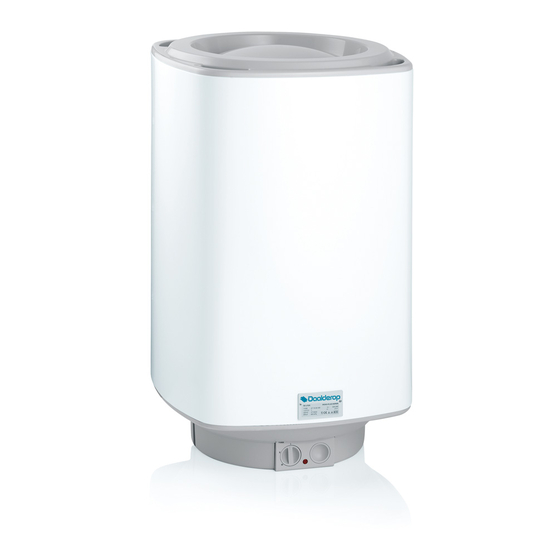
Summary of Contents for Itho Daalderop Smartboiler Mono
- Page 1 Itho Daalderop Smartboiler Installation & Use...
- Page 2 Translation of the original document.
- Page 3 Itho Daalderop retains the right to make changes without prior notification. Due to our continuous product improvement process, the illustrations in this document may not match the delivered appliance.
-
Page 4: Table Of Contents
Contents Safety and other regulations 9. Warranty 1.1. Safety 10. Declarations 1.2. Water quality requirements 2. Product information 2.1. Application 2.2. Technical data 2.3. Product data sheet information 2.4. Dimensional sketch 2.5. Package contents 2.6. Recycling 3. Installation 3.1. Boiler seating 3.2. -
Page 5: Safety And Other Regulations
1. Safety and other regulations 1.1. Safety Take the following steps before carrying ● out work on an open appliance: Install the product as outlined in this ● Switch the power off. manual and according to the relevant Make sure that the power cannot be installation and safety instructions. -
Page 6: Product Information
See the installation instructions heaters are fitted with a copper inner tank. for the low-pressure mixer tap. The Smartboiler Mono is a low-power heater with a single ● heating element offering 1000 W or 1750 W capacity. -
Page 7: Product Data Sheet Information
2.3. Product data sheet information Itho Daalderop Smartboiler Mono Smartboiler Mono Plus Description Symbol Unit Declared load profile — — Water heating energy efficiency class — — ƞ Energy-efficient water heating 1286 1286 2617 2617 1286 1286 1286 2617 2617 Annual water heating electricity consumption —... -
Page 8: Package Contents
2.5. Package contents Smartboiler Use the overview below to check whether the package contents are Mounting bracket complete and that the components have not been damaged. Levelling foot If you detect any damage or if one or more components are missing, Compression nut 15 mm please contact the sales point where you purchased the unit. -
Page 9: Installation
If the wall's strength is not sufficient to support the mounting of 80 NEVER turn on the power during installation to prevent damage L, 120 L or 150 L heater models, the Itho Daalderop boiler seating to the product. can be used to provide additional support for the wall mounting. -
Page 10: Existing Heater Replacement
3.2. Existing heater replacement Twist the levelling foot all the way to the back of the heater. The mounting bracket design enables the most common existing heaters to be replaced without needing to drill new holes or replace the plumbing. If this is not possible, install the heater according to the instructions under New installation on page 12. - Page 11 Heater model Dimension K (mm) 1005 1208 Install the mounting bracket in the REVERSE position if the measured distance is not equal to distance K in the chart. Always use the mounting bracket's topmost mounting holes. Rotate the centring rings to adjust the bracket horizontally. Mount the heater on the mounting bracket.
-
Page 12: New Installation
3.3. New installation Mount the heater on the mounting bracket. g) Level the heater vertically by rotating the levelling foot in or out. a) Position the drilling jig with the arrow up against the ceiling. b) Mark the hole positions for the relevant heater model on the wall. -
Page 13: Hot Water Connection
3.4. Hot water connection ä Caution! Connect the hot water pipe to the heater's hot water connection Take note of the direction in which the water flows through the (red) using a flat gasket or compression fitting safety group. The direction is indicated by an arrow on the safety group. -
Page 14: Electrical Connection
(built-in) power control. ä Caution! Turn OFF the electric circuit to which the heater will be connected in the meter box. Smartboiler Mono / Smartboiler Mono Plus a) Remove the closing cap. Colour Function Green/yellow Earth... -
Page 15: Operation
4. Operation 4.1. HMI controller 4.2. Initialising The Smartboiler is equipped with an HMI controller. An LCD test is performed while initialising. This briefly displays all the on-screen icons and symbols. After testing, the screen will display the heater's current operational status. The LED indicator is off. -
Page 16: Operational Status
4.3. Operational status The water is heated in accordance with the CONFIGURATION The screen remains inactive during normal operations. settings. The LED indicator is continuously lit in blue. Press any button to activate the screen and display the current operational status. The screen can display the following icons with these meanings: Icon Description... -
Page 17: Menu Structure
4.4. Menu structure HEATING MODE INITIALISING TEMP TIME MACH HEATER MODE HEATER MODE INFORMATION MENU STANDBY ELEM RELAY SERVICE MENU BOOST TIME TIME NIGHT BOIL SMART CONFIGURATION TEMP BOOST NIGHT TMAX SERVICE TMIN ERROR... -
Page 18: Information Menu
4.5. Information menu 4.6. Boost Press the Down buttons in the operational status to display There may occasionally be an insufficient amount of hot water. the information menu. Activate the BOOST function for immediate one-time heating of the water up to 85°C. 1505 time Heater information;... -
Page 19: Service Menu
4.8. Service menu Go to the SERVICE MENU by activating the screen in the operational status and pressing the button. Service menu selection; example The following SERVICE MENU options are available for selection: Icon Menu TIME Set the TIME, START NIGHT MODE START DAY MODE. -
Page 20: Time Service Menu
4.8.1. TIME service menu The following times can be set in the TIME service menu: Symbol Unit Description Min. Max. Step Setting TIME hh:mm Current time in hours and minutes 00:00 23:59 12:00 Starting time for day mode in hours and hh:mm 00:00 23:59... -
Page 21: Configuration Service Menu
4.8.2. CONFIGURATION service menu The following settings can be adjusted in the CONFIGURATION service menu: Symbol Unit Description Min. Max. Step Setting BOIL — Heater mode — SMART — SMART control — TEMP °C Heater water temperature BOOST — Boost —... - Page 22 TEMP - Heater temperature The maximum temperature of the heater's water. Min. 55°C | Max. 80°C | +/- 5°C. 65°C [standard setting] ● BOOST There may occasionally be an insufficient amount of hot water. Activate the BOOST function for immediate one-time heating of the water to at least 85°C.
-
Page 23: Service Service Menu
4.8.3. SERVICE service menu The following settings can be adjusted in the SERVICE service menu: Symbol Unit Description Min. Max. Step Setting Maximum heater temperature during TMAX °C SMART CONTROL. Minimum heater temperature during TMIN °C SMART CONTROL. Resetting the appliance during or after ERROR RESET error resolution. -
Page 24: Use
Open the hot water tap and flush the hot water pipe until cold and replace it if necessary. If that fuse is also not the cause of the water runs out of the tap. problem, contact Itho Daalderop. ä Warning! g) Change the heater mode to ON (see quick instructions below). -
Page 25: The Most Frequent Complaints
6. The most frequent complaints The following is an overview of the most common complaints known to Itho Daalderop. If you cannot resolve the complaint yourself, For each of these complaints there are a please contact your installer or service number of possible causes with a solution given organisation. - Page 26 Steam is coming out of the mixer tap. Cause Solution The thermostat or overload circuit breaker Disconnect the appliance from the ● is faulty. mains power. Contact your installer or service organisation. The heater is causing a short circuit Cause Solution There is a short circuit in the electrical Disconnect the appliance from the...
-
Page 27: Faults
7. Faults 7.1. Error messages 7.1.2. Blocking The LED indicator flashes slowly in red. ● The appliance has three types of error message which are displayed on the screen, namely: Blocking is indicated by a code starting with the letter B. ●... -
Page 28: Locking
7.2. Reset error message 7.1.3. Locking The LED indicator flashes quickly in red. ● An error message can be reset in one of two ways: Locking is indicated in the operational status by a code starting ● In the event of an error notification in the operational status, with the letter E. -
Page 29: Diagnosis Of Error Messages
7.3. Diagnosis of error messages Software error Cause Solution No communication with RF module. Reset the error. ● Replace the HMI controller. ● Hardware fault Cause Solution Defective RTC Reset the error. ● Replace the HMI controller. ● Software error Cause Solution Debug error... - Page 30 Overload protection Cause Solution Overheating of hot water temperature Wait until the water in the heater ● sensor. has cooled down sufficiently. Draw off hot water until the error ● goes away. Time not set Cause Solution The clock did not activate during Set the correct time in the TIME ●...
- Page 31 Hardware error Cause Solution The control board does not work properly. The appliance automatically resets ● itself a maximum of three times. Replace the control board. ● Hardware error Cause Solution Internal watchdog reset is not performed Reset the error. ●...
- Page 32 Hardware error Cause Solution Neutral relay does not work properly. Reset the error. ● Replace the control board. ● Software error Cause Solution Incorrect value in the EEPROM. Reset the error. ● Replace the control board. ● Heater selection error Cause Solution Incorrect control board.
- Page 33 Temperature sensor error (RefHi) Cause Solution The sensor measures a temperature Reset the error. ● outside the normal working range Replace the sensor. ● (sensor open). Replace the control board. ● Temperature sensor error (RefHi) Cause Solution The sensor measures a temperature Reset the error.
-
Page 34: Service And Maintenance
8. Service and maintenance 8.1. General maintenance 8.3. Hardware/software information In principle, the heater is maintenance-free. In the operational status, simultaneously press the Lower The heater casing can be cleaned with a normal, non-abrasive buttons to display the heater's circuit board and software versions. household cleaning agent. - Page 35 9. Warranty All Itho Daalderop products are covered by a standard two-year factory warranty. During this period, the product or product component will be repaired or replaced free of charge. The warranty conditions include provisions and exclusions. For the full warranty conditions and/or supplementary warranty terms or conditions, see the relevant product page on our website.
- Page 36 10. Declarations EG-Verklaring van overeenstemming | Déclaration de conformité CE | EG-Konformitätserklärung | EC Declaration of Conformity Itho Daalderop Group BV Postbus 7 4000 AA Tiel The Netherlands Verklaart dat het product | Déclare que le produit | Voldoet aan de geharmoniseerde Europese normen | Erklärt dass das Produkt | Declares that the product:...
- Page 38 The Netherlands Belgium Itho Daalderop Itho Daalderop Belgium BVBA Admiraal de Ruyterstraat 2 Brusselsesteenweg 498 3115 HB Schiedam 1731 Zellik E-mail: idsupport@ithodaalderop.nl T +32 2 207 96 30 Website: www.ithodaalderop.nl E info@ithodaalderop.be Consult your installer if you have any questions.
Need help?
Do you have a question about the Smartboiler Mono and is the answer not in the manual?
Questions and answers