Table of Contents
Advertisement
INSTALLATION PROCEDURE – USER MANUAL
TK-45
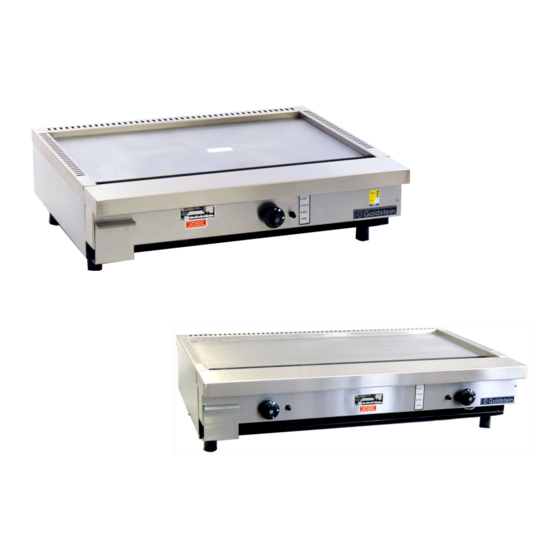
TEPPANYAKI
TEPPANYAKI
TEPPANYAKI
TEPPANYAKI
PROUDLY AUSTRALIAN MADE
SERVICE INSTRUCTION
MODELS TK K K K - - - - 24 TK
MODELS T
MODELS T
MODELS T
24 TK- - - - 30 TK
24 TK
24 TK
ESTABLISHED 1911
The Cooking Equipment Professionals
www.goldsteineswood.com.au
30 TK- - - - 36 TK
30 TK
30 TK
36 TK- - - - 45
36 TK
36 TK
45
45
45
TK- - - - 36
TK
TK
TK
36
36
36
Advertisement
Table of Contents

Subscribe to Our Youtube Channel
Related Manuals for goldstein TK-24

Summary of Contents for goldstein TK-24
- Page 1 TEPPANYAKI TEPPANYAKI TEPPANYAKI TEPPANYAKI PROUDLY AUSTRALIAN MADE INSTALLATION PROCEDURE – USER MANUAL SERVICE INSTRUCTION MODELS T MODELS T MODELS T MODELS TK K K K - - - - 24 TK 24 TK 24 TK 24 TK- - - - 30 TK 30 TK 30 TK- - - - 36 TK 30 TK...
-
Page 2: Table Of Contents
TABLE OF CONTENTS INTRODUCTION Page 3 INSTALLATION Page 4 & 5 COMMISSIONING Page 6 & 7 OPERATING INSTRUCTIONS Page 8 PILOT & BURNER OPERATION Page 9 TECHNICAL INSTRUCTIONS Page 10 TECHNICAL DATA Page 11 CLEANING INSTRUCTIONS Page 12 PROBLEM SOLVING Page 13 TEPPANYAKI TABLE Page 16... -
Page 3: Introduction
Congratulations for purchasing your Goldstein commercial cooking appliance. J. Goldstein & Co. is a wholly owned Australian company and has been operating since 1911, building high quality products. The information in this manual will assist your installer and ensure correct location and connection. -
Page 4: Installation
2. INSTALLATION INSTRUCTIONS PRE-INSTALLATION OF THE TEPPANYAKI Check that there is sufficient clearance between doors and passageways to move equipment into the cooking area. Remove banding and cardboard outer. Lift off wooden base. Push in legs and tap in with a hammer into tubes (If required mount on stand (OPTIONAL) INSTALLATION (FOR AUTHORISED TECHNICIANS ONLY) -
Page 5: Installation
2. INSTALLATION INSTRUCTIONS All equipment must be sitting level for proper operation and combustion where plinth type installation is made, plinth height and front overhang must be 50 mm minimum. Levelling can be made by the use of metal shims. For griddles where adjustable legs are provided, levelling can be made easily due to the threaded construction of the legs. -
Page 6: Commissioning
3. COMMISSIONING INSTRUCTIONS OPERATION (FOR AUTHORISED TECHNICIANS ONLY) Note: All the appliances that leave our factory have been tested and adjusted according to the specifications for the required gas. The regulator may have to be adjusted to achieve the required gas pressure Note: Before igniting the Teppanyaki plate, remove the protective coating on the plate with solvent (e.g. -
Page 7: Commissioning
3. COMMISSIONING INSTRUCTIONS To be carried out by Gasfitter or Authority service person COMMISSIONING APPLIANCE – DETAILS, TESTING, CHECKING PRESSURE ETC. COMMISSIONING CHECK LIST CHECK FOR DAMAGE AND MISSING PARTS ON BACK OF WARRANTY CARD. REMOVE ALL PLASTIC COATING FROM S/STEEL PANELS. MAKE SURE ALL PARTS ARE IN THEIR CORRECT POSITION E.G. -
Page 8: Operating Instructions
4. OPERATING INSTRUCTIONS GAS BURNERS TK-24 1 BURNER TK-30 1 BURNER TK-36 1 BURNER TK-45 2 BURNERS The Burners are adjusted as described on Page 9. Cooking is generally started towards the middle of the burner and then moved to the area which is not directly over the burner and can be held there for final finishing. -
Page 9: Pilot & Burner Operation
5. PILOT & BURNER OPERATION ● ● ● ● ● ● ● ● PILOT ● ● ● ● SPARKER TO LIGHT PILOT G G G G IGNITION POSITION – LIGHT PILOT – (If flame failure hold in for 10 seconds to establish pilot flame). TURN TO FULL ON –... -
Page 10: Technical Instructions
6. TECHNICAL INSTRUCTIONS Cont’d PILOTS Polidoro 509. Gas to pilot is controlled through an injector spud. This spud needs to be replaced when converting between L.P. and N.G. If appliance cannot be correctly adjusted, advise the local gas authority or the appliance manufacturer. -
Page 11: Technical Data
Injector Drill N.G. TK-45 3.10 L.P. 1.85 N.G. TK-24,30,36 2.95 CONVERSION INSTRUCTIONS To convert from N.G. to L.P. gas do the following: Replace N.G. burner injectors with L.P. injectors (refer to table this page). Replace pilot injectors to required size. -
Page 12: Cleaning Instructions
8. CLEANING INSTRUCTIONS CLEANING/MAINTENANCE OF TEPANYAKI Frequently during the cooking, clean Teppanyaki plate with a high heat spatula (this will prevent food build up and will make the final daily cleaning of the Teppanyaki plate easier). Use a mild cleaner, CAUSTIC cleaners ARE NOT TO BE USED, otherwise warranty will be void. -
Page 13: Problem Solving
9. PROBLEM SOLVING CAUSE AND REMEDY FOR DEFECTIVE OVEN COOKING Too much bottom heat, which results in burning on the bottom of products also scorching on the sides. Products will be too light on top, uneven in colour on the top and probably raw in the centre. Cause: Remedy Insufficient (BTU) MJ input. - Page 14 PROBLEM SOLVING Cont’d Dried out Product Cause: Remedy Too low a temperature. Adjust gas cock accordingly. Cause: Remedy Too long a cooking time. Adjust cooking time and temperature to suit product. Wide Variation of results from grill to grill. Cause: Remedy Fluctuating gas pressure.
- Page 15 PROBLEM SOLVING Cont’d Burner goes out and flashes back Cause Remedy Excessive aeration. Adjust. Yellow Flame Cause Remedy Too much gas to burner. Check gas pressure and burner Jet orifice. Cause Remedy Insufficient aeration. Adjust Harsh noisy flame Cause Remedy Excessive aeration Adjust.
-
Page 16: Teppanyaki Table
10. TEPPANYAKI TABLE IMO83B1 – April 2011... -
Page 17: Drawings
11. DRAWINGS MODELS TK-30 TK-36 TK-45 MODEL “FOR SERVICE & REPLACEMENT PARTS, CONTACT GOLDSTEIN” IMO83B1 – April 2011... -
Page 18: Spare Parts-Drawings
12. SPARE PARTS MODELS TK MODELS TK MODELS TK MODELS TK- - - - 30 TK 30 TK 30 TK- - - - 36 TK 30 TK 36 TK 36 TK 36 TK- - - - 45 ITEM No. CODE DESCRIPTION MKNPLM21 KNOB –... -
Page 19: Warranty
“normal use and service”. This does not include normal wear and tear of parts. GOLDSTEIN/ESWOOD will repair or replace any parts, which in GOLDSTEIN/ESWOOD’s sole judgement are defective in material or workmanship, in accordance with the warranty offered. -
Page 20: Branches
14. GOLDSTEIN/ESWOOD BRANCHES For inquiries please call your nearest state branch: Head Office 211-213 Woodpark Road New South Wales 2564 Phone: 02 9604 7333 Fax: 02 9604 5420 Victoria Queensland 47 Stubbs Rd Nautilus Complex Kensington Unit 12 Victoria 3031...
Need help?
Do you have a question about the TK-24 and is the answer not in the manual?
Questions and answers