
Related Manuals for Venue Lighting Effects revolver laser

Summary of Contents for Venue Lighting Effects revolver laser
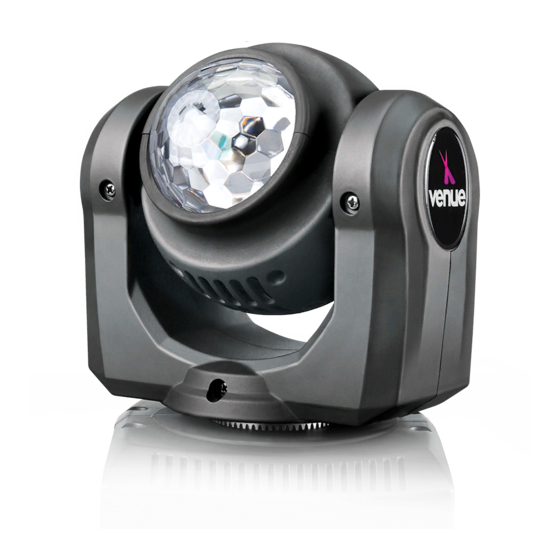
- Page 1 DUAL-SIDED MOVING HEAD EFFECT LIGHT WITH LASER AND MOONFLOWER www.venuelightingeffects.com...
-
Page 3: Table Of Contents
INTRODUCTION The Venue Revolver Laser is a DMX intelligent, dual sided, moving head effect light, which includes both a laser and moonflower effect. It is lightweight and compact which makes it a great light for mobile DJs, clubs and parties. This unit can be used as a standalone fixture in sound-activated mode, or controlled via DMX controller. -
Page 4: Before You Begin
This paragraph contains important installation or configuration information. Failure to comply with this information may prevent the fixture from functioning correctly. This paragraph reminds you of useful, although not critical, information. Venue Revolver Laser Manual... -
Page 5: Safety Instructions
SAFETY INSTRUCTIONS Please read these instructions carefully. It includes important information about the installation, usage and maintenance of this product. Laser Warning The arrow indicates the laser aperture. AVOID EXPOSURE – LASER RADIATION IS EMITTED FROM THIS APERTURE Use extreme caution when the laser beam is turned on. When device is in use, do NOT look directly or indirectly (reflectance) into the laser beam. -
Page 6: Introductions
• Built-in automated programs via master/slave or DMX with variable speed • Built-in sound activated programs via master/slave or DMX • 11, 13, and 17 channel DMX-512 operation Additional Features • Includes rubber feet for desktop placement & metal bracket/safety loop for truss mounting Control Panel Venue Revolver Laser Manual... -
Page 7: Setup
SETUP AC Power This fixture runs on 100~240 VAC, 50/60 Hz. Before powering on the unit, make sure the line voltage is within the range of accepted voltages. To determine the power requirements for a particular fixture, see the label affixed to the bottom of the fixture or refer to the fixture’s specifications chart. -
Page 8: Mounting Orientation
Mounting Orientation The Revolver Laser includes a metal bracket and safety loop for hanging upside-down only. Rigging Be sure that the structure can support the weight of the fixture. Please see the “Technical Specifications” section of this manual for a detailed weight listing. Mount the fixture securely. This may be done with a screw, nut and bolt, or a hanging clamp (not included). -
Page 9: Signal Linking
Signal Linking In order to use this fixture in a DMX or master/slave operation, you must daisy chain using DMX cables to link from one fixture to another. OPERATING INSTRUCTIONS Control Panel Buttons Access these functions using the four buttons located directly underneath the LED Control Display. BUTTON FUNCTION <Menu>... -
Page 10: Menu Map
Auto Mode must be turned “OFF” for Sound Active mode Select sensitivity level of the microphone Audio Sens 0–100 between 0 (less sensitive) and Sensitivity 100 (more sensitive). Pause current program (Blackout) Pause Mode bLNd Resume program Venue Revolver Laser Manual... - Page 11 Control Panel Menu Selections (Continued) SUB- MAIN FUNCTION SELECTION INSTRUCTION FUNCTION Stda Select “Standard” dimming mode StGE Select “Stage” dimming mode Dimming dINd Select “TV” dimming mode ArAL Select “Architectural” dimming mode tHAL Select “Theatrical” dimming mode Select standard or reverse Pan Turn PInt X-axis movement...
-
Page 12: Standalone Operation
4. Press <ENTER>. 5. Press <MENU> until “Auto” appears on the LED screen. 6. Using <UP> and <DOWN>, select “on” to enable quick movement sequences, or “oFF” to enable a slow pan. 7. Press <ENTER> to confirm settings. Venue Revolver Laser Manual... -
Page 13: Sound-Active
Sound-Active While an automatic program is enabled, you can choose whether or not to use the built-in microphone for sound-active response. This option is accessed via the Control Display (page 6). 1. Press <MENU> until “SoUn” appears on the LED screen. 2. -
Page 14: Configuring The Starting Address
Only one fixture may be set to master. Do not connect a DMX controller to the daisy chain for this operating mode. It does not matter which DMX mode is selected for the slave fixtures. Either mode will be effective. Venue Revolver Laser Manual... -
Page 15: 11-Ch Mode Dmx Operation
11-Ch Mode DMX Operation 17-Ch Mode DMX Operation CHANNEL CHANNEL FUNCTION CHANNEL CHANNEL FUNCTION Pan Turn Pan Turn Tilt Turn Tilt Turn Tilt Unlimited Rotation Tilt Unlimited Rotation Red1 Pan/Tilt Turn Speed Green1 Red1 Blue1 Green1 White1 Blue1 Laser White1 Strobe Laser Open Light... -
Page 16: Dmx Parameters
17-Ch Mode DMX Operation MODE MODE MODE FUNCTION VALUE PERECENT/SETTING 11 CH 13 CH 17 CH 000–255 0~100% Tilt 000–255 0~100% 000–127 Null 128–189 Counter-clockwise from fast to slow Tilt Unlimited Rotation 190–193 Stop 194–255 Clockwise direction from slow to fast Pan/Tilt Speed 000–255 From fast to slow... - Page 17 17-Ch Mode DMX Operation (Continued) MODE MODE MODE FUNCTION VALUE PERECENT/SETTING 11 CH 13 CH 17 CH 083–086 Color 21 087–089 Color 22 090–093 Color 23 094–097 Color 24 098–101 Color 25 102–104 Color 26 105–108 Color 27 109–112 Color 28 113–115 Color 29 116–119...
-
Page 18: Appendix
17-Ch Mode DMX Operation (Continued) MODE MODE MODE FUNCTION VALUE PERECENT/SETTING 11 CH 13 CH 17 CH Pan/Tilt Speed 000-255 From slow to fast 000-069 070-079 When Pan/ Tilt turn, off the light 080-089 090-099 When change color, off the light 100-179 Multi- Working Mode 180-189... -
Page 19: Fixture Linking
Fixture Linking You will need a serial data link to run light shows of one or more fixtures using a DMX controller or to run synchronized shows on two or more fixtures set to a master/slave operating mode. The combined number of channels required by all the fixtures on a serial data link determines the number of fixtures the data link can support. -
Page 20: 3-Pin To 5-Pin Conversion Chart
• Apply solution to the cloth or tissue and drag dirt and grime to the outside of the lens. • Gently polish optical surfaces until they are free of haze and lint. Venue Revolver Laser Manual... -
Page 21: Technical Specifications
The cleaning of external optical lenses and/or mirrors must be carried out periodically to optimize light output. Cleaning frequency depends on the environment in which the fixture operates. Damp, smoky or particularly dirty surroundings can cause greater accumulation of dirt on the unit’s optics. Clean with soft cloth using normal glass cleaning fluid. -
Page 22: Warranty
Some states do not allow limitations on how long an implied warranty lasts, so the above limitation may not apply to you. Venue Lighting Effects P.O. Box 5111, Thousand Oaks, CA 91359-5111 www.venuelightingeffects.com All trademarks and registered trademarks mentioned herein are recognized as the property of their respective holders. Made in China. Venue Revolver Laser Manual... - Page 24 www.venuelightingeffects.com 1907-19358581...