Table of Contents
Advertisement
Advertisement
Table of Contents

Related Manuals for Super SOCO CUX 2019


Summary of Contents for Super SOCO CUX 2019
- Page 1 OWNER’S MANUAL Soco CUX Version 1.0 January 2019...
- Page 2 Congratulations on purchasing your Soco electric motorcycle. We wish you an enjoyable and safe riding experience. For your safety and comfort, we recommend that you read carefully the whole of this manual before using the motorcycle. If you have any questions, you should contact either Vmoto UK using the details below, or a dealer authorised by Vmoto UK. The contact details for Vmoto UK are: Telephone: 0800 133 7304 Email: info@vmoto‐uk.com Address: Vmoto UK Distribution Limited 105 Sumner Street, London SE1 9HZ You should always follow the instructions, maintenance and riding requirements set out in this manual and have after‐sales servicing carried out ...
- Page 3 Before using your motorcycle 1.1 Your motorcycle should be assembled by a properly qualified motorcycle mechanic at a dealer authorised by Vmoto UK. 1.2 You should undertake all training and certification that is legally required to ride your motorcycle. Also, if it’s your first time riding this type of motorcycle, you should test in a quiet area away from traffic. 1.3 Ensure that you know about and obey all traffic laws and regulations. 1.4 Always use appropriate clothing, including armoured jacket and trousers, motorcycling boots, gloves and a properly‐fitted helmet. Riding style and safety 2.1 Ride with foresight and consideration for other road users. Always keep both hands on the handlebars while riding and turn the throttle slowly. 2.2 Never ride when under the influence of alcohol or drugs which may affect riding capability. 2.3 Ride with exceptional care on bumpy, loose or wet surfaces. 2.4 Pay attention to any unusual noises or handling of the motorcycle. If in doubt, check it out. 2.5 Always undertake the pre‐ride checks mentioned in this owner’s manual. 2.6 The motorcycle has a side stand. Ensure that the motorcycle is on an even, ...
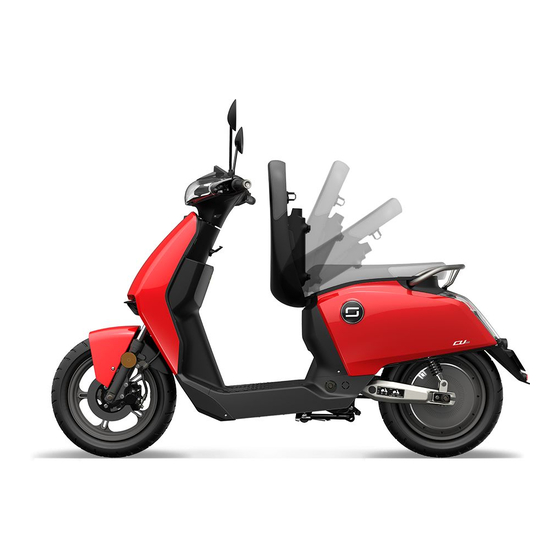
- Page 4 Vehicle schematics Side view Top view 3 ...
- Page 5 Instrument cluster 1 Speed display ‐ Displays the current speed 2 Clock/ error code display – Shows current time, or an error code if an error is present 3 Riding mode ‐ Shows riding mode: 1 – Eco 2 – Normal 3 ‐ Sport 4 Mileage ‐ Shows the total mileage of the vehicle or the current trip 5 / 6 Battery state of charge ‐ Indicates current battery status in bars and as a percentage 7 Data connection – shows whether a data connection is present Indicator light – shows when the indicator is on Battery error light – indicates battery error High beam indicator light – high beam on Cruise control light – indicates cruise control engaged Error light Charging 4 ...
- Page 6 Handle switches 5.1 Left hand side 1 Horn – press to sound 2 Indicator – push in direction of indication; centre to cancel 3 High / dipped beam – press to select 4 Cruise control – With throttle at a constant angle, press to engage cruise control; accelerate or brake to cancel 5.2 Right hand side (1) 1. SET button – changes instrument display ‐ Press for less than 2 seconds to switch between total mileage (odometer) and trip mileage ‐ Press for more than 2 seconds but less than 8 seconds to reset the trip mileage ‐ Press for more than 8 seconds to switch between mph and km/h 5 ...
- Page 7 5.3 Right hand side (2) 2 Gear change button – push left to increase gear, right to decrease 3 Hazard flasher – push on and off 4 Parking button – press to park, press again to disengage; READY indicates ready to ride Starting and locking 6.1 How to start 6 ...
- Page 8 6.2 Intelligent key fob 6.3 Ignition switch 7 ...
- Page 9 6.4 Safety switch The safety switch is located under the seat. Turn to ‘on’ to power on the motorcycle. Turn to ‘off’ to power down. Note that this prevents the alarm and anti‐theft from functioning. The motorcycle should always be powered down if not used for a long period of time, to prevent damage to the battery. ...
- Page 10 Loading 8.1 For storage, only use either the spare battery compartment or the tray on top of the battery compartment. The maximum loading of a motorcycle is 153kg, including rider, passenger and cargo. 8.2 The motorcycle is certified for a maximum of 2 people and the loading above. Overloading is extremely unsafe. Battery 9.1 For the first 3 charges, ensure that the motorcycle is fully charged. Also, make sure that the motorcycle receives a full charge at least every 2 months. 9.2 The charger will stop automatically. It is not possible to reverse the polarity. Charging for a long time / overnight will not damage the battery ...
- Page 11 9.9 Charging the motorcycle 1 Open the battery compartment 2 Turn the safety switch to ‘off’ 3 Take out the battery pack 4 Connect the charger to the battery 5 Connect the charger to AC current 9.10 The charger can become hot in use. For this reason it must be used in a dry, ventilated place and left on a surface which is non‐flammable and non‐insulating. Do not leave the charger on soft surfaces. 9.11 Never leave the motorcycle with a depleted battery as this can cause the battery voltage to dip below minimum and require replacement. 9.12 Using the motorcycle with a depleted battery will shorten the life of the battery and can make the battery inoperable (requiring replacement). 9.13 Do not attempt to modify or disassemble the battery, or perform any diagnostics. This is extremely dangerous and can result in fire and explosion. ...
- Page 12 10. Electrical safety 10.1 Only use the original charger and cables supplied with the motorcycle. Use of other chargers or cables is dangerous. Replace fuses in the charger plug with the same type. 10.2 Only once the charger is connected to the motorcycle, plug the charger into a 13A outlet. 10.3 Do not plug the other end into the 13A outlet until the charging cable is connected to the motorcycle. 10.4 The battery lights indicate the level of charge in the battery. 10.5 No adaptation should be required to domestic wiring although ensure that miniature circuit breakers (MCBs) are fitted at the distribution box. If in doubt, ask an electrician. 10.6 The battery should be stored in a clean, dry, ventilated space. Keep the motorcycle and battery outside residential buildings and away from corrosive substances, fire and heat sources. 10.7 Never charge the motorcycle in the wet, or in damp conditions. Never ...
-
Page 13: Troubleshooting
11.2 Vehicles parked outside must be covered with a waterproof cover in order to protect from sun damage and water ingress. 11.3 Do not use high pressure cleaners. They can penetrate the seals and cause electrical faults. Cleaning with a high pressure cleaner is dangerous. 11.4 The only other user maintenance that should be carried out is charging and tyre inflation. The correct pressure for the tyres is: front: 36 PSI rear: 36 PSI 11.5 Low tyre pressure or worn tyres will affect range and handling. 11.6 All other mechanical issues or error messages should be referred to a dealer authorised by Vmoto UK. If an error message appears, in the first ... - Page 14 2. Tyre pressures are too low 2. Check tyre pressures and inflate if necessary; riding with low tyre pressures also causes handling issues 3. The motorcycle is 3. Decrease the load; this is overloaded dangerous 4. The brakes require 4. Check brake pad wear and adjustment if necessary contact after sales care or dealer 5. The battery is old or 5. Replace the battery ...
- Page 15 Console display 93 Charge overcurrent Stop charging and check the charger Console display 92 Charge overvoltage Stop charging and check the charger Console display 91 Battery high temperature Stop charging / stop riding Console display 90 Battery discharge Stop riding immediately until overcurrent error resolves Console display 89 Charging low temperature Charge battery in a warmer place and wait for it to warm up Put battery in a warmer place Console display 88 Discharge low temperature and wait for it to warm up Console display 87 Network connection ...
- Page 16 Delivery certificate This certifies that a pre‐delivery inspection has been carried out by an authorised dealer / Vmoto UK in accordance with PDI check sheets in force _________________________ Signature of tester and dealer stamp _________________________ Date Vehicle identification number (VIN): Model name Warranty version Date of delivery Dealer name and address 15 ...
- Page 17 Service history All of the inspections and services should be carried out either by Vmoto UK or a dealer authorised by Vmoto UK. Inspections are due within 100 miles of when they are stated to be due. Inspections must be carried out at least annually, no matter what the distance ridden. The mandatory checks to be carried out at each service are: Charge batteries (note battery guidelines) and check contacts Check tyre pressure and correct if necessary Check tyre wear and replace tyre(s) if necessary Check brake pads and discs and correct / replace if necessary Check all main screws against torque requirements Check screws, nuts and fastening points Check motor mountings, stand mountings, suspension struts, fork and handlebar bearing Check the functioning of front and rear suspension Check that all operating parts are in working order Check all lights ...
- Page 18 Inspection Inspection 500 miles or 6 weeks 3,500 miles miles: ____________________ miles: ____________________ _________________________ _________________________ Date, signature, stamp Date, signature, stamp Inspection Inspection 6,500 miles 9,500 miles miles: ____________________ miles: ____________________ _________________________ _________________________ Date, signature, stamp Date, signature, stamp Inspection Inspection 12,500 miles 15,500 miles miles: ____________________ miles: ____________________ ...
- Page 19 Inspection Inspection 24,500 miles 27,500 miles miles: ____________________ miles: ____________________ _________________________ _________________________ Date, signature, stamp Date, signature, stamp Inspection Inspection 30,500 miles 33,500 miles miles: ____________________ miles: ____________________ _________________________ _________________________ Date, signature, stamp Date, signature, stamp Inspection Inspection 36,500 miles 39,500 miles miles: ____________________ miles: ____________________ ...
- Page 20 Inspection Inspection 48,500 miles 51,500 miles miles: ____________________ miles: ____________________ _________________________ _________________________ Date, signature, stamp Date, signature, stamp Inspection Inspection 54,500 miles 57,500 miles miles: ____________________ miles: ____________________ _________________________ _________________________ Date, signature, stamp Date, signature, stamp Inspection Inspection 60,500 miles 63,500 miles miles: ____________________ miles: ____________________ ...
- Page 21 Odometer changed Odometer changed miles: ____________________ miles: ____________________ _________________________ _________________________ Date, signature, stamp Date, signature, stamp Odometer changed Odometer changed miles: ____________________ miles: ____________________ _________________________ _________________________ Date, signature, stamp Date, signature, stamp 20 ...
Need help?
Do you have a question about the CUX 2019 and is the answer not in the manual?
Questions and answers