
Related Manuals for Heiniger Acutecc Euro Grinder

Summary of Contents for Heiniger Acutecc Euro Grinder
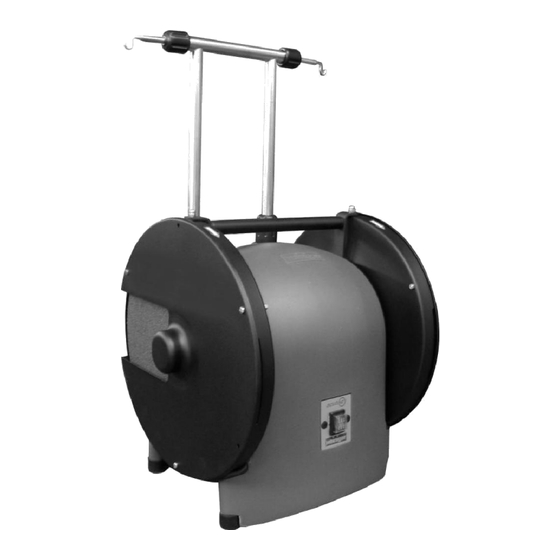
- Page 1 719-301 (EURO) 719-302 (GB) Euro Shearers Grinder Manufactured by H E I N I G E R A U S T R A L I A F0262 Acutecc Euro Grinder Manual 22/09/2006 Rev:01...
-
Page 2: Table Of Contents
When is the comb sharp? Setting up or adjusting the grinder to grind cutters Setting the length of the pendulum for cutters When is the cutter sharp? Emery setting procedure for Heiniger discs and double sided clamp plate. Maintenance Trouble shooting Material groups... -
Page 3: General Information
General information Motor specification sticker Intended use The Heiniger Acutecc Shearers Grinder is designed for sharpening combs and cutters for use on mechanical shearing handpieces. It is to be used in conjunction with other equipment designed for this sharpening process. -
Page 4: Safety Regulations
It is an offence to operate the grinder without the Euro guards fitted and in proper working order. Proper use HEINIGER Australia has fitted this grinder with safety devices in accordance with relevant regulations to protect the operator during use. Should these safety devices become inoperable for any reason it is the responsibility of the owner to ensure that it is repaired before further use. -
Page 5: Residual Dangers
Residual dangers Should dangers and hazards occur during operation of the grinder that are not directly related to grinding, we request that you inform Heiniger of this. This also applies to a technical failure that causes a hazard. Information symbols Warning Indicates a potentially dangerous situation. -
Page 6: Equipment Items
Electric motor 719-311 Spanner 719-318 Euro guard 719-061 Foot 719-323 Pendulum hook set 719-324 Cross arm set 719-325 Switch 719-328 Handle 719-062 Note: 13. Spare parts illustration is at the end of the manual. F0262 Acutecc Euro Grinder Manual 22/09/2006 Rev:01... -
Page 7: Discs & Pendulum
Discs & Pendulum The special light weight aluminium alloy discs and pendulum are precision tools and when used in conjunction with this manual give the best possible edge on your gear. With care they will provide you with years of service. To protect the pendulum, always store and transport it in the supplied case, use it only as instructed in this manual. -
Page 8: Guarantee
60 years. That is your best guarantee. Your HEINIGER Acutecc Euro Grinder was manufactured specifically to sharpen sheep shearing combs and cutters. With a minimal amount of care, your HEINIGER Acutecc Euro Grinder will provide you with years of excellent service. Guarantee period A global warranty covers your HEINIGER Acutecc Euro Grinder against faulty materials and workmanship for 1 year from the date of purchase. -
Page 10: Initial Start-Up
Initial start-up Note: Do not attempt to start the grinder unless this manual has been fully read and understood. Before starting the grinder ensure that the disc nuts are tight. The on/off switch for the grinder is located on the front of the motor housing. Ensure that the switch is in the off (up) position before connecting the grinder to a power source. -
Page 11: Grinder Operating Instructions
Grinder operating instructions Includes: Grinder setup, Grinding technique & using the Heiniger variable handle adjustable pendulum Warning: Always ensure that the Euro guards are securely fitted before setting up and using the grinder. Ensure the emeries are stuck to the disc and have no air bubbles between the emery and disc. -
Page 12: Setting The Length Of The Pendulum For Combs
(see fig ‘D’). On a Heiniger grinder, grind towards the grinder shaft until your comb touches the washer. - Page 13 The light will shine on a rounded/blunt edge but will not shine on a sharp edge. Note: You must grind your combs until the blunt edge is sharp (see fig ‘f’). If in doubt, grind it again.
-
Page 14: Setting Up Or Adjusting The Grinder To Grind Cutters
Setting up or adjusting the grinder to grind cutters With the grinder turned off, hang the pendulum from the pendulum hook. Fit the cutter to the cutter pins and lightly slide the cutter over the disc a couple of times using the grinding action (see fig ‘H’). -
Page 15: Setting The Length Of The Pendulum For Cutters
(see fig ‘M’), Heiniger grinding gauge is near the grinder shaft (see fig ‘M’). Place the then remove the cutter from the disc. -
Page 16: Emery Setting Procedure For Heiniger Discs And Double Sided Clamp Plate
10.14 Separate discs and clamp plate carefully and leave to completely dry before use a minimum of 1 hour. Note: Heiniger double-sided clamp plates must have 2 discs to clamp effectively even if only one emery is being set at a time. -
Page 17: Maintenance
Note: The discs may be hazardous if used in a damaged condition. If discs become damaged they must be replaced. Use only genuine Heiniger replacement discs. The discs are fitted to the grinder when dispatched and are protected by the Euro guard. -
Page 18: Trouble Shooting
1) Use Heiniger shearer’s glue. 1) Wrong glue used. stick to discs 2) Old glue used. 2) Use new Heiniger shearers glue. 3) Wash in hot soapy water. 3) Discs have film of foreign matter on them (oil, dirt, grease, old glue etc). -
Page 19: Component Illustration
Component illustration... -
Page 20: Spare Parts Illustration
Spare parts illustration... -
Page 21: Warranty Registration Card
Return this section to: Warranty registration card Heiniger Australia 5A Tayet Link Retain this section Bibra Lake Western Australia 6163 WARRANTY REGISTRATION WARRANTY REGISTRATION Euro Grinder Euro Grinder Serial number: Serial number: Delivery date: Delivery date: Selling agent: Purchased by:...
Need help?
Do you have a question about the Acutecc Euro Grinder and is the answer not in the manual?
Questions and answers