Table of Contents
Advertisement
Quick Links
Download this manual
See also:
Operating Manual
Advertisement
Table of Contents

Subscribe to Our Youtube Channel
Related Manuals for Deltamess TKS-WM


Summary of Contents for Deltamess TKS-WM
- Page 1 Installation instructions For competent personnel only IMPORTANT! READ CAREFULLY BEFORE USE. KEEP FOR THE ENTIRE PRODUCT LIFE. Heat meters Deltamess TKS-WM compact heat meter...
-
Page 2: Scope Of Delivery
Scope of delivery Heat meter (calculator with measuring capsule incl. installed temperature sensor) Blister pot (measuring capsule protective cap) Installation instructions Operating manual with CE-Declaration of conformity with disposal instructions Use information for existing pockets (for Germany only) Accessory kit with two security seals Temperature sensor for ball valve / tee (O-ring red) preassembled - Consisting of: 1 x TF bolt (0352), 1 x extension ring (1520) - 1 x O-ring black (1109) 1 x O-ring green (0787), 1 O-ring red V-pipe (0759) -
Page 3: Table Of Contents
Calculator - volume measuring part connection cable ............8 Dimensioned drawings ................... 9 TKS-WM interface DM1 ....................9 TKS-WM temperature sensor for housing................. 9 Overall TKS-WM lengths ....................10 TKS-WM housing sensor installation ................12 Symbols and warnings ..................14 Installation positions ..................... - Page 4 Contents Installing the temperature sensor - without pocket (ball valve)......23 Temperature sensor - diameter 5.2 mm ................23 Temperature sensor mouting ..................23 Installing the temperature sensor - with pocket ..........24 Wall-mounted installation with removable calculator ........25 Check the installation ................... 26 Open the shut-offs ......................
-
Page 5: Safety And Warranty
Safety and warranty Important notes This product must be installed properly and in accordance with the specified installation guidelines and may therefore only be installed by trained, qualified competent personnel. Intended use Heat meters are used for central recording of heating energy consumption. Heat meters are intended for this use only. -
Page 6: Lithium Battery Safety
Lithium battery safety Safety instructions for lithium batteries Certain components of the heat meter can be equipped with a lithium battery. This type of battery is classified as dangerous goods. ALWAYS COMPLY WITH THE RESPECTIVE VALID TRANSPORT REGULA- TIONS! Test certificates for the batteries used are available on request. Handling lithium batteries: •... -
Page 7: Technical Data
Technical data Standards and directives CE conformity refer to Declaration of Conformity (enclosed) Electromagnetic compatibility Interference resistance EN 61000-6-2 Emitted interference EN 61000-6-3 Degree of protection IP protection rating IP65 Heat meters European Measuring Instruments Directive (MID) 2004/22/EG EC type examination certificate DE-12-MI004-PTB009 Heat meters EN1434... -
Page 8: Connection Sizes And Dimensions
Technical data Connection sizes and dimensions Connection sizes and dimensions 1.5 m Installation location Return Installation length of the EAT 110 mm 130 mm Pipe connection 3/4 inch OD 1 inch OD Weight (capsule + calculator) 380 g 380 g Installation position horiz./vert. -
Page 9: Dimensioned Drawings
Dimensioned drawings TKS-WM interface DM1 TKS-WM temperature sensor for housing Temperaturfühler (TF) Ø5,2mm direkt tauchend Torque 5Nm 1. O-ring for sensor identification V-pipe=red (20759) / R-pipe=blue (20760) 2. TF bolt (20352) 3. O-ring (21109) 4. Extension ring (21520) 5. Temperature sensor Ø 5.2 mm 6. -
Page 10: Overall Tks-Wm Lengths
101,50 Dimensioned drawings Overall TKS-WM lengths Overall length 110 mm 101,50... - Page 11 Dimensioned drawings Overall TKS-WM lengths Overall length 130 mm 101,5...
-
Page 12: Tks-Wm Housing Sensor Installation
Dimensioned drawings TKS-WM body sensor installation Overall length 110 mm / 130 mm 1. O-ring for sensor identification V-pipe=red (20759) / R-pipe=blue (20760) 2. TF-bolt (20352) 3. O-ring black (21109) 4. Extension ring (21520) 5. O-ring green (20787) 6. Temperature sensor Ø 5,2 mm... - Page 13 Dimensioned drawings TKS-WM body sensor installation Overall length 130 mm with 2 cut-offs 1. O-ring for sensor identification V-pipe=red (20759) / R-pipe=blue (20760) 2. TF-bolt (20352) 3. O-ring black (21109) 4. Extension ring (21520) 5. O-ring green (20787) 6. Temperature sensor Ø 5,2 mm...
-
Page 14: Symbols And Warnings
Symbols and warnings This type of battery is classified as dangerous goods Certain components of the heat meter can be equipped with a lithium battery. Risk of scalding due to hot water An installed meter is a pressurized component! To be installed by trained competent personnel only. The heat meter may only be installed in single tube connectors (EAS) and only without use of adapter rings and adapters. -
Page 15: Installation Positions
Installation positions Horizontal installation Vertical installation Tilted vertical installation NO overhead installation... -
Page 16: Installation Variants - Without Pocket
Installation variants - without pocket Body without shut-off valves 1. Return sensor without pocket integrated in the flos sensor body 2. Flow sensor without pocket Body with shut-off valves 1. Return sensor without pocket integrated in the flos sensor body 2. -
Page 17: Installation Variants - With Pocket
Installation variants - with pocket Body without shut-off valves regulations concerning the use of pockets (thermowells)! sensor body 2. Flow sensor with pocket Identifying the EAT • Check whether the body is marked " DM1". See page 9 for dimensions If the body has this marking, the measuring capsule can be used without any further tests. -
Page 18: Prepare For Installation - Without Pocket
Prepare for installation - without pocket - for new installation • Flush the system • Close the ball valves 1. Ball valve available with connection for flow sensor without pocket - for instrument replacement • Close the ball valves • Remove the seals 1. -
Page 19: Prepare For Installation - With Pocket
Prepare for installation - with pocket - for new installation Observe national and country-specific regulations con- cerning the use of pockets (thermowells)! • Flush the system • Close the ball valves • Remove protective cap from the pocket - for instrument replacement Observe national and country-specific regulations concerning the use... -
Page 20: Installing The Heat Meter (Heat Meter Replacement Part Available)
Installing the heat meter (heat meter replacement part available) Preparing for installation 1. Close taps/valves (shut off water) 2. Undo union nuts and remove replacement part Installing the body 3. Install the body, 4. Use the enclosed seals 5. Tighten the union nuts... -
Page 21: Insert The Measuring Capsule, Note The Flow Direction
Installing the heat meter Preparing for installation (dismantling the old instrument) • Undo existing meters with a hook wrench and remove • Remove all seals • Remove temperature sensor • Remove all O-rings Insert the measuring capsule, note the flow direction •... -
Page 22: Fixing The Measuring Capsule
Installing the heat meter Inserting the measuring capsule • Push in the new measuring capsule and turn by hand • Wide nose in the wide groove (flow direction pre-determined) Fixing the measuring capsule • Use the hook wrench to tightly screw the head ring of the measuring capsule until it stops. -
Page 23: Installing The Temperature Sensor - Without Pocket (Ball Valve)
Installing the temperature sensor - without pocket (ball valve) Temperature sensor - diameter 5.2 mm (preassembled) The temperature sensors for the flow- and reture pipe are peassembled with the necessary mounting hardware. 1. Temperature sensor identificion 3. O-ring black (auxiliary member for mounting) BLUE (Return): for body TKS 4. -
Page 24: Installing The Temperature Sensor - With Pocket
Installing the temperature sensor - with pocket ing the use of pockets (thermowells)! In EU states (except Germany) pockets are also approved for new installations, if they conform to the MID. In Germany, pockets are not approved for new installations! For replace- ment installations the enclosed user information for existing pockets must be observed! For the pocket mounting of a preassembled temperature... -
Page 25: Wall-Mounted Installation With Removable Calculator
Wall-mounted installation with removable calculator Variants with removable calculator can be up to max. 30 cm away from the flow sensor using the optional wall bracket (Art. No. 11012). (1) Use the materials supplied to fix the wall bracket (a) in the required position. Align the wall bracket so that the groove (b) points upwards. -
Page 26: Check The Installation
Check the installation Open the shut-offs • Open the ball valves • Switch on the heating and • open the radiator valve Check for leaks and check flow direction Incorrect flow direction is shown on the display. • Check for leaks and check flow direction... -
Page 27: Sealing The Instrument
Sealing the instrument Sealing the flow sensor (1) Thread the wire of the seal through the seal drill hole of the union nut at the inlet and the flow sensor. (2) Stick the seal through the free opening. Wind the wire tightly by turning the blade of the seal. -
Page 28: Sealing The Temperature Sensor In The Pocket
Note the meter readings • Remove installation protection Note the installation date, meter num- bers, and seal numbers, Note the old and new meter readings. Handover record available on: www.deltamess.de Dispose of the old instru- ment according to the national regulations! -
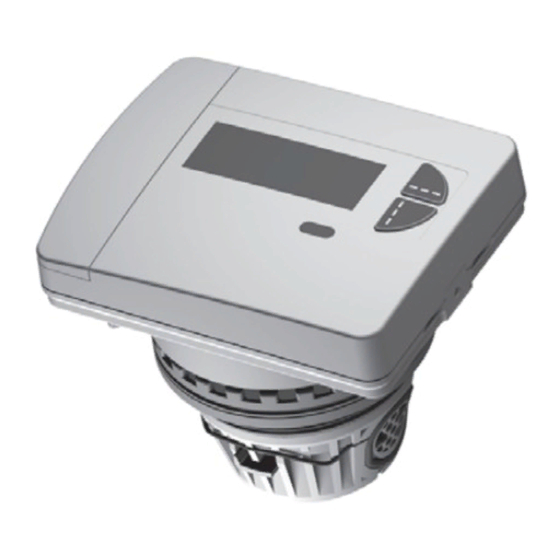
Page 29: Instrument Elements
Instrument elements Controls and interfaces (1) By default, the display is always off (sleep mode). Briefly press the key <H> or <V> to bring up the display loop to the quick reading. Press the key <H> or <V> for more than 3 seconds to call up the plane operating display diagramm. -
Page 30: Display
Display Special operating states Display Description Measures/Notes • Communication credit of • Is corrected after the credit period the module interface or (module = current day; IrDA = current IrDA exceeded month) has expired. • Operating time expired • Instrument must be replaced •... -
Page 31: Key Assignments
Key assignments Key assignment for default level 1. Activate LC display Press the < H > key or Press the < V > key for more than 3 seconds 2. Switch from any position in a level to the next level Press the <... -
Page 32: Putting Into Use
Putting into use Activate programming mode Use the < H > key to navigate to the relevant display level (L3 or L4). Use the < V > key to navigate to the display of the relevant value (here reference date). Use the key shortcut <... -
Page 33: Example: Activating / Deactivating Levels
Putting into use Example: Activating / deactivating levels Display level L3 - display of "possible + active levels" Use the shortcut < H > +< V > (see Seite 31) to activate programming mode. If programming mode is activated, the "M-" symbol flashes. Briefly press the <... -
Page 34: Example: Change The Dimensional Unit (Kwh <-> Mwh Or Mj <-> Gj)
Putting into use (kWh <-> MWh or MJ <-> GJ) Example: Change the dimensional unit Display level L3 - display of "possible + active levels" Use the shortcut < H > +< V > (see Seite 31) to activate programming mode. If programming mode is activated, the "M-"... -
Page 35: Installation Suggestions
Installation suggestions (1) Installation in the area of the secondary circuit not continuously flowed through. (2) Installation in the area of the primary circuit not continuously flowed through. The heat meter is only flowed through if hot flow water flows from the prima- ry circuit into the secondary circuit via the three-way mixing valve. -
Page 36: Checklist
Checklist Observe national and country-specific regulations! Before the installation 1. Are the sealing points on the measuring instrument undamaged? £ (seal on return sensor, seal) 2. Is a suitable installation kit available? £ (Ball valves, built-in parts, seals) £ 3. Is the installation kit positioned correctly? 4. -
Page 37: Following Installation
2. Are the return sensor and the flow sensor sealed? £ 3. Is the instrument number noted (on the nameplate)? 4. Is the initial meter reading noted? £ (Level 0, important for billing) 5. Has the handover record been filled? £ (Available on www.deltamess.de) -
Page 38: Notes On Heat Meter Add-On Modules
Notes on heat meter add-on modules Use of combined heat/cooling meters with add-on module With the introduction of the new heat meter generation, the housing colour of the heat meter add-on modules has been changed from blue to white. In addition, the serial number concept has been optimised for the new heat meters. -
Page 39: R99/0005-02 - Add-On M-Bus Module
Notes on heat meter add-on modules The following system IDs are generated from the serial no. for heat: System ID channel 1: 65 000 100 for heat System ID channel 2: 62 000 100 for cooling The combined heat/cooling meter is identified and managed in the Q AMR and Q walk-by radio systems on the basis of these numbers. - Page 40 DELTAMESS DWWF GmbH Compact heat meter Deltamess Type: TKS-WM Sebenter Weg 42 Document No.: 30186-4 23758 Oldenburg in Holstein, Germany Source: DM_Installation instructions Phone 00 49 (0) 43 61/ 51 14-0 Issue date: 18.09.2015 00 49 (0) 43 61/ 51 14-88 Issue status: 09.15...
Need help?
Do you have a question about the TKS-WM and is the answer not in the manual?
Questions and answers