Advertisement
Advertisement
Table of Contents

Related Manuals for XtremeMac Luna Voyager

Summary of Contents for XtremeMac Luna Voyager
- Page 1 Luna ™ Voyager User’s Guide...
-
Page 2: Package Contents
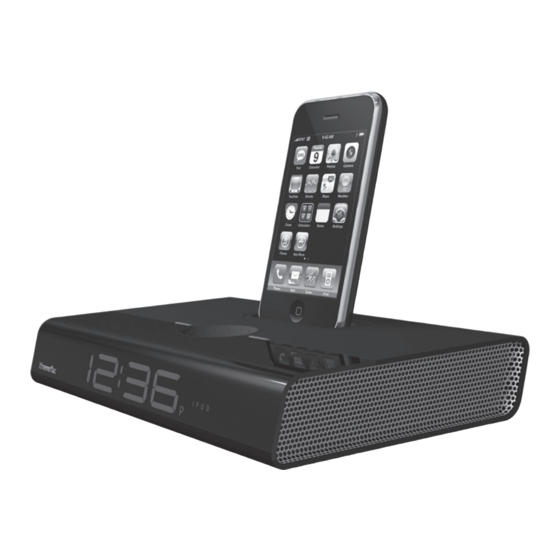
Congratulations on your purchase! Thank you for purchasing Luna Voyager compact alarm clock and personal audio system. The following pages explain the features and operation of Luna Voyager, so please take a few moments to read through this manual. Package contents: • Luna Voyager... - Page 3 safety and operating instructions carefully before installation and use, and keep these instructions handy for future reference. The lightning flash with arrowhead, within an equilateral triangle, is intended to alert the user to the presence of uninsulated “dangerous voltage” within the product’s enclosure that may be of sufficient magnitude to constitute a risk of electric shock to persons. C aution: To prevent the risk of electric shock, do not remove cover (or back). No user-serviceable parts inside. Refer servicing to qualified service personnel. The exclamation point within an equilateral triangle is intended to alert the user to the presence of important operating and maintenance (servicing) instructions in the literature accompanying the appliance. CAUTION: To prevent electric shock do not use this (polarized) plug with an extension cord, receptacle or other outlet unless the blades can be fully inserted to prevent blade exposure. WARNING: To reduce the risk of fire or electric shock, do not expose this appliance to rain or moisture.
- Page 4 This equipment has been tested and found to comply with the limits for a Class B digital device, pursuant to Part 15 of the FCC Rules. These limits are designed to provide reasonable protection against harmful interference in a residential installation. This equipment generates, uses and can radiate radio frequency energy and, if not installed and used in accordance with the instructions, may cause harmful interference to radio communications.
- Page 5 1. Universal dock well 2. Control wheel Settings/Volume/Snooze 3. Alarm button 4. Clock Play/Pause Button 5. LED display 1. Auto time set switch 2. OFF|12|24 hour switch 3. Line-in 4. Power jack 1. Battery Compartment...
-
Page 6: Unpacking And Initial Setup
UnPackIng anD InItIaL setUP 1. Remove Luna Voyager from the box and remove all foam and protective plastic. Properly dispose of all material. 2. Place Luna Voyager on a level surface following the precautions listed in the safety warnings. 3. Remove AC adapter from the packaging. 4. Read and review manual and safety warnings. 5. Open battery compartment cover on the bottom of the unit and insert two “AAA” batteries for alarm and time backup and close cover. 6. Connect the AC adapter into the jack on the back of the unit labeled power and connect the other end of the adapter into a power outlet. 7. Select the appropriate dock adapter for your device and carefully insert into the dock well. Each dock adapter is labeled with compatible device on the bottom left corner of each adapter. Please see the section “Inserting and removing the dock adapters” later in the manual for more details. settIng tHe tIMe WItH tHe DeVIce Set the time switch on the back of the unit to AUTO and then dock your iPhone or iPod. The unit will automatically set the time from your device. Make sure to set the clock mode switch on the back of the unit to 12 or 24 hour depending on your preference. Note: If you are experiencing difficulties getting the unit to set the time from your device remove the device, set the switch to AUTO and then dock your device into the unit again. -
Page 7: Setting The Alarm
4. Use the control wheel to set the minutes and press the clock button to accept and save your changes. Note: Make sure the time switch on the back of the unit is set to SET to save your changes. Otherwise once you dock your device the unit will automatically set the time from the device. settIng tHe aLaRM Press and hold the alarm button on the top of the unit until the time on the display begins to blink. - Page 8 To control display brightness Press and hold the clock button and rotate the control wheel to control the display brightness – rotating the control wheel counter clockwise will dim the display and rotating the control wheel clockwise will brighten the display. Note: The display will turn all the way off – to turn back on, press and hold the clock button while rotating the control wheel clockwise. Inserting and removing dock adapters 1. Select the appropriate dock adapter for your device by turning over the adapter and looking at the bottom left corner for the name of the device for compatibility.
- Page 9 contRoL WHeeL When alarm is sounding Rotate the wheel when alarm is sounding to snooze the alarm. The snooze is set for 10 minutes. When iPod is playing Use the control wheel to adjust the volume. To set the time Press and hold the clock button and use the control wheel to adjust the time. To control display brightness Press and hold the clock button and rotate the control wheel to control the display brightness - rotating the control wheel counter clockwise will dim the display and rotating the control wheel clockwise will brighten the display. Note: The display will turn all the way off - to turn back on, press and hold the clock button while rotating the control wheel clockwise.
-
Page 10: Troubleshooting
tRoUBLe sHootIng no PoWeR Check AC adapter connection Connect the AC adapter into the jack in the back of Luna labeled “Power” and then plug the AC adapter into the wall outlet. Check wall outlet function Plug another device into the same outlet to confirm the outlet is working. - Page 11 Imation Europe B.V., Siriusdreef 46-52, 2132 WT Hoofddorp, The Netherlands Made in China | Fabriqué en Chine. Designed in the USA. © Imation Corp. XtremeMac, Luna and the “X” logo are trademarks of Imation Corp. “Made for iPod” and “Made for iPhone” mean that an electronic accessory has been designed to connect specifically to iPod or iPhone, respectively, and has been certified by the developer to meet Apple performance standards.
Need help?
Do you have a question about the Luna Voyager and is the answer not in the manual?
Questions and answers