
Related Manuals for UUGear Witty Pi 3

Summary of Contents for UUGear Witty Pi 3
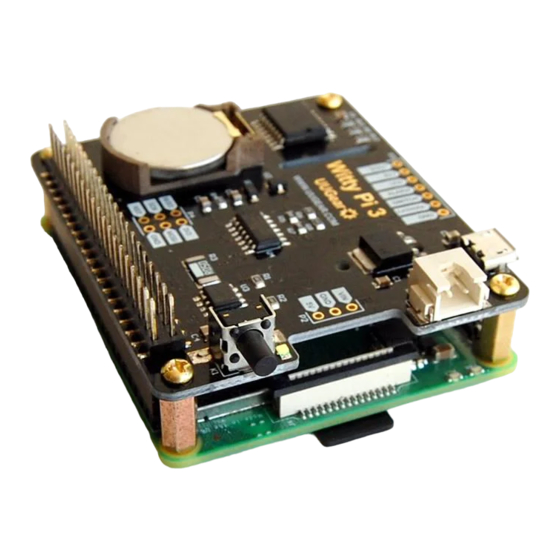
- Page 1 Witty Pi 3 Realtime Clock and Power Management for Raspberry Pi User Manual (revision 1.03) Copyright © 2019 UUGear s.r.o. All rights reserved.
-
Page 2: Table Of Contents
What is in the Package? ..............3 Witty Pi 3 Specifications ..............4 Software Installation ................5 Software Update/Uninstallation ............7 Mounting Witty Pi 3 on Raspberry Pi ..........8 Input Voltage ..................10 Software Usage ................. 11 Write system time to RTC ................... 12 Write RTC time to system ................... - Page 3 The Unpopulated 3-Pin Header (P2) ..........24 The Unpopulated 7-Pin Header (P3) ..........24 Frequently Asked Questions (FAQ) ..........27 What I2C Address is Used by Witty Pi 3? ................27 What I C Registers Are Provided by Witty Pi 3? ..............28 What GPIO Pins Are Used by Witty Pi 3? ................
-
Page 4: What Is Witty Pi
Witty Pi is small electronic circuit board that can add realtime clock and power management to your Raspberry Pi. Witty Pi 3 is the third generation of Witty Pi. After installing Witty Pi 3 on your Raspberry Pi, you get some amazing new features: ... - Page 5 5V (up to 26V, depends on the load and heat sink). Witty Pi 3 doesn't have any jumper, and all configurations are done via I2C interface. Witty Pi's software can help you to make configuration very quickly.
-
Page 6: What Is In The Package
What is in the Package? Each Witty Pi 3 package contains: Witty Pi 3 board x 1 CR2032 battery x 1 M2.5 x 11mm Copper Standoff x 4 M2.5 screws x 8... -
Page 7: Witty Pi 3 Specifications
Witty Pi 3 Specifications Dimension: 65mm x 56mm x 19mm Weight 20g (net weight without battery) ATtiny841(datasheet) Micro Controller DS3231SN (datasheet) Realtime Clock LDO Voltage Regulator LM29150 (datasheet) Battery CR2032 (for time keeping) DC 5V (via micro USB) or DC5.3V~26V (via Power In XH2.54 connector, better no higher than 8V without... -
Page 8: Software Installation
Software Installation It is recommended to install the software for Witty Pi 3 before physically mount Witty Pi 3 on your Raspberry Pi. Before installing the software, please check whether you have 1-Wire interface enabled. This is important because 1-Wire interface uses GPIO-4 by default, which will conflict with Witty Pi. If you need to use 1-Wire interface, please assign it to a different GPIO pin. - Page 9 Witty Pi 3 (tapping button, schedule shutdown or auto-shutdown due to low input voltage), this script will not be executed. Now the software has been installed and you will need to physically mount/install Witty Pi 3 on your Raspberry Pi and connect power supply to Witty Pi 3 only.
-
Page 10: Software Update/Uninstallation
“wittypi” directory and repeat the installing process, then you are all set. pi@raspberrypi mv wittypi wittypi.bak pi@raspberrypi wget http://www.uugear.com/repo/WittyPi3/install.sh pi@raspberrypi sudo sh install.sh If you prefer to completely remove the software, besides removing the “wittypi” directory, you should also remove the “/etc/init.d/wittypi”... -
Page 11: Mounting Witty Pi 3 On Raspberry Pi
Mounting Witty Pi 3 on Raspberry Pi You can simply plug Witty Pi 3 on your Raspberry Pi’s 2x20 pin header, and it can work just like that. However, if you wish, you can use the copper standoffs and screws in the package to tightly mount Witty Pi 3 on your Raspberry Pi. - Page 12 After mounting Witty Pi 3 on your Raspberry Pi, and connect the power supply to Witty Pi 3 (via the micro USB connector or XH2.54 connector), you can see...
-
Page 13: Input Voltage
5V (if you input power via the XH2.54 connector). The LM29150 is 26V tolerated, but it doesn’t mean you can really use 26V to power your Witty Pi 3. LM29150 is a linear regulator, which means the dropped voltage will be dissipated as heat and the... -
Page 14: Software Usage
./wittyPi.sh ================================================================================ Witty Pi - Realtime Clock + Power Management for Raspberry Pi < Version 3.00 > by UUGear s.r.o. ================================================================================ >>> Current temperature: 29.50° C / 85.1° F >>> Your system time is: Mon 24 Jun 2019 14:45:09 BST >>>... -
Page 15: Write System Time To Rtc
2. Write RTC time to system This option will copy the time from the Realtime Clock on Witty Pi 3 to your Raspberry Pi system. This option should be used when you find the RTC time is correct while the system time is not. -
Page 16: Schedule Next Shutdown
flow chart below shows what this script actually do: Schedule next shutdown This option allows you to specify when your Raspberry Pi should shutdown automatically. Please notice the input format should be “DD HH:MM”. DD means the day in the month, HH is the hour, MM is the minute. -
Page 17: Choose Schedule Script
??:??:12” is OK, while “?? 15:??:25” is not supported. If you input an unsupported pattern, Witty Pi 3 will try to change it to the closest one that could be supported. You will see the message on the console. -
Page 18: Set Low Voltage Threshold
7. Set low voltage threshold If you are powering your Witty Pi 3 from the XH2.54 connector, and the input voltage is lower than the low voltage threshold, Witty Pi 3 will shutdown your Raspberry Pi. Here you can specify the low voltage from 2.0V to 25.0V. -
Page 19: View/Change Other Settings
It is “OFF” by default, which means your Raspberry Pi will not be turned on when power supply is connected to Witty Pi 3, and you will need to tap the button on Witty Pi 3 to start it. Here you can set it to 1 (ON) or 0 (OFF). -
Page 20: Reset Data
Once you select this option, the software will display a sub menu, which allows you to: Clear auto startup time: The auto-startup time will be erased and Witty Pi 3 will not auto-start your Raspberry Pi. Clear auto shutdown time: The auto-shutdown time will be erased and Witty Pi 3 will not auto-shutdown your Raspberry ... -
Page 21: How Schedule Script Works
How Schedule Script Works? A schedule script defines a serial of ON/OFF states and specify the duration of each state. At the end of each state, there should be a scheduled shutdown (for ON state) or scheduled startup (for OFF state). - Page 22 Please keep in mind that, running the same schedule script at different moment may get different result, as the “runScript.sh” will search and find the proper state according to current time. When the “runScript.sh” is executed, if the current time is located at an “OFF” state instead, it will take the next “ON”...
-
Page 23: Make Schedule Script
Make Schedule Script A schedule script is a text file with. Wpi file extension. You can use any text editor to create and edit it. In the major of cases, using “nano” will be very convenient. Below is a very simple schedule script and it will keep your Raspberry Pi on for 5 minutes in every 20 minutes. - Page 24 If you wish to define an OFF state for two days, you can write: When this line gets executed, a startup will be scheduled at the end of the OFF state. Sometimes you may want to skip certain scheduling of shutdown/startup, and let your own program to do the job.
-
Page 25: Using Schedule Script Generator
You can use our web application to create your schedule script. Just simply open this URL in your web browser and you are ready to go: http://www.uugear.com/app/wittypi-scriptgen/ This web application allows you to visually create the schedule script, it immediately generate the final schedule script (on the right). -
Page 26: Advanced Usage Of Schedule Script
“./runScript.sh” in the “~/wittypi” directory, the script will start to work. This allows you to schedule script as an interface, to integrate other tools with Witty Pi 3 together. For example, you can create your own tool to visually create a schedule script, or remotely generate the schedule script via a web interface. -
Page 27: The Unpopulated 3-Pin Header (P2)
This header is for inputting voltage to power Witty Pi 3. It will be useful if you neither want to input 5V via the micro USB connector, nor input higher voltage via the XH2.54 connector. - Page 28 Witty Pi 3’s software detects and processes it. SWITCH It is the signal line that connects to the switch (button) on Witty Pi 3. If you want to connect your own (2-lead) switch, just wire the two leads to Switch and GND pins.
- Page 29 If you measure the voltage between cathode and ground as V , you can calculate the actual current like this: / 0.05 = 20 * V It is the ground of Witty Pi 3 board, and it directly connects to the GND wire of power supply.
-
Page 30: Frequently Asked Questions (Faq)
Also Witty Pi 3 has a micro controller (ATtiny841), which also works as an I C slave, and the micro controller’s I C address is 0x69. If you have Witty Pi 3 connected to Raspberry Pi and run “sudo i2cdetect –y 1” in the console, you will see this: pi@raspberrypi sudo i2cdetect -y 1... -
Page 31: What I 2 C Registers Are Provided By Witty Pi 3
C interface. The software configures Witty Pi 3 by setting the I C register accordingly. The table below shows the 20 registers provided by Witty Pi 3. As you can see, some of them are read-only (can not be changed, or can only be updated by the firmware itself):... - Page 32 Default On = 1 Write Default Off = 0 Pulse interval when Raspberry Pi is 6,7,8 or Read & off: Write 1 second = 6 2 seconds = 7 4 seconds = 8 8 seconds = 9 This parameter affects the white LED blinking and dummy load.
- Page 33 Below is an example to read the register at address 7, to know the current power mode (0x00 means input 5V via the micro USB connector): pi@raspberrypi i2cget -y 1 0x69 7 0x00 pi@raspberrypi And below is an example to write the register at address 11, to set the pulsing interval to 1 second (using value 6): pi@raspberrypi i2cset -y 1 0x69 11 6...
-
Page 34: What Gpio Pins Are Used By Witty Pi 3
GPIO-3 (SCL 1). Witty Pi 3 doesn’t actually use the TXD pin, but it will monitor its voltage. The TXD pin is supposed to be HIGH when system is on, and should go LOW after system has been shut down. If you connect... -
Page 35: Is Witty Pi 3 Compatible With "Other Hardware
Please understand that we might not have the hardware you have on hand, and even if we have, it is difficult for us to make tests on all these hardware with Witty Pi 3. Fortunately, it is not that difficult to figure out the answer by yourself. - Page 36 These scripts should be executed automatically after the operating system is up. If these scripts are not automatically executed for any reason, Witty Pi 3 will cut the power of Raspberry Pi. In this case, the first place to check is the “/etc/init.d/wittypi” file, and there is possibility that it contains wrong paths to these scripts.
- Page 37 You may ask, how comes the shutdown alarm could act like a startup alarm? This situation exists since Witty Pi 2. Witty Pi 2 and 3 use the same RTC chip (DS3231), which is way better than the one used in on Witty Pi (DS1337). The downside however, is the new RTC chip merges two alarm pins into one.
-
Page 38: Revision History
Revision History Revision Date Description 1.00 2019.06.14 Initial revision 1.01 2019.06.24 Add information for Raspberry Pi 4B 1.02 2019.07.10 Add description of provided I2C registers 1.03 2019.07.28 Information for confliction with 1-Wire interface.
Need help?
Do you have a question about the Witty Pi 3 and is the answer not in the manual?
Questions and answers