
Subscribe to Our Youtube Channel
Summary of Contents for Geyserwise Delta T
- Page 1 GeyserWise Delta T 220V Thermostat instruction manual SANS 181 compliant All in one hot water management Before operating and installation, carefully read all instructions. Do not discard this manual. www.geyserwise.co.za...
-
Page 2: Table Of Contents
Index Warranty Components About the GeyserWise Application Installation Technical information Improper usage Dangers during installation Exclusion of liability Installation 220V pumped solar system Installation procedure steps Apply all safety measures Install control box Install the display unit Remove thermostat and replace with supplied geyser temperature probe... -
Page 3: Warranty
Warranty conditions apply: We, GeyserWise CC, warrant to you that, for a period of six months from the date of purchase, the GeyserWise 220V Delta "T" all in one Hot Water Management System (the "good") will be free of any defect. -
Page 4: Components
Collector temperature sensor and extension cable Also referred to as a probe, it senses the temperature in the panel and relays the information to the control box via the extension cable. www.geyserwise.co.za www.geyserwise.co.za... -
Page 5: About The Geyserwise
About the GeyserWise Application GeyserWise is suitable for installation 220V pumped solar hot water heaters. When installing the GeyserWise be sure to follow the appropriate instructions of each particular manufacturer for all other components as well: Installation of geyser. Installation of solar collectors. -
Page 6: Improper Usage
Before connecting the GeyserWise, make sure that the power supply matches the specifications on the type plate. Factory labels and markings may not be altered, removed or rendered unreadable. Make sure that all devices which are connected to the GeyserWise conform to the technical specifications of the GeyserWise. Exclusion of liability The manufacturer cannot monitor the compliance to this manual as well as the conditions and methods during installation and operation. -
Page 7: Installation 220V Pumped Solar System
A summary of the installation steps are as follows: Apply all safety measures. Install the control box. Install the display unit. Remove existing thermostat and replace with new supplied thermostat. Install the collector probe. Complete all electrical connections. Set up the controller and all settings. www.geyserwise.co.za www.geyserwise.co.za... -
Page 8: Apply All Safety Measures
IMPORTANT! Make sure that there is no reading on the multimeter STEP 2: Install control box Find a dry place near the isolator switch. The control box must not be exposed to the elements! www.geyserwise.co.za www.geyserwise.co.za... -
Page 9: Install The Display Unit
STEP 4: Remove thermostat and replace with supplied geyser temperature probe The geyser's thermostat needs to be removed. The geyser temperature probe provided by GeyserWise has a built in probe that measures the temperature in the geyser. It also supplies information to the element whether it should switch on or not. - Page 10 Push the plug connected to the geyser temperature probe. Plug it into the dedicated plug as provided on the control unit. Geyser Thermostat Connection Collector Probe Connection Display Connection www.geyserwise.co.za www.geyserwise.co.za...
-
Page 11: Install The Collector Probe
The measurement on a lower point will result in an incorrect reading (lower temperature). This implication is that the panel will be warmer than the indicated temperature and therefore stop the pump too soon. The solar system will not be functioning optimally! www.geyserwise.co.za www.geyserwise.co.za... -
Page 12: Connections On Control Box Summary
Plug the probe connection into the control box at the dedicated port. Connections on control box summary Geyser Thermostat Connection Collector Probe Connection Display Connection www.geyserwise.co.za www.geyserwise.co.za... -
Page 13: Complete All Electrical Connections
Connect Live and Neutral as indicated. Ensure that the wires are properly fastened as they are drawing a large Connect Earth wire as indicated. current. Loose connections can damage the connector block. Connect the wire from controller to geyser www.geyserwise.co.za www.geyserwise.co.za... - Page 14 Before you replace the lid it is important to do a final check on the electrics by comparing it to the wiring as indicated on the lid. Power up system Switch on main supply at DB board. 2. Then switch on power at isolator switch. Summary Main power Power to geyser Main power Power to geyser www.geyserwise.co.za www.geyserwise.co.za...
-
Page 15: Connect Wire Between Controller And Pump
Before you replace the lid it is important to do a final check on the electrics by comparing it to the wiring as indicated on the lid. Power up system Switch on main supply at DB board. 2. Then switch on power at isolator switch. Summary www.geyserwise.co.za www.geyserwise.co.za... -
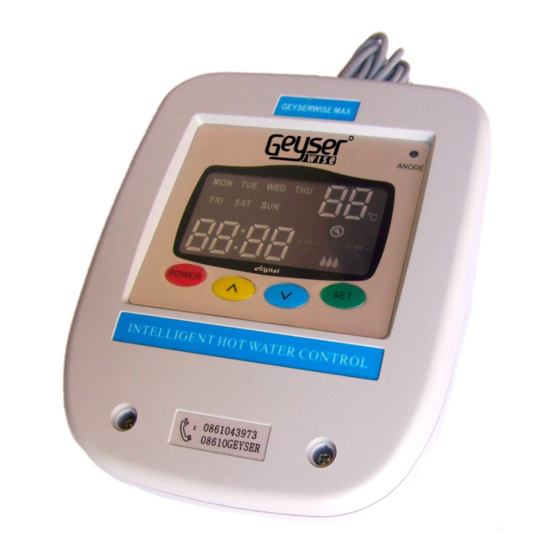
Page 16: Display
Real time clock. Anode depletion indicator. Real time clock. Element ndicator. dicator. Anode depletion indicator. Element on/off indicator. Element on/off indicator. Element on/off indicator. Pump on/off indicator. cator. cator. Pump on/off indicator. Timers. Timers. Timers. www.g www.geyserwise.co.za www.geyserwise.co.za www.geyserwise.co.za www.geyserwise.co.za... -
Page 17: Adjusting Day Of The Week
Press the green set button until the day of the week flashes. Adjust the day of the week by using the ^ and v arrow buttons. Adjust the day of the week by using the ^ and v arrow buttons. www.geyserwise.co.za www.geyserwise.co.za www.geyserwise.co.za... -
Page 18: Adjusting The Real Time Clock
^ and v arrow keys. Maximum temperature settings There are four maximum temperature settings. It is important to note that these settings apply to the four quarters of the day and not to the set times that the elements must come on. www.geyserwise.co.za www.geyserwise.co.za... -
Page 19: Setting Solar Differential
Set the temperature differential to your requirements using the arrow keys. Available temperatures is 7°C to 15°C. Setting the anti-freeze temperature GeyserWise has an anti-freeze function where the pump will start circulating warm water from the geyser to the collector if the panel... -
Page 20: Setting Geyser Timers
Instruction manual Display Setting geyser element timers There are four on/off timers that can be set with the GeyserWise. Note that you can set different timers for the weekend. To set timer number one, follow the steps as Adjust the hours you require by using indicated below: buttons. -
Page 21: Eliminating A Timer
If the homeowner does not use any hot water, it may lead to overheating of the geyser. To prevent occurrence of the above mentioned the GeyserWise has a holiday mode function. To prevent occurrence of the above mentioned the GeyserWise has a holiday mode function. -
Page 22: Element Indicator
4 kW. This then means settings reappear. that the user consumed 120 kWh since the last time the unit was reset. www.geyserwise.co.za www.geyserwise.co.za... -
Page 23: Error Codes Summary
Check all of the above (More information on page 46) • Clean pump (More information on page 48) www.geyserwise.co.za Error code: E5 - Over temperature protection Possible cause: Geyser temperature exceeds 85°C Action(s): Open hot water tap to reduce temperature in geyser (More information on page 47) www.geyserwise.co.za... - Page 24 Remedial action The thermal pocket too close to the element. It's recommended that you contact an electrician or GeyserWise technician to deal with the E1 error code. Remedial action The following steps should be taken by the electrician or technician. PLEASE DO NOT DO THIS YOURSELF.
- Page 25 Switch off mains to geyser at DB board for 3 seconds. Switch the geyser back on at the DB board. Press the red power button on the GeyserWise to switch on element. You should see at least 1°C temperature rise in 20 minutes without any water withdrawals.
- Page 26 Remedial action Check if there is any water in the drip tray under the geyser. If there is any water, dry the drip tray and water www.geyserwise.co.za leak detector. The source of the water should be investigated. Error code: Communication failure Please note that the geyser element will not work during an E7 error code.
- Page 27 October until the end of March. This effectively means that the element does not switch on at all for six months of the year and all water heating is from solar. On the GeyserWise controller, use the following procedure to ensure the element seldom or never switches on: Press the SET button once and a temperature setting will appear.
-
Page 28: General
We do not recommend temperatures as high as 90°C, but would like to offer a workable solution in case of higher temperatures. At the moment all our MAX models come with the following thermostat: Thermal cut-out sold with GeyserWise MAX model Cut-out temperature is at 90°C. *NB: Please note cut-out temperature. -
Page 29: How To Deal With Power Failure In Case Of 220V Pump Application
If a 220V pump is used in a pumped solar system there will be no back-up power to drive the pump in case of a power failure. The display of the GeyserWise will also not be working during the time the electricity is off. -
Page 30: Geyserwise Anti-Freeze Function
GeyserWise has an anti-freeze function where the pump will start circulating warm water from the geyser to the collector once the collector temperature reaches 5°C (default) to prevent the panel from freezing. Please note the appropriate panels for frost prone areas and anti-freeze valves are still needed. ESKOM also recommend an indirect system for frost-prone areas. - Page 31 Instruction manual Notes www.geyserwise.co.za...
- Page 32 086 104 3973 • fax 086 664 3973 PRETORIA physical address Unit 5 Edison Park, 183 Edison Crescent, Hennops Park, Centurion, 0172 tel 012 653 1020 email info@geyserwise.co.za • web www.geyserwise.co.za • reg no 2004/083059/23 • VAT no 4550224515 www.geyserwise.co.za...
Need help?
Do you have a question about the Delta T and is the answer not in the manual?
Questions and answers
Hello i set my temperature at 45 degrees ,when the timer comes on my water is at 40 degrees but the flames are flashing which means its not heating up to the 45 degrees ,do you know why please