
Related Manuals for Ernex AS MaxiCut 1500

Summary of Contents for Ernex AS MaxiCut 1500
- Page 1 ���������������� �������������� ������������ �������� ������������������������������� ��������������������� �������������������� ���������������������� ������������...
-
Page 2: Table Of Contents
CONTENTS 1. Safety instructions 2. General instructions/Dust and Noise 3. Directions for assembly/Power Supply 4. Control functions/Transport 5. Operation 6. Maintenance/Repair 7. Troubleshooting 8. Warranty 9. Technical data 10. Standard/optional equipment 11. Spare part list/drawings 12. Wiring diagaram 13. Conformity declaration 14. -
Page 3: Safety Instructions
1. SAFETY INSTRUCTIONS 1. This machine is designed and constructed by Ernex AS and has been submitted for test and found in conformity with the Machine Directive 2006/42/EF, 2006/95/EF and EN 1870-5: 2002. 2. The Health and Safety at Work places duties on designers, manufacturers and supp-liers to ensure that among other things: 1. -
Page 4: General Instructions/Dust And Noise
2. GENERAL INSTRUCTIONS 2.1 General safety precautions: • IMPORTANT! According to the CE-regulations, rollertables must always be used. • IMPORTANT! Note that the sawblade moves up and forward the entire length of the slot. This is the essence of the MaxiCut concept. •... -
Page 5: Directions For Assembly/Power Supply
3. DIRECTIONS FOR ASSEMBLY 3.1 Top guard adjustment • Adjust the top guard (Fig. 2) so that the wooden strip on the inside of the guard is 3 mm from the saw blade. See Fig. 1. 3 mm (1/8") Fig. 1 Fig. - Page 6 3.2 Mounting rollerbox and adjustable rollertable • Attach guide bar to saw by turning lockinghandle. See Fig. 3. • Remove stop screw A at the end of the guide bar and insert the end of the roller- box into the guide bar. Retighten stop screw A. •...
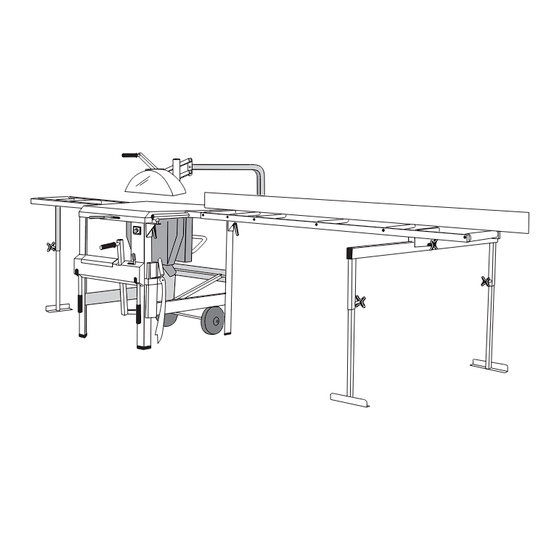
- Page 7 3.3 Attaching support roller • Attach support roller to the saw using M10x16 screws. See Fig. 5. Fig. 5 3.4 Assembling the fixed table w/board support Assemble as illustrated in Fig. 6a/6b. M10 x 16 Fig. 6b Fig. 6a...
- Page 8 3.4 Connecting mains supply - direction of rotation • When connecting a saw with a three-phase motor to the mains, check to see that the sawblade rotates in the right direction (away from the riving knife). The direction of blade rotation is indicated on the sawblade cover under the table. If the blade rotates in the wrong direction, two of the phases must be switched.
-
Page 9: Control Functions/Transport
4. CONTROL FUNCTIONS/TRANSPORT 4.1 Raising and lowering transport wheels • To position the wheels for transport, lift the saw by the handles so that the axle drops into the bottom notch, and lower the saw again. • The saw should not be left standing on its wheels during motor vehicle transport or while in use. -
Page 10: Operation
4.4 Raising and lowering saw blade The saw blade is raised and lowered by means of the elevation arm illustrated in D, Fig. 9. The blade may be locked at the desired height by means of the elevation locking clamp illustrated in D, same figure. - Page 11 5.2 Bevelled crosscutting (tilted blade) • Tilt saw blade to desired angle and tighten locking clamp. • Place material against fence and cut by lifting saw blade. See Fig. 11. Fig. 11 5.3 Angled crosscutting • Turn turn table to desired angle in relation to fence. •...
- Page 12 5.5 Ripping • Lock sawblade at desired height. The blade must be parallel to the fence. • Position the fence lengthwise so that its end is in level with the centre of the saw- blade. • Lock fence at desired distance from sawblade to obtain width required. •...
- Page 13 Fig. 16 5.8 Cutting rabbets and grooves across material • Set the turntable at 90° to the fence and lock the sawblade at the desired height. • Hold material against the fence and feed it through the sawblade by pulling the rollertable towards you.
-
Page 14: Maintenance/Repair
6. MAINTENANCE/REPAIR CAUTION! Make sure power supply is dis connect ed while performing mainte- nance operations. A minimum of maintenance is required to ensure satisfactory performance and a long service life. • Lubricate moving parts, linkages and the bearings carrying the turntable at regu- lar intervals. - Page 15 Fig. 18 Fig. 19 REPAIR Routines at repair: The machine must only be repaired by qualified electricians or authorised service workshops. Testing the brakes: The brake for the saw blade rotation should be tested regularly. The stop-time must be max. 10 sec. Start/stop the saw 10 times in a row and check the stop-time.
-
Page 16: Troubleshooting
7. TROUBLESHOOTING The saw does not start: * check the power supply * do not use the cable with several machines at the same time * check that the cable is not too long, and that the cross-section is not too small * contact an electrician The saw vibrates and is weak * check that the blade box under the bench does not contain chips and sawdust... -
Page 17: Warranty
1-year warranty commencing from the date on which the machine is sold to the end user. Ernex AS/The importer promise to repair, or at our op- tion, replace with like grade and quality any product determined to be faulty due to the failure of parts, material or workmanship. -
Page 18: Technical Data
9. TECHNICAL DATA MaxiCut 1500 Manufacturer: Ernex AS, Norway. NS-ISO 9001 Model: Norsaw MaxiCut 1500. Table: 650 mm x 790 mm. Height: 885 mm. Weight: 124 kg. Sawblade: Carbide-tipped, Z=32. Diam. 360 mm. Arbor hole 30 mm. (USA 31.75 mm.) Kerf width 3.5 mm. -
Page 19: Standard/Optional Equipment
10. STANDARD EQUIPMENT • Guide Bar • Rollerbox • Support roller • Carbide-tipped sawblade • 2 push sticks • Top guard • Wheels • Hand tools OPTIONAL EQUIPMENT • Adjustable infeed rollertable with support trestle • Fixed outfeed rollertable with board support •... -
Page 20: Spare Part List/Drawings
Ernex AS Spare Part List Gjerde 1500 Pos. Art.No. Text 720 101 Saw frame 820 165 Clamp f/sawblade, outer 720 078 Tabletop 820 166 Spindle nut (left handed) 720 242 Foot 720 390 Motor 230V/1-ph. 2kW EMG 720 008 Turntable 720 391 Motor 230V/3-2.2kW EMG... - Page 22 Ernex AS Deleliste Rullebord/Tilleggsutstyr 12-/1603/1500 Pos. Art.nr. Tekst 745 715 Ramme m/ruller reg./fast 772 728 Rull m/plastlager & aksel 707 879 Plastlager f/rull (2) 772 878 Plastplugg 745 376 Støttebukk kompl. 745 310 Ben f/støttebukk 772 722 Målebånd f/stålanh. 2.6m reg.bord 772 742 Målebånd f/stålanh.
-
Page 26: Conformity Declaration
MaxiCut 1500 SAMSVARSERKLÆRING CONFORMITY DECLARATION KONFORMITÄTSERKLÄRUNG KONFORMITETSINTYG DICHIARAZIONE DI CONFOMITA Ernex AS Fabrikant – Manufacturer – Hersteller – Produttore: 1792 Tistedal Adresse – Adress – Anschrift – Indirizzo: Erklærer herved at : Nr.: ………………… Maskin: Mod.: Som er omfattet av denne erklæring, er fremstilt i overensstemmelse med Rådets direktiv av 2006/42/EF, 2006/95/EF og EN 1870-5:2002. -
Page 27: Product Marks
14. PRODUCT MARKS... - Page 28 Holland/Netherland: Gjerde B.V. Mors 9, NL-7151 MX Eibergen Tel: +31 545 472855, Fax: +31 545 472865 E-mail: info@gjerde.nl www.gjerde.nl 2011 Ernex AS Bjørnstadgt. 7, N-1792 Tistedal, Norway. Tlf. +47-69 17 83 30, Fax +47-69 17 83 60 E-Mail: ernex@ernex.no - www.ernex.no...
Need help?
Do you have a question about the MaxiCut 1500 and is the answer not in the manual?
Questions and answers