Table of Contents
Advertisement
Advertisement
Table of Contents

Related Manuals for ensto Enervent eAir


Summary of Contents for ensto Enervent eAir
- Page 1 7.3.2016 Enervent eAir Installation instruction...
-
Page 2: Table Of Contents
ENGLISH . . . . . . . . . . . . . . . . . . . . . . . . . . . . . . . . . . . . . . . . . . . . . . . . 5 Read me first . - Page 3 TCG units ..........38 Twin Tropic units .
-
Page 5: English
ENGLISH Installation instructions... -
Page 6: Read Me First
Models and compo- nents table at the end of this manual, check WARNING: Before opening the maintenance your order and contact your seller or Ensto hatch, always make sure that the unit’s supply Enervent before starting installation. -
Page 7: Terminology
WARNING: Make sure you follow the local Term Explanation regulations for electrical installations. outside air Outside air supply to ventila- tion unit underpressure Actions taken for avoiding WARNING: Make sure the unit is fully prevention excessive under pressure cli- mate inside when one or sev- detached from the electrical network before eral appliances are extracting carrying out voltage tests, insulation resist-... -
Page 8: And Ltr-7
• Avoid installing the unit in spaces with high tem- perature and high humidity level. In certain condi- tions these can cause condensation on the unit’s outer shell. • Consider the unit noise level when choosing the installation location. If possible install the unit on a soundproof wall. -
Page 9: Building The Ventilation System
Building the ventilation system NOTE: The ventilation ducts must be plugged Designing the ventilation system must be done by a close until the ventilation system is taken into professional ventilation designer. By following closely use. This is in order to keep warm air from the design plan when building the ventilation system, flowing into the duct. -
Page 10: Installing Duct Coils
Ventilation Duct Insulation Examples Cold/semi-warm* spaces: Sound insulation is not taken into account in these • In standard ventilation the insulation must be insulation instructions and examples. designed and implemented so that the maximum air temperature change in the duct is less than 1°C. NOTE: A semi-warm* space refers also to For example, 100 mm of sheet, mat, or pipe-cov- dropped ceilings, sub-floors, and casings. - Page 11 These coils are installed in the supply air duct (after • Check the duct coil and its connections for leaks the ventilation unit). immediately after the system has been filled with liquide. Table 2 shows preheating/precooling coils. These coils • Place the supply air temperature sensor (TE10) in are installed in the outside air duct (before the ventila- the duct after the coil, and the water coil return tion unit).
-
Page 12: Installing Ventilation Unit Ceiling Installation Plate
ature sensor (TE01) before the heater in the outside can be used (option 2). The cooling coil can be either air duct and connect the sensor(s) to the MD con- built in the ventilation unit or it can be a duct coil, trol circuit board.. -
Page 13: Installing Chg Geothermal Pre-Heating / Pre-Cooling
The heat pump will not be started up for ventilation cooling. Installation: Mount the cooling coil in the supply air duct (in case of a duct coil). Connect the condensate water outlet. Build a separate pump group with valve and actuator for circulating cool brine adjacent to the ventilation unit cooling coil. -
Page 14: Requirements And Preparations For Electrical Connections
and pre-heating. The damper can be controlled from Connect the condensate water outlet. the same relay that controls the circulation pump for Build a separate pump group for circulating cool the hydronic pre-cooler/heater. brine adjacent to the ventilation unit cooling coil. Be sure to isolate the pipes carefully with vapour The CHG pre-heating / pre-cooling system can be built proof insulation to prevent condensation on the... - Page 15 If the panels have a shared holder, the other panel needs a separate micro USB charger (not supplied by Ensto Enervent). Commissioning two control panels with their own...
- Page 16 The functions and accessories listed in the following table may need external wiring or connecting to function: Location on MD Voltage/current Cable Wiring outside controller card (example) AI NTC TE20 /TE21 Room temperature Connector on 3,3VDC KLM 2X0.8 sensor eAir operating panel wall holder circuit board TE01 Outside air temperature...
- Page 17 Location on MD Voltage/current Cable Wiring outside controller card (example) Free AI13 (sw 0-10VDC KLM 4x0.8 configurable) Free AI14 (sw 0-10VDC KLM 4x0.8 configurable) Free AI15 (sw 0-10VDC KLM 4x0.8 configurable) Free AI16 (sw 0-10VDC KLM 4x0.8 configurable) Analog Outputs AO Control voltage for cooling / 0-10VDC 10mA KLM 2x0.8...
-
Page 18: Installation
MODBUS-RTU foamed plastic) Insulation mate- For heat and sound insulation. rial (foamed Modbus registers are available on Ensto Enervent plastic and/or wool, depend- webpage www.enervent.fi ing on where the unit will be WARNING: Do not connect the external bus... -
Page 19: Installing Models Pinion, Pingvin, Pingvin Xl, Pandion, Pelican
Installing models Pinion, Pingvin, • Make sure the ventilation ducts are insulated according to the instructions in Insulating venti- Pingvin XL, Pandion, Pelican, lation ducts chapter Pegasos, Pegasos Twin Tropic and • Make the applicable electrical and plumbing Pallas connections according to the electrical and prin- cipal diagram at the end of this manual. - Page 20 NOTE: Make sure to leave the cables loose Make sure there is enough space underneath the ceiling plate to fit the unit. in case the unit needs to be taken down for some reason. Lift the unit up. Hook the unit to the front side of ceiling installa- NOTE FOR PINGVIN: It is essential for the tion plate.
-
Page 21: Floor Installation
Make sure that the electricity supply cable is not tion, avoid fastening the isolation in a way that con- pinned between the ceiling installation plate and ducts sound and vibration to the house frame. the ventilation unit. Set the unit on top of an insulating plate, for Reinstall the fan, filter and heat exchanger. - Page 22 • The condensate water should be led in a falling, at least Ø15 mm pipe, through a watertrap to a floor drain or such. • The pipe must at all times lie lower than the con- densate water drip pan of the ventilation unit. •...
-
Page 23: Further Installation Phases
Further installation phases: Unit 1/4” DN32 G½” DN32 (inner (VEAB, (duct models MD and MDE thread) outer case) thread) Principal, control and wiring diagrams for each model Pelican HP / HP •• can be found at the end of this manual. Oceanic Pegasos MDE/ ••... -
Page 24: Installing Model Cg, Tcg And Twin Tropic Cw
Installing model CG, TCG and Twin • If the installation is done in wintertime it is rec- ommended not to let water in the coil until the Tropic CW ventilation is running. This in order to prevent cold air from entering the ventilation system and Principal, control and wiring diagrams for each of the possibly freezing the coil. -
Page 25: Commissioning
nection schematics. Terminals 11,12 and 13 in the When making the calibration make sure that ICE-A2000 controller. • all filters are clean and Open the 4 locking screws on the frame of the • all supply and extract air valves, the roof pass- ionizer module, located below the electrical con- through and the outside air grating are in place. -
Page 26: Control System
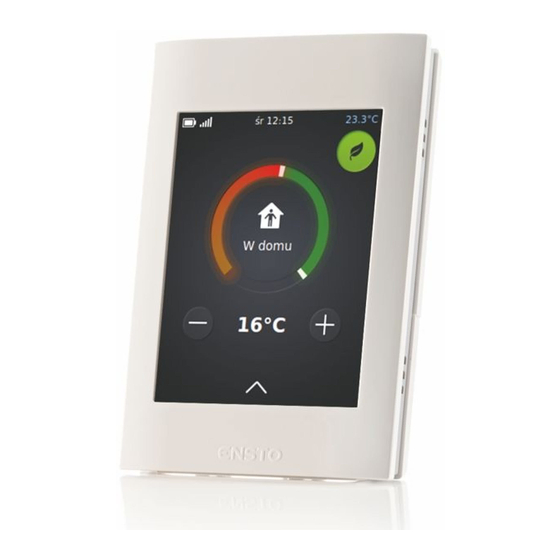
NOTE: You can also charge the control panel control system and it’s eAir control panel. The control using a micro USB charger (not supplied by is configured on the factory, but needs commissioning Ensto Enervent). on site. Important to know about control system Commissioning eAir control panel... -
Page 27: Setting Up System With Setup Wizard
The panel will ask which language you want The panel starts up automatically and displays the to use and fetch the rest of the data from the Ensto logo. ventilation unit motherboard. Wait until the language selection appears. Returning to setup wizard This may take some time. - Page 28 Screen settings ture to vary between +13 °C and +40 °C (factory setting). These two settings are available only for Set the screen brightness by adjusting the units with cooling functionality. value that appears when tapping the item . • Room temperature average setting uses the room NOTE: Setting the brightness value low will temperature sensor for comparing (not included increase the control panel battery life.
- Page 29 temperature exceeds this value, cooling power connected to the ventilation unit, besides the two is increased or heating power is reduced. The RH% and CO₂ sensors that are preconfigured. default value is +40°C. Tap the desired analog input to configure the set- Set heating/cooling limitation on or off by tog- tings for that input.
- Page 30 NOTE: If the set duct pressure is outside the 10. Tap Continue to accept the Constant duct pres- sure settings and to enter the Heat recovery operational range of the fans, there will be a settings . duct pressure alarm and the fans will be shut down.
- Page 31 Set the speed for the extract fan by tapping This value defines the extract air fan speed in the percentage value and entering a new one . Home operating mode. The allowed value range is 20-100%. The default value is 30%. The speed of the extract air fan when summer night cooling is active.
- Page 32 16. Set heating on or off by toggling the value . 26. Tap Continue to accept the Manual overpres- sure settings and to enter the Boost function This setting defines whether or not after heating settings . is allowed in Away operating mode. 17.
- Page 33 Set rotor dehumidification to on or off by tap- room temperature sensor (not included in the ping this setting . basic delivery). The default value is Extract air temperature. If allowed rotor dehumidification is active when humidity boosting is active and the outside air 17.
-
Page 34: Setting Up System Without Setup Wizard
To enable one . the eAir web connection you must log in to the internet page my.ensto.com with the serial The default value for supply air is 50% and for number and pin code given in this menu. - Page 35 MD card connections MD card connections NTC sensors AI16 (X10) Free Analog Outputs AO 0 - 10V MD card has connections for 8 NTC-10 temperature sensors Input Output Outdoor temperature measuring TE01 AO1 (X18) Control voltage for supply fan Supply air temperature after heat recovery unit AO2 (X18) Control voltage for extract fan TE05...
-
Page 36: Documenting Commissioning
MD card connections MD card connections Miscellaneous connections X24 USB device Not in use X27, X28 Operating panel connections for eAir wall holder +24VDC only ModBus RTU O3 Ozone Connector 11 on ICEA2000A unit Ethernet sensor (ION) X23 USB host Software update by USB memory stick only X1-X7, X12 Sensors Ethernet... -
Page 37: Using Eair Control Panel
• Ventilation must be sufficient. accessed by tapping the round button at the center of the control panel main view. If the ventilation is insufficient, the humidity indoors becomes too high and can result in the The eco mode can be activated in all modes formation of condensation on cold surfaces. -
Page 38: Tcg Units
• VAK1,2,3 modes are designed for large properties to each mode. Supply and extract fans have each their where the unit is running under an external con- own fan speeds. trol subsystem. The unit runs only as prompted by Modes that affect the fans are the external system. -
Page 39: Extra Time (Office Mode)
Manual boosting humidity transmitters in the ventilation system. The transmitters are optional accessories. Boosting or airing function is started directly from the boosting, humidity boosting and temperature control panel. Boosting accelerates both fans for a pre- boosting may activate in Home mode. Additionally, defined time (default setting is 30 minutes). -
Page 40: Temperature Control
Supply, extract and room temperature according to which the ventilation unit will operate controllers during that set time period. The timer programme includes no check for conflict- A supply air controller controls the temperature of the ing programmes. The user himself must make sure supply air. -
Page 41: Alarms
By selecting Max heating / Max. cooling in the control • changing filters panel Operating mode menu, momentarily boosted • cleaning heat exchanger heating or cooling is activated. This action forces the • cleaning fans supply air control at maximum and accelerates the fan •... -
Page 42: Cleaning Heat Exchanger
Service of ionizer module . Changing bag and pleated filters Open the lock. The ionizer module found in ION ventilation units needs annual cleaning. Remove the old filter. Refer to the ionair operating and service manual Put in a new one. Observe the arrow that indi- supplied with the ventilation unit for complete cates the right airflow in pleated filters. -
Page 43: Technical Information And Attachments
Technical information and attachments • Models with duct coils (tables 1 and 2) • List of extra equipment • Troubleshooting guide • Table of models and components • Table of technical features • Dimensional drawings • Electrical diagrams • Principal diagrams •... -
Page 44: Table 1: Afterheating And Cooling Duct Coils
Table 1: Afterheating and cooling duct coils Ventilation unit models that come equipped with duct coils for after heating or cooling. These coils are installed in the supply air duct (after the ventilation unit). Models with duct coil Unit Hydronic (water) Hydronic (brine) cool- Right hand Conden sate drain... -
Page 45: Table 2: Preheating And Precooling Coils
Table 2: Preheating and precooling coils Preheating/precooling coils. These coils are installed in the outside air duct (before the ventilation unit). CHG 200 CHG 250 CHG 400 Coil type VEAB CWK 200-3-2,5-L/R VEAB CWK 250-3-2,5-L/R VEAB CWK 400-3- 2,5-L/R Product code L: K930040501V (left) L: K930040502V (left) L: K930040503V... - Page 46 Ødy Rear wall Maintenance Bottom door Air flow Condensation-water Quick-release fastener (2 pcs) outlet G½” Air flow to the left Dimension ØD ØDY CWK 200-3-2,5-L CWK 250-3-2,5-L CWK 400-3-2 ,5-L Condensation-water Condensation-water-insulated on the top, bottom, on the Coil outlet G½” rear wall and behind the maintenance door.
-
Page 47: Extra Equipment Available
Extra equipment available K58 003 0001 eAir control panel package. The package includes the control panel, wall mounting bracket and 20 m cable. K58 003 0002 eAir USB charger K93 003 0004 carbon dioxide transmitter for installation on the wall 0-10V / 24V K93 003 0005 carbon dioxide transmitter with display for installation on the wall... -
Page 48: Troubleshooting
Troubleshooting Alarm Description Alarm Symptoms Possible reason Action Notes limit Supply air Heat exchanger is not The ventila- TE05 min Supply air +5°C is cold . rotating: after heat tion unit exchanger enters the • drive belt is broken Replace the drive belt. malfunc- is cold. - Page 49 Alarm Description Alarm Symptoms Possible reason Action Notes limit +55°C Supply air is Electric after heater is TE10 max Supply air Replace or fix the The unit will not hot . malfunctioning . is hot, fire heater. start before the hazard.
- Page 50 Alarm Description Alarm Symptoms Possible reason Action Notes limit Alarm from Alarm Deviation in the chan- Supply air 10 Pa Find out the reason the differ- activates . nel pressure . pressure for the alarm. ential pres- Ventilation The deviation can be sure trans- unit has adjusted .
- Page 51 Installation instructions...
-
Page 53: Models And Components
MODELS AND COMPONENTS Installation instructions... - Page 55 Installation instructions...
- Page 57 Installation instructions...
-
Page 59: Technical Features
TECHNICAL FEATURES Installation instructions... - Page 61 Installation instructions...
- Page 63 Installation instructions...
-
Page 65: Dimensional Drawings
DIMENSIONAL DRAWINGS Installation instructions... - Page 66 Pinion right hand...
- Page 67 Pinion left hand Installation instructions...
- Page 68 Pingvin right hand...
- Page 69 Pingvin left hand Installation instructions...
- Page 70 Pingvin XL right hand...
- Page 71 Pingvin XL left hand Installation instructions...
- Page 72 Pandion...
- Page 73 Pelican Installation instructions...
- Page 74 Pegasos (XL) / Twintropic...
- Page 75 Pallas Installation instructions...
- Page 76 LTR-2...
- Page 77 LTR-3 Installation instructions...
- Page 78 LTR-4...
- Page 79 LTR-6 dimensional drawing 25 mm Installation instructions...
- Page 80 LTR-6 dimensional drawing 50 mm...
- Page 81 LTR-7 (XL) Installation instructions...
-
Page 83: Wiring Diagrams
WIRING DIAGRAMS Installation instructions... -
Page 84: Md Basic Electric Diagrams
MD BASIC ELECTRIC DIAGRAMS MD basic wiring diagram... - Page 85 MD basic external connections Installation instructions...
- Page 86 MD HRC connection...
- Page 87 MD electrical after-heater 1~ Installation instructions...
- Page 88 MD electrical after-heater 2~...
-
Page 89: Md Preheater Electric Diagrams
MD PREHEATER ELECTRIC DIAGRAMS (CHG/AGH) MD water-circulating preheater/precooler connections Installation instructions... - Page 90 MD electrical preheater 1~...
- Page 91 MD electrical preheater 2~ Installation instructions...
-
Page 92: Tcg Differing Electric Diagrams
TCG DIFFERING ELECTRIC DIAGRAMS MD TCG... - Page 93 MD TCG with absolute humidity logging function Installation instructions...
-
Page 94: Pallas Differing Electric Diagrams
PALLAS DIFFERING ELECTRIC DIAGRAMS MD Pallas basic wiring diagram... - Page 95 MD Pallas HRC and electrical after-heater connections Installation instructions...
- Page 96 MD Pallas fan and electrical after-heater power supply...
- Page 97 MD Pallas ionizer connections Installation instructions...
-
Page 98: Twin Tropic Differing Electric Diagrams
TWIN TROPIC DIFFERING ELECTRIC DIAGRAMS MD TwinTropic external connections... - Page 99 MD TwinTropic HRC connections Installation instructions...
- Page 100 MD TwinTropic water-circulating cooling connections...
-
Page 101: Miscellaneous Electrical Connections
MISCELLANEOUS ELECTRICAL CONNECTIONS MD cooker hood and central vacuum cleaner indication connections Installation instructions... - Page 102 MD duct pressure connection...
- Page 103 MD duct pressure installation Installation instructions...
- Page 104 MD filter guard connection...
- Page 105 Installation instructions...
-
Page 107: Principal Diagrams
PRINCIPAL DIAGRAMS Installation instructions... - Page 108 MD HW principle scheme...
- Page 109 MD CG principle scheme 1 Installation instructions...
- Page 110 MD CG principle scheme 2...
- Page 111 MD CG principle scheme 3 Installation instructions...
- Page 112 MD CG principle scheme 4...
- Page 113 MD CG principle scheme 5 Installation instructions...
- Page 114 MD CG connections...
- Page 115 MD CHG principle scheme ground loop Installation instructions...
- Page 116 MD CHG principle scheme heat exchanger...
- Page 117 MD CW principle scheme Installation instructions...
- Page 118 Pallas MD TCG principle scheme...
- Page 119 Pandion MD TCG principle scheme 1 Installation instructions...
- Page 120 Pandion MD TCG principle scheme 2...
- Page 121 Installation instructions...
-
Page 123: Control Diagrams
CONTROL DIAGRAMS Installation instructions... - Page 124 ANTURIT / GIVARE / SENSORS / FÜHLER MD TE01 = Ulkoilma / Uteluft / Outside air / Frischluft TE02 = Ulkoilma esilämmittimen jälkeen / Uteluft efter förvärmare / Outside air after preheater / Frischluft nach vorwärmer TE05 = LTO jälkeinen tuloilma / Tilluft efter VVX / Supply after HRW / Zuluft nach WRG TE07 (Dehum) = Tuloilma kuivatuksen jälkeen / Tilluft efter avfuktning / Supply after dehumidification / Zuluft nach entfeuchtung...
-
Page 125: Md Adjustment Charts
MD ADJUSTMENT CHARTS MDE-(CG) Installation instructions... - Page 126 MDW-(CG)(CHG)
- Page 127 MDE-(CG) with electrical preheater Installation instructions...
- Page 128 MD MDCG-W...
- Page 129 MD LTR4 MDCG-W Installation instructions...
-
Page 130: Pallas Adjustment Charts
PALLAS ADJUSTMENT CHARTS Pallas switch board... - Page 131 MD Pallas MDE-CG Installation instructions...
- Page 132 MD Pallas MDW-CG...
- Page 133 MD Pallas MDCG-E Installation instructions...
- Page 134 MD Pallas MDCG-W...
- Page 135 MD Pallas TCG-W-ION Installation instructions...
-
Page 136: Twin Tropic Adjustment Chart
TWIN TROPIC ADJUSTMENT CHART MD TwinTropic CW (E) -
Page 137: Table Of Parameters
Table of parameters MENU SUBMENU FACTORY SETTINGS FIELD SETTINGS Setup wizard Display settings Display brightness 97 % Sleep mode delay 90 sec Sleep mode delay for wall mounting bracket Temperature shown on front of panel Outside air temperature Mode of operations Home Temperature control Supply air. - Page 138 MENU SUBMENU FACTORY SETTINGS FIELD SETTINGS Heat recovery settings Defrosting Limit temperature for winter boost 8 °C Arctic mode Mode settings Home mode settings Supply air 30 % Exctract air 30 % Min. fan speed (only for Supply air 70 % heatpumps) Extract air 70 %...
- Page 139 MENU SUBMENU FACTORY SETTINGS FIELD SETTINGS Temperature boost settings Temperature boost Select temperature measurement Extract air temperature Max. supply air fan speed 90 % Max. extract air fan speed 90 % Cooker hood / CVC Cooker hood on, Supply air 50 % Cooker hood on, Extract air 30 %...
-
Page 141: Eu Declaration Of Conformity
EMC 2004/108/EC, machine directive MD 2006/42/EC, radio equipment and telecom- munications terminal equipment directive R&TTE 1999/5/EC, ROHS II directive 2011/65/EU and battery directive 2013/56/EU. Manufacturer: Ensto Enervent Oy Manufacturer´s contact: Kipinätie 1, 06150 Porvoo, FINLAND, Tel +358 207 528 800, fax +358 207 528 844 enervent@enervent.fi, www.enervent.fi Description of the product: Ventilation unit with heat recovery Trade name of the product: Enervent®... -
Page 142: Representatives For The Products Outside Finland
REPRESENTATIVES FOR THE PRODUCTS OUTSIDE FINLAND Sweden: Ensto Sweden Ab, Västberga Allé 5, 126 30 Hägersten, SWEDEN, tel +46 8 556 309 00 Norway: Noram Produkter Ab, Gml. Ringeriksvei 125, 1356 BEKKESTUA, NORWAY, tel +47 95 49 67 43 Estonia:... - Page 143 Installation instructions...
- Page 144 Ensto Enervent Oy Kipinätie 1 FIN-06150 Porvoo, Finland Tel. +358 207 528 800 Fax. +358 207 528 844 enervent@ensto.com www .enervent .fi...
Need help?
Do you have a question about the Enervent eAir and is the answer not in the manual?
Questions and answers