Table of Contents
Advertisement
Quick Links
Advertisement
Table of Contents

Subscribe to Our Youtube Channel
Related Manuals for VIISAN VK18300


Summary of Contents for VIISAN VK18300
- Page 1 Intelligent Book Scanner User Manual...
-
Page 2: Table Of Contents
Index Copyright ............................3 Trademarks ............................. 3 Disclaimer ............................3 Safety Introduction ......................... 4 Product Introduction ........................5 System Requirements ........................6 Package Contents .......................... 7 Parts and Functions ........................8 Installing the Software ........................9 Connecting the Book Scanner ....................10 Getting Started .......................... -
Page 3: Copyright
Copyright All rights reserved by original manufacturer, no part of the materials shall be reproduced in any form or by any means without prior written permission. Trademarks Windows is a registered trademark of Microsoft Corporation in the United States and other countries. -
Page 4: Safety Introduction
Safety Introduction 1. Please read this safety information carefully before using the product. 2. After reading this Safety Introduction, please make sure to keep it in a place where you can easily access it while using the product. 3. The following safety precautions are intended to assist you in enjoying the safe and correct use of this product and preventing unwanted accidents or damage. -
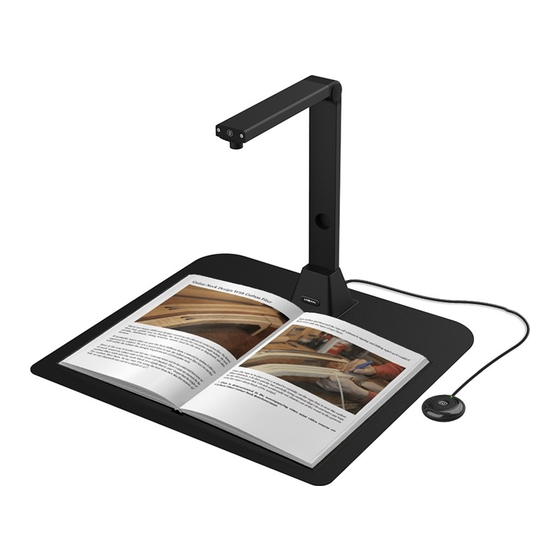
Page 5: Product Introduction
Product Introduction The intelligent book scanner provides a new perspective on book scanning. Easily scan documents, receipts, name cards, books, booklets or magazines directly without cutting or damaging them. This book scanner bundles an intelligent book scanning software, providing extremely useful features and integrated with many imaging algorithms such as page turning detection. -
Page 6: System Requirements
System Requirements To ensure the performance of this scanner, the following hardware system requirement are necessary: Recommended System Minimum System Intel® Core™ i5 or higher Intel® Core™ 2 Duo or processor AMD Athlon™ II processor Intel® HD Graphics 5000 or Intel®... -
Page 7: Package Contents
Package Contents Make sure the following items are included in this package. If any items are missing or damaged, contact the dealer where you purchased the book scanner. (1) Book Scanner (2) USB cable (3) Soft Mat (4) External Shutter Button (5) Software CD (6) Quick Start Guide (7) Warranty Card... -
Page 8: Parts And Functions
Parts and Functions This section describes the physical components of the book scanner. 1. LED Touch Switch 2. LED Lamp 3. Base 4. Foldable Hinge 5. Camera Lens 6. USB Hub for External Button Connection 7. USB Jack for PC Connection 8. -
Page 9: Installing The Software
Installing the Software NOTE: Before installing this application software, it is recommended to close any antivirus programs or security software running on your system. If you are installing this software from a download file, please double click the .exe file to start the installation process. -
Page 10: Connecting The Book Scanner
Connecting the Book Scanner Before you start to use the scanner software, please make sure your book scanner device has been set up correctly. Please double check the following procedures before you proceed. 1) Connect the USB cable to the USB connector on the book scanner. 2) Connect the other end of the USB cable to your PC. -
Page 11: Getting Started
Getting Started • To start the program, please double click on the CamBook scanning software icon on the desktop. • Or start CamBook from the Windows Programs list: Click the Windows Start Menu > All Programs > CamBook folder > CamBook. Main Window When the software is launched, you should see the main window appears as shown below. - Page 12 NOTE: If you don’t see the real-time preview video from the camera device and a [Detecting devices…] message is displayed in the middle of the main window as below, please double check the following items sequentially. 1) Please make sure your hardware device is correctly connected to your PC via a USB cable.
-
Page 13: Control Panel
Control Panel Here is the default look for CamBook control panel. You can make change with following settings: (1) Function Tabs There are 2 major functions available [Document] & [Book]. You can select different functional modes by clicking on the function names shown in the menu bar area. Mode Icons Description... - Page 14 (2) Menu Control Settings At the top of the main window, there are two control buttons available: Buttons Explanations Note Language Language settings for software UI • Shows Tool Tip Settings • PDF Options Settings • Help • About (3) Toolbar On the left side toolbar, there are many useful control tools available: Buttons Explanations...
- Page 15 (4) Device Settings At the bottom of the main window, there are some control settings for the camera device: Button Explanations Device Selecting camera devices Format Selecting the camera video output format Resolution Selecting the camera video resolution NOTE: • In the [Format] options, there are usually two options, YUV or MJPEG.
- Page 16 Convert into PDF Convert or merge multiple images files into one PDF file Convert into TIF Convert or merge multiple images files into one TIF file Convert into Text Convert or merge multiple images files into one Text file Convert into Word Convert or merge multiple images files into one Word file Convert into Excel Convert or merge multiple images files into one Excel file...
-
Page 17: Scanning Preparation
Scanning Preparation 1) To start scanning, please place the book scanner on a surface table or desk. 2) Review your own needs and select the proper processing modes of either [Document] or [Book] from the scanning software. Reminders: 1) Avoid scanning documents or books in places near windows or other environments with strong lighting. -
Page 18: Using The Led Light
Using LED Light There are three levels of LED brightness control available, for use in low-light environments. To turn on the LED light, please follow below steps. 1. Touch the LED light icon to turn on the LED light. 2. Touch for the 2nd time to switch to a lower brightness. 3. -
Page 19: What Can You Do With This Software
What you can do with this software? The CamBook software provides an overhead scanning unit that does not need to touch the documents being scanned. The following operations can be performed with the software: Book Scanning A book or booklet up to size A3 can be scanned without cutting pages out. When a page is scanned the software will automatically flatten the curved pages and split the scan into two separate images. -
Page 20: Scanning Using Document Mode
Scanning Using Document Mode 1) To scan document materials, set the top function tab to [Document] mode. You can make any changes in the settings menu as necessary. 2) Place a document face up on the center of the scan mat. 3) Set the cropping to [Automatic] and click [Scan] button in the upper right corner of the scanning software in order to scan an image, additionally you may also press the external shutter button to initiate scanning. - Page 21 4) When scanning is complete, the scanned image will appear on the right-hand side of the output window, allowing you to double-click on the thumbnail image to open the scanned result. 5) The following is an example for a scan in the B&W (Document) mode. Original Output Result...
- Page 22 Manual Cropping This software allows the user to manual crop for a scanned object before scanning the final image. To adjust the cropping frame please follow methods below. 1. Set the cropping mode to "Self-Defined". 2. Move the blue cursor to a corner or an edge of the crop frame (the blue cursor will change to ).
-
Page 23: The Scan Settings Of Document Mode
The Scan Settings of Document Mode In the document function mode, you can use following feature settings: Item Feature Setting Options Explanations Settings Automatic Automatic crop for a single object Automatic (Multiple) Automatic crop for multiple objects Cropping Self-Defined Manual crop for a single object No Cropping Scan without cropping Single Page... - Page 24 B&W (Document) Output image in Black & White and whiten background B&W (Binarized) Output image in Black & White B&W (Red Stamp) Output image in Black & White and keep Image any red stamp Settings Color (Original) Output image in original color Color (Enhanced) Output image with color enhanced Gray...
-
Page 25: Scanning Using Book Mode
Scanning by Using Book mode 1. To scan a book or booklet, set the top function tab to [Book] mode. According to the thickness of the book, select scanning with “Curve Fitting” or “Straight Fitting” from the drop-down menu of Cropping and then set the Scan to “Manual”. - Page 26 1. After scanning, the software will automatic flatten curved page and split them into two separate images, then display in the left-hand side preview window. 2. To export the scanned images, press the [Export] button in the upper right corner to open the Export Settings menu.
- Page 27 Export Settings: Here are some options for exporting the scanned page. Page Export Settings Descriptions Export without merging. This is for flip-right style books Export without merging. This is for flip-left style books Export with merged left and right pages. Export left pages only.
-
Page 28: The Scan Settings Of Book Mode
The Scan Settings of Book Mode In the Book function mode, you can use following feature settings: Item Feature Setting Options Explanations Settings Curve Fitting Automatic curved page flattening NOTE: This is used for scanning thicker books with curved surfaces Cropping Straight Fitting Automatic straight page flattening... - Page 29 Color (Enhanced) Output image with color enhanced Gray Output image in grayscale Language Select OCR language Note: Make sure to select the correct language of the original text from the drop-down menu to perform text recognition. Add prefix for the file name Prefix Serial Name by serial number...
-
Page 30: Special Functions
Special Functions Finger Removal Function The CamBook offers a very useful function which detects fingers at the margin of books and erases them from the scanned image. The following requirements must be fulfilled before using the “Finger removal” function properly. 1. - Page 31 Correct Finger Position There are some finger positions that can cause a malfunction of the "Finger Removal" function. The following are a few examples of correct and incorrect finger positions. Distance too small The fingers should be positioned at a distance to the text elements in the book as shown in the picture example.
- Page 32 Single Finger Position Always keep your finger straight and placed on the middle section of the opened book. Do not place your finger on the top or bottom of the opened book. Correct Incorrect Correct Incorrect Correct Incorrect...
- Page 33 Mixed Patterns and Colors To scan a flat, color magazine or catalog, we recommend turning-off the “Finger Hiding” function in the scan settings, as the finger removal function may cause malfunction, the reason being that the analyzing algorithm will detect an area of mixed patterns and colors at the border of the image.
- Page 34 Scan Size Limitations An opened book can’t occupy less than one-half the width of the scanning area. If scanning with a book that is too small, the finger removal function may not correctly remove the fingers from the scanned image Do not place the book outside the scanning area.
-
Page 35: Auto Scan Function
Auto Scan Function This CamBook scanner software offers a very useful automatic scan function. When the scanner device detects a page is turned, the software will automatically start continuous scanning. To use the Auto Scan function, please set the Scan Interval to “Automatic” from the top setting panel and then press “Start”... -
Page 36: Set Front And Back Cover Images
Setting Front and Back Cover Images To scan the front and back cover images of your book, you can follow the procedures below: 1) Click on the "Front Cover" button on the left-hand side. 2) Place the book front-cover (face up) at the center of the scan mat. 3) Set the [Image Settings] feature option to “Color (Original).”... -
Page 37: Usage Example
Usage Example Scanning a Color Document Well To scan a color document well, you can follow these procedures: 1) Click on the [Document] function in the top menu bar. 2) Set the [Cropping] feature option to “Automatic”. 3) Set the [Scan Mode] feature option to “Single Page”, this will instruct the software to only capture one side of the object. -
Page 38: Scanning A Document And Saving It As Apdf File
Scanning a document and saving it as a PDF file To scan a single page document and save it as a PDF file, you should follow these procedures: 1) Click on the [Document] function in the top menu bar. 2) Set the [Cropping] feature option to “Automatic”, this will instruct the software to search for a single suitable document in the preview window and crop out a good image. -
Page 39: Scanning A Multi-Page Document Into A Pdf File
Scanning a Multi-Page Document into a PDF file To scan a multiple page document into a PDF file, you should follow these procedures: 1) Click on the [Document] function in the top menu bar. 2) Set the [Cropping] feature option to “Automatic” 3) Set the [Scan Mode] feature option to “Multiple page”, this will instruct the software to capture multiple pages of the document. -
Page 40: Using The Crop Feature To Scan Multiple Images At The Same Time
Using the Crop Feature to Scan Multiple Images at the Same Time To use the crop feature to scan multiple images at the same time, you can follow these procedures: 1) Click on the [Document] function in the top menu bar. 2) Set the [Cropping] feature option to “Automatic (Multiple)”, this will instruct the software to search for multiple objects in the preview window and crop out as many images as possible. -
Page 41: Scanning A High Quality Image Of Business Card
Scanning a High-Quality Image of a Business Card 1) Click on the [Document] function in the top menu bar. 2) Set the [Cropping] feature option to “Automatic” for scanning a single card or “Automatic (Multiple)” to scan with multiple cards. 3) In order to get a better image quality, please place the name card in the middle of the scanning area. -
Page 42: Scanning A Multi-Page Document Into A Word File
Scanning a Multi-Page Document into a Word File To scan a multi-page document and create OCR to then put into a Word file, you can follow these procedures: Click on the [Document] function in the top menu bar. Set the [Cropping] feature option to “Automatic”. Set the [Scan Mode] feature option to “Multiple page”. -
Page 43: Combining Multiple Images Files Into One Pdf File
Combining Multiple Image Files into One PDF File If you have captured multiple images in your file directory, you can easily combine them into one PDF file: 1) In the file directory column shown on the right-hand side of the main control window, you can press and hold the “Shift”... -
Page 44: Comparing Multiple Image Files In One Window
Comparing Multiple Image Files in One Window If you have captured multiple images in your file directory, you can easily compare them side-by-side by using the Image Comparing feature: 1) In the file directory column shown on the right-hand side of the main control window, you can press and hold the “Shift”... -
Page 45: Adding A Watermark Into Scanned Document File
Adding a Watermark in Scanned Document File To add a common watermark such as DRAFT or CONFIDENTIAL to your scanned document, you can follow the following procedures: 1) Click on the [Document] function in the top menu bar. 2) Click on the Watermark icon in the left-hand side toolbar to bring up the Watermark setting dialog. -
Page 46: Configuring The Pdf Settings
Configuring the PDF Settings The documents you process with this software can be saved as PDF with differing settings. The following steps can guide you in settings the detail options of a PDF file. 1) Click on the settings icon in the upper right-hand side of the main window and select “Setting”... -
Page 47: Supported Ocr Languages
Supported OCR Languages The CamBook software is integrated with a powerful OCR function, the user can scan a document and convert the image into a searchable PDF, editable Word, Text, or Excel file. The OCR function supports the following languages. English German French... - Page 48 Luba Papiamento Tatar (latin) Turkmen (latin) Welsh Arabic Farsi Mexican Spanish Bosnian (Latin) Bosnian (Cyrillic) Moldovan German (Switzerland) Tetum Kazakh (Cyrillic) Mongolian (Cyrillic) Uzbek (Latin) Simplified Chinese+English Traditional Chinese+English Japanese+English Polish Turkey NOTE: 1) In order to correctly utilize the built-in OCR feature, when using the OCR function, please set [Image Settings] option to “B&W (Document)”...
-
Page 49: Faqs (Frequently Asked Questions)
FAQs (Frequently Asked Questions) Q1: Why am I seeing the video from the Webcam instead of the book scanner? A1: Please select the correct camera device by clicking on the [Device] setting in the lower left corner of the main window, and then select the correct book scanner device. - Page 50 V1.6...
Need help?
Do you have a question about the VK18300 and is the answer not in the manual?
Questions and answers