HTC Vive Cosmos User Manual
Hide thumbs
Also See for Vive Cosmos:
- Quick start manual (5 pages) ,
- User manual (38 pages) ,
- Getting started (2 pages)
Table of Contents
Advertisement
Advertisement
Table of Contents

Related Manuals for HTC Vive Cosmos


Summary of Contents for HTC Vive Cosmos
- Page 1 VIVE Cosmos User guide...
-
Page 2: Table Of Contents
About the link box for VIVE Cosmos Connecting the headset to your computer via the link box Restarting the link box Can I use older versions of the link box with VIVE Cosmos? Can I use a laptop with VIVE Cosmos? Converter... - Page 3 Capturing screenshots in VR Seeing real surroundings Enabling motion compensation Updating the firmware Troubleshooting VIVE Cosmos Joining the VIVE Cosmos beta program Setting the power supply frequency What do the error codes and messages mean? What can I do? Trademarks and copyrights Index...
- Page 4 About this guide About this guide We use the following symbols to indicate useful and important information: This is a note. It provides detailed information for setup, common questions, and what to do in specific situations. This is a tip. It will give you an alternative way to do a particular step or procedure that you may find helpful.
-
Page 5: System Requirements
System requirements System requirements What's inside the box? Your VIVE Cosmos comes with the following items, which you'll use to experience immersive VR environments: Main Accessories component VIVE Cosmos § Headset cable (attached) § Audio cable (attached) § Top strap (attached) §... - Page 6 System requirements Component Minimum system requirements Recommended system requirements ® ® NVIDIA GeForce GTX 970 4GB, NVIDIA GeForce GTX 1070/Quadro ™ AMD Radeon R9 290 4GB P5000 equivalent or better, AMD equivalent or better VR Ready Radeon Vega 56 equivalent or better graphics card.
-
Page 7: Headset And Headphones
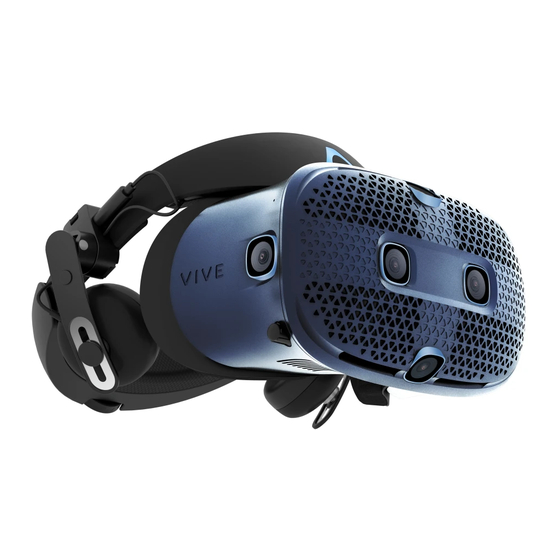
Headset and headphones Headset and headphones Headset About the VIVE Cosmos headset The headset is your window to the VR environment. The headset has cameras that are used for inside-out tracking. The cameras on the headset are sensitive. Do not cover or scratch the cameras. - Page 8 Headset and headphones 8. On-ear headphone 9. Status light 10. Headset button Back and bottom views 1. Adjustment dial 2. Side cushion 3. Front pad 4. Mic 5. Visor 6. Nose rest 7. Interpupillary distance (IPD) knob 8. Face cushion frame 9.
- Page 9 Headset and headphones Putting on the VIVE Cosmos headset Before wearing the headset for the first time, make sure to: § Peel off the protective film on the lenses. § Fully loosen the band and peel off the protective film starting from the left side of the band.
- Page 10 Headset and headphones Hold the visor to your eyes. Adjust the position of the visor until you see a clear image inside the headset. Pull down the headset band around the back of your head until you hear a click. The click indicates that the headset band has locked into place.
- Page 11 Headset and headphones Make sure the visor faces straight ahead. If the band sits too low or high on the back of your head, the visor will be tilted. It will also be difficult to position the on-ear headphones properly on your ears. If there's light leakage around the areas of your nose or cheeks, adjust the position of the band.
- Page 12 If there's light leakage around the areas of your nose or cheeks, readjust the strap and reposition the band. Can I wear my prescription glasses while using VIVE Cosmos? Most glasses fit inside the headset. Make sure that no part of your glasses scratch the headset lenses.
- Page 13 Quickly take a break from VR to check your surroundings. While wearing VIVE Cosmos, hold the visor with one or both hands, and then gently flip it up. To return it to its original position, tilt the visor down until it completely covers your eyes.
- Page 14 Headset and headphones Connecting a USB device to VIVE Cosmos You can connect a compatible USB Type-C device to VIVE Cosmos using a USB cable. While holding the visor with one hand, pull up the band. Detach the face cushion frame from the headset. To release the frame from its latches, gently pull on any side of the frame starting from the bottom, and then pull one side at a time on the top.
- Page 15 Headset and headphones Align and push the tabs on the face cushion frame into their corresponding slots on the headset. Make sure to position the ridge of the face cushion frame below the headset, audio, and USB cables. You'll hear a click when the face cushion frame locks in place. Connect the other end of the USB cable to USB Type-C device.
- Page 16 Headset and headphones To reattach, align one end of the face cushion with the marker on the bottom part of the face cushion frame. Press down the face cushion against the outline of the frame, and then check that the other end of the face cushion lines up with the marker on the top part of the frame.
- Page 17 Headset and headphones Reattaching the front and back pads to the headset Always make sure that the front and back pads are attached to the headset. While holding the visor with one hand, pull up the band. Starting from the middle, align the front pad tabs with their corresponding slots on the band, and then press along the front pad.
- Page 18 Headset and headphones Check that the headset cable strip is properly attached. For details, see Reattaching the headset cable strip to the back pad on page 18. You'll hear a click when the tabs are inserted. Make sure to minimize the gap between the pad and the band. Reattaching the headset cable strip to the back pad The fabric strip guides the headset cable, and is inserted on the back pad.
- Page 19 Headset and headphones Align the back pad tabs with their corresponding slots on the band, and then press along the back pad to reattach. You'll hear a click when the tabs are inserted. Make sure to minimize the gap between the pad and the band.
- Page 20 Headset and headphones Detaching the top strap from the headset band If you want to, you can detach the top strap from the headset band. You'll need to first remove the front and back pads on the headset. For details, see Removing the front and back pads on page 16.
- Page 21 Headset and headphones Reattach the front and back pads to the headset. For details, see Reattaching the front and back pads to the headset on page 17. Attaching the top strap to the headset band For added comfort, attach the top strap before wearing the headset. You can adjust the top strap by using the velcro strip.
- Page 22 Cleaning the face cushions Before cleaning the face cushions, remove it first from the VIVE Cosmos headset. When cleaning the face cushions, remember to: § Dampen a clean smooth cloth with cold water and gently wipe the area you want to clean.
- Page 23 Headset and headphones Insert the tabs on the replacement front cover into the slots on the visor, and then press down on the front cover. Make sure to minimize the gap between the front cover and the visor, and that all tabs are fully locked into place.
-
Page 24: Headphones
Headphones Adjusting the fit of the on-ear headphones While wearing the VIVE Cosmos headset, adjust the on-ear headphones to a comfortable position over your ears, then press the headphones into place. Is the fit too loose or tight? In case you feel pressure around your temples, adjust the position of the on-ear headphones for a more comfortable fit. - Page 25 Headset and headphones Detaching the on-ear headphones from the headset band To use your own headphones with VIVE Cosmos, you'll need the replacement kit for headphones. For details on how to order the kit, contact customer care. Before using your own earphones, you first need to detach the on-ear headphones from the headset band.
- Page 26 Headset and headphones Reattaching the on-ear headphones to the headset band You can reattach the on-ear headphones if you've used your own earphones with VIVE Cosmos. Before attaching the on-ear headphones to the headset band, do the following: Remove the cable guides, screws, and rubber pad, which are part of the replacement kit for earphones, as well as the side cushions from the headset band.
- Page 27 Headset and headphones 1. Audio cable guide 2. Rubber pad 3. Screws 4. Side cushions 5. Headset cable guide 6. Cable stopper Flip open the metal clasps on the left and right on-ear headphones. Attaching the right on-ear headphone Attach the right headphone with the audio plug to the right side of the headset band. Hook the headphone clip over the top of the band.
- Page 28 Headset and headphones Make sure the audio cable runs under the band, and not over the top. Check that it isn't also wedged between the clip and the band. Close the clasp around the band, and then snap into place. Connect the audio cable connector to the headphone plug.
- Page 29 Headset and headphones Attaching the left on-ear headphone Attach the left headphone to the left side of the headset band. Pin the headset cable along the cable guide on the left headphone. Hook the headphone clip over the top of the band. The screw holes and line marker on the band are helpful guides for positioning the clip.
- Page 30 Headset and headphones Make sure the audio cable runs under the band, and not over the top. Check that it isn't also wedged between the clip and the band. Close the clasp around the band and snap into place. Attaching the headphone audio cable After the left and right on-ear headphones have been attached, attach the headphone audio cable to the headset band.
- Page 31 Plugging in your earphones If you prefer, you can use your own earphones with VIVE Cosmos. To do this, you'll need the replacement kit for earphones. Contact customer care for details on how to order it.
- Page 32 Headset and headphones Attaching the cable guides to the headset band To use your own headphones with VIVE Cosmos, you'll need the replacement kit for headphones. For details on how to order the kit, contact customer care. Before plugging in your earphones, you need to attach the audio cable guide and headset cable guide to the headset band.
- Page 33 Headset and headphones 6. Cable stopper On the right side of the band, place the audio connector between the rubber pad and audio cable guide. Align the holes on the band, rubber pad, and audio cable guide, and then screw in place. On the left side of the band, align the headset cable guide holes with the holes on the band, then screw in place.
- Page 34 Headset and headphones 1. Side cushion 2. Screws 3. Rubber pad 4. Audio connector 5. Audio cable guide Detaching the headset cable guide You can remove the headset cable guide from the left side of the band Remove the side cushion. Remove the screws using a cross-shaped screwdriver (PH00).
-
Page 35: Common Solutions
USB 3.0 or higher port. After switching, restart the computer and link box. Can I use VIVE Cosmos when SteamVR is in Safe mode? No, you cannot. Make sure that SteamVR is not running in Safe mode before using VIVE Cosmos. -
Page 36: Link Box
Link box Link box About the link box for VIVE Cosmos Use the link box to connect the headset to your computer. 1. Headset cable port 2. Power button 3. Power port 4. DisplayPort port 5. USB 3.0 port... -
Page 37: Connecting The Headset To Your Computer Via The Link Box
On your computer, you might see a notification that drivers are being installed. Wait for the installation to finish. ™ To verify that VIVE hardware is detected, restart the VIVE Console app on your computer. Can I use older versions of the link box with VIVE Cosmos? -
Page 38: Can I Use A Laptop With Vive Cosmos
Link box Use only the link box as well as the power adapter that came with your VIVE Cosmos. Otherwise, you will encounter hardware compatibility issues. Can I use a laptop with VIVE Cosmos? As long as your laptop meets the system requirements, you can use it with VIVE Cosmos. -
Page 39: Converter
About the converter for VIVE Cosmos Use the converter to connect the headset to your computer. If your VIVE Cosmos originally came with the link box, you can replace the link box with the converter. The converter can be purchased from the Accessories tab on https:// www.vive.com/product/... -
Page 40: Connecting The Headset To Your Computer Via The Converter
Connecting the headset to your computer via the converter If your VIVE Cosmos originally came with the link box, you can replace the link box with the converter when it becomes available. Connect the power adapter cable to its corresponding port on the converter for VIVE Cosmos. -
Page 41: Can I Use A Laptop With Vive Cosmos
Can I use a laptop with VIVE Cosmos? As long as your laptop meets the system requirements, you can use it with VIVE Cosmos. If your laptop does not have a DisplayPort port but has a Mini DisplayPort port instead, you can purchase a Mini DisplayPort Male-to-DisplayPort Female adapter cable. -
Page 42: Controllers
Controllers Controllers About the VIVE Cosmos controllers Use the controllers to interact with objects in the VR world. Front view 1. Joystick 2. VIVE button 3. Y button 4. X button 5. B button 6. A button... - Page 43 Controllers Back view 1. Right bumper 2. Right trigger 3. Grip button 4. Left bumper 5. Left trigger 6. Battery cover When you need to clean the controllers, simply wipe them down using the cleaning cloth provided in the box. Do not use organic solvents or acid-based liquids to clean the controllers.
-
Page 44: Inserting The Batteries Into The Controller
Controllers Inserting the batteries into the controller Make sure that the included batteries have been inserted into both controllers before turning them on. It is highly recommended to use AA alkaline batteries for the controllers. Gently push down on the icon near the top of the battery cover, then slide and lift to remove it. -
Page 45: Removing The Batteries From The Controller
Controllers Removing the batteries from the controller Gently push down on the icon near the top of the battery cover, then slide and lift to remove it. Pull the tab in the battery compartment to remove the batteries. Replace the battery cover. Attaching the lanyards to the controllers Using the lanyards may help prevent the controllers from accidentally being dropped;... -
Page 46: Turning The Controllers On Or Off
Controllers Turning the controllers on or off To turn the controller on, briefly press the VIVE button. § To turn the controller off, press and hold the VIVE button for around 3 seconds. §... -
Page 47: Pairing The Controllers With The Headset
Controllers Pairing the controllers with the headset On your computer, open VIVE Console. Pair the right controller. a) From VIVE Console, click the right controller icon, and then click Pair new. b) Turn on the controller by briefly pressing the VIVE button. c) Press and hold the VIVE and B buttons at the same time then release to start pairing. -
Page 48: Play Area
The play area sets the virtual boundaries of VIVE Cosmos. Your interaction with VR objects happens within the play area. VIVE Cosmos is designed for room-scale setup, but you can also use it if you have limited space or for stationary experiences. -
Page 49: Choosing The Play Area
§ Avoid an empty room with plain walls. The lack of defining features could affect tracking. Setting up VIVE Cosmos for the first time Before you can use VIVE Cosmos, you’ll need to complete the setup process, which includes installing VIVE and SteamVR software, setting up the hardware, and using the headset's cameras and sensors to define your play area. -
Page 50: Setting Up The Play Area
Play area Setting up the play area Set up a room-scale play area to enjoy an immersive VR experience. Or, you can choose to have a limited space or stationary experience only. From your computer, open the VIVE Console app. Click , and then select Room Setup. -
Page 51: Resetting The Play Area
Does VIVE Cosmos store my room or environment image? VIVE Cosmos uses its built-in cameras and sensors in order to operate the inside-out tracking function, including establishing boundary displays and viewing the features of your surroundings. The actual image of your environment is not permanently stored on your VIVE Cosmos after displaying it in VR. -
Page 52: I Can't Complete The Room Setup. What Should I Do
Play area inaccessible, even as connection to other websites seems normal. Please make sure that your network settings are correct, or ask your network administrator for support. I can't complete the room setup. What should I do? Check if you're using special characters (such as à or é) in your local Windows user name, which could cause the problem. -
Page 53: Vive Reality System
VIVE Reality System VIVE Reality System What is VIVE Reality System? Our software, reimagined. VIVE Reality System reimagines our core software experience for the age of spatial computing. Discover new content and unify your library in a new user-first home space. -
Page 54: What Is Origin
Launching titles from Lens Quickly sort, find, and launch titles from Lens. Sign in to your VIVEPORT account on the computer where VIVE Cosmos is connected to before opening Lens. Press the VIVE button on the right controller to open Lens. - Page 55 VIVE Reality System In Origin, you can: § Explore the virtual space by teleporting. § Interact with objects. Launching Origin Press the VIVE button on the right controller to open Lens. On the left side of Lens, select Go to Origin. If you go to Origin while in an app, you'll exit that app.
-
Page 56: Settings
§ On VIVE Console, click Settings General Open folder. § Go to C:\Users\[user name]\AppData\Roaming\HTC\Vive\Screenshot. Seeing real surroundings See your real surroundings on the headset through the VIVE Cosmos cameras. From your computer, open the VIVE Console app. Click , and then select Settings Camera. -
Page 57: Enabling Motion Compensation
Troubleshooting VIVE Cosmos If you feel that VIVE Cosmos is not running smoothly or if you encounter problems while using it, try the tools in VIVE Console to fix them. From your computer, open the VIVE Console app. -
Page 58: Joining The Vive Cosmos Beta Program
Settings Joining the VIVE Cosmos beta program Opting in to the VIVE Cosmos beta program lets you receive preview builds and give feedback. Beta software may be unstable and not work as intended. From your computer, open the VIVE Console app. - Page 59 Settings Error Issue Steps to resolve issue code DisplayPort cable is 1. Make sure the DisplayPort cable is plugged in to the disconnected or no video link box (if using one) and computer. stream detected. 2. On your computer, go to Control Panel System and Security System.
- Page 60 Settings Error Issue Steps to resolve issue code USB hub update failed. 1. From your computer, open the Device Manager. 2. Under Universal Serial Bus controllers, find and right- click Generic USB Hub, and then select Properties. 3. Click the Details tab, and then select Hardware IDs from the drop-down list.
- Page 61 Settings Error Issue Steps to resolve issue code Update VIVE software Update both the VIVE software and firmware. and firmware to fix this. The server is Restart VIVE Console. disconnected. Restart VIVE Console to fix this. The compositor is Restart VIVE Console. disconnected.
-
Page 62: Trademarks And Copyrights
© 2019 HTC Corporation. All Rights Reserved. VIVE, the VIVE logo, VIVEPORT, the VIVEPORT logo, HTC, the HTC logo, and all other HTC product and service names are trademarks and/or registered trademarks of HTC Corporation and its affiliates in the U.S. and other countries. -
Page 63: Index
- adjusting the IPD Setting the power supply frequency - cleaning the lenses - connecting a USB device - front cover - putting on Troubleshooting VIVE Cosmos - replacing the face cushion - status lights VIVE Console - beta program Lens... - Page 64 Index - Setting the power supply frequency - troubleshooting - volume limit VIVE Reality System...
Need help?
Do you have a question about the Vive Cosmos and is the answer not in the manual?
Questions and answers