
Related Manuals for Entrematic Ditec QIK80EH

Summary of Contents for Entrematic Ditec QIK80EH
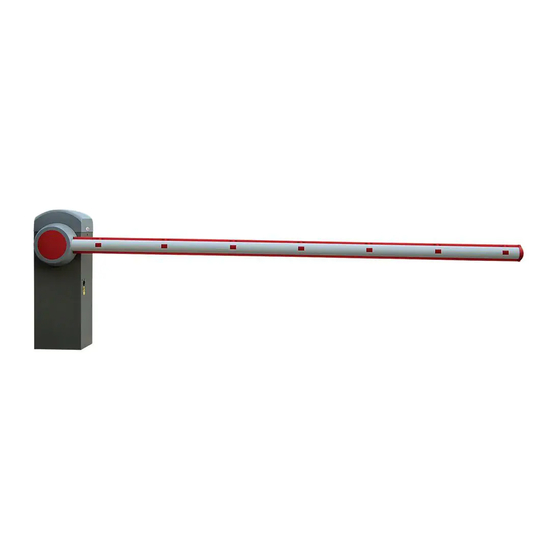
- Page 1 Ditec QIK80EH IP2085EN Technical Manual Electromechanical barrier (Translation of the original instructions) www.ditecentrematic.com...
-
Page 2: Table Of Contents
All the rights concerning this material are the exclusive property of Entrematic Group AB. Although the contents of this publication have been drawn up with the greatest care, Entrematic Group AB cannot be held responsible in any way for any damage caused by mistakes or omissions. We reserve the right to make changes without prior notice. -
Page 3: General Safety Precautions
1. General safety precautions Failure to respect the information given in this manual may cause personal injury or damage to the device. Keep these instructions for future reference This installation manual is intended for qualified personnel only. Installation, electrical connections and adjustments must be performed by qualified person- nel, in accordance with Good Working Methods and in compliance with the current regulations. -
Page 4: General Safety Precautions For The User
General safety precautions for the user These precautions are an integral and essential part of the product and must be supplied to the user. Read them carefully since they contain important information on safe installation, use and maintenance. These instructions must be kept and forwarded to all possible future users of the system. -
Page 5: Ec Declaration Of Conformity
(Directive 2006/42/EC, Annex II-B) The manufacturer Entrematic Group AB, with headquarters in Lodjursgatan 10, SE-261 44 Land- skrona, Sweden, declares that the Ditec QIK80EH type motorised barrier complies with the essential requisites of the following EC directives: - Electromagnetic Compatibility Directive 2004/108/EC... -
Page 6: Technical Specifications
3. Technical specifications QIK80EH Power supply 230 V~ 50/60 Hz Absorption 1.2 A Torque 200 Nm Insulation class Class 1 Opening time 6÷12 s/90° Closing time 6÷12 s/90° Bar length (max) 7950 mm Service class 4 - INTENSE Intermittence S2 = 50 min S3 = 50% Temperature min -20°... -
Page 7: Standard Installation
4. Standard installation Ref. Code Description QIK80EH Barrier cabinet QIK80Z Cabinet fastening base QIKC40 Bar 3975 mm QIKCG Joint for bar QIKLUX Bar lighting kit QIKC Box of 10 bar reflectors QIKAM Mobile support QIKGR Aluminium skirt 2000 mm QIKAF Fixed support QIKAFE Fixed support with electromagnetic block... -
Page 8: Dimensions
5. Dimensions PL = min 4500 - max 7600 80 80... -
Page 9: Main Components
6. Main components Ref. Code Description 24 V motor with encoder Opening/closing limit switches Limit switch adjustment Mechanical stop adjustment Key release Blue spring Ø63 mm Control panel BATKH Continuous mode battery kit Display module for diagnostics and advanced control... -
Page 10: Mechanical Installation
7. Installation The given operating and performance features can only be guaranteed with the use of DITEC Entrematic accessories and safety devices. Unless otherwise specified, all measurements are expressed in mm. 7.1 Mechanical installation Ø12,5 If the surface does not allow cabinet to be fastened strongly and firmly, prepare a concrete base with embedded anchor ties and QIK80Z base plate which must be level and clean. -
Page 11: Installation Of Bar
8. Installation of bar Ø3 Ø3 - Cut the length of the bar to L=PL+350 mm. - Install the bar as shown in the figure. -
Page 12: Bar Balancing
9. Bar balancing - Release the automation as described on page 45 and place the bar in the vertical opening position. - Place the spring in the correct position depending on the choice of opening direction as de- scribed on page 39. - Using the nuts above the spring (see ref. -
Page 13: Selecting Opening Direction
10. Selecting opening direction Righthand opening Lefthand opening Apertura verso destra Apertura verso sinistra DIP2=OFF DIP2=ON 85 Nm - Select the opening direction as shown in the figure. - Mount the spring using the special screw M12x40 [C] with thread locking compound and tightly fasten as shown in the figure. -
Page 14: Limit Switch Adjustment
11. Limit switch adjustment - Adjust the opening and closing position of the bar using the special screws [A]. - Adjust the opening and closing limit switches using the special cams [C] so that the switches are activated approx. 3 mm before the mechanical stop [B]. 12. -
Page 15: Electrical Connections
13. Electrical connections NB: the electrical connections and start-up of the gearmotors are shown in the EL34 control panel installation manual. Before connecting the power supply, make sure the plate data correspond to that of the mains power supply. An omnipolar disconnection switch with a contact opening distance of at least 3mm must be fitted on the mains supply. -
Page 16: Routine Maintenance Plan
14. Routine maintenance plan Perform the following operations and checks every 6 months, according to the intensity of use of the automation. Disconnect the 230 V~ power supply and batteries (if present): - Clean and oil the levers and check the nuts and screws are all well tightened. - Clean and grease the spring-post as shown in the figure. -
Page 17: Operating Instructions
Operating instructions General safety precautions for the user These precautions are an integral and essential part of the product and must be supplied to the user. Read them carefully since they contain important information on safe installation, use and main- tenance. - Page 18 Any repair or technical intervention must be carried out by qualified personnel. Cleaning and maintenance work must not be carried out by children unless they are supervised. To ensure that the system works efficiently and correctly, the manufac- turer’s indications must be complied with and only qualified personnel must perform routine maintenance on the motorised door or gate.
-
Page 19: Manual Release Instructions
Manual release instructions In the event of a fault or power failure, insert the key, turn it anticlockwise and completely open the hatch. Manually open the barrier. To block the barrier again, close the hatch, turn the key clockwise and remove the key. WARNING: do not release with the springs under tension without bar. -
Page 20: Instructions For Maintenance Workers
Instructions for maintenance workers Indication of alarms on MD2 module (if installed) The MD2 display module shows the following alarms, that take priority over all other displayed messages. Type Power Display Description Operation supply Failed test on safety sensor in- Check the wiring and correct operation of the safety stalled on terminal 8. - Page 21 Type Power Display Description Operation supply Failed internal BUS communi- Check the control panel is working properly. cation. Master/Slave presence Check the correct power supply is reaching the au- with automations in simulta- tomations. neous synchronism. Factory initialisation incom- Contact Technical Support. plete.
- Page 22 The installer must prepare and keep a maintenance record showing all the routine and extraordinary maintenance work carried out. Entrematic Group AB Lodjursgatan 10 SE-261 44, Landskrona Sweden...
- Page 23 Date of intervention Technician's signature Customer's signature Intervention performed Installer's stamp Operator Date of intervention Technician's signature Customer's signature Intervention performed For any problems and/or information, contact the Technical Service. Entrematic Group AB Lodjursgatan 10 SE-261 44, Landskrona Sweden www.ditecentrematic.com...
- Page 24 Entrematic Group AB Lodjursgatan 10 SE-261 44, Landskrona Sweden www.ditecentrematic.com...
Need help?
Do you have a question about the Ditec QIK80EH and is the answer not in the manual?
Questions and answers