Advertisement
Table of Contents
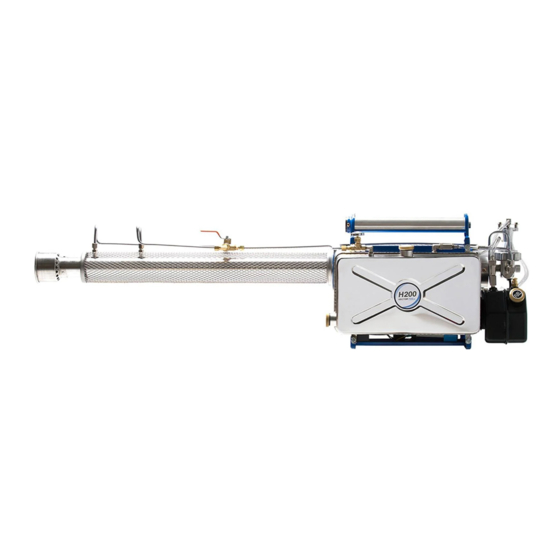
INSTRUCTION MANUAL THERMAL FOGGER VECTORFOG H100, H100SF, H200 & H200SF
When fogging outdoors, you should only fog for short periods at a time and when there is not much wind. When
fogging indoors you should start at the furthest part of the building and work your way back until you get to the
entrance or exit.
It's essential to read the chemical manufacturer's instructions before you start applying, including diluting ratio and
safety precautions.
Only experienced personnel should operate this equipment.
You must exercise caution if fuel is spilt, in order to avoid the risk of fire.
Please read this manual before using the equipment.
You must wear protective equipment (face/breathing mask, protective clothing, gloves,
etc.) when handling potentially hazardous chemicals.
It is advisable to wear ear plugs to protect the user from the high noise produced by the
machine
The interior of the machine heats up to extremely high temperatures. Do not add fuel or
chemicals during the operation of the machine or when it is hot after use.
Avoid fogging chemicals upwind.
High voltage can be dangerous. Do not turn on the machine when the spark plugs
electrode is exposed.
Experts in Fogging Technology™
CAUTION MARKS
1
Advertisement
Table of Contents

Related Manuals for Vector Fog H100


Summary of Contents for Vector Fog H100
- Page 1 Experts in Fogging Technology™ INSTRUCTION MANUAL THERMAL FOGGER VECTORFOG H100, H100SF, H200 & H200SF When fogging outdoors, you should only fog for short periods at a time and when there is not much wind. When fogging indoors you should start at the furthest part of the building and work your way back until you get to the entrance or exit.
-
Page 2: Specifications
SPECIFICATIONS Model H100 / H100SF H200 / H200SF Motor Pulse Jet Pulse Jet Chemical Tank Polymer Stainless steel Tank Size 4.5L 6.5 L Flow rate 10-50 LPH 10-50 LPH Pressure in the chemical tank 0.224 bar 0.224 bar Fuel Petrol... - Page 3 CHECKLIST BEFORE STARTING THE UNIT Unpacking the unit When unpacking the unit, please make sure that that the machine is not damaged and that all the accessories mentioned in this manual are not missing. Charge the battery Make sure the right power supply is being used (110/220 volts). Connect the charger to the unit and then connect to the mains.
- Page 4 Fill the chemical tank Pour the special fogging chemical mixture into the chemical tank. It is important not to add more chemical mixture than it’s needed. Leaving remaining chemicals in the tank after use could affect the performance of the machine in the following session as deposits may solidify.
-
Page 5: Maintenance
To turn off the machine Turn the chemical supply valve clockwise to stop the supply of chemical. Keep the machine in operation for 5 seconds to help get rid-off any chemical mixture still in the system. Close the directional/close valve and press the off/choke button located above the fuel tank to stop the machine. -
Page 6: Common Troubleshooting
Maintaining the valve petal Unscrew the fuel filter before removing the top of the carburettor. Check the valve for any distortions or cracks. If it’s damaged, you will need to replace this part. TIP: It’s important to assemble the parts of the carburettor in the order there where disassembled. - Page 7 • Check the spark plug Remove the spark plug using a spanner or spark plug remover. Hold the plug by its plastic cap and press the start button to check if there is a spark between the electrode and the earth. Also you should hear if there buzzing sound from the ignition coil.
- Page 8 The machine is turned on, but the engine works intermittently or stops: • Examine the fuel tank assembly to check for any leakages. After pressing the start button, cover the tank and connections with soap to check for leaks. If bubbles are observed, the gasket needs replacing on the fuel tank cap or the tank itself.
-
Page 9: Parts & Assembly
PARTS ASSEMBLY 01. Resonator & chemical Inlet nozzle 1. Ejection pipe 2. Inner cooling pipe 3. Outer cooling pipe 4. Bracket 5. Safety net 6. Ejection nipple plate 7. Ejection buffer spring 8. Ejection nipple 9. Ejection nipple tube 10. Straight nipple 11. - Page 10 03. Chemical & Fuel Tank 1. Fuel tank 2. Run tee 3. Fuel tank pipe 4. Check valve 5. Rubber check valve 6. T-check valve 7. upper air pipe 8. Oil pressure hose (blk) 9. O-ring 10. Oil tank peg 11.
Need help?
Do you have a question about the H100 and is the answer not in the manual?
Questions and answers