Advertisement
Neo Coolcam
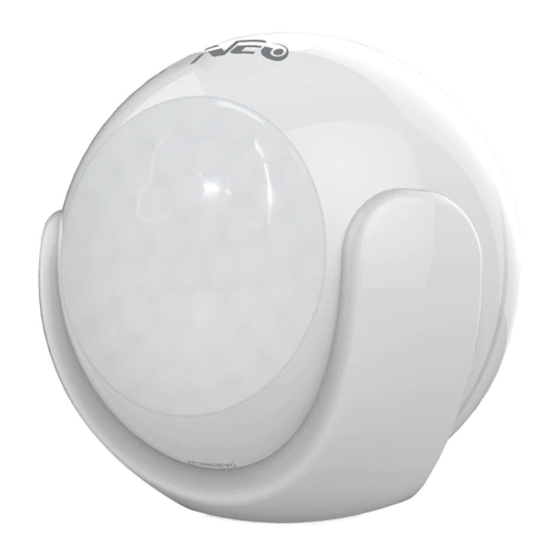
Motion Sensor 2 with temperature sensor
SKU: NEOEMS02Z
Quickstart
This is a Multilevel Sensor for Europe. To run this device please insert fresh 1 * CR123A
batteries. Please make sure the internal battery is fully charged.
1) Disassemble PIR main body and insert battery into PIR sensor. After making it powered
on, please do not operate it within 20s.
2) Make sure PIR sensor is located within the Z-Wave network range of gateway.
3) Set Z-Wave gateway into inclusion mode (Refer to gateway user manual).
4) Press the code button in PIR sensor three times continuously, LED Color Indicator then
PIR sensor will enter inclusion mode. Meanwhile, LED light would flash red color five times
on and off alternately.
5) PIR will be detected and included in the Z-Wave network.
6) Wait for gateway to configure PIR sensor.
Advertisement
Table of Contents

Related Manuals for NEO Coolcam Motion Sensor 2


Summary of Contents for NEO Coolcam Motion Sensor 2
- Page 1 Neo Coolcam Motion Sensor 2 with temperature sensor SKU: NEOEMS02Z Quickstart This is a Multilevel Sensor for Europe. To run this device please insert fresh 1 * CR123A batteries. Please make sure the internal battery is fully charged. 1) Disassemble PIR main body and insert battery into PIR sensor. After making it powered on, please do not operate it within 20s.
-
Page 2: What Is Z-Wave
What is Z-Wave? Z-Wave is the international wireless protocol for communication in the Smart Home. This device is suited for use in the region mentioned in the Quickstart section. Z-Wave ensures a reliable communication by reconfirming every message (two-way communication) and every mains powered node can act as a repeater for other nodes (meshed network) in case the receiver is not in direct wireless range of the transmitter. -
Page 3: Installation
Reset to factory default This device also allows to be reset without any involvement of a Z-Wave controller. This procedure should only be used when the primary controller is inoperable. 1. Remove the cover of PIR sensor. 2. Make sure the sensor is powered. 3. - Page 4 7.Direct association can be allowed between PIR and other ZWave network devices if preset association functionality. Z-Wave gateway will not take part in such communication. Using this mechanism, PIR can communicate with other devices even when gateway is damaged. Detection Range PIR has to be installed in a corner of room or perpendicularly to door.
-
Page 5: Product Usage
Inclusion/Exclusion On factory default the device does not belong to any Z-Wave network. The device needs to be added to an existing wireless network to communicate with the devices of this network. This process is called Inclusion. Devices can also be removed from a network. This process is called Exclusion. Both processes are initiated by the primary controller of the Z-Wave network. -
Page 6: Quick Troubleshooting
Communication to a Sleeping device (Wakeup) This device is battery operated and turned into deep sleep state most of the time to save battery life time. Communication with the device is limited. In order to communicate with the device, a static controller C is needed in the network. This controller will maintain a mailbox for the battery operated devices and store commands that can not be received during deep sleep state. -
Page 7: Configuration Parameters
Association Groups: Group Maximum Description Number Nodes Lifeline Send control commands to associated devices such as relay module, lighting, etc. Send Notification to associated devices in this group. Sending Sensor Binary Report to associated devices in this group. Configuration Parameters Z-Wave products are supposed to work out of the box after inclusion, however certain configuration can adapt the function better to user needs or unlock further enhanced features. - Page 8 Parameter 3: Basic Set Level Basic Set Command will be sent where contains a value when motion sensor is triggered, Z- Wave gateway will take it for consideration; for instance, if a lamp module is received the Basic Set Command of which value is decisive as to how bright of dim level of lamp module shall be.
- Page 9 Parameter 7: Light Sensor Polling Interval This Parameter can be set as interval time for light sensor measuring ambient illumination level. Size: 2 Byte, Default Value: 180 Setting Description 60 - 36000 Light Sensor Polling Interval Parameter 8: Lux Level Function Enable If this parameter is set to ‘1’, and when Lux level is less than the value defined by parameter #5, PIR sensor will send a BASIC_SET command frame(i.e.
- Page 10 Parameter 11: Led Blink Enable This parameter defines the Led on/off enable. If this parameter is set to ‘1’, led blink will be enabled, the led will blink once when motion sensor detect a movement. Otherwise, the led will be turned off always. Size: 1 Byte, Default Value: 1 Setting Description...
-
Page 11: Technical Data
Technical Data Dimensions 45 x 45 x 48 mm Weight 25.14 gr Hardware Platform ZM5101 6924715906508 IP Class IP 20 Voltage Battery Type 1 * CR123A Device Type Multilevel Sensor Firmware Version 03.50 Z-Wave Version 04.26 Z-Wave Product Id 0x0258.0x0003.0x108d Supported Command Classes •... -
Page 12: Explanation Of Z-Wave Specific Terms
Explanation of Z-Wave specific terms Controller — is a Z-Wave device with capabilities to manage the network. • Controllers are typically Gateways,Remote Controls or battery operated wall controllers. Slave — is a Z-Wave device without capabilities to manage the network. Slaves can •...
Need help?
Do you have a question about the Motion Sensor 2 and is the answer not in the manual?
Questions and answers