Table of Contents
Advertisement
Available languages
Available languages
Quick Links
Advertisement
Table of Contents

Related Manuals for Akaso B60


Summary of Contents for Akaso B60
- Page 1 USER MANUAL B60 WiFi Camera...
- Page 2 CONTENTS 01 - 22 23 - 44 45 - 66 67 - 88...
-
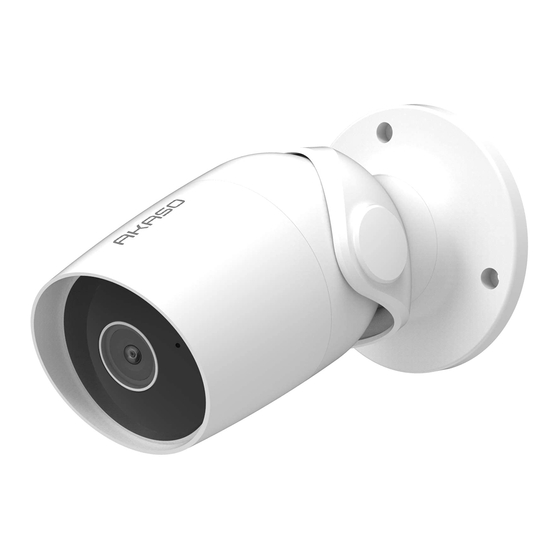
Page 3: What's In The Box
2. Open the accessories bag and take out the expansion bolt, and insert it into the holes. 3. Tighten the 3 screws to fix the device on the installation surface (wall or ceiling). B60 Wireless Camera Power Adapter Expansion Bolt... - Page 4 Privacy Policy ③ Then set password, click “Done”. 3. Get a New Account If you already have an account for Akaso Smart, just ignore the below and log in your account to add device. Set Password ① Open “Akaso Smart” to click “ register → agree”, fill in the mobile number or Email.
- Page 5 4. Add Your Camera Follow the on-screen instructions to finish the setup to connect your router. Cancel Add Device Otherwise Enter your home’s Wi-Fi pa... Power the device on and make sure the indicator is flashing quickly or a prompt tone is heard Wi-Fi: AKASO_WiFi Change Network Confirm...
- Page 6 Cancel Add Device Otherwise Select a method Back 2019-01-09 13:51:48 Signal: 91% QR Code Use camera to sacn the QR code on the mobile phone which contains Connecting Now net-pairing info. AP Code Power the device on and make Mobile phone transmit the net- sure the indicator is flashing pairing info by connecting camera's hotspot.
-
Page 7: Format Microsd Card
Connecting Now Please format as per the below: ① Open “Akaso Smart” to enter into the main interface, click camera icon to enter into the live view interface. Make sure your phone and device are as close to your router as possible. - Page 8 "high". Motion Detection Settings More Back ② If you need your phone to receive an alert message, you must allow “Akaso Smart” APP 2019-01-09 13:51:48 Signal: 91% Modify Device Name...
-
Page 9: Live View Interface
Screenshot Speak Record others successfully. ② The account which have been shared will get a message on “Akaso Smart” app, please Playback Alarm Cloud storage confirm and agree to this sharing request, then the others also can live view and do... -
Page 10: Playback Interface
① Setting: Enter into the more setting. 10. PLAYBACK INTERFACE ② Camera Date and Time: The date and time of live image. Click”Playback → Calendar for select the date”, slide the time bar to playback the videos, ③ Sound On / Off Option: Turn On / Off the sound. press to Play / Pause. -
Page 11: Specification
11. MORE SETTING INTERFACE 8. SD Card Settings: Show SD Card information and format SD Card. 9. Cloud Storage: Save the video flips on cloud to avoid the loss from card. Click”Playback → Calendar for select the date”, slide the time bar to playback the videos, Enter into the more setting, click “Cloud Storage”... -
Page 12: Troubleshooting
6. Why can't the phone receive an alarm message? A. device does not support 5GHz WiFi, please ensure that when adding device, the Confirm that the notification permission of the AKASO Smart APP in the phone settings phone is connected to 2.4GHZ WiFi. - Page 13 English 9. APP often can not load the video, showing disconnect? 14. Why does configuring a camera network with other mobile phones fail? Troubleshoot the problem based on the camera's indicator status: A camera can only be bound by one account, and other accounts can only be viewed ①...
-
Page 14: Qué Hay En La Caja
② Abra la bolsa de accesorios y saque el perno de expansión, e insértelo en los orificios. ③ Apriete los 3 tornillos para fijar el dispositivo en la superficie de instalación (pared o techo). Adaptador de Cargador Cámara Inalámbrica B60 Perno de Expansión QUICK REFERENCE... - Page 15 ③ Luego configura la contraseña, haga clic en "Terminar". en su cuenta para agregar el dispositivo. ① Abrir "Akaso Smart" para hacer clic en "Crear nueva cuenta → De acuerdo", ingrese el número de teléfono o correo electrónico. Establecer la contraseña...
- Page 16 4. Agrega Su Cámara Siga las instrucciones en pantalla para finalizar la configuración para conectar su enrutador. Cancelar Añadir dispositivo Otros m... Introducir la contrasena de Wi-Fi... Encienda el dispositivo y asegúrese de que el indicador parpadee rápidamente o se oiga un tono de aviso Wi-Fi: AKASO_WiFi Cambiar red...
- Page 17 Cancel Atrás Atrás Seleccione el méto... Atrás Añadir dispositivo Otros m... 2019-01-09 13:51:48 Señal: 91% Código QR c... El teléfono genera un código QR sobre información de red correspondiente en su pantalla, y Conectando se puede obtener información de red correspondiente escaneando el código QR con la cámara.
-
Page 18: Formatear La Tarjeta Microsd
Conectando empezará grabar. Formatéela de acuerdo a lo siguiente: ① Encienda “Akaso Smart” para entrar en la interfaz principal, clic en el icono de cámara para entrar en la interfaz de visualización en vivo. Mantener el enrutador, móvil y equipo lo más cerca posible... - Page 19 Volver Ajuste de detecctión para mejorar la sensibilidad de la alarma, se recomienda seleccionar “Alto”. Atrás Si necesita que su teléfono reciba un mensaje de alerta, debe permitir la APP de “Akaso 2019-01-09 13:51:48 Señal: 91% Modificar nombre de equipo WIFI Camera Smart”...
- Page 20 APP “Akaso Smart” con éxito por adelantado) que quiere compartir, luego clic en completar, la cámara fue compartida a otros con éxito. ② La cuenta que ha sido compartido obtendrá un mensaje en la app de “Akaso Smart”, Reproducir...
- Page 21 ① Configuración: Ingrese a más configuración. 10. INTERFAZ DE REPRODUCCIÓN ② Fecha y Tiempo de Cámara: La fecha y el tiempo de imagen en vivo. Clic en “Reproducción → Calendario para seleccionar la fecha”, deslice la barra de tiempo ③ Opción de Sonido Encendido/Apagado: Encienda / Apague el sonido. para reproducir los videos, presione para Reproducir / Pausar.
- Page 22 8. Configuraciones de Tarjeta SD: Muestre la información de Tarjeta SD y formatee la 11. MÁS INTERFACES DE CONFIGURACIÓN Tarjeta SD. Haga clic en la parte superior derecha para abrir y configurar, vea a continuación: 9. Almacenamiento de la Nube: Guarde los videos en la nube para evitar la pérdida de la tarjeta.
-
Page 23: Solución De Problemas
6. ¿Por qué el teléfono no puede recibir un mensaje de alarma? Confirme que el permiso de notificación de la APP AKASO Smart en las configuraciones C. Tenga en cuenta que la red de WiFi es suave, se recomienda intentar reiniciar el enrulados. - Page 24 Español 8. El acceso de APP al dispositivo es fallido, ¿Qué debo hacer? 13. ¿Por qué la función de operación de cuenta compartida no está completa? Restablezca el dispositivo después de restablecerlo a las configuraciones de fábrica. Si el Para causas de seguridad, los permisos de cuenta compartida son restringidos, y problema todavía existe, póngase en contacto con el servicio al cliente para asistencia algunas funciones del dispositivo no se pueden operar.
-
Page 25: Qu'y A-T-Il Dans La Boite
① Percez 3 trous du mur / du plafond. ② Ouvrez le sac d'accessoires et retirez le boulon d'expansion, puis insérez-le dans les trous. ③ Serrez les 3 vis pour fixer l'appareil sur la surface d'installation (mur ou plafond). B60 Caméra IP Chargeur Boulon d'Expansion QUICK... - Page 26 Si vous avez déjà un compte pour Akaso Smart, ignorer l'étape susmentionnée et connecter votre compte pour ajouter un périphérique. ① Ouvrir «Akaso Smart» pour cliquer sur «créer un nouveau compte → D’accord», remplir le numéro de portable ou du courrier électronique.
- Page 27 ① Cliquer sur «Ajouter → Caméra de sécurité → L’étape Suivante → Entrer le mot de passe Wi-Fi → confirmer». Retour QR Code AKASO Annuler Sélectionnez le type d'a... Bienvenue à la maison Paramétrez la position de votre famile pour obt... >...
- Page 28 ① Cliquer «Ajouter u → Caméra de sécurité → Autre méthode → configuration». Entrer le mot de passe Wi-Fi AKASO Allumez l'appareil et assurez-vous que le Annuler Sélectionnez le type d'a...
-
Page 29: Insérer La Carte Micro Sd
à enregistrer. Veuillez la formater selon les étapes suivantes: ① Ouvrir «Akaso Smart» pour entrer dans l'interface principale, cliquer sur l'icône de Placez appareil, téléphont et routeur caméra pour entrer dans l'interface de visualisation en direct. - Page 30 Alarme de détection de mouvement ② Si vous souhaitez que votre téléphone reçoive un message d'alerte, vous devez Partage d'appareils autoriser l'application «Akaso Smart» à obtenir toutes les autorisations dans l'interface Informations appareil des autorisations de votre application de téléphonie portable.
- Page 31 «Terminé», la caméra est partagée avec d'autres avec succès. Lecture Diection Alarme ② Le compte qui a été partagé recevra un message sur l'application «Akaso Smart». Ma famille Scénario Profil Veuillez confirmer et accepter cette demande de partage. Et puis les autres utilisateurs...
- Page 32 ① Réglage: Entrer dans l’interface de paramètres. 10. INTERFACE DE LECTURE ② Date et heure de la caméra: La date et l'heure de l'image en direct. Cliquer sur «Lecture → Calendrier» pour sélectionner la date, faire glisser la barre de ③...
-
Page 33: Spécification
7. Réglages de détection de son: Encienda / Apague la alarma de detección de 11. INTERFACE DE PARAMÈTRES movimiento y la selección de sensibilidad. Cliquer sur en haut à droite pour l’ o uvrir et configurer. 8. Réglages de Carte SD: Afficher les informations sur la carte SD et la formater, voir partie «Formater la carte Micro SD». -
Page 34: Dépannage
C. Notez que le réseau WIFI actuel est lisse, il est recommandé d'essayer de redémarrer Température de le routeur. Jour & nuit Filtre auto IR-CUT −20 °C à 50 °C service ④ Le voyant de l'appareil devient bleu. Et l'application ne peut pas trouver l'appareil. A. - Page 35 10. Pourquoi y a-t-il un cercle au milieu lorsque je regarde l'écran vidéo, cela va-t-il tarder ? Vérifiez que l'autorisation de notification de l'APP "Akaso Smart" dans les paramètres du Le cercle indique que la vidéo est en cours de chargement. Le délai indique que le téléphone est activée et que les paramètres d'alarme mobile sont tous activés dans...
-
Page 36: Installazione
② Aprire la borsa degli accessori ed estrarre il bullone di espansione e inserirlo nei fori. ③ Serrare le 3 viti per fissare il dispositivo sulla superficie di installazione (parete o soffitto). Adattatore per Auto B60 Camera senza Fili Bullone di Espansione QUICK... - Page 37 3. Ottenere un Nuovo Account ③ E poi istabilire un password, e cliccare “Fatto”. Se hai già un account per Akaso Smart, ignora il sotto e accedi al tuo account pe aggiungere un dispositivo. ① Aprire “Akaso Smart” per fare un clic “Creare Un Nuovo Account→Sono d'accordo”, Impostare la password compilare il numero telefonico o Email nel cellula.
- Page 38 4. Aggiungi la tua fotocamera Seguire le istruzioni visualizzate per completare l'installazione per connettere il router. Annulla Indietro Aggiungi Dispositivo Altrimenti Impostare il Wi-Fi per il disposi... Accendere il dispositivo e assicurarsi che I'indicatore del dispositivo lampeggi velocemente o si sente un segnale acustico.
- Page 39 Indietro Selezionare un met... Annulla Indietro Indietro Aggiungi Dispositivo Altrimenti 2019-01-09 13:51:48 Segnale: 91% Codice QR Usare la fotocamera per scannerizzare il codice QR sul In Connessione telefono che contiene le info di accoppiamento di rete Modalità dell... Il dispositivo crea Wi-Fi hot spot, il Accendere il dispositivo e assicurarsi telefono trasmette le informazioni che I'indicatore del dispositivo...
- Page 40 In Connessione videocamera inizierà a registrare. Si prega di formattare la scheda come di seguito indicato: ① Aprire "Akaso Smart" per accedere all'interfaccia principale, fare clic sull'icona della videocamera per accedere all'interfaccia di live view. Assicurarsi che il telefono e il dispositivo...
- Page 41 Se si desidera che lo smartphone riceva un messaggio di avviso, bisogna consentire Condivisione Dei Dispositivi Info Dispositivo all'APP "Akaso Smart" di ottenere tutte le autorizzazioni nell'interfaccia delle autorizzazioni Utilizzare Echo dell'app sullo smartphone. Il set di funzionalità di base...
- Page 42 ① Accedere a più impostazioni, fare clic su "Condivisione Dei Dispositivi" per impostare, poi fare clic su " Aggiungere Condivisione " per selezionare la regione e immettere l'account (l'account deve essere registrato con successo tramite app "Akaso Smart") che Fotografia...
- Page 43 ① Impostazione: Accedere a più impostazioni. 10. INTERFACCIA RIPRODUZION ② Data e Ora della videocamera: La data e l'ora dell'immagine live. Fare clic su "Riproduzione → Calendario per selezionare la data", scorrere la barra del ③ Opzione Suono On / Off: Attivare / Disattivare il suono. tempo per riprodurre i video, premere per Riprodurre / Mettere in pausa.
- Page 44 9. Cloud Storage: Salvare le registrazioni video su Cloud per evitare la perdita del 11. ALTRE INTERFACCE DI IMPOSTAZIONE contenuto in caso la scheda si guasti. Fare clic su in alto a destra per accendere e impostare, vedere sotto: Accedere a più impostazioni, fai clic su "Cloud Storage". 10.
-
Page 45: Risoluzione Dei Problemi
6. Perché lo smartphone non può ricevere il messaggio di allarme? speciali. Accertarsi che l'autorizzazione alla notifica dell’ A PP AKASO Smart nelle impostazioni del C. Se la corrente connessione Wi-Fi non è normale, si consiglia di provare a riavviare il telefono sia attivata e che le impostazioni dell'allarme mobile siano tutte abilitate router. - Page 46 Italiano 8. La richiesta di accesso al dispositivo dell’ A PP è fallito, cosa devo fare? 13. Perché le funzioni di gestione dell'account non sono complete per chi gestisce l’account Si prega di ripristinare il dispositivo alle impostazioni di fabbrica. Se il problema persiste, di condivisione? contattare il servizio clienti per l'assistenza tecnica.
Need help?
Do you have a question about the B60 and is the answer not in the manual?
Questions and answers