
Related Manuals for Murrplastik mp-IM1


Summary of Contents for Murrplastik mp-IM1
- Page 1 ACS labelling systems mp-IM1 operating instructions As of May 2019 – v1.6 8902865312...
-
Page 2: Table Of Contents
Driver installation ................21 Direct connection via network cable ..........24 Configuring network settings on the PC ........24 Configuring network settings on the mp-IM1 ....... 26 Settings in the mp-UniversalMarkingSoftware ......27 Settings in the ACS Gold Studio software ........29 Assembling the carrier plate / printing.......... - Page 3 13.1 Cleaning the mp-IM1 printer ............33 13.2 Replacing the fleece box..............34 13.3 Consumed ink cartridges and fleece boxes ........35 Contact ..................35 Technical data................36 Shipping instructions for return ............ 37...
-
Page 4: Copyright And Trademarks
Murrplastik Systemtechnik GmbH. All product names used herein are for identification purposes only and may be trademarks of their respective owners. Murrplastik disclaims any and all rights in those marks. 2 Important hints This operating instructions must be read and understood. -
Page 5: Safety Instructions
(PC) labels based on inkjet technology. The possibility of labelling as well as the respective durability and quality of the inscription with the mp-IM1 can only be guaranteed for the labelling material along with the special ink, both approved by Murrplastik. -
Page 6: Not Intended Use
Not provided is labelling of non-approved Murrplastik material. Not provided is using of ink not approved by Murrplastik. Not provided is labelling by means of software or operating systems which are not approved by Murrplastik. -
Page 7: Using The Device
Using the device Do not touch into or onto the printer during printing. Do not touch the ink cartridge. There is a risk of injury! Do not move the ink cartridge carriage by hand; if you do, you may damage the device! Keep the openings of the housing clear. - Page 8 If you use an extension socket board with this device, take care to ensure that the total power consumed by the connected equipment does not exceed the maximum permitted power consumption for the extension socket board. Also take care to ensure that the total power consumed by the equipment connected to a wall outlet does not exceed the maximum permitted power consumption for the affected wall outlet.
-
Page 9: Ink Cartridge Handling
Always switch off the device using the power button next to the display. If you press this button, the display goes off. Only when the display is gone off may the mains plug be pulled out or the power supply be disconnected. Ink cartridge handling Always store the ink cartridge out of the reach of children. -
Page 10: Repairing The Device
Cartridge ink information: The ink used is a specially developed Murrplastik ink for labelling polycarbonate (PC). This ink does not release any harmful volatile organic compounds (VOCs) into the workplace. Specialised air purification systems are therefore not required. -
Page 11: Radio Interference
Important information You will need administrator rights for installing the USB printer driver! A possible network installation must be carried out by the user’s responsible administrator. Since this is a specific installation NO support is offered by Murrplastik for this! -
Page 12: Scope Of Delivery
(e.g. in case of service). The following components are included in the scope of delivery: mp-IM1 printer Ink cartridge EK-PC 3.1 mp-IM1 carrier plate Power cable with power supply unit USB connecting cable Ethernet connecting cable... -
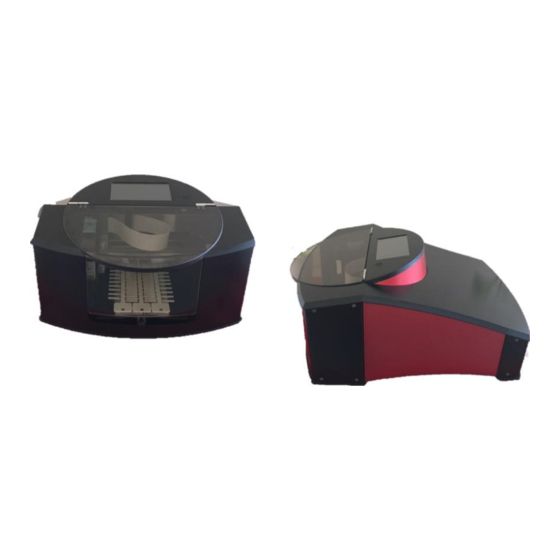
Page 13: Device Overview
5 Device overview on/off button * interactive touch display service flap Press the on/off button longer than 3 seconds to turn off the device. - Page 14 Opened service flap Absorbent fleece Service station Replaceable ink cartridge USB-B connection Power connection Service connection Ethernet connection (USB-A)
-
Page 15: Interactive Touch Display
6 Interactive touch display The interactive touch display allows you to operate and control the device. To do this, use the menu guide points on the left edge of the screen. Home key Info key Settings key Cancel key Hit Home to return to the Home menu. The Home menu is the menu item that is displayed after booting the device. - Page 16 The following table shows the structure of the table in menu items and sub-menu items: Symbol Lead point Subitem 1 Subitem 2 Home Network Info Ink Cartridge Printer DHCP IP Address Network Netmask Gateway Hostname Settings Language Print Job Eject Tray Tray Control Insert Tray Clean Cartridge...
- Page 17 The following table shows you which options you can perform in the individual menu items. Menu item Figure Description The Home screen. In addition, the pending Home print jobs are displayed here. Navigation to ‘Network’, ‘Ink Info cartridge’ and ‘Printer’ possible.
- Page 18 Menu item Figure Description You get access to the Settings settings of the device. You get access to the following network settings: DHCP Settings IP address Network Netmask Gateway Hostname If you want to activate Settings DHCP, the checkbox must Network be filled.
- Page 19 Menu item Figure Description Select one of these seven languages and save with the floppy disk icon: German Settings English Language Spanish French Italian Portuguese Russian You have the option of selecting whether the printed frame should remain in the device for Settings drying.
-
Page 20: Initial Commissioning Of The Mp-Im1
At first read the safety instructions for this printer at the beginning of this manual before using the device. Take the mp-IM1 out of its packaging and place it on a flat, stable and vibration-free surface. Make sure that there is enough space for the drawer to extend. -
Page 21: Driver Installation
If required, you can download the driver installation file from the Murrplastik homepage on the Internet. It is not necessary that you connect the mp-IM1 to the PC during driver installation. Please note The driver installation is shown as an example under Windows®10 64 bit. - Page 22 Confirm the Windows® query with [Yes]. Select the desired language. You can choose between "German" and "English". Click on [Next].
- Page 23 Click again on [Next]. Apply the default path and click on [Install]. Complete the installation by clicking on [Finish].
-
Page 24: Direct Connection Via Network Cable
The IP address must be provided by the customer's network administrator. It is also possible to integrate the mp-IM1 into an existing company network. Due to the complexity and potential risks, this setup is the sole responsibility of the customer's network administrator. - Page 25 Select [Properties] from the context menu. Open the settings for the Internet Protocol Version 4 (TCP/IPv4) by double-clicking it.
-
Page 26: Configuring Network Settings On The Mp-Im1
[OK]. Configuring network settings on the mp-IM1 Set the network settings on the mp-IM1 using the touch panel in [Settings] - [Network]. Enter an IP address from the same network area in which the PC is located, e.g. 192.168.54.50. -
Page 27: Settings In The Mp-Universalmarkingsoftware
10 Settings in the mp-UniversalMarkingSoftware In mp-UniversalMarkingSoftware the mp-IM1 is added and the calibration points are entered. The settings must be made separately for each Windows® user. To do this, start the software and click on the printer symbol. Click on [+] "Add a printer". - Page 28 Please complete the remaining columns as follows: Kind = select the red label symbol Alias = you may name this field freely Type = Inkjet Orientation = Baseplates-Rows = Baseplates-Columns = Distance-X = Distance-Y = Offset-X = Offset-Y = -4.2 Open the printer properties by clicking on the printer icon and make sure that...
-
Page 29: Settings In The Acs Gold Studio Software
Please note that the offset values may vary slightly depending on the device. 11 Settings in the ACS Gold Studio software In the ACS Gold Studio software the mp-IM1 is added and the calibration points are entered. The settings must be made separately for each Windows® user. - Page 30 Click [Add] to take over the device into the "List of output devices". Set a hook at "As default". Change the "Rows/Page" and the "Frames/Row" value each into "1". Enter the calibration point values. X = 18.8 Y = -28.0 Rotation = 0 Please note These values are default values...
- Page 31 Click [Setup] to check the paper size in the driver. (Can alternatively also be done in "Devices and Printers".) Make sure that page size "Large" is selected. Here you can optionally set the resolution to 600 dpi as well. Check your settings you have done in the "Output Setup" window once again and close it by clicking on [Done].
-
Page 32: Assembling The Carrier Plate / Printing
12 Assembling the carrier plate / printing Place the carrier plate on the drawer as shown in the following figure. Then place the base plate on the carrier plate. -
Page 33: Cleaning And Maintenance
13 Cleaning and maintenance In order to keep the mp-IM1 printer in good condition and functional, it should be cleaned and maintained periodically, if necessary also more times. 13.1 Cleaning the mp-IM1 printer Switch off the printer. Unplug the power cable. -
Page 34: Replacing The Fleece Box
13.2 Replacing the fleece box Change the fleece box as soon as it is apparently full. After opening the service flap you will find the fleece box in the lower right corner. Remove the fleece box and replace it with a new one. -
Page 35: Consumed Ink Cartridges And Fleece Boxes
13.3 Consumed ink cartridges and fleece boxes Dispose of empty ink cartridges and full fleece boxes at a local waste management site in accordance with the statutory regulations. 14 Contact Technical Support +49 7191 482-2222 acs.helpdesk@murrplastik.de... -
Page 36: Technical Data
15 Technical data Printing method Inkjet Print resolution 600 x 600 dpi special Murrplastik ink EK-PC 3.1 Print cartridge 1x Murrplastik - Black Print volume approx. 1,000,000 chars / cartridge Print area approx. 120 x 120 mm Print speed approx. 8 sec / frame Input voltage 110 –... -
Page 37: Shipping Instructions For Return
16 Shipping instructions for return In case of a necessary shipment (for example, maintenance, repair) of the mp-IM1 you must observe the following: Always switch off the device by pressing the power button so that the ink cartridge carriage drives into its parking position and will fixed in place. - Page 38 Low Voltage Directive 2014/35 / EU and the EMC Directive 2014/30 / EU. The printer mp-IM1 meets the following standards in detail: Equipment safety EN 60950-1.2006 + A11: 2009 + A1:2010 + A12:2011 Information technology equipment –...
- Page 39 Notes...
- Page 40 Murrplastik Systemtechnik GmbH Dieselstraße 10 71570 Oppenweiler Germany +49 7191 482-0 info@murrplastik.de www.murrplastik.de As of May 2019 – v1.6 8902865312...
Need help?
Do you have a question about the mp-IM1 and is the answer not in the manual?
Questions and answers