Table of Contents
Advertisement
Advertisement
Table of Contents

Related Manuals for Murrplastik P3B

Summary of Contents for Murrplastik P3B
- Page 1 ACS labelling systems p³b operating instructions As of June 2017 8902865309...
-
Page 2: Table Of Contents
p³b operating instructions Index Copyrights and Trademarks ............. 4 Important hints ................4 Safety instructions ................5 Intended use ..................5 Not intended use ................6 Choosing an installation site ............6 Using the device ................7 Ink cartridge handling ..............9 Repairing the unit ................ - Page 3 Assign network settings with EpsonNet Config® ......26 9.2.1 Prepare for access via network cable ..........26 9.2.2 Prepare for access via wireless LAN ..........29 Information about the printer driver ..........31 Install the printer driver for network access ......... 32 Change the printer name ..............
-
Page 4: Copyrights And Trademarks
Windows® is a registered trademark of Microsoft Corporation. Epson® is a registered trademark of Seiko Epson Corporation. All product names used herein are for identification purposes only and may be trademarks of their respective owners. Murrplastik disclaims any and all rights in those marks. 2 Important hints This operating instructions must be read and understood. -
Page 5: Safety Instructions
The possibility of labelling as well as the respective durability and quality of the inscription with the p³b can only be guaranteed for the labelling material along with the special ink, both approved by Murrplastik. • Only the approved special ink can be used. -
Page 6: Not Intended Use
• Not provided is labelling of non Murrplastik material. • Not provided is using of ink not approved by Murrplastik. • Not provided is labelling by means of software which is not approved by Murrplastik. -
Page 7: Using The Device
3.4 Using the device While the printer is printing, keep your hands out of the machine and do not touch the ink cartridges. There is a risk of injury! • Do not move the print head by hand – if you do, you may damage the equipment. - Page 8 • If you use an extension lead socket with this unit, take care to ensure that the total power consumed by the connected equipment does not exceed the maximum permitted power consumption for the extension lead socket. • Also take care to ensure that the total power consumed by the equipment connected to a wall outlet does not exceed the maximum permitted power consumption for the affected mains socket.
-
Page 9: Ink Cartridge Handling
• Always turn the unit off by using the power button on the control panel. When you press this key, the mains LED lights up briefly. Do not disconnect the power plug until the mains LED light has gone out. 3.5 Ink cartridge handling •... -
Page 10: Repairing The Unit
• Do not touch the ink outlet or the area around it. • Do not remove or pull on the label, because this may cause ink to leak out. • Always install an ink cartridge immediately after opening the packaging. If the ink cartridge is unpacked and then left out for a while before being used, it may then be impossible to print with it. -
Page 11: Radio Interference
• If the unit no longer works properly, although it has been used in accordance with the usage instructions, then configure the unit's settings only as described in these usage instructions. Incorrect changes made to other control elements can damage the unit, and often require time-consuming work to be performed by qualified technicians in order to restore the normal operating condition of the equipment. -
Page 12: Scope Of Delivery
4 Scope of delivery Upon receipt of the device check the shipment for completeness. Please keep the outer packaging in case the device needs to be sent in for service or repair. Scope of supply: Printer with carrier plate and exchangeable base plate Canopy 4 Screws Torx spanner... -
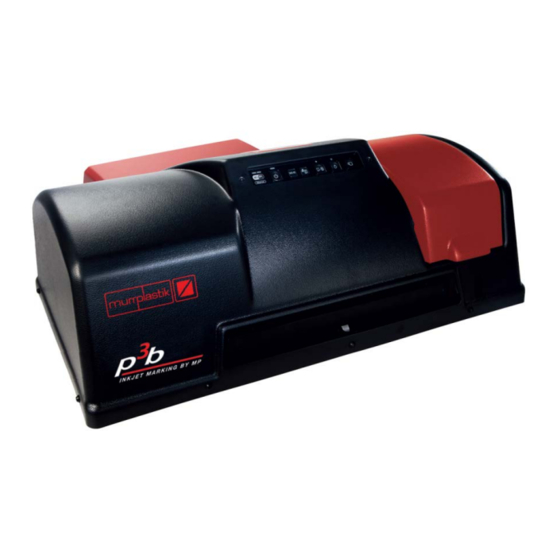
Page 13: Unit Overview
5 Unit overview Control panel See next page. Service flap Open to replace ink cartridges. Carrier plate Holds the base plates for labelling material. Inspection window Lets you check the level of the waste ink tank. Waste ink tank Collects the ink released during initialisation and cleaning procedures. -
Page 14: Control Panel
6 Control panel WLAN connection LED (blue/blue) Lights up or flashes to indicate the network status or network errors. If both LEDs are out, the printer is not connected to a network. On/Off key (mains power button) Used to switch the printer on or off. Status LED (blue) The operating status of the printer is indicated by the LED (steady or flashing) - Page 15 Ink key Used to move the print head into the position for replacing the ink cartridges. After replacing the ink cartridges, press the key again to move the print head to its normal working position (far right). Press and hold the key for at least three seconds to carry out print head cleaning.
-
Page 16: Take The Printer Into Operation
7 Take the printer into operation Read the safety instructions for this printer at the beginning of this manual before using the device. 7.1 Set up and connect the printer 1. Attach the canopy. To do so, slide the canopy (2.) from above onto the output opening on the back of the printer. -
Page 17: Install The Ink Cartridges
5. Open the service flap. 6. Check whether a waste ink tank is installed. The waste ink tank (a) is located behind the inspection window (b) underneath the print head (c). Install if necessary! 7.2 Install the ink cartridges 1. Carefully cut open the ink cartridge pouch and remove the cartridge. -
Page 18: Install And Replace The Chip Bars
4. Open the service flap and the cartridge cover. Place each ink cartridge in its correspondently marked cartridge bay (MK/BK) and press it down until you hear it click into place. Close the cartridge cover/service flap. 5. Press and hold the ink key (a) for about one second. - Page 19 Unmounting the chip bars Press the ink-key to make the cartridge storage/print head move to the left to open the service flap. Open the cartridge cover and remove the red chip bars by moving it a little bit backwards and then draw it straight up. Before pressing the ink button, the drawer must fully be pulled out.
-
Page 20: Installation For Access Via Usb Cable
According to system requirements there are two driver versions available: 32bit and 64 bit drivers. Both versions are available on the CD included but can alternatively be downloaded from the Murrplastik homepage. Before installing resp. downloading make sure whether you have a 32bit or 64bit operating system. -
Page 21: Installing The Printer Driver For Usb Access
8.2 Installing the printer driver for USB access Start the installation by double- clicking the driver installation file according to your operating system version (32Bit or 64Bit). Confirm the security prompt of the Windows® user account control with [YES]. Start the driver installation by clicking on [Setup]. - Page 22 The language setting of the operating system is assumed and can be changed for the driver at this point. Continue with [OK]. Accept the license agreement. Continue with [OK]. The driver installation will be performed. Close the window by clicking [OK]. The printer driver has been successfully installed.
-
Page 23: Installation For Access Via Network
USB port. Administrator rights are mandatory for installation. The installation file is included on the enclosed CD, but can also be downloaded on the Murrplastik homepage as part of the driver package. The installation is started by running the *.exe file. - Page 24 The language setting of the operating system is assumed and can be changed for the installation at this point. Continue with <Next>. Continue with <Next>. Accept the license agreement. Continue with <Next>.
- Page 25 It is recommended to use the default installation path. Continue with <Next>. Click <Install>. Complete the installation by clicking <Finish>.
-
Page 26: Assign Network Settings With Epsonnet Config
9.2 Assign network settings with EpsonNet Config® 9.2.1 Prepare for access via network cable With the previously installed EpsonNet Config® tool, the p³b is assigned its network settings (IP address, netmask, gateway). Before changing the printer port or network environment, make sure the network is working properly. - Page 27 'EpsonNet Config®' window opens. Series ≙ p³b is not If the printer SC-P400 listed, check whether the p³b is switched on and a direct connection via network cable with the computer is present. Then click [Refresh]. The printer is displayed in the 'EpsonNet Config®' window.
- Page 28 'Device Properties' window opens. Change to the 'TCP/IP' – 'Basic' area. Select 'Manual' and enter the IP Address, Subnet Mask and Default Gateway. Click on [Transmit]. Confirm the configuration with [OK]. Close the message 'Transmission is complete' by clicking [OK]. The p³b has now got its network settings.
-
Page 29: Prepare For Access Via Wireless Lan
If the p³b should be addressed via a wireless LAN, the following steps must be carried out. 9.2.2 Prepare for access via wireless LAN Condition for access via wireless LAN is a previous configuration for access via network cable (see chapter 9.2.1). Change to the area 'Network' /... - Page 30 Enter the login password (PSK) for the wireless LAN. Click on [Transmit]. Confirm the configuration with [OK]. Close the message 'Configuration successfully completed' with [OK]. Close the 'EpsonNet Config®' window via the menu items [Device] – [Quit].
-
Page 31: Information About The Printer Driver
According to system requirements there are two driver versions available: 32bit and 64 bit drivers. Both versions are available on the CD included but can alternatively be downloaded from the Murrplastik homepage. Before installing resp. downloading make sure whether you have a 32bit or 64bit operating system. -
Page 32: Install The Printer Driver For Network Access
9.4 Install the printer driver for network access Faultless installation is only feasible if the printer has already been assigned its network settings with the EpsonNet Config® Tool. Start the installation by double- clicking the driver installation file according to your operating system version (32Bit or 64Bit). - Page 33 The language setting of the operating system is assumed and can be changed for the driver at this point. Continue with [OK]. Accept the license agreement. Continue with [OK]. If the p³b is connected to the computer via a network cable and is switched on as well as has been assigned a correct network...
-
Page 34: Change The Printer Name
Choose ≙ p³b EPSON SC-P400… and click [OK]. Finish the installation by clicking [OK]. 9.5 Change the printer name The installed printer is listed in the Windows® 'Devices and Printers' window. If an installation via USB cable has already been carried out, now there is a copy of the EPSON SC-P400, which is the... - Page 35 The name of the network printer must be renamed to Epson SC-P400 Series (Network). Click on the printer with the right mouse button and select 'Printer properties' from the context menu. The 'Properties…' window of the printer opens. You can change the name of the printer here.
-
Page 36: Driver Settings In Windows
10 Driver settings in Windows® 1. Adjusting the paper size Open the 'Devices and Printers' window 'EPSON SC-P400 Series' ≙ USB access respectively in Windows®. Here the p³b appears as 'EPSON SC-P400 Series (Network)' ≙ network access. The name of the printer must not be changed! The settings for both devices are the same. - Page 37 2. Adjusting the print quality • Epson Premium Glossy Real good, powerful print. Ink consumption and printing time slightly increased. Click with the right mouse button on the printer and choose 'Printing preferences' from the context menu. The media type 'Epson Premium Glossy' is the default setting after the driver installation.
- Page 38 Make sure the quality level is set to '5'. Open the drop-down menu of 'Gloss Optimizer' and set it to 'Off'. Optional setting Removing the hook in 'High Speed' can slightly improve print quality, but increases the print time. The media settings for 'Epson Premium Glossy' should be finally shown as here.
- Page 39 • Plain papers Good, clear print. Moderate ink consumption and optimized print time. Click with the right mouse button on the printer and choose 'Printing preferences' from the context menu. The media type 'Epson Premium Glossy' is the default setting after the driver installation.
- Page 40 Make sure the quality level is set to '3'. Optional setting Removing the hook in 'High Speed' can slightly improve print quality, but increases the print time. The media settings for 'plain papers' should be finally shown as here. Finally, close the 'Printing Preferences' window by clicking [OK].
-
Page 41: Settings In The Acs Software
11 Settings in the ACS software The new device and its corresponding calibration point (offset) are added/entered in the ACS software. Please note: Depending on whether you are accessing the p³b via USB cable or via network, you must select the 'EPSON SC-P400 Series' respectively 'EPSON SC-P400 Series... - Page 42 Click [Add] to take over the device into the 'List of output devices'. Set a hook at 'As default'. Change the 'Frames/Row' value into '3'. Enter the calibration point values X = 33.0 Y = -173.3 Please note These values are default values and can be vary slightly...
-
Page 43: Sheet Labels Output - Monomatt
11.2 Sheet Labels output - Monomatt Start the ACS software, do not open a project and click [Settings] - [Output Device Setup]. If the EPSON SC-P400… is not preselected already in the upper drop-down menu of the Sheet Labels output section (red frame), open this drop-down menu and choose... -
Page 44: Sheet Labels Output - Labels
Enter the calibration point values. X = 122.3 Y = -9.3 Open the 'Rotation' drop-down menu and choose value '90'. Please note These values are default values and can be vary slightly by device. Check your settings once again and close the window by clicking on [Done]. - Page 45 The device to be choosen has already been selected in chapter 8.2 (Sheet labels output - Monomatt) and added in 'List of output devices'. A hook for 'Standard' has already been set. Open the 'Calibration Point' drop-down menu and choose the second entry from above '0.0'.
- Page 46 Enter the calibration point values. X1 = 74.5 Y1 = -123.5 The rotation value is '0'. Please note These values are default values and can be vary slightly by device. Close the window by clicking on [Done].
-
Page 47: Assembling The Base Plates / Printing
12 Assembling the base plates / printing 1. Use the On/Off button (a) to switch on the printer. The carrier plate (b) with the preassembled exchangeable base plate moves out. 2. Place the base plates (c) on the exchangeable base plate (b). These are used to position the label plate frames precisely for printing. -
Page 48: Cleaning And Maintenance
13 Cleaning and maintenance In order to keep the printer in good condition and functional, it should be cleaned and maintained periodically, if necessary also more times. 13.1 Cleaning the printer • Switch off the printer. • Unplug the power cable. •... -
Page 49: Replacing The Waste Ink Absorber
1. Retract the carrier plate. To do so, push the carrier plate gently into the printer until automatic retraction takes place. 2. Open the service flap. 3. Turn the waste ink tank latch to open it. 4. Remove the cap. 5. -
Page 50: Ink Pads Are Used Up
The Paper LED and the Ink LED are blinking alternately. Ink pads are used up and must be replaced. This must be done at the manufacturer. The printer cannot be used until the pads have been replaced. 14 Contact Technical Support +49 7191 482-2222 acs.helpdesk@murrplastik.de... -
Page 51: Technical Data
15 Technical data Printing method Inkjet Print resolution 5760 x 1440 dpi Nozzles per col. Drop size 1,5 picolitres Special ink (ECO solvent) Print cartridges 1) 1x BK Photo Black 1x MK Matte Black 3x chip bars Print volume 2) approx. -
Page 52: Shipping Instructions For Return
16 Shipping instructions for return In case it becomes necessary to return the p³b for whatever reason (e. g. service, repair) it is essential to observe the following points: • The device must not be shipped with full waste ink tank. The ink tank must be emptied and reinserted correctly resp. - Page 53 Declaration of European Conformity...
- Page 54 Notes...
- Page 56 Murrplastik Systemtechnik GmbH Dieselstraße 10 71570 Oppenweiler Germany +49 7191 482-0 info@murrplastik.de www.murrplastik.de As of June 2017 8902865309...
Need help?
Do you have a question about the P3B and is the answer not in the manual?
Questions and answers