Advertisement
Table of Contents
- 1 Table of Contents
- 2 Safety Precautions
- 3 Site Selection & Preparation
- 4 Stand Parts & Set up
- 5 Blade Set up
- 6 Control Panel
- 7 Get to Know Your Cutter
- 8 Preparing for Cutting
- 9 Making Your First Test Cut
- 10 Troubleshooting
- 11 Care and Maintenance
- 12 Warranty Statement
- 13 Hardware Bundles
- Download this manual
Advertisement
Table of Contents

Related Manuals for US Cutter MH Series


Summary of Contents for US Cutter MH Series
- Page 1 VINYL CUTTER User Manual & Assembly Instructions...
-
Page 2: Table Of Contents
Table of Contents Thank you for your purchase of this new MH Cutter Your new MH Vinyl Cutter and Plotter is your gateway into a world of possibilities. From more industrial Table of Contents uses like custom signage, vehicle decals, and window graphics to hobby and art creation including wall and Safety Precautions glass art and garment customization. -
Page 3: Safety Precautions
Safety Precautions CAUTION IS STRONGLY ADVISED WHEN USING THIS EQUIPMENT Device requires installation. Operation of this device requires use of sharp blades and caution should be taken to make sure that fingers do not get caught in moving gears during operation. Disconnect power during assembly, service and maintenance. -
Page 4: Site Selection & Preparation
Site Selection & Preparation If you are setting up for the first time please take a moment to refer to the Packaging Guide to take account of all the included components and accessories. For help with Stand Assembly, please refer to included instructions. The first step to setting up your cutter is finding a good location for the machine. -
Page 5: Stand Parts & Set Up
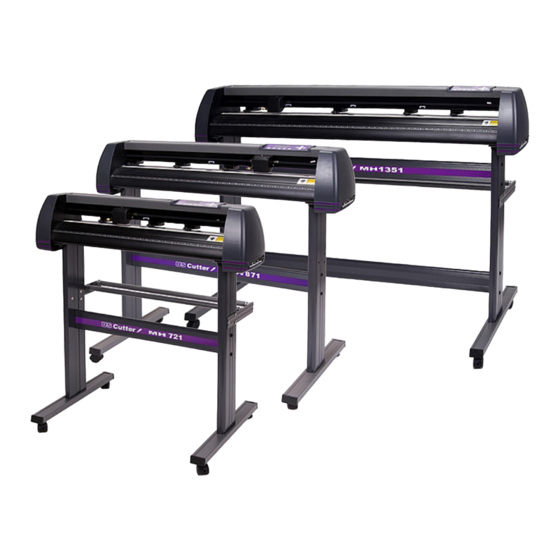
Stand Parts & Set Up Your MH Cutter purchase may have included a stand, if you selected that option. If so, you’ll want to set it up first. Please see instructions following page for assembly instructions. Short Screw Bolt Cap Bolt Long Screw Screw Sleeve Cap... - Page 6 (x3) Bolt Cap (x3) Bolt (x1) Right Roller Arm (x1) Right Column Attach the Right Roller Arm to the outer side of the Right Column (outer side will have a curved edge and will have larger hole openings) (x3) Bolt Cap (x3) Bolt (x1) Left Roller Arm (x1) Left Column...
- Page 7 Assembled right side (roller arm, column) (x4) Long Screw (1) Foot Attach the Foot on the right side Assembled left side (roller arm, column) (x4) Long Screw (1) Foot Attach the Foot on the left side 425.481.3555 www.uscutter.com...
- Page 8 Assembled right side (roller arm, column, foot) (x2) Short Screw (x2) Screw Sleeve Cap (x2) Screw Sleeve (x1) Center Crossbeam Add the Center Crossbeam to the right side (some larger models will have more than one Center Crossbeam. If your model has 2 Crossbeams, repeat this step, attaching both to the right side) Assembled right side (roller arm, column, foot)
- Page 9 Completed Stand (x2) Roller Add the Rollers Completed stand with rollers, MH Cutter Add the Cutter to the completed stand 425.481.3555 www.uscutter.com...
-
Page 10: Blade Set Up
Blade Set Up Unscrew the cap from Set Brass Ring on Remove the protective Insert the blade into the Blade Carriage. Blade Carriage to the cover from a new blade. the top of the Blade fully down position. Carriage. Screw the cap back Adjust the carriage cap until the Adjust the Brass Ring until it onto the Blade... -
Page 11: Installing The Pen Carriage
Installing the Pen Carriage Most new users will benefit from practice “cutting” with the supplied pen carriage until they are comfortable with normal operations of the cutter and cutting software. Your pen carriage should come assembled and appear as it does in this image. If it does not, please refer to the pen replacement section below for assembly instructions. -
Page 12: Get To Know Your Cutter
Get To Know Your Cutter Before you start cutting, you should familiarize yourself with the cutter and its basic parts and functions. FRONT VIEW CONTROL PANEL CARRIAGE ARM PINCH ROLLERS FEED ROLLERS POSITIONING BUTTON LEFT SIDE COVER RIGHT SIDE COVER Used to provide input directly to the cutter. - Page 13 RIGHT SIDE VIEW Used to connect a USB USB CABLE PORT cable from the cutter to a computer. Used to connect a serial SERIAL (COM) cable from the cutter to a CABLE PORT computer. USB CABLE PORT SERIAL (COM) CABLE PORT LEFT SIDE VIEW Used to connect a power POWER CABLE...
- Page 14 Control Panel MAIN SCREEN The main screen of the cutter allows you to set the main settings of the cutter including the cutting speed and cutting force options. It also allows you to cut a test pattern or check the amount of force that is currently set. Resets by stopping the cutter, and setting the origin of the carriage arm to its RESET BUTTON right most position.
- Page 15 OFFLINE/PAUSE SCREEN Offline mode is used to reposition the cutting material and blade so that a new starting position can be set for the next design. Offline mode can also be accessed while the cutter is in operation and will pause the current cutting process.
- Page 16 SETUP SCREEN The Setup screen allows you to adjust some of the more technical settings of the cutter. For most users, these settings should not be changed. Resets by stopping the cutter, and setting the origin of the carriage arm RESET BUTTON to its right most position.
- Page 17 Cut & Place Vinyl Like A Pro Oracal 8300, 8500, 45° Main Tape 8510, & 8800 Blade GXF-775 or Glass Application R-Tape AT65 Oracal 3951 & 3651 Main Tape 45° Digital Printed HP Gloss & Matte GFX-341 Blade Graphics A good VINYL CUTTER Main Tape 45°...
- Page 18 Connecting The Cutter To A Computer Attach the power cord to the cutter and then plug in the unit and turn on the power. If using the Serial Cable to connect your cutter to a computer: If you are using a Serial Cable to connect your cutter to a computer then no further setup is necessary.
-
Page 19: Preparing For Cutting
Preparing For Cutting If you are going to cut from a scrap or single sheet instead of a roll, then skip the next step on placing a vinyl roll. All other steps will be the same. Place the roll on top of the stand rollers. For heat press vinyl, please flip the roll. - Page 20 Feed the vinyl underneath the pinch rollers (if working from a single sheet instead of a roll, the vinyl can also be feed from the front). Adjust the pinch rollers so there is one roller located on each side of the vinyl (and, on models with 3 or more rollers, one roller near the center).
- Page 21 Leave a gap of between ”-1 ” from the edge of the roller and the edge of the vinyl on both sides. Engage the Pinch Rollers by pushing down on the Pinch Roller Release Levers. If the cutter is not already on, turn it on now. 425.481.3555 www.uscutter.com...
- Page 22 If you would like to change the position of where the cut will be made: Press the OFFLINE/PAUSE button to enter offline mode. Adjust the vinyl to where you want to make your cut to start by using the Up and Down arrow keys on the control panel. Now, adjust the blade to where you want your cut to start by using the Left and Right arrow keys.
- Page 23 Now press the Origin button to tell the cutter that this is the location where you would like the cut to begin. When choosing a starting location for your design, remember that the process will start in the bottom right area of the design. Please leave enough room to the left of and behind the starting location to finish your cut.
-
Page 24: Making Your First Test Cut
Making Your First Test Cut A Basic Guide To Vinyl Cutting Now that you’ve got your system fully the edge of the cutter feed area or you This Test Cut will help you to calibrate assembled let’s take a moment to test increase the risk of a mis-feed that will the machine for this material. - Page 25 CUT SPEED This setting determines how fast the design is cut out and is usually measured in centimeters per second. small intricate DECREASE designs CUT SPEED large simpler INCREASE designs CUT SPEED FORCE/PRESSURE This setting determines how hard the blade comes down onto the material. outer square INCREASE won’t weed...
-
Page 26: Troubleshooting
Troubleshooting PROBLEM SOLUTION The cutter performs erratically Some computers do not work well when connected via the USB port of the cutters. If you are having problems while cutting and are using the USB cable during cuts, stops cutting to connect from your cutter to computer, you may wish to try the serial cable before the cut is finished, or connection to avoid further problems. - Page 27 ISSUE ISSUE Cut has dashes or looks perforated. Cut line tapers and not cutting towards the end. EXAMPLE EXAMPLE CAUSE CAUSE Damaged cutting strip (groove in Dull blade or blade holder isn’t strip) or too much blade is exposed secured properly in slot. (friction build up).
-
Page 28: Care And Maintenance
Care and Maintenance Some Cutter Parts will require periodic replacement: • The blades packaged with your MH cutter will dull with time and usage. In general, the blades with the sharpest points like the 60 degree blade will dull fastest in much the same way that a very sharp pencil point will wear down quickly. -
Page 29: Warranty Statement
• All returns must be authorized by an USCutter representative before the product shipped. The USCutter representative will issue a Return Merchandise Authorization (RMA) number that must be put on the outside of the returned item packaging. US Cutter will not be responsible for any item sent back without an RMA in place and it may be returned to customer only if they will be responsible for any shipping costs. -
Page 30: Hardware Bundles
Hardware Bundles The fastest and easiest way to get started. See USCUTTER.com for all currently offered bundle packs! Heat Press Starter Kit Sign Shop In a Box your garment decorating Good sign shops start business ground with from small packages. This the equipment and a sample of comprehensive... - Page 31 SAME DAY SHIPPING Order by 4:30PM EST USCutter Stencil Kit for Spray Paint, Airbrush Art, Glass Etching USCutter has worked with an airbrush artist to create this unique Stencil Supply Kit. It contains all the supplies you need to cut masking Etched Glass Kit vinyl for lettering and graphics Oracal 8510 gives the professional...
- Page 32 WE RECOMMEND USAGE OF THE FOLLOWING VINYL WITH YOUR NEW MH CUTTER : Copyright © 2019 USCutter All rights reserved. No part of this publication may be reproduced, distributed, or transmitted in any form or by any means, including photocopying, recording, or other electronic or mechanical methods, without the prior written permission of the publisher, except in the case of brief quotations embodied in critical reviews and certain other noncommercial uses permitted by copyright law.
Need help?
Do you have a question about the MH Series and is the answer not in the manual?
Questions and answers