Table of Contents
Advertisement
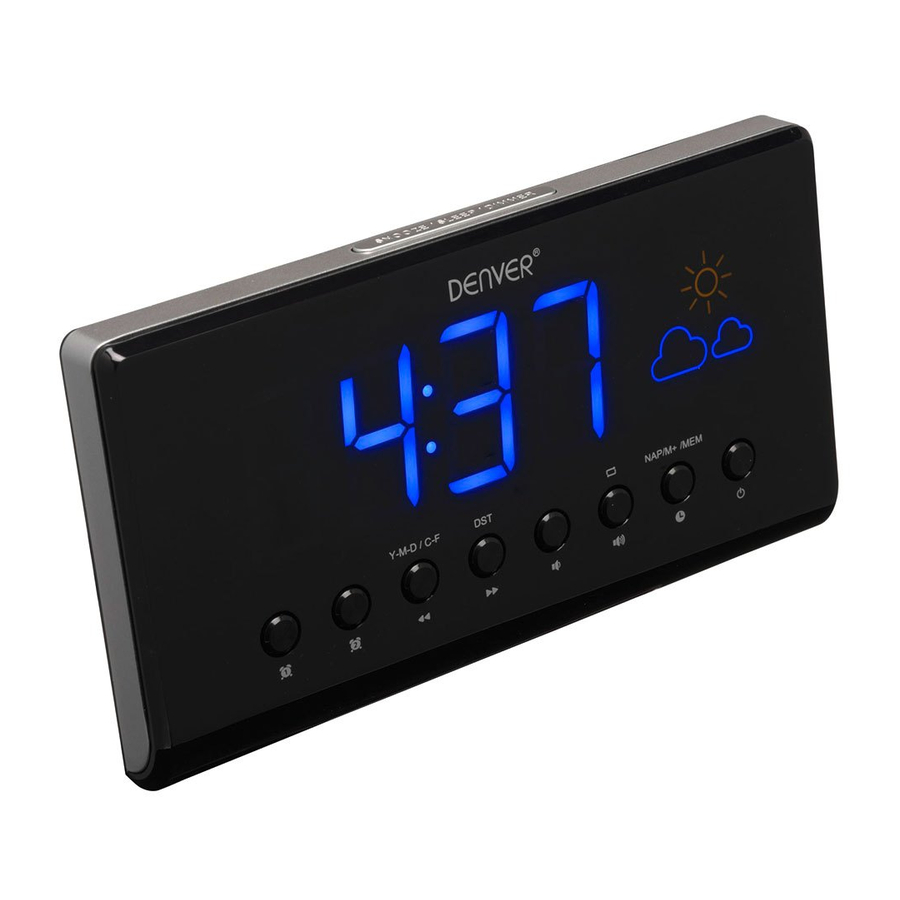
DENVER CRP-718
ENGLISH
FUNCTION AND CONTROLS
1. SNOOZE / SLEEP / DIMMER
2. DISPLAY
3. PM INDICATOR
4. STANDBY INDICATOR
5. ALARM 1 INDICATOR
6. ALARM 1 ON / OFF SET
7. ALARM 2 ON / OFF SET
8. << / TUNE - / YEAR/MONTH/DAY / C-F
9. >> / TUNE + / DST
10. VOLUME DOWN / DISPLAY LIGHT AUTO ON-OFF
11. VOLUME UP / TOGGLE BETWEEN DISPLAY CONTENTS ON-
OFF
12. CLOCK ADJ. / MEM.SET / M+ / NAP
13. ON / OFF RADIO / ALARM OFF
14. WEATHER FORECAST
15. ALARM 2 INDICATOR
16. TEMPERATURE SENSOR (IN DOOR) / HUMIDITY SENSOR
17. AC POWER CORD
18. FM ANTENNA
19. SPEAKER
20. BATTERY COMPARTMENT
21. RATING LABEL
ENG-1
Advertisement
Table of Contents

Subscribe to Our Youtube Channel
Related Manuals for Denver CRP-718


Summary of Contents for Denver CRP-718
- Page 1 DENVER CRP-718 ENGLISH FUNCTION AND CONTROLS 1. SNOOZE / SLEEP / DIMMER 2. DISPLAY 3. PM INDICATOR 4. STANDBY INDICATOR 5. ALARM 1 INDICATOR 6. ALARM 1 ON / OFF SET 7. ALARM 2 ON / OFF SET 8. << / TUNE - / YEAR/MONTH/DAY / C-F 9.
-
Page 2: Led Display Mode
LED DISPLAY MODE TIME POWER CONNECTION Plug the AC power cord to a household outlet AC source. This unit is equipped with a battery back up system, it requires a 3V CR2032 flat lithium battery (not included). Insert the battery in the battery compartment, making certain that the positive and negative (+ and -) battery terminals are attached to the corresponding terminals on the plate in the battery compartment. -
Page 3: Time And Calendar Manual Setting
TIME AND CALENDAR MANUAL SETTING Setting Time and Calendar Press Clock ADJ. (12) button in standby mode and keep depress over 2 seconds to enter time set mode, after enter the setting mode, press Clock ADJ. button (12) to change the mode cycle as follows: Normal →... -
Page 4: Snooze Function
Action (during data adjustment): - Press << / Tune - (8) button to adjust data backward. - Press >> / Tune + (9) button to adjust data forward. - Keep depressed << or >> button for 2 seconds to enable auto forward. -
Page 5: Dimmer Control
DIMMER CONTROL The dimmer button (1) allows you to set the brightness of the LED display to high, medium and low 3 levels. DISPLAY LIGHT AUTO ON/OFF FUNCTION 1. Press display light auto on-off button (10) for 3 seconds, the LED display indicator will light on, the LED display will turn off after 15 seconds automatically. -
Page 6: Radio Mode
to the clock mode. TIME Contents in 10-second intervals Contents in 5-second intervals Contents in 5-second intervals Contents in 5-second intervals RADIO MODE Note: Ensure that the FM antenna is completely unrolled and extended to have the best FM reception. 1. - Page 7 4. Use the Tune+ or Tune- button to select the desired preset station (P01-P10) 5. Press the memory / memory + button again to set the preset. 6. Repeat steps 2 through 5 to set more presets. 7. The unit can preset 10 stations totally for FM. 8.
-
Page 8: Specifications
Weather station predicts possible weather, thus symbols could not agree with current weather. Forecast: SUNNY for night means cloudless sky. Humidity sensor specification: Operating temperature range : 10 ~ 50ºC Operating humidity range : 30 ~ 95% If temperature is below 10ºC or higher than 50ºC, The LED display will show - - % for humidity and not show the weather forecast. - Page 9 ALL RIGHTS RESERVED, COPYRIGHT DENVER ELECTRONICS A/S www.denver-electrionics.com Electric and electronic equipment contains materials, components and substances that can be hazardous to your health and the environment, if the waste material (discarded electric and electronic equipment) is not handled correctly.
- Page 10 SVA PRAVA SU ZADRŽANA, AUTORSKA PRAVA DENVER ELECTRONICS www.denver-electrionics.com Električna i elektronička oprema sadrže materijale, komponente i tvari koji mogu biti opasni za vaše zdravljei okoliš ako se otpadni materijal (odbačena električna i elektronička oprema) ne odlože na propisani način.
Need help?
Do you have a question about the CRP-718 and is the answer not in the manual?
Questions and answers