Table of Contents
Advertisement
Quick Links
Advertisement
Table of Contents

Related Manuals for ACTAtek ACTAtek3 Series

Summary of Contents for ACTAtek ACTAtek3 Series
- Page 1 ACTAtek3 Manual Version 1.2 Nov 11, 2011 ACTAtek Pte Ltd...
- Page 2 ACTAtek Pte Limited Revision History Revision Date Description Author 2010/03/29 Initial Release Cheong / Justin 2011/05/18 Updated chapter 2, chapter 8 Cheong 2011/11/21 -Correct RS232 back panel ports diagram Peter -Update Thailand Office contact info ACTAtek3 Manual...
- Page 3 Pte Limited ACTAtek3 Manual Copyright 2004 - 2011 ACTAtek Pte Limited, All rights reserved. No part of this document may be reproduced, transmitted, transcribed, stored in a retrieval system, or translated into any language, in any form or by any means, electronic, mechanical, magnetic, optical, chemical, manual or otherwise without the prior written permission of ACTAtek Pte Limited.
- Page 4 18, Boon Lay Way, #09-96/97/98 Tradehub 21, 609966 Singapore Phone: 65 65154520 Fax: 65 65154521 E-mail: Sales-asean@actatek.com (Sales Enquiries) ACTATEK (THAILAND) CO. LTD. 416/153 Soi Laphrao 87 Yaek 14, Laphrao Road, Wangtonglang,Bangkok 10310 Thailand Tel/Fax: +66253104876 Mobile: +66809080466 E-mail: Sales-asean@actatek.com (Sales Enquiries) ACTAtek3 Manual...
-
Page 5: Table Of Contents
ACTAtek Pte Limited Table of Contents Chapter 1. Introduction................. 8 1.1. Purpose ....................8 1.2. Document Conventions ................8 1.3. Intended Audience and Reading Suggestion ..........8 1.4. Software References for this document ..........8 Chapter 2. Product Overview ............... 9 2.1. ACTAtek3 Model number ................9 2.1.1. - Page 6 ACTAtek Pte Limited 6.2. Add User ....................24 6.2.1. Adding A New User via Fingerprint..............24 6.2.2. Adding A New User via Smart Card ............26 6.2.3. Deleting A Smart card user .................27 6.2.4. Adding A New User via Password ...............28 6.3. Error Messages ..................29 6.4.
- Page 7 ACTAtek Pte Limited 8.2.3. Adding An Event Log ..................53 8.2.4. View User List .....................54 8.2.4.1. To sort:....................56 8.2.4.2. To Delete/Deactivate/Activate Users: ..........56 8.2.5. To Add New Users ..................57 8.2.5.1. To Add A New User:................57 8.2.6. Departments ....................59 8.2.6.1. To Add a New Department: ...............59 8.2.6.2.
-
Page 8: Chapter 1. Introduction
ACTAtek Pte Limited Chapter 1. Introduction This sections explains the purpose and software references of the ACTAtek3. 1.1. Purpose ACTAtek3 is an Access Control and Time Attendance product which allows users to access its record from any where, at any time and on any platform. -
Page 9: Chapter 2. Product Overview
ACTAtek Pte Limited Chapter 2. Product Overview 2.1. ACTAtek3 Model number Model Number Description Embedded SSL-Web Server with PIN / Camera / ACTA3-[Model]-[Option]-[Others] Smartcard / Fingerprint / Sample up to 10,000 users Table 1.ACTAtek3 Model Number 2.1.1. Legend Model Meaning... -
Page 10: Comparison Between Fingerprint And Smart Card Models
ACTAtek Pte Limited Table 3.Example 2.2. Comparison between Fingerprint and Smart Card Models: Fingerprint + Features Fingerprint ONLY Smartcard ONLY Smart Card Seven-Finger Enrollment Built-in Smart Card Reader Built-in Web and Database Server... -
Page 11: Warranty Note
Warranty for a 1 year period is provided for free, for any extension, please consult your sales agent for details on ongoing maintenance and warranty for your units. Checklist Please check that your ACTAtek3 has come with the following, if anything is missing, contact us at support@actatek.com . ACTAtek3 Unit Instructions CD ... -
Page 12: Operating System (For Access Via Corporate Network)
ACTAtek Pte Limited Unix Machine Apple Macintosh Smart Phone 2.4.2. Network Interface 10 BaseT Ethernet (built-in) RJ45 Cabling for Network Connectivity. Straight Network Cable (White cable, to connect to your corporate network via Hub/Switch) ... -
Page 13: Chapter 3. Actatek3 Structure And Connections
ACTAtek Pte Limited Chapter 3. ACTA3 Structure and Connections 3.1. ACTAtek3 Internal Structure and Connections ACTAtek3 back panel ACTAtek3 Manual... -
Page 14: Connection Details
ACTAtek Pte Limited 3.2. Connection Details: 3.2.1. JP18 Used for 12V 1A power output. 3.2.2. JP20 Used for video output. The output can be connected to any television or monitors with AV input. 3.2.3. Used for alarm purpose, when the case of the unit is open, the alarm will be triggered. -
Page 15: Chapter 4. Fingerprint Notes
ACTAtek Pte Limited Chapter 4. Fingerprint Notes 4.1. Introduction ACTAtek3 uses latest Optical Scanning technology with its own algorithms and matching calculations, a step above other sensors in the market. It must be emphasized that to get an accurate enrollment and quick authentication each time a fingerprint is presented, the fingerprint placement must be towards the center of the scanner. -
Page 16: Good Image Vs Bad Image
ACTAtek Pte Limited 4.3. Good Image vs Bad Image A good fingerprint image is one in which the core of the fingerprint is well-defined and easily recognizable. The core of a finger is defined as the “point located within the inner most recurring ridge”, it is normally located in the MIDDLE of the fingerprint. -
Page 17: Fingerprint Enrollment & Authentication
ACTAtek Pte Limited 4.4. Fingerprint Enrollment & Authentication In order to receive a successful enrollment and authentication, it is critical that the following should be noted carefully. Each successful enrollment will result in a successful authentication and save a lot of time in troubleshooting and erroneous readings. -
Page 18: Fingerprint Enrollment
After each placement, wait for the message “Template Stored” on the LCD screen to appear, and then remove your finger and press “Enter/Return” to enroll the second or third finger(s). you have any questions regarding the enrollment procedure, e-mail us at support@actatek.com . ACTAtek3 Manual... -
Page 19: Chapter 5. Actatek3 Tm Introduction
12V DC Power supply with the network cable securely attached to the port. Once your unit is powered up, the following screen should appear, the ACTAtek logo, the system clock, the Trigger should appear in the left corner, and the date/day of the system in the right corner. -
Page 20: Lcd Module
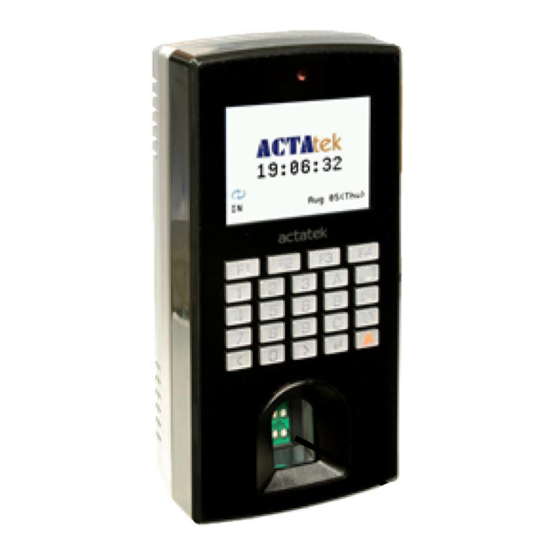
ACTAtek Pte Limited 5.2. LCD Module The Standby Screen displayed when the ACTAtek3 is first powered up is as shown below. It has basic information such as the company logo, time, trigger type, date and day displayed when the system is idle and is not currently in use. -
Page 21: Fingerprint Scanner Module
ACTAtek Pte Limited 5.4. Fingerprint Scanner Module The biometric fingerprint module uses optical scanner technology with a 500 dpi resolution and it can be accessed either with a 1:1 authentication or 1:N authentication. The 1:N authentication, although convenient, has its limitation in the maximum number of users. -
Page 22: Chapter 6. System Configuration
ACTAtek Pte Limited Chapter 6. System Configuration 6.1. Login Logging In to the ACTAtek3 Admin System There are two ways for a Super Administrator to log in to the ACTAtek3 system, one by fingerprint, and two by password. To login via fingerprint, do read up on the fingerprint enrollment procedure and follow the below steps to login. - Page 23 ACTAtek Pte Limited Managing the network settings, including IP assignment, Subnet Mask, DNS, and so on. Resetting the system and other miscellaneous terminal settings can also be done. Each of these steps will be discussed in detail in the following sections, starting from Adding a new user to Exiting from the system.
-
Page 24: Add User
ACTAtek Pte Limited 6.2. Add User 6.2.1. Adding A New User via Fingerprint After successfully entering the Administrator Menu, select the first icon on the top left of the screen, which is for Adding A New User. Add User... - Page 25 ACTAtek Pte Limited After successful enrollment of the third fingerprint, the message “User Added” will be displayed. Press Enter/Return to add another user, or Press the Menu button to go back to the Administrator Menu Screen, or hit Back twice to exit from the system.
-
Page 26: Adding A New User Via Smart Card
ACTAtek Pte Limited 6.2.2. Adding A New User via Smart Card After successfully entering the Administrator Menu, select the first icon on the top left of the screen, which is for Adding A New User. Add User S martcard... -
Page 27: Deleting A Smart Card User
ACTAtek Pte Limited 6.2.3. Deleting A Smart card user After successfully entering the Administrator Menu, select the first icon on the top left of the screen, which is for Adding A New User. Add User S martcard Add user... -
Page 28: Adding A New User Via Password
ACTAtek Pte Limited 6.2.4. Adding A New User via Password After successfully entering the Administrator Menu, select the first icon on the top left of the screen, which is for adding a New User. Press Enter/Return Add User... -
Page 29: Error Messages
ACTAtek Pte Limited 6.3. Error Messages Beware Of.. E rror! B ad Quality! A “Bad Quality” warning will be displayed if the fingerprint enrolled is not of acceptable quality by the system. The reasons for the message could be manifold, either due to too little pressure on the sensor, or too much pressure on the sensor, both of which could result in an inaccurate reading of the fingerprint captured. - Page 30 ACTAtek Pte Limited 1. Access Denied This message will be displayed when and if the user provides invalid login information, such as invalid ID, password, fingerprint or smart card. 2. Unauthorized This message will be displayed when the user tries to login during an unauthorized time period.
-
Page 31: User Management
ACTAtek Pte Limited 6.4. User Management 6.4.1. User Management – Activating A User After enrolling a few users into the system, you can manage them with the User Management option under the Administrator Menu. Select the second icon on the top left of the screen, which is for User Management. -
Page 32: User Management - Deleting A User
ACTAtek Pte Limited Press Enter/Return to deactivate another user, or Press the Menu button to go back to the Administrator Menu Screen, or hit Back twice to exit from the system. 6.4.3. User Management – Deleting A User After enrolling users into the system, you can manage them with the User Management ... -
Page 33: Auto Match
ACTAtek Pte Limited 6.5. Auto Match Auto Match – Enable/Disable After enrolling users into the system via fingerprint, Auto Match may be enabled for individual users. The primary function of Auto Match is to allow users to access the system without inputting their ID first. -
Page 34: To Disable Auto Match
ACTAtek Pte Limited 6.5.2. To Disable Auto Match Select the third icon on the top left of the screen, which is for Auto Match Press ‘Enter/Return’ once “Auto Match” is highlighted. Automatch Automatch √ Automatch E nter ID:... -
Page 35: Date & Time
ACTAtek Pte Limited 6.6. Date & Time Date & Time Function ACTAtek3 can be used as both an Access Control system, as well as a Time Attendance System. For this reason, it is critical to set the correct date & time function, so that the unit works and records the correct time of the attendance data for payroll or other HR purposes. -
Page 36: To Modify The Time Settings
ACTAtek Pte Limited 6.6.2. To Modify the Time Settings Select the icon on the top right of the screen, which is for Date & Time Settings. Press ‘Enter/Return once “Date & Time” is highlighted. Press the ‘Previous and Next Button’(s) until the “Adjust Time” option is highlighted. -
Page 37: Ip Address Configuration
ACTAtek Pte Limited 6.7.1. IP Address Configuration Select the icon on the bottom left of the screen, which is for IP Settings. Press ‘Enter/Return’ once IP Settings is highlighted. Press the ‘Previous/Next’ buttons to highlight “IP Address”, press ‘Enter/Return’. -
Page 38: Dns Ip Configuration
ACTAtek Pte Limited 6.7.3. DNS IP Configuration Select the icon on the bottom left of the screen, which is for IP Settings. Use the Previous / Next button until the DNS IP* option is highlighted. Press Enter/Return ... -
Page 39: Dhcp Ip Configuration
ACTAtek Pte Limited 6.7.5. DHCP IP Configuration DHCP Configuration allows for IP Addresses to be dynamically assigned, and match with that of the corporate LAN settings. With this option, the IP Settings do not have to be statically assigned and the process can be simplified. Below are the steps for enabling or disabling the settings. -
Page 40: Terminal Settings
ACTAtek Pte Limited 6.8. Terminal Settings 6.8.1. Terminal Settings Function The terminal settings feature allows users to set the ACTAtek3 in a multi-user environment. Moreover, the Terminal Settings option can allow users to set the Security Level from High to Low, with High Fingerprint Security allowing for maximum minutiae to be accounted for during authentication. -
Page 41: No. Of Fp Sample
ACTAtek Pte Limited 6.8.2. No. of FP Sample Select the second icon on the bottom left of the screen, which is for Terminal Settings. Use the Previous / Next button until “No. of FP Sample” is highlighted. Press Enter/Return ... -
Page 42: System Reboot
ACTAtek Pte Limited 6.8.4. System Reboot Select the second icon on the bottom left of the screen, which is for Terminal Settings. Use the Previous / Next button until “Reboot” is highlighted. Press Enter/Return to reboot the unit. -
Page 43: Resetting The Event Log
ACTAtek Pte Limited 6.9.1. Resetting the Event Log Select the third icon on the bottom left of the screen, which is for Reset Setting. Use the Previous or Next button until “Event Logs” is selected Press Enter/Return ... -
Page 44: Factory Default
ACTAtek Pte Limited 6.9.3. Factory Default Select the third icon on the bottom left of the screen, which is for Reset System. Use the Previous or Next button until “Factory Default” is selected. Press Enter/Return A message “System Reset!” will be displayed once the system has been successfully ... -
Page 45: Chapter 7. Web Administration
Internet Explorer or Netscape Navigator. We have used Internet Explorer as our demonstrative guide; it works the same way with Netscape or any standard web browser. For queries regarding this, contact us at support@actatek.com. ACTAtek3 permits for 4 access... -
Page 46: Ssl Certification - Data Encryption
ACTAtek Pte Limited 7.1. SSL Certification – Data Encryption When http://192.168.1.100 (default IP Address of the ACTAtek3 unit) is typed on the address bar of IE or netscape or any other web browser, the login page will appear. Click on “Secure”... -
Page 47: Terminal Status
ACTAtek Pte Limited 7.2. Terminal Status The first page displayed, as above, will be the same no matter which login is chosen. It will show a brief status of the terminal. The information displayed includes: Feature Description Model Number The Model Number of your ACTAtek3 unit. -
Page 48: Chapter 8. Super Administration Guide
ACTAtek Pte Limited Chapter 8. Super Administration Guide 8.1. Overview After logging in under Super Administrator (Default ID: A999, password: 1), the left panel will differ from the other administrator(s), as can be seen below. All options will be available for configuration and modification of the system and user configurations. -
Page 49: Terminal
3. Terminal List - To view the list of terminals connected. 4. Access Client Setup - To setup the ACTAtek to the Access Manager 5. Door Open Schedule - To view or modify the door opening schedule. 6. Bell Schedule - To view or modify the bell schedule period. -
Page 50: Tools
- To backup the system data. 5. Restore System Data -To restore the system data from a previous setting 6. Firmware Upgrade - To upgrade the firmware provided by ACTAtek Ltd. 7. Download Report -To download access log report in Excel or Txt format 8. -
Page 51: User Administration
ACTAtek Pte Limited 8.2. User Administration 8.2.1. Attendance Report Under User Administration, select the option listed as “Attendance Report”, by clicking this following screen should be displayed: This report will give you a summary of the IN/OUT of any given user (up to 10 sets of IN/OUT). - Page 52 ACTAtek Pte Limited ACTAtek3 Manual...
-
Page 53: View Event Log
ACTAtek Pte Limited 8.2.2. View Event Log Under User Administration, the first option listed is “View Event Log”, by clicking this following screen should be displayed: There are 6 different searching options available to view the Event Log which include “User Name”, “User ID”, “Department”, “Event”... -
Page 54: View User List
ACTAtek Pte Limited Select “Add Event Log” under User Administration from the left of your screen, and the above screen should be displayed. Enter the Employee ID for whom the event is being added, and enter the Date & Time in yyyy/mm/dd &... - Page 55 ACTAtek Pte Limited The information listed in a user entry is “User ID” followed by “Last Name”, “First Name”, “Other Name”, “Active, FP”, “SMC”, “PSW”, “A/M” and “IN/OUT”. Description of Information displayed: Feature Description Active The Status of the User: Black –Active , Grey - Inactive Whether Fingerprint is an available authentication option.
-
Page 56: To Sort
ACTAtek Pte Limited 8.2.4.1. To sort: To sort the list, click on the column header, for instance, to sort by Last Name, click on the column header “Last Name”, which is in blue, and the list will be sorted in alphabetical order. -
Page 57: To Add New Users
ACTAtek Pte Limited 8.2.5. To Add New Users There are 2 ways of adding users to the system; you can either add them directly at the web interface, or at the terminal. We have already discussed how to add a user at the terminal (in Section 5.2), now let us look at how to add a user directly from the web interface. - Page 58 ACTAtek Pte Limited Select the status of the user, whether they can use Auto Match or Password, and click “Add” to add the new user. ACTAtek3 Manual...
-
Page 59: Departments
ACTAtek Pte Limited 8.2.6. Departments This option under User Administration can be used to Add new departments, modify existing departments or delete them. 8.2.6.1. To Add a New Department: Click on “Departments” under User Administration from the left column. Enter the Department Name, and description and click “Add”... -
Page 60: User Messages
ACTAtek Pte Limited 8.2.7. User Messages This option can be used to send personalized messages to individual users, who will be able to view them once they are authenticated at the ACTAtek3 unit. 8.2.7.1. To Add a New Message: Click on “User Messages” under User Administration on the left column, the following screen should be displayed. -
Page 61: To Delete An Existing User Message
ACTAtek Pte Limited 8.2.7.2. To Delete an existing User Message: Check the box of the relevant message, and if all need to be checked, click “Select All”, and hit “Delete”. If the delete does not need to be made, click “Deselect All” to uncheck all boxes. -
Page 62: Access Control
ACTAtek Pte Limited 8.3. Access Control 8.3.1. Access Groups An Access Group allows for users to be given standard access for the workplace. Different departments may have different access rights and some corporations have employers who are on shift duties, and may need different access levels for each shift, depending upon their time of entry and exit from the workplace. -
Page 63: To Add A New Access Group
ACTAtek Pte Limited 8.3.1.2. To Add a New Access Group Under “Add Access Group”, select the relevant Department from the drop down menu and input the name of the access group being added, and click “Add”. 8.3.1.3. To Modify an Access Group Click on the access group number to view the Access Group. -
Page 64: To Add A New Access Right
ACTAtek Pte Limited 8.3.1.4. To Add a New Access Right Click on “Add Access Right”. Select which terminal this access right is for and whether Quick Access (Smart Card Access) is enabled or disabled for it. Click on “Set Terminal” for proceed, as shown in the following page. -
Page 65: To Delete/ Modify Access Right
ACTAtek Pte Limited By default all access is disabled. You can now either add another time setting for the same access right by select “Set Time” or create another Access right by selecting “Submit & Create another Access Right” and repeat the above steps, or confirm this access group by clicking “Submit Access Group”. -
Page 66: Triggers
ACTAtek Pte Limited 8.3.2. Triggers 8.3.2.1. To View or Modify Existing Trigger List The “Triggers” option under Access Control shows you a number of different triggers preset into the system; this is for easy monitoring of attendance and other options. To view the list of triggers in the system, click on “Triggers”... - Page 67 ACTAtek Pte Limited To modify the time settings & other information for the relevant trigger displayed, The information to be modified includes: Trigger Name - Display name for the Trigger. - The days for the setting to be adjusted. From (Time) - Select the onset of this trigger.
-
Page 68: Holidays Settings
ACTAtek Pte Limited 8.3.3. Holidays Settings The Holidays Settings option is for companies that have unique access rights or options for those days. Holiday setup can be done from “Access Rights Control” by clicking on “Holidays”, which will show the following screen: To add a new holiday, either click on the calendar to find the dates to add. -
Page 69: Terminal Settings
ACTAtek Pte Limited 8.4. Terminal Settings 8.4.1. Terminal Setup To make any system configuration changes to the system, click on Terminal Setup under “Terminal Settings” from the left column. All system changes that are technically related will be available from this option for the network administrator. - Page 70 ACTAtek Pte Limited Terminal Mode - If you choose Access Manager mode, you will be able to connect this unit to the Access Manager. Door Strike 1 Option - Setting for Door Strike connectors. Relay Delay - This will keep the door open for the seconds specified.
-
Page 71: Terminal List
ACTAtek Pte Limited 8.4.2. Terminal List The “Terminal List” option under “Terminal Settings” can be used to view the list of terminals, and their respective name, type, serial number and IP Address, as shown below. This will show all the units in connection with this unit, including all secondary and primary units connected through the network. - Page 72 ACTAtek Pte Limited ACTAtek3 Manual...
-
Page 73: Bell Schedule
ACTAtek Pte Limited 8.4.4. Bell Schedule The Bell Schedule option needs to be enabled via Door Strike 2 Option under Terminal Setup page. Once enabled, ACTAtek3 is able to trigger a bell wired to the door strike 2 connector for the scheduled time. -
Page 74: Terminal Clock
ACTAtek Pte Limited 8.4.5. Terminal Clock The “Terminal Clock” can be modified according to the region you are in. It is extremely useful to have a correct timing for all time attendance purposes or for reporting purposes since that’s the time the system will record for any access. -
Page 75: External Devices
ACTAtek Pte Limited 8.4.6. External Devices (Reserved) To add any external devices, which include External Mifare Reader, or other smart card readers, the “External Devices” option can be used. To do so, click on “External Devices” under Terminal Settings, and the following page should be displayed. -
Page 76: Terminal
ACTAtek Pte Limited 8.5. Terminal 8.5.1. Backup System Data Backing up is an essential part of any computer parts or Internet Appliance. It can provide the added security and flexibility that is needed for these devices. With the Backup System Data feature, the system’s configuration files can be saved, so as the user data. -
Page 77: Restore System Data
ACTAtek Pte Limited 8.5.2. Restore System Data Once backup is complete and the changes made to the system since the previous backup caused the system to work improperly or malfunction, you can always rollback to the previous setup by selecting the “Restore System Data” option under Tools in the left column. -
Page 78: Firmware Upgrade
Firmware releases will be carried out on a regular basis, first with a monthly release, then quarterly and then an annual release. ACTAtek will continue to add new features to its unit and have a monthly firmware upgrade to include those features for our clients. - Page 79 ACTAtek Pte Limited Reports can be downloaded by various different options, as shown below. Reports can either be downloaded by: User Name User ID Department Period From/To (Date yy/mm/dd) Event Format – CSV or Text Click “Download” for the report to be downloaded to your system for payroll or other management purposes.
-
Page 80: Capture Fingerprint
Fingerprint”. Once the fingerprint is captured, it can be viewed via the web interface, as shown below. These images should only be used for analysis purposes, and ACTAtek is not liable for any mis-use of these images, please also note that all fingerprint data collected can only be used for scanner analysis and serve no other purposes. -
Page 81: Remote Door Open
ACTAtek Pte Limited 8.5.6. Remote Door Open Most organizations or corporations or even small business have visitors coming in and out for meetings, or to drop parcels, etc. Those visitors are not enrolled in the system since they are not part of the company’s payroll or should not have access to the office at odd hours. -
Page 82: Reboot
ACTAtek Pte Limited 8.5.7. Reboot To reboot the ACTAtek3 remotely, the 'Reboot' option can be selected. Click on the 'Reboot' button to reboot the unit. ACTAtek3 Manual...
Need help?
Do you have a question about the ACTAtek3 Series and is the answer not in the manual?
Questions and answers