Keit IRmadillo User Manual
Rugged ftir spectrometer for real-time process analysis
Hide thumbs
Also See for IRmadillo:
- User manual (41 pages) ,
- User manual (32 pages) ,
- User manual (17 pages)

Related Manuals for Keit IRmadillo


Summary of Contents for Keit IRmadillo
- Page 1 User Manual Rugged FTIR Spectrometer for Real-Time Process Analysis www.keit.co.uk support@keit.co.uk DOC0535 10 July 2019, 16:56...
-
Page 2: Table Of Contents
1. Introduction ......................7 Introduction to the IRmadillo ................... 7 Brief introduction to infrared spectroscopy .............. 7 How FTIR spectrometers work ................8 What makes the IRmadillo different? ..............8 2. System overview ....................9 System configuration .................... 10 Controller ......................10 Software ....................... -
Page 3: User Manual
4.4.1 Uninterruptible power supply (UPS) ............... 20 4.4.2 Ensuring a power connection to the spectrometer ......... 20 Table 1 – IRmadillo power specifications ..............20 4.4.3 Connecting the power cable to the instrument ..........21 Data communication connection ................23 4.5.1... - Page 4 User Manual Page 4 Modbus communications ..................60 6.1.1 Configure Keit controller ................60 6.1.2 Holding registers .................... 62 6.1.3 Representation of data in Modbus ..............62 6.1.4 Modbus RTU tutorial ..................63 Modbus TCP server ....................66 6.2.1 Getting started with Modbus TCP ..............67 OPC-UA ........................
- Page 5 Appendix 2: Controller Specifications ..............98 Appendix 3: Technical Drawings IRmadillo ............101 Appendix 4: Declarations of Conformity ............104 Declaration of Conformity - IRmadillo (Ex-Certified Spectrometer) ........ 104 Declaration of Conformity - Controller ................105 Declaration of Conformity – Flow Cell ................106 FCC Class A emissions statement ................
-
Page 6: Contact Keit
User Manual Page 6 Contact Keit Website: www.keit.co.uk Postal address: Keit Ltd. Unit 4, Zephyr Building Eighth Street, Harwell Campus Didcot Oxfordshire OX11 0RL United Kingdom Telephone number: +44 (0) 1235 431260 Support email: support@keit.co.uk The triangle symbol on the product label means essential safety information must be followed to prevent user injury or damage to the instrument. -
Page 7: Introduction
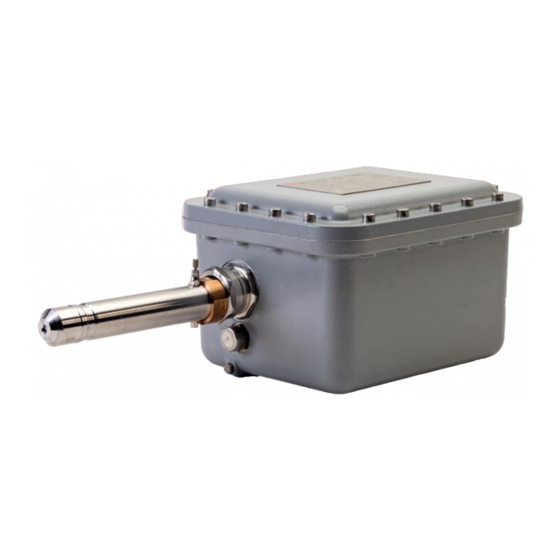
The IRmadillo has no moving parts and a rigid probe which is inserted directly into the reaction vessel or process pipeline for continuous real-time analysis. The device is tolerant of extreme vibration levels. -
Page 8: How Ftir Spectrometers Work
What makes the IRmadillo different? The IRmadillo is an FTIR instrument in that it creates an interferogram and requires a Fourier transform to interpret the information for a spectrum. But rather than using a moving mirror to create the interferogram it uses a proprietary arrangement of fixed mirrors to create an interference pattern. -
Page 9: System Overview
Page 9 System overview www.keit.co.uk System overview: DOC0535 10 July 2019, 16:56 Back to Table of Contents... -
Page 10: System Configuration
(VDU), and mouse. Controller The controller is delivered with the spectrometer software (Keit Spec) pre-installed. The standard industrial controller allows direct connection of the system cables. The controller is an industrial-grade computer which performs signal processing and provides spectra and chemometrics data to the DCS. -
Page 11: Safety
Do not use the probe as a carry handle. It will be damaged if used to support the instrument. It is the responsibility of the user to suitably risk assess the handling of the instrument and provide suitable equipment if necessary. www.keit.co.uk Safety: DOC0535 (10 July 2019, 16:56) Back to Table of Contents... -
Page 12: Electrical Safety
User Manual Page 12 Electrical safety The Keit-supplied electrical mains cable must be earthed and WARNING should include a 5A fuse as well as a means of isolating both live and neutral; obey local electrical safety codes. An additional earth connection must be provided to the WARNING enclosure chassis exterior via the provided M6 screw. - Page 13 • The media to be monitored must be an area where dust particles are excluded • The dip probe must be mounted so that it is protected from impact • Contact Keit for advice regarding material compatibility before installing the spectrometer in a process www.keit.co.uk...
-
Page 14: Pressure Safety Notes
The suitability of the instrument for various pressures, temperatures and their rates of change is process dependent (even if the limits are within those marked on the product label). Contact Keit for advice before installing the spectrometer in a process. -
Page 15: Installation
The Ex certifications for this product do not cover protection from flammable or explosive dusts. www.keit.co.uk Installation: DOC0535 (10 July 2019, 16:56) Back to Table of Contents... -
Page 16: Spectrometer Components
User Manual Page 16 Spectrometer components See Appendix 3: Technical Drawings IRmadillo for detailed drawings 4.2.1 Product label (A) The product label specifies the model of instrument with permissible environmental and analyte operating conditions, along with applicable certification. www.keit.co.uk Installation: DOC0535 (10 July 2019, 16:56) -
Page 17: Probe Purge Outlet (B)
4.2.4 ATR Element (D) The ATR element at the end of the probe is made of an infrared glass that will be damaged by chemicals with pH >9. Contact support@keit.co.uk for advice before installing the spectrometer in a process. The material of the ATR element is fragile. It is important to keep the element clean because this is where the spectrometer interacts with analytes. -
Page 18: Power Cable Port (J)
More detail on how to connect them to the cables is given on page 19 in section Electrical installation. 4.2.11 Mounting holes (K) The spectrometer should be supported using the four M8 mounting holes in its base. Note that the spectrometer weighs~18 kg. www.keit.co.uk Installation: DOC0535 (10 July 2019, 16:56) Back to Table of Contents... -
Page 19: Connection To A Vessel Or Pipeline For Measuring
Probe installation into the analyte or process fluid is unique for each application and is not covered in this user guide. Safe installation of the probe into the process is the responsibility the user and should be assessed by a suitably trained person. www.keit.co.uk Installation: DOC0535 (10 July 2019, 16:56) Back to Table of Contents... -
Page 20: Electrical Installation
Unless otherwise specified, the power cable will be delivered blunt cut. The spectrometer is designed to operate over a wide range of voltages shown below in Table 1. If you plan to operate the spectrometer outside of these ranges, contact Keit for advice before powering up the instrument. -
Page 21: Connecting The Power Cable To The Instrument
Never leave an exposed fibre connector. Tighten the set (grub) screws on the power and data cables NOTE when connected. This is a condition of use for these connectors. www.keit.co.uk Installation: DOC0535 (10 July 2019, 16:56) Back to Table of Contents... - Page 22 Step 6. Connect the power cable to the mains power supply. Step 7. The spectrometer is now powered up and will start thermally stabilising. www.keit.co.uk Installation: DOC0535 (10 July 2019, 16:56) Back to Table of Contents...
-
Page 23: Data Communication Connection
Note: The Data Link display light on the front of the controller will not come on when the spectrometer is connected to the controller via USB. www.keit.co.uk Installation: DOC0535 (10 July 2019, 16:56) Back to Table of Contents... -
Page 24: Connecting The Fibre Data Communication Cable To The Controller
Protect the data communication fibre from stress and tight bends (< 80mm bend radius not allowed!). Tight bends cause NOTE a stress at the glass surface and increase the probability of fracture. www.keit.co.uk Installation: DOC0535 (10 July 2019, 16:56) Back to Table of Contents... -
Page 25: Purging The Unit
User Manual Page 25 Purging the unit The IRmadillo spectrometer is designed to be continuously purged. This eliminates any interference in operation caused by water vapour and carbon dioxide within the instrument; both interact strongly with infrared (IR) light. Suitable purge gases: •... -
Page 26: Stabilisation Period
Page 26 Stabilisation period The IRmadillo requires a stabilisation period of >12 hours once powered on and purged. This is to allow the internal components to reach a stable temperature and humidity. Once fully dried out the instrument is very robust against changes in ambient conditions, provided a purge gas supply is maintained. -
Page 27: Using The System And Software
This manual describes the Keit Spectrometer Software (Keit Spec) version 4.0.7. Getting started Keit Spec uses the concept of projects to store spectral data. Two types of project are available: (1) Manual Sample Acquisition and (2) Continuous Collection. 5.2.1 Manual sample acquisition This is an operation mode that allows you to collect individual samples, either for bench analysis or as part of chemometric model-building. - Page 28 Click on the Background Scan button and choose Collect Background. Because all subsequent scans will use the background scan to calculate the absorbance, it is very important to scan for as long as possible to optimise performance. The IRmadillo NOTE does not need frequent new background scans to be collected, so it is worth investing time in a high-quality background scan at the beginning of use.
-
Page 29: Manual Sample Acquisition
You can now remove the probe from the sample, thoroughly clean the probe and ATR element, then insert the probe into the next sample and start the next collection. www.keit.co.uk Using the system and software: DOC0535 (10 July 2019, 16:56) Back to Table of Contents... -
Page 30: Monitoring A Reaction Or Process
The IRmadillo is designed for reaction and process monitoring. The Keit Spectrometer Software (Keit Spec) saves data directly to a database as spectra are generated. This means you can perform some interpretation during use with a chemometric model generated with various external packages, as well as exporting the data into text files for further analysis. -
Page 31: The Spectrometer Tab
User manual Page 31 The Spectrometer tab When you start the Keit Spectrometer Software (Keit Spec) you will see the Spectrometer screen which provides information to help you set up the instrument and ensure that it is working properly. After starting the software wait a few seconds for the spectrometer to connect and for the internal electronics to activate and the emitter to warm up. - Page 32 Show Debug Info Displays additional information in the main interface (i.e., return spectrum number, and FFT processing time) which may be useful when diagnosing performance issues. www.keit.co.uk Using the system and software: DOC0535 (10 July 2019, 16:56) Back to Table of Contents...
- Page 33 Export Background to Text file Allows you to save the background reference spectrum in a human-readable format for occasions when you’d like to carry out calculations using it. www.keit.co.uk Using the system and software: DOC0535 (10 July 2019, 16:56) Back to Table of Contents...
- Page 34 To return to Normal Running Mode, either click Dismiss or close the Cleaning Mode window. www.keit.co.uk Using the system and software: DOC0535 (10 July 2019, 16:56) Back to Table of Contents...
- Page 35 This control is also available CAUTION over the various automation interfaces (Modbus, OPC-UA). Ensure that your sterilisation cycle does not exceed the temperature rating of your probe. www.keit.co.uk Using the system and software: DOC0535 (10 July 2019, 16:56) Back to Table of Contents...
-
Page 36: Manual Sample Acquisition
After each sample has been collected, information about it will appear in this panel. Each line refers to a different measurement. To display the absorption spectrum for that sample www.keit.co.uk Using the system and software: DOC0535 (10 July 2019, 16:56) - Page 37 F. Configure Chemometrics The Keit Spec application contains analysis engines that can use chemometric models generated by a number of software vendors. When a model is configured, a summary of the results output is visible in the data panel (E).
- Page 38 This is useful if (for example) you discover that your probe was not clean when you collected the original background spectrum, which would mean that all data collected subsequently will be incorrect. www.keit.co.uk Using the system and software: DOC0535 (10 July 2019, 16:56) Back to Table of Contents...
- Page 39 Use this button to display a contextual menu to allow the plot display to be adjusted. This menu can also be found by right-clicking on the plot. www.keit.co.uk Using the system and software: DOC0535 (10 July 2019, 16:56) Back to Table of Contents...
- Page 40 Windows clipboard, an Excel spreadsheet (requires a working copy of Microsoft Excel to be installed), or as an image. www.keit.co.uk Using the system and software: DOC0535 (10 July 2019, 16:56) Back to Table of Contents...
-
Page 41: Configure Acquisition
Configure acquisition A. Chemometrics Panel The Keit Spec application contains analysis engines that can use chemometric models generated by a number of software vendors. When a model is configured, a summary of the results output is visible in this panel. - Page 42 OPC server license). Turn this feature on to enable control over OPC-UA. D. Publishing Rate This controls how quickly results are published via OPC or Modbus. www.keit.co.uk Using the system and software: DOC0535 (10 July 2019, 16:56) Back to Table of Contents...
- Page 43 G. Last Background Displays the date and time that the current background spectrum was collected. www.keit.co.uk Using the system and software: DOC0535 (10 July 2019, 16:56) Back to Table of Contents...
-
Page 44: Batch Viewer
The X and Y ranges of the plot are scaled to show the whole spectrum. If you wish to concentrate on a smaller range, unchecking these options will prevent the plot rescaling each time a new sample is displayed. www.keit.co.uk Using the system and software: DOC0535 (10 July 2019, 16:56) Back to Table of Contents... - Page 45 You may choose to export only the data that is currently displayed in the Trends panel (as Viewed) or all the data in the batch. www.keit.co.uk Using the system and software: DOC0535 (10 July 2019, 16:56)
- Page 46 Hovering the mouse over the panel will cause the spectrum related to that point in time to be displayed in the Spectrum panel (C). www.keit.co.uk Using the system and software: DOC0535 (10 July 2019, 16:56)
- Page 47 You may choose to export only the data that is currently displayed in the Trends panel (as Viewed) or all the data in the batch. www.keit.co.uk Using the system and software: DOC0535 (10 July 2019, 16:56)
- Page 48 Autoscale (Default) shows the whole batch data. Leading shows the most recently collected data, with history defined by the range set on the context menu (right-click on the plot). www.keit.co.uk Using the system and software: DOC0535 (10 July 2019, 16:56) Back to Table of Contents...
-
Page 49: Reaction Monitor
The alarm is indicated in the ALARM column in the Metrics panel. C. Chart Display Settings Chart History Length (sec) Adjusts the history duration on the monitoring plots. www.keit.co.uk Using the system and software: DOC0535 (10 July 2019, 16:56) Back to Table of Contents... - Page 50 The various parameters that are being monitored are displayed in this panel with the various control limits shown (if specified), based on the alarm settings for each parameter. www.keit.co.uk Using the system and software: DOC0535 (10 July 2019, 16:56) Back to Table of Contents...
-
Page 51: Configure Chemometrics
Keit software. Export the model file from your analysis software, and then load it into the Keit software. The data stored in the current batch or project will be re- analysed against the model and the results presented in the Trends panel of the Batch viewer tab (for continuous project), or the Data panel of the Sample Acquisition tab (for manual projects). - Page 52 C. Statistics Panel The model statistics associated with the chemometric model that is selected in the Current Models panel are shown in this panel. www.keit.co.uk Using the system and software: DOC0535 (10 July 2019, 16:56) Back to Table of Contents...
-
Page 53: Supported Model Types
Q-residuals. These values will be shown as NaN in Keit Spec. It is possible to apply multiple models or pretreatments sequentially in Camo, but it may be necessary to export the whole Camo file and then select the final model from within Keit Spec. See Section 5.8.3 Common chemometrics errors. -
Page 54: Editing Camo Model Settings
C. Information about the current model, including how it was built, when it was imported and the file path that it was loaded from. www.keit.co.uk Using the system and software: DOC0535 (10 July 2019, 16:56) Back to Table of Contents... -
Page 55: Common Chemometrics Errors
Camo, but not all Error in a sub-model file such correct model from within the models have been as MSC/EMSC/OSC. Keit Spec (see Section 5.8.2 loaded into Keit Spec. Editing Camo model settings). Classifier models: The Error 5151 occurred at... -
Page 56: Log Viewer
The Keit Spec application logs changes that are made to its configuration, various events and performance information about the spectrometer. Logs are also useful in case you need to contact Keit for service assistance. A log file is created for each month that the instrument is operating. - Page 57 Log Level Serious Standard Verbose Debug Instrument Errors Application events (starting/stopping) Settings Changes Settings configuration errors, non-fatal errors and warnings. www.keit.co.uk Using the system and software: DOC0535 (10 July 2019, 16:56) Back to Table of Contents...
- Page 58 Each log entry is displayed in a new row in the table. Hover the mouse pointer over long fields to display information that overflows the space that you have available. www.keit.co.uk Using the system and software: DOC0535 (10 July 2019, 16:56)
-
Page 59: Offline Viewer
Page 59 5.10 Offline viewer Project files can be opened in the Keit Offline Viewer software. The software is installed alongside the Keit Spec application on your computer. When the software opens, choose the project file that you want to view. The interface that is displayed will depend on the type of project that you open and appears very similar to the relevant tab (either Manual Sample Acquisition or Batch Viewer) of the main application. -
Page 60: Data Communication Integration And Configuration
(DCS). Both of these Modbus interfaces are very similar, so the Modbus RTU is described fully first before introducing Modbus TCP/IP. 6.1.1 Configure Keit controller To enable either of the Modbus interfaces they must be enabled on the Configure Acquisition tab. - Page 61 C. Register List The Modbus registers that are available from the IRmadillo are shown in this panel, along with their addresses. Clicking on a register will cause a description of its contents and its data to be displayed in the box below (D). Note that: Input registers are used to read data from the spectrometer.
-
Page 62: Holding Registers
Collects a new background scan. Scan Test Dialog Pops up a dialogue box in Keit Spec. Can be used to test the communication. 6.1.3 Representation of data in Modbus Modbus uses different methods to represent data of different types. These are described in the table below. -
Page 63: Modbus Rtu Tutorial
First, you will need to setup a serial link to the controller from the master computer (e.g., your desktop PC). Find the serial port’s COM number using device manager (in this example it is COM8). Right click and set the port settings to match those in Keit Spec (Usually only the Bits per second need changing). - Page 64 To start device communication, click on the new file icon, top left. This will open a window with a list register addresses and their contents as shown below. www.keit.co.uk Data communication: DOC0535 (10 July 2019, 16:56) Back to Table of Contents...
- Page 65 Similarly, the names of the metrics can be read from address 8000 and using the “[“ and “]” delimiters to identify the start and end of the string array. This gives: “Sucrose”, “Glucose”, “Fructose”, “Organic acids”, “Ethanol”, “OD” and “pH”. www.keit.co.uk Data communication: DOC0535 (10 July 2019, 16:56) Back to Table of Contents...
-
Page 66: Modbus Tcp Server
E. Register View Displays the contents of the register that is selected in the list above. Check the ‘Show in Hex’ box to view the data in hexadecimal format. www.keit.co.uk Data communication: DOC0535 (10 July 2019, 16:56) Back to Table of Contents... -
Page 67: Getting Started With Modbus Tcp
On the controller, open a windows CMD window and type ‘ipconfig’. This will provide you with the IPv4 address: The Radzio connection settings will then become: www.keit.co.uk Data communication: DOC0535 (10 July 2019, 16:56) Back to Table of Contents... -
Page 68: Opc-Ua
OPC-UA requires an active connection to a local network that is shared with the computers or control hardware that will consume the data that the IRmadillo generates. A. Communication settings Configure the communications port to match your plant control system settings. -
Page 69: Licensing The Opc-Ua Server
Once the license is activated, turn on the “Enable OPC-UA server” switch on the OPC-UA Server tab in the Keit Spec software. When the OPC-UA server is active, it will be visible on the local network that the IRmadillo control computer is connected to. -
Page 70: Uaexpert Client
“address space” of data items being served. See Illustration below. This can be used to experiment with changing the “Control” items, which are used to command “Keit Production OPC”. For example, changing the Value of “Control.Command” to “Collect Baseline” will cause a new baseline to be collected. - Page 71 The server will generally reply to an instruction by setting “Command” to the same instruction preceded by “-->”. The server will also write status messages to “Command”; these always start with “-->”. www.keit.co.uk Data communication: DOC0535 (10 July 2019, 16:56) Back to Table of Contents...
- Page 72 Reset Spectrometer Performs a hardware reset. Reenable Sagnac TEC Reenables Sagnac TEC. Test Dialog Opens a dialog in the detector component, just to demonstrate communication. www.keit.co.uk Data communication: DOC0535 (10 July 2019, 16:56) Back to Table of Contents...
-
Page 73: Controller Administrator Guidance
Page 73 Controller administrator guidance When connecting Keit’s controller to communicate to your distributed control system (DCS) using Ethernet, you will need to connect it to your local area network (LAN). Some changes may be required to ensure compliance with your internal Information Technology (IT) policies. -
Page 74: Connecting The Spectrometer To Camo Analytics' Process Pulse
In event mode, Process Pulse reads data and imports only if the values have changed. Gathered Absorbance Data Type Once data type is chosen, the user has the possibility to manage tag names. www.keit.co.uk Data communication: DOC0535 (10 July 2019, 16:56) Back to Table of Contents... - Page 75 Finally, a preview of the data to be collected is shown so that a final validation of the settings can be done before completing the data source setup. www.keit.co.uk Data communication: DOC0535 (10 July 2019, 16:56) Back to Table of Contents...
-
Page 76: Maintenance
Page 76 Maintenance There are no user-serviceable parts inside. Please contact Keit or our local agent to arrange service or repair. Service should only be performed by suitably trained engineers. Service and support contacts Website: www.keit.co.uk Postal address: Keit Ltd. -
Page 77: Cleaning Instructions: Infrared Glass Probes
The metal tube of the probe can also be cleaned by wiping with a cloth. • For hard to remove fouling (such as biofilms or dried on chemicals) Keit recommends an oxidative acid clean. To perform this: o First clean the ATR using the methods outline above... -
Page 78: Cleaning Instructions: Diamond Probes
The metal tube of the probe can also be cleaned by wiping with a cloth. • For hard to remove fouling (such as biofilms or dried on chemicals) Keit recommends an oxidative acid clean. To perform this: o First clean the ATR using the methods outline above... -
Page 79: Cleaning Prior To Sterilise-In-Place (Sip)
SIP. This is especially important if you perform a dry SIP process. Contact Keit for advice before subjecting your probe to an SIP process. Failure to clean the probe before SIP may result in permanent CAUTION: damage to the ATR element and will invalidate the warranty. - Page 80 Step 4. Place the tip of the pen into one of the ports on the connecter and then press the pen outer shell towards the connecter. You will hear a “click” when the process is complete. Repeat this for the other port on the connecter. www.keit.co.uk Maintenance: DOC0535 (10 July 2019, 16:56) Back to Table of Contents...
- Page 81 Q-tip. Repeat the process with a new Q-tip on the other port. Step 7. Reconnect the connectors. Align the keyways and turn the locknut as shown until a distinct click is heard. www.keit.co.uk Maintenance: DOC0535 (10 July 2019, 16:56) Back to Table of Contents...
-
Page 82: Troubleshooting
User manual Page 82 Troubleshooting If you encounter any issues either during installation or during use of the IRmadillo please contact Keit (support@keit.co.uk). Issue Cause Potential Solution Check mains power No power to spectrometer connection Software cannot connect Check integrity of the fibre-... -
Page 83: Remote Health Check
Remote Health Check Keit can perform an examination of your system’s health data to determine whether any servicing needs to be carried out. There are two options for carrying out the health check: 7.8.1 Remote access If your control PC is connected to the Internet and you are willing to allow remote access, then this is the easiest way to arrange a health check. -
Page 84: Sending Data Manually
If this is inconvenient, please contact Keit to arrange a specific time for the health check. 7.8.2 Sending data manually If you would prefer not to allow remote access, then please send Keit the health check data directly. Step 1. -
Page 85: Accessories
Once the sample cell is empty, pull it off of the probe, and thoroughly clean and dry both the ATR element and the sample cell before repeating any measurements. www.keit.co.uk Accessories: DOC0535 (10 July 2019, 16:56) Back to Table of Contents... -
Page 86: Flow Cell
The flow cell assembly contains a pressure vessel and has been designed to withstand the analyte conditions that are specified on your product label. For detailed drawings, see Appendix 3: Technical Drawings IRmadillo. It is important to follow these instructions completely to ensure safe use of the flow cell. -
Page 87: Specifications And Safety Limits (Flow Cell)
Prevent load being applied to the instrument by the installation. Connections must not apply forces to the flow cell or the IRmadillo dip probe. Such loads increase the likelihood of leakage and could cause the spectral performance of the instrument to become inconsistent. -
Page 88: Installation
Step 2. Fit the PTFE alignment plate to the flow cell with the tapered bore facing outwards and secure with 4-off M6 x 20 A2-70 cap head screws and tighten to 8.7Nm. www.keit.co.uk Accessories: DOC0535 (10 July 2019, 16:56) Back to Table of Contents... - Page 89 (if needed). Take care to avoid damaging the ATR element on the tip of the dip probe. www.keit.co.uk Accessories: DOC0535 (10 July 2019, 16:56) Back to Table of Contents...
- Page 90 Step 5. Ensure that the connection ports are still in the required orientation. Fit clamp screw and lock collar, with collar backed off fully, to central tapping in the clamp plate. www.keit.co.uk Accessories: DOC0535 (10 July 2019, 16:56) Back to Table of Contents...
-
Page 91: Maintenance
O-ring elastomer, or if the flow cell is often removed to facilitate cleaning. Regularly check fastener tightness using a calibrated torque wrench. www.keit.co.uk Accessories: DOC0535 (10 July 2019, 16:56) Back to Table of Contents... -
Page 92: Cleaning
The flow cell may be cleaned using standard laboratory cleaning practices as appropriate for your reaction. The entire flow cell assembly, including the O-ring and fasteners are also compatible with standard autoclave procedures. www.keit.co.uk Accessories: DOC0535 (10 July 2019, 16:56) Back to Table of Contents... -
Page 93: Flanged Probe (Ex Certified)
Flanged probe (Ex certified) 8.3.1 Introduction A version of the IRmadillo spectrometer probe ( 31 mm) is available to allow connection to process pipework with an ANSI/ASME B16.5 or EN 1092-1 compliant flange. A hub is welded to the wall of the probe and a compatible lap-joint flange is mounted between the hub and spectrometer body to permit clamping to process pipework. -
Page 94: Specifications And Safety Limits (Welded Flange Probe)
The probe body and hub are manufactured from Hastelloy, which is resistant to many aggressive chemicals. However, you are advised to check with Keit before installing on a new process. The lap-joint flange behind the flange may be manufactured from Hastelloy or stainless steel. - Page 95 Once the spectrometer is aligned with the port, fit appropriate bolts as specified in the relevant standard, and tighten in stages in the order shown below. Ensure that the bolts are sufficiently tight to prevent a leak from your pipework. www.keit.co.uk Accessories: DOC0535 (10 July 2019, 16:56) Back to Table of Contents...
-
Page 96: Maintenance
Page 96 8.3.5 Maintenance Keit recommends regular inspection of the integrity of the welds on the front and rear in line with local safety procedures. Inspection of the sealing weld will require removal of the flange and spectrometer from the pressure vessel and can be completed as part of regular inspection/maintenance of the spectrometer and pipework. -
Page 97: Appendix 1: Technical Specification Sheet (Model Asm0627, Ex-Certified Irmadillo)
User Manual Page 97 Appendix 1: Technical Specification Sheet (Model ASM0627, Ex-Certified IRmadillo) www.keit.co.uk Appendix 1: DOC0535 (10 July 2019, 16:56) Back to Table of Contents... -
Page 98: Appendix 2: Controller Specifications
‘standard’ user. The standard user account starts automatically and is the default account for the Keit Spectrometer Application. The system administrator account is provided so that the end user can change the operating system configuration or install additional software if that is required. - Page 99 20W and the internal power supply is rated to 60W. Fibre-Optic Link The data communications between the controller and the spectrometer are provided by a Duplex LC multimode fibre- optic cable which is supplied by Keit. Front panel Indicator Label Function...
- Page 100 The COM ports are terminated in industry standard 9 Way Male D-sub Connector Plugs. The COM ports are configured in the BIOS by default to RS485, however RS232 and RS422 may also be made available if required. www.keit.co.uk Appendix 2: DOC0535 (10 July 2019, 16:56) Back to Table of Contents...
-
Page 101: Appendix 3: Technical Drawings Irmadillo
User Manual Page 101 Appendix 3: Technical Drawings IRmadillo IRmadillo spectrometer (without sampling accessories) www.keit.co.uk Appendix 3: DOC0535 (10 July 2019, 16:56) Back to Table of Contents... - Page 102 User Manual Page 102 IRmadillo spectrometer with flow cell (non-Ex certified) www.keit.co.uk Appendix 3: DOC0535 (10 July 2019, 16:56) Back to Table of Contents...
- Page 103 User Manual Page 103 IRmadillo spectrometer with welded flange (Ex certified) www.keit.co.uk Appendix 3: DOC0535 (10 July 2019, 16:56) Back to Table of Contents...
-
Page 104: Appendix 4: Declarations Of Conformity
Page 104 Appendix 4: Declarations of Conformity Declaration of Conformity - IRmadillo (Ex-Certified Spectrometer) IRmadillo Ex-Certified Object of the declaration: IRmadillo™ Spectrometer, model: ASM0627 Equipment Type: Mid Infrared Fourier Transform Spectrometer Manufacturer: Keit Ltd Address: Unit 4, Zephyr Building, 8 Street, Harwell Campus, Didcot, Oxfordshire, OX11 0RL, United Kingdom. -
Page 105: Declaration Of Conformity - Controller
User Manual Page 105 Declaration of Conformity - Controller Controller Object of the declaration: IRmadillo Spectrometers Controller, model: Impact-E2000. Equipment Type: Industrial Control Personal Computer (PC). Manufacturer: Keit Ltd Address: Unit 4, Zephyr Building, 8 Street, Harwell Campus, Didcot, Oxfordshire, OX11 0RL, United Kingdom. -
Page 106: Declaration Of Conformity - Flow Cell
Declaration of Conformity – Flow Cell Accessory: Flow Cell Object of the declaration: Flow Cell, model: ASM0992 Equipment Type: Flow cell accessory for use with IRmadillo spectrometer Manufacturer: Keit Ltd Address: Unit 4, Zephyr Building, 8 Street, Harwell Campus, Didcot, Oxfordshire, OX11 0RL, United Kingdom. -
Page 107: Fcc Class A Emissions Statement
User Manual Page 107 FCC Class A emissions statement IRmadillo Ex-Certified Object of the declaration: IRmadillo™ Spectrometer, model: ASM0627 Equipment Type: Mid Infrared Fourier Transform Spectrometer Manufacturer: Keit Ltd Address: Unit 4, Zephyr Building, 8 Street, Harwell Campus, Didcot, Oxfordshire, OX11 0RL, United Kingdom.
Need help?
Do you have a question about the IRmadillo and is the answer not in the manual?
Questions and answers