Table of Contents
Advertisement
Quick Links
Advertisement
Table of Contents

Related Manuals for Abode AVSC4001

Summary of Contents for Abode AVSC4001
- Page 1 Vac & Steam 2 in 1 Hard floor Cleaner User Guide Model No: AVSC4001 For Customer Services & Spare Parts please call 0845 209 7461 Opening times: Monday - Friday 8am – 6pm & Saturday 9am – 1pm or visit us at www.productcareuk.com...
-
Page 2: Table Of Contents
Connection to the mains supply ……………………………………. 22-23 Thank you for purchasing your Abode Vac & Steam. Convert from Vac to Steam Mop in seconds. With a swivel head for flexible cleaning and an ergonomic handle for comfort, cleaning your hard floors has never been so easy. -
Page 3: Safety Instructions
Safety instructions IMPORTANT SAFETY INSTRUCTIONS READ CAREFULLY AND KEEP FOR FUTURE REFERENCE WARNING: It is hazardous for anyone other than a competent person to carry out any service or repair operation that involves the removal of a cover which gives protection against exposure to electrical parts. - Page 4 Safety instructions • Do not direct steam at people, animals, electrical outlets, or equipment containing electrical components. • Unplug from outlet when not in use . Do not leave the cleaner unattended while plugged in. • Do not use with damaged cord or plug. •...
- Page 5 Safety instructions • Do not use cleaner in an enclosed space filled with vapor given off by oil-based paint, paint thinner, some moth proofing substances, flammable dust, or other explosive or toxic vapors. • Do not use on leather, wax polished furniture or floors, synthetic fabrics, velvet or other delicate, steam-sensitive materials.
- Page 6 Safety instructions • The filling aperture must not be opened during use. • This cleaner is intended for household use only. Do not use the cleaner for purposes other than it’s intended use. • This cleaner should not be used by children. Ensure that children do not play with the cleaner.
- Page 7 Safety instructions Symbol IEC 60417-5597 (2002-10) is used on the unit to indicate the following: • This unit operates with hot water vapour (steam), to avoid scalding and burns take extra care when in use.
-
Page 8: Vac And Steam Overview
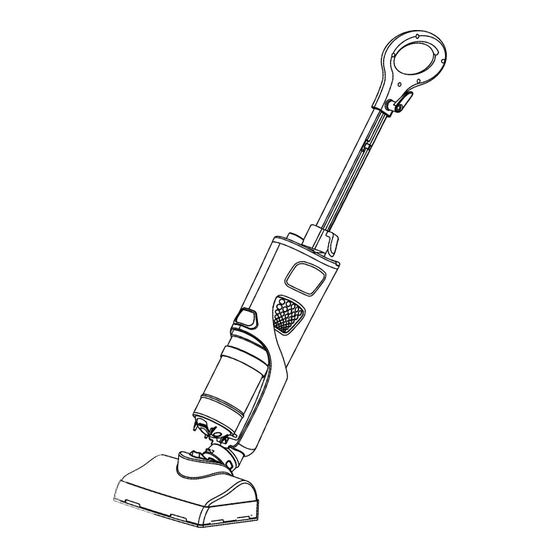
Vac and Steam overview Before you use your steam mop Remove all the packaging and lay out the separate components. 1 Handle 4 On/off dial Mop pad 2 Cord storage 5 Exhaust filter 8 Steam base attachment 3 Water tank 6 Filling cup Dust cup Power cord... -
Page 9: Assembly
Assembly Check the cleaner after unpacking for any visual damage such as: Misaligned or damaged parts Damage to the main body and separate Components Damage to the plug or cable If you can see any damage do not use the steam mop and follow the return instructions on the Guarantee page (19). -
Page 10: Mode Controls
Mode controls The Abode Vac and Steam has two operating modes: Vacuum Mode Steam Mode Note: do not use mop pad/steam base attachment Attach steam pad and base. in vacuum mode. Fill the water tank. Remove if attached. Move the black marker from Move the black marker from the central ‘off’... -
Page 11: Vacuum Mode
Vacuum Mode Once the handle is assembled, pull and twist the cord holder to unwrap the cord. Plug the unit into a mains socket and turn the power on. Move the black marker from the central ‘off’ position, twisting the dial clockwise for vacuum function. - Page 12 Vacuum Mode STORAGE 1. Lightly place your foot on the top of the unit base. Tilt the unit forward to the upright position. 2. Move the black marker from the vacuum position to the central ‘off’ position, twisting the dial anticlockwise.
- Page 13 Vacuum Mode Emptying the dust cup Emptying the cone filter For optimal suction performance, clean filter often. 1. Lift the filter frame out from the top of the dust cup and remove the two filter layers. 1. Press the clip at the 2.
-
Page 14: Steam Mode
Steam Mode Place the cleaner in an upright position into the steam frame and secure. Place the microfibre You must attach the pad onto the base of steam frame and pad to the cleaner when the unit, lining up using the steam the velcro to secure. - Page 15 Steam Mode Once the handle is inserted, steam pad attached and water filled, pull and twist the cord holder to unwrap the cord. Plug the unit into a mains socket and turn the power on. Move the black marker from the central ‘off’...
- Page 16 Steam Mode Storage 1. Lightly place your foot on the top of the unit base. Tilt the unit to the upright position. 2. Move the black marker from the steam position to the central ‘off’ position, twisting the dial clockwise. 3.
-
Page 17: Cleaning And Care
Cleaning and Care To clean the exterior of the device, use a damp, soft cloth and mild detergent. NEVER IMMERSE THE CLEANER IN WATER When wiping off the main body, do not allow moisture in the area around the power dial. If the steam mop is damaged, contact the customer service helpline. - Page 18 Cleaning and Care Care of your dust cup filters 1. Ensure the unit is unplugged and the power dial is centred. Once the dust cup is removed, lift the filter frame out of the top and remove the two filter layers from the frame filter. 2.
-
Page 19: Guarantee
Guarantee After registration, this product is guaranteed for 3 years from the date of the original purchase. If any defect arises due to faulty materials or workmanship the faulty product must be returned to the place of purchase. Register your product at www.productcareuk.com. Refund or replacement is at the discretion of the store. -
Page 20: Customer Support
Customer support For Customer Services & Spare Parts please call 0845 209 7461 Opening times: Monday - Friday 8am – 6pm & Saturday 9am – 1pm or visit us at www.productcareuk.com Produced for: G2S ltd Bolton BL6 5HY Disposal information This symbol is known as the 'Crossed-out wheelie bin Symbol'. -
Page 21: Spare Parts
Spare parts Steam base Mop pad Handle Dust cup Dust filter Filling cup For Customer Services & Spare Parts please call 0845 209 7461 Opening times: Monday - Friday 8am – 6pm & Saturday 9am – 1pm or visit us at www.productcareuk.com... -
Page 22: Connection To The Mains Supply
Connection to the mains supply WARNING- THIS APPLIANCE MUST BE EARTHED This appliance is designed to operate from a mains supply of AC230V - 240V ~ 50/60HZ. Check that the voltage marked on the product corresponds with your supply voltage. This product is fitted with a 13A plug complying with BS1363. - Page 23 Connection to the mains supply For UK use only – Plug fitting details (where applicable): As the colours of the wires in the mains lead of this appliance may not correspond with the coloured markings identifying the terminals in your plug, proceed as follows: The GREEN/YELLOW wire is the EARTH and must be connected to the terminal which is marked with the letter E or by the earth symbol or...
- Page 24 Revision 1...
Need help?
Do you have a question about the AVSC4001 and is the answer not in the manual?
Questions and answers