Table of Contents
Advertisement
Advertisement
Table of Contents

Related Manuals for eyecloud.ai Sticker-Eye

Summary of Contents for eyecloud.ai Sticker-Eye
- Page 2 If you need any help please submit a support case describing the steps you took and provide the following information: Device serial number Username (email address or mobile phone used to register your account) If you purchase Sticker-Eye from our Amazon page and you need assistance, write us on amzservice@eyecloud.tech and attach your order ID.
-
Page 3: Table Of Contents
1.1 What’s Inside..................7 1.2 Camera Specifications................7 1.3 Mobile App Symbols................9 2. Getting Started..................12 2.1 How Sticker-Eye Works...............12 2.2 Turn Sticker-Eye On or Off..............14 2.3 Charge Before First Use..............14 2.4 Get the Mobile App................16 2.5 Register a New Account..............18 2.6 Add New Camera................18 2.7 LEDs Definition..................30... - Page 4 2.9.2 Check Your Wi-Fi Signal............41 2.10 System Upgrade................42 3. Battery & Recharging................44 3.1 General Information................44 3.2 Battery Life..................45 3.3 Recharging...................45 3.4 Battery Tips & Tricks................45 4. Live Streaming..................47 4.1 Watch a Live Stream................47 4.2 Record a Video From Live Stream.............48 4.3 Take a Snapshot From Live Stream..........48 4.4 Talk.......................49 4.5 Listen....................49...
- Page 5 5.3 Upload & Delete Faces................56 5.3.1 Upload a Face to Your Face Library........58 5.3.2 Remove a Face From Your Face Library.......59 5.3.3 Tips & Tricks................59 6. Manage Detection...................60 6.1 Customize Detection................60 6.2 Focus Area...................63 6.3 Motion Trigger Sensitivity..............64 6.4 Schedule Your Camera..............66 7.
- Page 6 10.2 Remove a Device................78 10.3 Log Out....................78 10.4 Rename Camera................79 10.5 Personalize Your Profile..............79 11. Security & Privacy.................81 11.1 Security During Pairing..............81 11.2 Encrypted Local Storage..............81...
-
Page 7: General Information
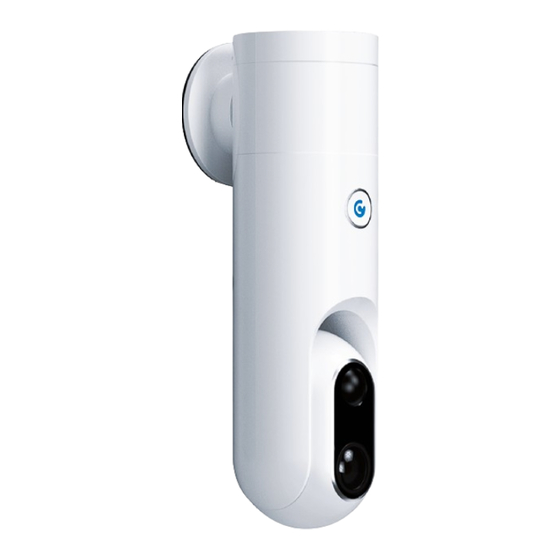
1. General Information 1.1 What’s Inside A. 1 x eyecloudCam B. 1 x magnetic mount C. 2 x stickers D. 1 x type-C USB cable E. 3 x mounting screws 1.2 Camera Specifications... - Page 8 Sensor resolution FHD 1080p Night vision IR LED 850nm, up to 20ft Optical FOV >110° diagonal Ambient light sensor PIR Sensor 20ft Video format H.264 MP Image format PTZ support Digital Local Storage 8GB or 32GB internal Processor Intel Movidius VPU, TI OTA FLASH storage 32MB WiFi...
-
Page 9: Mobile App Symbols
1.3 Mobile App Symbols The following list will give you an overview of all icons and their meaning: ICON ACTION Sticker-Eye app Add new device Devices/Homepage View all real-time alerts View all recordings saved on the device, including those you didn’t receive... - Page 10 Next Day Previous Day Enter Camera Settings Watch live stream Wi-Fi reconfigure Record a video from live stream Take a snapshot from live stream Talk during Live Stream Mute/unmute during Live Stream Turn on/off Siren during Live Stream Manage detection modes Manage video settings Reset Device Set focus area...
- Page 11 System Upgrade System Upgrade - new FW available Device info Rename device Wi-Fi signal strength Snapshots Recordings User info (avatar, email) Downloaded videos Recorded videos Move to trash Download...
-
Page 12: Getting Started
With Face Recognition enabled, the user can choose whether he/she wants to receive a notification or not when a familiar face is recognized. Since all decisions are made on-device, Sticker-Eye also works if the internet is down. The detection modes won’t be affected whatsoever. Sticker-Eye will still be able to record events and store them locally, but won’t send notifications. -
Page 14: Turn Sticker-Eye On Or Off
To turn off the device, press the main button for at least 15 seconds. 2.3 Charge Before First Use Before getting started with Sticker-Eye, make sure to fully charge it: 1. Get the camera out of the box. 2. Get the USB Cable from the package 3. -
Page 16: Get The Mobile App
2.4 Get the Mobile App Download the Sticker-Eye app via App Store or Google Play, or direct download on your smartphone using the QR code below:... -
Page 18: Register A New Account
2.5 Register New Account You can register a new account with your email or your phone number. To register a new account: 1. Tap the Sticker-Eye icon on your mobile device. 2. Tap Register Now (bottom right corner). 3. Fill in the fields (Region, email/phone number, password, password confirmation). - Page 19 10. Select the network name that starts with Stickereye_ and ends with the last 6 symbols matching the MAC address printed on the bottom box label. 11. From the Sticker-Eye camera you’ll hear the following voice chime: “Pairing Started”. 12. Go back to the Sticker-Eye app and press Continue.
- Page 24 9. Check for the device name that starts with Stickereye_ and ends with the last 6 symbols matching the MAC address printed on the bottom box label. 10. From the Sticker-Eye camera you’ll hear the following voice chime: “Pairing Started”.
- Page 28 Keep in mind: 1. For the Android users: If the Sticker-Eye camera doesn’t show up in the Devices List, you can Connect Manually by tapping the button on the bottom of the screen. To do so: Tap Connect manually. Press Continue.
- Page 29 it manually by tapping Enter it manually. Make sure your Wi-Fi is a 2,4GHz network and not 5 GHz. 3. If you choose to enter the Wi-Fi manually, please write the name of the Wi-Fi network, the Wi-Fi password and the Security Protocol. If you’re not sure which security protocol should you choose, please select WPA2 (which is the default protocol on most routers, if the password was already set).
-
Page 30: Leds Definition
2.7 LEDs Definition 2.8 Mount and Position your Camera 2.8.1 Mounting Don’t use the stickers for outdoor mounting. The temperature, humidity, and other atmospheric conditions might affect the efficiency of the sticker. When mounting the device outside, consider using the magnet mount or the screws. - Page 31 Horizontal Surfaces Place the camera on any horizontal surface. That’s about that. Vertical Walls a. Use sticker for indoor purposes only b. Use screws c. Use magnet mount for magnetic surfaces...
- Page 32 Roofs and Ceilings a. Use screws b. Use magnet mount Use the sticker only for indoor purposes on those surfaces that you don’t want to drill through: a. Furniture b. Tile c. Glass d. Interior walls e. Exterior walls etc. Use the screws for drillable surfaces:...
-
Page 33: Adjust Monitoring Range
2.8.2 Adjust the Monitoring Range Rotate the camera body to adjust the horizontal range. Rotate the camera head to adjust the vertical monitoring range. -
Page 34: Mounting Tips & Tricks
3. Sticker-Eye provides a 110-degree horizontal view. Placing objects close to the camera (at a distance of approximately 20 inches/50 cm) might obscure its field of view. Also, the night vision might be affected and the images might turn out blurry because of the IR reflection. -
Page 35: Outdoor Practices
4. Sticker-Eye detects movement or people up to 20 feet (6 meters) away. The motion sensor is much more sensitive to side-to-side movement across its field of view, and less sensitive to movement directly toward or away from the camera. - Page 36 (such as traffic, vegetation, swimming pools, other surfaces that reflect the sunlight etc.). Even with Person Detection enabled, Sticker-Eye will always exit standby mode because of the moving background and will start searching for people. If it doesn’t find anyone, the camera won’t send you notifications...
-
Page 37: Indoor Practices
2.8.5 Indoor Practices a. The camera cannot properly detect events through the glass. Don’t place it behind or facing a window/glass b. Avoid placing the camera in room corners. Since room corners are surrounded by walls, these places usually have a weak Wi-Fi signal reception. Low Wi-Fi will affect both the streaming quality and battery lifetime. - Page 38 c. Avoid placing the camera towards air conditioning ducts, fans or heaters. Heat or differential heat might trigger the device more often, leading to quick battery discharge.
-
Page 39: Wi-Fi Reconfiguration
2.9.1 How to reconfigure your Wi-Fi For iOS users: 1. Tap the Sticker-Eye icon on your mobile device. 2. The Device page will display a list of your connected devices. 3. Press the Reconnect icon associated with the device you want to reconfigure. - Page 40 10. Select the network name that starts with Stickereye_ and ends with the last 6 symbols matching the MAC address printed on the bottom box label. 11. From the Sticker-Eye camera you’ll hear the following voice chime: “Pairing Started”. 12. Go back to the Sticker-Eye app and press Continue.
-
Page 41: Check Your Wi-Fi Signal
9. Check for the device name that starts with Stickereye_ and ends with the last 6 symbols matching the MAC address printed on the bottom box label. 10. From the Sticker-Eye camera you’ll hear the following voice chime: “Pairing Started”. -
Page 42: System Upgrade
Keep in mind: If the Wi-Fi goes down, the camera will still be working as per usual. The detection modes won’t be affected whatsoever. Sticker-Eye will still be able to record events and store them locally, but won’t send you notifications. - Page 43 To perform a system upgrade, follow the next steps: 1. Tap the Sticker-Eye icon on your mobile device. 2. Press the Device Settings icon associated with the device you want to update. 3. Tap System Upgrade 4. The phone screen will display a Loading symbol 5.
-
Page 44: Battery & Recharging
3.1 General Information The battery bars indicate battery capacity. To see the battery level of a device: 1. Tap the Sticker-Eye icon on your mobile device. 2. The Device page will display a list of your connected devices. 3. Press the Device Settings icon associated with the device you want to check out. -
Page 45: Battery Life
3.2 Battery Life In normal conditions*, the battery life of Sticker-eye is about two months. Normal Conditions: 10-15 recordings/day with low false wake-ups. False wake-ups usually happen when the camera is configured to detect persons only but is triggered by objects that resemble people. -
Page 46: Battery Tips & Tricks
3. Make sure you are running the latest version of the firmware. 4. Reduce the number of unwanted alerts: don’t point the camera towards moving or cluttered backgrounds that can easily trigger Sticker-Eye. 5. If you are unable to position it elsewhere than facing a moving/cluttered background, reduce motion sensitivity. -
Page 47: Live Streaming
The maximum duration of a live streaming session is 30 minutes. When watching a live stream, you can zoom in or out. To keep the frame rate as high as possible when the Wi-Fi is low on quality and signal strength, Sticker-Eye will automatically switch from a higher encoding rate to a lower encoding rate. -
Page 48: Record A Video From Live Stream
4. To stop viewing the live feed, press Back Keep in mind: If the Wi-Fi is weak, Sticker-Eye will reduce the frame rate and the encoding bit rate to keep the frame at a good quality level. 4.2 Record a Video from Live Stream To record a video from live stream: 1. -
Page 49: Talk
4. Tap the Snapshot icon. 4.4 Talk 1. Tap the Sticker-Eye icon on your mobile device. 2. The Device page will display a list of your connected devices. 3. Select the camera you want to talk from by pressing the Play button on the camera feed image. -
Page 50: Enable Siren
4.6 Enable Siren To activate the siren when an alert is triggered: 1. Tap the Sticker-Eye icon on your mobile device. 2. The Device page will display a list of your connected devices. 3. Press the Device Settings icon associated with the device you want to manage 4. -
Page 51: View Your Content
The events that Sticker-Eye captures are divided into two categories: alert images and recordings. To receive real-time alert images, you must be logged in to the Sticker-Eye app and have your device connected to the internet. Once you log out, you won’t be receiving notifications anymore. -
Page 52: View Recordings & Snapshots
5.1 View Recordings & Alert Images There are several ways to view recordings and alert images:... -
Page 53: Alerts
To view the events recorded when the camera was offline, go to the Playback page (see Section 5.1.2). View Alert Images 1. Tap the Sticker-Eye icon on your mobile device. 2. Tap the Alerts icon (bottom center of the screen). -
Page 54: Playback
Video icon , you’ll get an overview of locally saved Videos (the last video recorded at that moment) View Recordings 1. Tap the Sticker-Eye icon on your mobile device. 2. Tap the Alerts icon (bottom center of the screen). 3. The screen will display the Alerts page with an overview of locally saved alert images (the last 5 alert images captured at that moment). -
Page 55: Download & Delete
6. To see recordings that occurred a day before, tap the Previous Day icon 5.2 Download & Delete Recordings Since all recordings are stored on-device, Sticker-Eye must be online for the following functions to work: 5.2.1... -
Page 56: Delete Recordings
5.2.3 To delete recordings: 1. Tap the Sticker-Eye icon on your mobile device. 2. Tap the Alerts icon (bottom center of the screen). 3. The Alerts page displays. 4. Tap the Videos icon (top right corner). 5. Click on the Daily Video Thumbnail of choice. -
Page 58: Upload A Face To Your Face Library
5.3.1 To upload a face: 1. Tap the Sticker-Eye icon on your mobile device 2. Click on the Profile icon 3. Tap Face Library 4. Tap the Add New Face icon 5. You can either Take a photo or Choose from your Album 6. -
Page 59: Remove A Face From Your Face Library
3. You don’t have to upload the same face on different devices. When uploading a face on a single Sticker-Eye, that image will be applicable to all connected devices. If any of your devices is offline, you’ll get a “Partially Synced” notification. If a face is successfully uploaded on all devices, you’ll get a “Synced”... -
Page 60: Manage Detection
Sticker-Eye comes with the following detection modes: Motion Detection The camera detects and records any type of motion (including people). If you enable Motion Detection, you’ll receive notifications on your phone each time Sticker-Eye detects motion. Person Detection The camera detects and records people only. If you enable Person Detection, Motion Detection will automatically turn on, but the camera will start filtering the information and will send you notifications only when people pass by. -
Page 63: Focus Area
4. Tap the Alerts Settings icon 5. Manage detection. 6.2 Focus Area Recordings will contain the area of interest only. To focus your Sticker-Eye on specific areas: 1. Tap the Sticker-Eye icon on your mobile device. -
Page 64: Motion Trigger Sensitivity
6. Press Save. 6.3 Motion Trigger Sensitivity To change the sensitivity level for a device: 1. Tap the Sticker-Eye icon on your mobile device 2. The Device page will display a list of your connected devices. 3. Press the Device Settings icon associated with the device you want to manage 4. -
Page 66: Schedule Your Camera
The Alert Time configuration applies to all detection modes of the selected camera. To set a schedule for a camera: 1. Tap the Sticker-Eye icon on your mobile device. 2. The Device page will display a list of your connected devices. -
Page 67: How To Make The Best Of The Ai Functions
Such a hard to identify object has a higher chance of being incorrectly detected as a person. 3. If you mount Sticker-Eye upside down, make sure to invert the camera feed as well. - Page 68 5. The field of view of the camera should include the whole person instead of just the upper or lower part of the body. Similar to the previous recommendation, this will give the AI more features of the person, increasing its accuracy. 6.
-
Page 69: Smart Notifications
8. SMART NOTIFICATIONS 8.1 Detection Notifications Motion Detected Enable Motion Detection ONLY and receive smart notifications each time Sticker-Eye detects motion (people included.) Person Detected If you enable Person Detection, Motion Detection will automatically turn on, but the camera will start filtering the information and will send you notifications only when people pass by. - Page 70 *Insert Name* Recognized If you enable push notifications when Sticker-Eye detects faces from your Face library, you’ll get the following message: Stranger Detected If Sticker-Eye detects an unknown face (that is not uploaded on your library), you’ll get the following notification:...
-
Page 71: Faces Notifications
8.2 Faces Notifications There are four types of notifications you’ll get on your mobile phone when you add or delete a face on your Face Library: Face Synced Once a face is successfully uploaded on all devices, you’ll get the following notification on your phone: Face Partially Synced When uploading a face on your... - Page 72 Face Deleted Once a face is successfully removed from all devices, you’ll get the following notification on your phone: Face Partially Deleted When removing a face from your Face Library, if any of your devices are offline, you’ll get the following notification:...
-
Page 73: Low Battery Notifications
8.3 Low-Battery Notifications When the battery drops below 25%, but it’s higher than 15%, you’ll get an alert on your mobile app and a notification email. When the battery drops below 15%, but it’s higher than 5%, you’ll get an alert on your mobile app and a notification email. - Page 74 When the battery drops below 5%, you’ll get an alert on your mobile app and a notification email.
-
Page 75: Video Settings
9. Video Settings 9.1 Viewing Position To change the viewing position: 1. Tap the Sticker-Eye icon on your mobile device. 2. The Device page will display a list of your connected devices. 3. Press the Device Settings icon associated with the device you want to manage. -
Page 76: Video Quality
To change video quality: 1. Tap the Sticker-Eye icon on your mobile device. 2. The Device page will display a list of your connected devices. 3. Press the Device Settings icon associated with the device you want to manage. -
Page 77: Personalize Your System
10. Personalize Your System 10.1 Share Device With Friends When sharing a device with a friend, both parties must have the Sticker-Eye mobile app installed: To share Sticker-Eye with friends: As a Guest: 1. Tap the Sticker-Eye icon on your mobile device. -
Page 78: Remove A Device
2.4 GHz network as the device. If you remove a device, all your settings, recordings and images will be erased. This operation is usually done when you want to give STICKER-EYE camera as a gift. To remove a device: 1. -
Page 79: Rename Camera
10.4 Rename Camera To avoid mix-up, you can rename your cameras. To rename your camera: 1. Tap the Sticker-Eye icon on your mobile device. 2. The Device page will display a list of your connected devices. 3. Press the Device Settings icon associated with the device you want to rename. - Page 80 4. Change your profile picture by clicking on the avatar placeholder. 5. Change your email address by clicking on Username. 6. Press Back to go back. Language To change language: 1. Tap the Sticker-Eye icon on your mobile device. 2. Tap the Profile icon 3. Select Language Settings.
-
Page 81: Security & Privacy
Sticker-Eye adds some limitations to prevent this from happening: 1. Only the Master Account can perform the pairing and unpairing. 2. The user needs to be in the same location as the Sticker-Eye camera. 3. The user needs to be in the Wi-Fi range of the Sticker-Eye camera.
Need help?
Do you have a question about the Sticker-Eye and is the answer not in the manual?
Questions and answers