Table of Contents
Advertisement
Advertisement
Table of Contents

Related Manuals for Focusrite Scarlett 8i6


Summary of Contents for Focusrite Scarlett 8i6
- Page 1 User Guide www.focusrite.com Version 1.0...
-
Page 2: Table Of Contents
Using the Scarlett 8i6 as a stand-alone mixer........ -
Page 3: Overview
Although all inputs and outputs on the Scarlett 8i6 are routed directly to and from your DAW for recording and playback, you can configure the routing within your DAW in order to meet your precise needs. -
Page 4: Box Contents
- before they arrive at your DAW, should you need to do so. The Scarlett 8i6 also has connectors for sending and receiving MIDI data; this lets you use it as a MIDI interface between your computer’s USB port and other items of MIDI equipment in your system. -
Page 5: Getting Started
With the Third Generation, Scarlett interfaces introduce a new, faster way of getting up and running, using the Scarlett Quick Start tool. All you need to do is connect your Scarlett 8i6 to your computer. Once connected, you will see that the device is recognised by your PC or Mac and the Quick Start tool will guide you through the process from there. - Page 6 Double-click on the icon to open the Finder window shown below: Double-click on the “Click Here to Get Started.url” icon. This will redirect you to the Focusrite website, where we recommend that you register your device: Click on “Let’s get you started”, and you’ll be presented with a form which will be partly prefilled for you automatically.
-
Page 7: Windows Only
Windows only: On connecting your Scarlett 8i6 to your PC, a Scarlett icon will appear on the desktop: (Note that the drive letter may be something other than D:, depending on what other devices you have connected to your PC). - Page 8 Your OS should automatically switch the computer’s default audio inputs and outputs to be the Sound Settings Scarlett 8i6. To verify this, right click on the Sound icon on the taskbar and select and set the Scarlett as the Input and Output Device.
-
Page 9: All Users
This will ensure that your Scarlett 8i6 has full functionality. Please bear in mind that should you wish to register your Scarlett 8i6 after taking this action, you will need to do so manually, as explained above. -
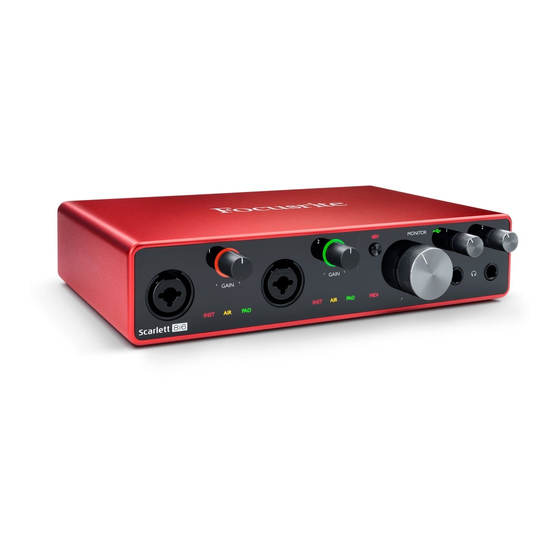
Page 10: Hardware Features
Focusrite ISA microphone preamps. PAD – two green LEDs; illuminate when PAD is selected from Focusrite Control for Inputs 1 and 2. PAD decreases the signal level going to your DAW by 10 dB; use when the input source... - Page 11 - connect one or two pairs of stereo headphones at the two ¼” (6.25 mm) TRS jack sockets below the headphone volume controls. The headphone outputs always carry the signals that are currently routed to analogue outputs 1 & 2 and 3 & 4 respectively (as stereo pairs) in Focusrite Control.
-
Page 12: Rear Panel
15. SPDIF IN and OUT – two phono (RCA) sockets carrying two-channel digital audio signals in or out of the Scarlett 8i6 in S/PDIF format. These are essentially Inputs 7 and 8 and Outputs 5 and 6 to/from the unit. Like all the other inputs and outputs, signals at these connectors may be routed in Focusrite Control. -
Page 13: Connecting Your Scarlett 8I6
USB Port Types: The Scarlett 8i6 has a single Type C USB 2.0 port (on the rear panel). Once the software installation is complete, simply connect the Scarlett 8i6 to your computer; if your computer has a Type A USB port we recommend you use the Type A-to-Type C USB cable provided with the unit. -
Page 14: Audio Setup In Your Daw
DAW that uses Core Audio. After following the Getting Started procedure described on page 5, you can start using your Scarlett 8i6 with the DAW of your choice. To allow you to get started if you do not already have a DAW application installed on your computer, both ProTools | First and Ableton Live Lite are included;... -
Page 15: Loopback Inputs
Once the Scarlett 8i6 is set as the preferred Audio Device* in your DAW, all eight inputs and six outputs will appear in your DAW’s Audio I/O preferences (note however that Ableton Live Lite is limited to a maximum of four simultaneous mono input channels and four simultaneous mono output channels). -
Page 16: Examples Of Usage
DAW. During recording, a mix of the instruments and the vocalist, plus the playback of any tracks already recorded in the DAW, can be monitored on headphones. Alternatively, loudspeakers can be used if the vocal mic is in a separate room. The mix itself is set up in Focusrite Control. -
Page 17: Low Latency Monitoring
Input channels 1 and 2 of the Scarlett 8i6 each have a PAD function: when selected from Focusrite Control (PAD illuminates green when active), the signal level fed to your DAW is reduced by 10 dB. -
Page 18: Creating An Effects Loop
Creating an effects loop The Scarlett 8i6 allows the easy integration of external outboard processors or effects. A good example is the inclusion of an outboard stereo compressor to a recording setup similar to that outlined above. Connect Line Outputs 3 and 4 to the compressor’s inputs, and the compressor’s outputs to Line Inputs 3 and 4, as shown below. -
Page 19: Using The Scarlett 8I6 As A Stand-Alone Mixer
This feature lets you configure it – for example, as an on-stage sub-mixer – using your computer, and then upload the configuration to the device itself. Then you can use the Scarlett 8i6 as a simple local mixer as part of your equipment rig to control the overall mix of multiple instruments. -
Page 20: Focusrite Control
Focusrite Control in full detail, together with examples of application. To open Focusrite Control: Installing Focusrite Control on your computer will place an FC icon on the dock or desktop. Click the icon to launch Focusrite Control. Assuming that your Scarlett interface is connected to your computer with the USB cable, the Focusrite Control GUI (Graphical User Interface) will appear as shown below (Mac version illustrated). - Page 21 Output 2 (Headphones 1R) Input 3 Output 3 (Headphones 2L) Input 4 Output 4 (Headphones 2R) Input 5 S/PDIF 1 Input 6 S/PDIF 2 S/PDIF 1 S/PDIF 2 Loopback 1 Loopback 2 Please refer to the Focusrite Control User Guide for further details.
-
Page 22: Specifications
8: analogue (6), S/PDIF (2) Outputs 6: analogue (4), S/PDIF (2) Fully assignable 8-in/6-out software mixer Mixer (Focusrite Control) Supported sample rates 44.1 kHz, 48 kHz, 88.2 kHz, 96 kHz, 176.4 kHz and 192 kHz Microphone Inputs Dynamic Range 111 dB (A-weighted) Frequency Response 20 Hz to 20 kHz ±0.1 dB... - Page 23 Instrument Inputs 1 & 2 Dynamic Range 110.5 dB (A-weighted) Frequency Response 20 Hz to 20 kHz ±0.1 dB < 0.03% (minimum gain, -1 dBFS input with THD+N 22 Hz/22 kHz bandpass filter) +12.5 dBu (no PAD); +14 dBu (PAD selected); Maximum input level measured at minimum gain Gain Range...
-
Page 24: Physical And Electrical Characteristics
XLR Combo type: Mic/Line/Inst, on front panel Mic/Line switching Automatic Line/Instrument switching Selected per channel from Focusrite Control 10 dB attenuation, selected per channel via Focusrite Control Shared +48 V phantom power switch for inputs 1 & 2 Phantom power (XLR connections only) AIR function... - Page 25 Weight and Dimensions 210 mm x 149.5 mm x 47.5 mm W x D x H 8.27” x 5.89” x 1.87” 0.84 kg Weight 1.85 lbs...
-
Page 26: Troubleshooting
Your Scarlett 8i6 has a two-year warranty, valid anywhere in the world, against manufacturing defects. Full Terms and Conditions can be found at https://focusrite.com/warranty. Focusrite is a registered trade mark and Scarlett 8i6 is a trade mark of Focusrite Audio Engineering Limited.
Need help?
Do you have a question about the Scarlett 8i6 and is the answer not in the manual?
Questions and answers