Advertisement
Table of Contents
Advertisement
Table of Contents

Subscribe to Our Youtube Channel
Related Manuals for Gamma X-Stringer XLT


Summary of Contents for Gamma X-Stringer XLT
- Page 1 ELECTRONIC STRINGING MACHINE OWNER’S MANUAL Issue 1 - September 2018...
-
Page 2: Table Of Contents
(1) year from the date of purchase for all electrical parts and string clamps. Should any defects develop under normal use within the specifi ed time periods, GAMMA will at its option, repair or replace the defective EQUIPMENT provided it is returned to GAMMA prepaid at the purchaser’s expense. -
Page 3: Key Features
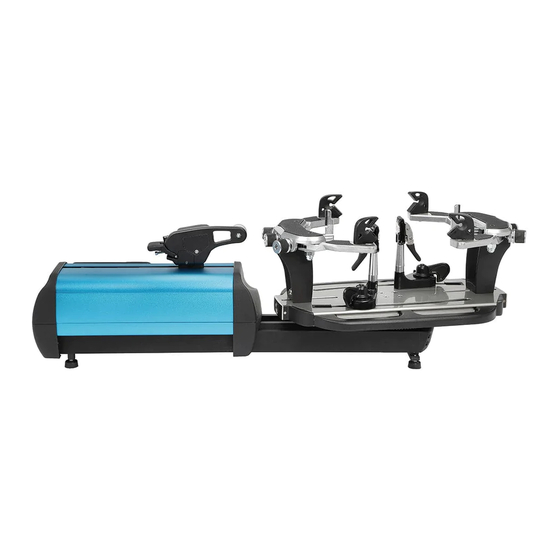
FEATURES MACHINE FEATURES Electric Constant Pull Tensioner with 11.0 to 90.0 lbs Tension Range Digital Tension Setting with LED Display Parallel Jaw Linear Gripper with Textured Gripping Surfaces Professional Six Point “Quick Mount” Racquet Mounting System- Accommodates All Racquets ... -
Page 4: Assembly Instructions
ASSEMBLY INSTRUCTIONS Leg Bracket with Foot Pads There are four rubber foot pads supplied with the machine. Two have exposed threads and two have a spacer sleeve over the threads. Install the two rubber foot pads with the exposed threads into the outer holes on both ends of the leg bracket. - Page 5 ASSEMBLY INSTRUCTIONS Rubber Foot Pad Installation Insert the two rubber foot pads with the spacer sleeve into the into the threaded holes of the rails located on the underside of the baser on the right side as shown. NOTE: If desirted, the Rubber Foot Pads may also be installed on the left side of the machine base.
-
Page 6: Power Connection & Controls
POWER CONNECTION & CONTROLS Front Panel Features A - String Gripper B - Tension Lever C - Control Panel D - LED Display Back Panel Features Power On/Off Switch A/C Power Cord Socket Foot Pedal Switch Receptacle Instructions for Power Connection and Controls CAUTION ! Before connecting to the power supply, check the voltage source that the machine is being connected to. - Page 7 CONTROL PANEL FUNCTIONS AND FEATURES Single Digit (1-9) Three Digit (XX.X) Tension Memory LED Display Setting LED Display Memory Button - Indexes from 9 preset Tension Index Buttons - Changes tension settings that can be stored in tension setting in +/- 1.0 or +/- 0.1 Lb or memory.
- Page 8 STRING CLAMP INSTALLATION String Clamp Installation The post of the string clamp and tube of the string clamp base are treated with grease to provide protection against corrosion during shipping. Remove any excessive grease with a clean cloth prior to use. The post and tube may also be cleaned with isopropyl alcohol.
-
Page 9: Mounting The Frame
MOUNTING THE FRAME Adjusting the Frame Support Posts Loosen the lock bolts of the frame support posts and space them apart with the frame support slides separated by the approximate length of the racquet head. Although it is not required, it is good practice to center the sup- port posts on the turntable. -
Page 10: Stringing The Frame
STRINGING THE FRAME Clamp Base Operation To lock the string clamp base to the turntable, rotate the clamp base locking lever clockwise. To release the string clamp base from the turntable, rotate the clamp base locking lever counter-clockwise. The Locking Lever should be tightened enough to prevent clamp base slippage on the turntable, when the desired tension is placed on the string. - Page 11 STRINGING THE FRAME Applying Tension Before applying tension, gently pull the string until all slack is removed. To apply tension, wrap the string clockwise around the String Guide and position the string between the two gripper jaws. CAUTION: NEVER TENSION A STRING WITH YOUR FINGERS BETWEEN THE STRING AND THE STRING GUIDE AS SERIOUS INJURY COULD RESULT IF YOUR FINGER IS CAUGHT BETWEEN THE STRING AND STRING GUIDE WHEN TENSION IS APPLIED TO THE STRING.
- Page 12 STRINGING THE FRAME Clamping the First Main String Secure the tensioned main string using the remaining fi xed clamp. Repeat the procedure for all of the remaining main strings and tie off following the racquet manufacturers recommendations. Follow the manufacturer’s recommended stringing pattern for one or two piece string- ing.
-
Page 13: Additional Features
ADDITIONAL FEATURES Turntable Brake The turntable may be locked in any position. To engage the turntable brake, rotate the brake lever clockwise. To release the brake, rotate the brake lever counter clockwise. Turntable Brake Lever - Released Position Turntable Brake Lever - Engaged Position Badminton Shoulder Support Protection Pad Installation Slide the badminton shoulder support cover... -
Page 14: Pathfinder Awl
PATHFINDER AWL The machine includes the pathfi nder string- ing awl which creates a pathway between or around strings to make inserting a string through blocked grommets easier and quicker. Insert the awl through the grommet hole in the same manner as for traditional awls. The Pathfi... -
Page 15: Maintenance & Adjustments
Most tension calibrators (such as a Gamma Tension Calibrator) function by clamping off the string attached to one the end of the calibrator and applying tension to the string located on the opposite end of the calibrator. - Page 16 MAINTENANCE & ADJUSTMENTS Adjusting the String Clamp Jaw Spacing The string clamps will need minor adjust- ments according to what string type, con- struction, and gauge you are using. To adjust the gap (clamping pressure) between the clamp jaws, insert the string through the racquet as if you were beginning the main strings.
-
Page 17: Troubleshooting Tips
TROUBLESHOOTING TIPS PROBLEM SOLUTION String slips in clamps - Adjust gap between clamp jaws - Clean clamp jaws String slips in gripper - Clean gripper jaws - Make sure string is wrapped over top gripper prior to inserting between gripper jaws String clamp base slips on turntable - Clean bottom of clamp &... -
Page 18: Parts List
PARTS LIST PART # DESCRIPTION PART # DESCRIPTION CAP SCREW- M8x30 KEY PAD / ELECTRONICS WASHER- M8 TENNIS STRING CLAMP MFASC10 TT CLUTCH PAD MQAC12 QA CLAMP BASE TALL TT7/TT8 TT BOLTS* SUPP POST MOUNT PLATE TT END CAP - CENTER TT END CAP- RIGHT TOOLS &... -
Page 19: Parts Drawing
PARTS DRAWING MFASC10 MMSPP13 MFSPP13 MQAC12 MBMSP11... - Page 20 MMAN69 (MGXLT-10) GAMMA SPORTS 200 Waterfront Drive Pittsburgh, Pennsylvania 15222 Phone: 800.333.0337 Fax: 412.323.0317 Visit our website at www.gammasports.com Copyright 2018 GAMMA Sports - All Rights Reserved...
Need help?
Do you have a question about the X-Stringer XLT and is the answer not in the manual?
Questions and answers