Sony STR-DH520 Operating Instructions Manual
Multi channel av receiver
Hide thumbs
Also See for STR-DH520:
- Service manual (72 pages) ,
- Quick setup manual (2 pages) ,
- Specifications (2 pages)

Related Manuals for Sony STR-DH520


Summary of Contents for Sony STR-DH520
- Page 1 Multi Channel AV Receiver Operating Instructions STR-DH520 ©2011 Sony Corporation 4-263-361-11(1)
-
Page 2: Important Safety Instructions
The model and serial numbers are located on the rear of the unit. Record these numbers in the space provided below. Refer to them whenever you call upon your Sony dealer regarding this product. Model No. Serial No. This symbol is intended to alert the user to the presence of uninsulated “dangerous voltage”... - Page 3 12)Use only with the cart, stand, tripod, bracket, or table specified by the manufacturer, or sold with the apparatus. When a cart is used, use caution when moving the cart/apparatus combination to avoid injury from tip-over. 13)Unplug this apparatus during lightning storms or when unused for long periods of time.
-
Page 4: About This Manual
Notice for customers: The following information is only applicable to equipment sold in countries applying EU Directives. The manufacturer of this product is Sony Corporation, 1-7-1 Konan Minato-ku Tokyo, 108-0075 Japan. The Authorized Representative for EMC and product safety is Sony Deutschland GmbH, Hedelfinger Strasse 61, 70327 Stuttgart, Germany. -
Page 5: Table Of Contents
Table of Contents About This Manual...4 Supplied accessories...6 Description and location of parts...7 Getting started ...16 Connections 1: Installing the speakers ...17 2: Connecting the speakers ...19 3: Connecting the TV ...21 4a: Connecting the video equipment ...22 4b: Connecting the audio equipment...28 5: Connecting the antennas (aerials)...28 6: Connecting the AC power cord (mains lead) ...29... -
Page 6: Supplied Accessories
Supplied accessories • Operating Instructions (this manual) • Quick Setup Guide • FM wire antenna (aerial) (1) • AM loop antenna (aerial) (1) • Remote control (1) – RM-AAU104 (USA and Canada models only) – RM-AAU105 (Other models) • R6 (size AA) batteries (2) •... -
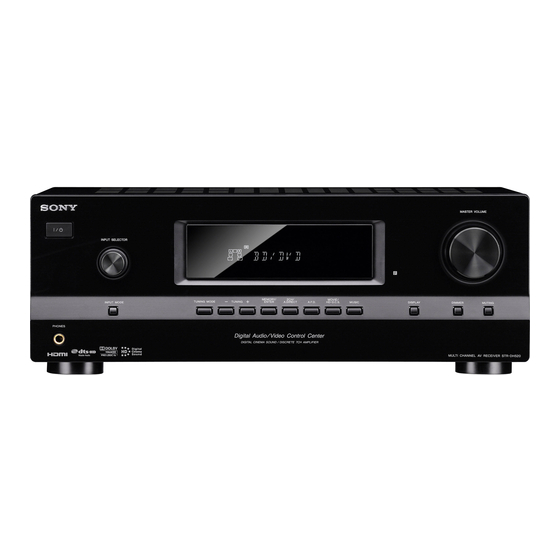
Page 7: Description And Location Of Parts
Description and location of parts Front panel A ?/1 (on/standby) (page 29, 40, 47) B INPUT SELECTOR (page 36 - 39, 41, 51) C Display panel (page 8) D Remote control sensor Receives signals from remote control. E MASTER VOLUME (page 36, 37) F MUTING (page 37) G DIMMER Adjusts the brightness of the display panel in 3... - Page 8 Indicators on the display panel COAX A Playback channel indicators The letters (L, C, R, etc.) indicate the channels being played back. Based on the speaker settings, the box around the letter(s) vary to show how the receiver downmixes the source sound.
- Page 9 G Dolby Pro Logic indicator Lights up the respective indicator when the receiver performs Dolby Pro Logic processing. This matrix surround decoding technology can enhance input signals. Dolby Pro Logic PL II Dolby Pro Logic II PL IIx Dolby Pro Logic IIx PL IIz Dolby Pro Logic IIz Note...
-
Page 10: Rear Panel
Rear panel 1, 2 A Audio signal section DIGITAL INPUT/OUTPUT jacks (page 21, 24, HDMI IN/OUT OPTICAL IN COAXIAL IN ANALOG INPUT/OUTPUT jacks (page 21, 26, White (L) AUDIO IN/OUT Red (R) AUDIO OUT Black PORTABLE IN B Video signal section The image quality depends on the connecting jack. - Page 11 Remote control Use the supplied remote control to operate this receiver and other equipment. The remote control is assigned to operate Sony audio/ video equipment. You can reassign the input button to match the equipment connected to your receiver (page 61).
-
Page 12: Input Buttons
Selects the equipment you want to use. When you press any of the input buttons, the receiver turns on. The buttons are assigned to control Sony equipment. Numeric buttons** Hold down SHIFT (O), then press numeric buttons to preset or tune to the preset stations. -
Page 13: Numeric Buttons
, N and TV CH +/ SOUND FIELD +/PROG +/ tactile dots. Use the tactile dots as references when operating the receiver. To control a Sony TV Hold down TV (P), then press the button printed in yellow to select the function you want. - Page 14 Displays the TV menus. N TV CH +**/– or PROG +**/– Scans for the preset TV channels. Selects the next or previous page while in the text mode. Q TV VOL +/– or +/– Adjusts the TV volume. R MUTING or Activates the TV’s muting function.
- Page 15 To control other Sony equipment Be sure to hold down SHIFT (O) to activate the buttons printed in pink (page 12). Name Numeric buttons** ENT/MEM CLEAR DISPLAY POP UP/MENU Color buttons V/v/B/b TOOLS/OPTIONS MENU/HOME ./> RETURN/EXIT O GUIDE or TOP MENU...
-
Page 16: Getting Started
Getting started You can enjoy your audio/video equipment connected to the receiver by following the simple steps below. Installing and connecting the speakers (page 17, 19) Checking the connection appropriate for your equipment Connecting the TV and video equipment (page 21, 22) The image quality depends on the connecting jack. -
Page 17: Connections
Connections 1: Installing the speakers This receiver allows you to use a 7.1 channel system (7 speakers and one subwoofer). Example of speaker system configuration AFront speaker (Left) BFront speaker (Right) CCenter speaker DSurround speaker (Left) ESurround speaker (Right) FSurround back speaker (Left)* GSurround back speaker (Right)* HFront high speaker (Left)* IFront high speaker (Right)*... - Page 18 Tips • When you connect a 7.1 channel speaker system with two surround back speakers, all the angles A should be the same. • When you connect a 7.1 channel speaker system with two front high speakers, place the front high speakers –...
-
Page 19: 2: Connecting The Speakers
2: Connecting the speakers Center speaker Surround speaker Right Left 10 mm (13/32") Right Left Right Left Subwoofer * Surround back/ Front speaker Front high speaker ** A Monaural audio cord (not supplied) B Speaker cord (not supplied) continued... - Page 20 * When you connect a subwoofer with an auto standby function, turn off the function when watching movies. If the auto standby function is set to on, it turns to standby mode automatically based on the level of the input signal to the subwoofer, and the sound may not be output.
-
Page 21: 3: Connecting The Tv
A Audio cord (not supplied) B Optical digital cord (not supplied) C Component video cord (not supplied) D Video cord (not supplied) E HDMI cable (not supplied) Sony recommends that you use an HDMI- authorized cable or Sony HDMI cable. Video signals Audio/Video signals... -
Page 22: 4A: Connecting The Video Equipment
Using HDMI connection High-Definition Multimedia Interface (HDMI) is an interface which transmits video and audio signals in digital format. By connecting Sony “BRAVIA” Sync- compatible equipment using HDMI cables, operations can be simplified. See ““BRAVIA” Sync Features” (page 47). HDMI features •... - Page 23 • DSD signals of Super Audio CD are not input and output. • Be sure to turn the receiver on when the video and audio signals of a playback equipment are being output to a TV via the receiver. If you set the “PASS.THRU” to “OFF”, video and audio signals will not be transmitted when the power is turned off.
- Page 24 B Coaxial digital cord (not supplied) C Component video cord (not supplied) D HDMI cable (not supplied) Sony recommends that you use an HDMI- authorized cable or Sony HDMI cable. Notes • Be sure to change the default setting of the BD/DVD input button on the remote control so that you can use the button to control your DVD player.
- Page 25 Connecting a PlayStation 3 PlayStation 3 Audio/video signals A HDMI cable (not supplied) Sony recommends that you use an HDMI- authorized cable or Sony HDMI cable.
-
Page 26: Connecting Satellite Tuner, Cable Tv Tuner
Connecting a satellite tuner, cable TV tuner Satellite tuner, Cable TV tuner Audio/video signals A HDMI cable (not supplied) Sony recommends that you use an HDMI- authorized cable or Sony HDMI cable. B Component video cord (not supplied) C Video cord (not supplied) - Page 27 Connecting a VCR, DVD recorder Audio/video signals A HDMI cable (not supplied) Sony recommends that you use an HDMI- authorized cable or Sony HDMI cable. B Video cord (not supplied) C Audio cord (not supplied) Note Be sure to change the default setting of the VIDEO input button on the remote control so that you can use the button to control your DVD recorder.
-
Page 28: 4B: Connecting The Audio Equipment
4b: Connecting the audio equipment Super Audio CD player, CD player Portable audio A Audio cord (not supplied) B Phono cord with stereo headphone jack (not supplied) Notes • Before connecting cords, be sure to disconnect the AC power cord (mains lead). •... -
Page 29: 6: Connecting The Ac Power Cord (Mains Lead)
6: Connecting the AC power cord (mains lead) Connect the AC power cord (mains lead) to a wall outlet. AC power cord (mains lead) To the wall outlet Note Be sure to turn the receiver on when the video and audio signals of a playback equipment are being output to a TV via the receiver. -
Page 30: Selecting The Speaker Pattern
Selecting the speaker pattern Select the speaker pattern according to the speaker system which you are using. V/v/b Speaker pattern settings For example: 5 / 2 2 front + 2 front high + center Speaker Front Front left/ pattern left/right right high 5/2.1 4/2.1... -
Page 31: Using Auto Calibration
Using AUTO CALIBRATION (Europe, Australia and Taiwan models only) This receiver is equipped with DCAC (Digital Cinema Auto Calibration) Technology which allows you to perform automatic calibration as follows: • Check the connection between each speaker and the receiver.* • Adjust the speaker level. •... - Page 32 Set up the optimizer microphone. Place the optimizer microphone at your seating position. Use a stool or tripod so that the optimizer microphone remains at the same height as your ears. Confirm active subwoofer setup • When a subwoofer is connected, turn on the subwoofer and turn up the volume prior to activating the subwoofer.
- Page 33 The table below provides measurement status shown on the display panel. Measurement for Speaker existence Speaker gain, distance, frequency response Subwoofer gain and distance * The corresponding speaker indicator lights up in the display panel during measurement. Tips • You can also select the calibration type you want and perform the Auto Calibration by using the “CUSTOM”...
- Page 34 When error codes appear Check the problem of the error. Display and explanation * 32 None of the speakers were detected. Make sure that the optimizer microphone is connected properly and perform the Auto Calibration again. If the optimizer microphone is connected properly but the error code still appears, the optimizer microphone cable may be damaged.
-
Page 35: Adjusting The Speaker Levels (Test Tone)
• FULL.FLAT Makes the measurement of frequency from each speaker flat. • ENGINEER Sets to “the Sony listening room standard” frequency characteristics. • FRONT.REF Adjusts the characteristics of all the speakers to match the characteristics of the front speaker. -
Page 36: Basic Operations
Press V/v repeatedly to select “AUTO xxx*”. The test tone is output from each speaker in sequence. * xxx represent a speaker channel. Note Depending on the speaker pattern settings, test tone may not be output from all speakers even though you selected “AUTO xxx”. -
Page 37: Viewing Information On The Display Panel
Play back the source. Press MASTER VOL +/– or +/– to adjust the volume. You can also use MASTER VOLUME on the receiver. Press SOUND FIELD +/– to enjoy the surround sound. You can also use 2CH/A.DIRECT, A.F.D., MOVIE/HD-D.C.S. or MUSIC on the receiver. -
Page 38: Recording Using The Receiver
Press the corresponding input button which you want to check the information. Press AMP MENU, then press DISPLAY repeatedly. Each time you press the button, the display changes cyclically as follows: Index name of the input* t Selected input t Sound field currently applied t Volume level t Stream info** When listening to FM and AM radio Preset station name* t Frequency t... -
Page 39: Tuner Operations
Tuner Operations Listening to FM/AM radio You can listen to FM and AM broadcasts through the built-in tuner. Before operation, make sure you have connected the FM and AM antennas (aerials) to the receiver (page 28). The tuning scale for direct tuning is shown below. Area USA, Canada 100 kHz... -
Page 40: Direct Tuning
Tuning to a station directly (Direct Tuning) You can enter the frequency of a station directly by using the numeric buttons. Press TUNER repeatedly to select the FM or AM band. You can also use INPUT SELECTOR on the receiver. Press D.TUNING. -
Page 41: Presetting Fm/Am Radio Stations
Presetting FM/AM radio stations You can store up to 30 FM and 30 AM stations as your favorite stations as preset stations. TUNER V/v/B/b Press TUNER repeatedly to select the FM or AM band. You can also use INPUT SELECTOR on the receiver. -
Page 42: Receiving Rds Broadcasts
Naming preset stations Press TUNER repeatedly to select the FM or AM band. You can also use INPUT SELECTOR on the receiver. Tune to the preset station you want to create an index name for (page 41). Press AMP MENU. Press V/v repeatedly to select “TUNER”, then press Press V/v repeatedly to select... -
Page 43: Enjoying Surround Sound
Enjoying Surround Sound Selecting the sound field This receiver can create multi channel surround sound. You can select one of the optimized sound fields from the receiver’s pre-programmed sound fields. Press SOUND FIELD +/– repeatedly to select the sound field you want. You can also press 2CH/A.DIRECT, A.F.D., MOVIE/HD-D.C.S. -
Page 44: Music Mode
HD-D.C.S. (HD Digital Cinema Sound) This mode is Sony’s new innovative home theater technology using the latest acoustic and digital signal processing technologies. It is based on precise response measurement data of a mastering studio. With this mode, you are able to enjoy Blu-ray... - Page 45 When headphones are connected You can only select the following sound fields if the headphones are connected to the receiver. x HP 2CH (Headphones 2CH) This mode is selected automatically if you use headphones (except Analog Direct). Standard 2 channel stereo sources completely bypass the sound field processing and multi channel surround formats are downmixed to 2 channels except LFE signals.
- Page 46 Digital audio formats supported by the receiver Digital audio formats that this receiver can decode depend on digital audio output jacks of the connected equipment. This receiver supports the following audio formats. Audio format Dolby Digital Dolby Digital EX Dolby Digital Plus Dolby TrueHD DTS-ES DTS 96/24...
-
Page 47: Resetting Sound Fields To The Default Settings
Sony products such as TV, Blu-ray Disc/DVD Player, AV amplifier, etc. that supports the Control for HDMI function. By connecting Sony equipment that is compatible with the “BRAVIA” Sync with an HDMI cable (not supplied), operation is simplified as follows: •... -
Page 48: Preparing For The "Bravia" Sync
Preparing for the “BRAVIA” Sync The receiver is compatible with the “Control for HDMI-Easy Setting” function. • If your TV is compatible with the “Control for HDMI-Easy Setting” function, you can set the Control for HDMI function of the receiver and playback equipment automatically by setting the Control for HDMI function on your TV (page 48). -
Page 49: Playing Back Equipment With One-Touch Operation (One-Touch Play)
Playing back equipment with one-touch operation (One-Touch Play) By a simple operation (one-touch), equipment connected to the receiver with “BRAVIA” Sync function start automatically. You can enjoy the sound/image from connected equipment. When you set “PASS.THRU” to “AUTO” or “ON”, sound and image can be output only from the TV while the receiver remains in standby mode. -
Page 50: Turning Off The Receiver With The Tv (System Power-Off)
Turning off the receiver with the TV (System Power-Off) When you turn the TV off, using the POWER button on the TV’s remote control, the receiver and the connected equipment turn off automatically. You can also use the receiver’s remote control to turn off the TV. -
Page 51: Advanced Operations
Advanced Operations Switching between digital and analog audio (INPUT MODE) When you connect equipment to both digital and analog audio input jacks on the receiver, you can fix the audio input mode to either of them, or switch from one to the other, depending on the type of material you intend to watch. - Page 52 Press V/v repeatedly to select “A. ASSIGN”, “V. ASSIGN” or “H. ASSIGN”, then press Press V/v repeatedly to select the following setting, then press or b. For “A. ASSIGN” and “V. ASSIGN”: Select input name you want to assign to. For “H.
-
Page 53: Using The Setting Menu
Using the setting menu You can customize the receiver by making various adjustments with settings menu. V/v/B/b RETURN/ EXIT O Press AMP MENU. Press V/v repeatedly to select the menu item you want, then or b. press Press V/v repeatedly to select the parameter you want to adjust, then press Press V/v repeatedly to select... -
Page 54: Overview Of The Menus
Overview of the menus The following options are available in each menu. For details, see the referencing page in the parentheses. Menu Parameters [Display] [Display] AUTO CAL Auto Calibration (Standard) [A. CAL] [STANDARD] (page 31) Auto Calibration (Custom) [CUSTOM] LEVEL Test tone [LEVEL] [T. - Page 55 Menu Parameters [Display] [Display] Surround speakers size [SUR SIZE] Front high speakers size [FH SIZE] Front left speaker distance [FL DIST.] Front right speaker distance [FR DIST.] Center speaker distance [CNT DIST.] Surround left speaker distance [SL DIST.] Surround right speaker distance [SR DIST.] Surround back speaker distance [SB DIST.]...
- Page 56 Menu Parameters [Display] [Display] Front speakers bass level [EQ] [BASS] (page 59) Front speakers treble level [TREBLE] TUNER FM station receiving mode [TUNER] [FM MODE] (page 59) Naming preset stations [NAME IN] AUDIO Synchronizes audio with video [AUDIO] output (page 59) [A/V SYNC] Digital broadcast language selection...
- Page 57 LEVEL menu You can adjust the level of each speaker manually. x T. TONE Lets you adjust the speaker levels while listening to the test tone from your seating position (page 35). x FL LVL, FR LVL, CNT LVL, SL LVL, SR LVL, SB LVL, SBL LVL, SBR LVL, LH LVL, RH LVL, SW LVL You can adjust each speaker’s level (front...
- Page 58 Tips • The “LARGE” and “SMALL” settings for each speaker determine whether the internal sound processor will cut the bass signal from that channel. When the bass is cut from a channel, the bass redirection circuitry sends the corresponding bass frequencies to the subwoofer or other “LARGE”...
-
Page 59: Audio Menu
EQ menu You can adjust the tonal quality (bass/treble level) of the front speakers. x BASS x TREBLE Note This function does not work when “A. DIRECT” is selected. TUNER menu You can set the FM station receiving mode and name the preset stations. -
Page 60: System Menu
When the TV is turned on while the receiver is in the standby mode, the receiver outputs HDMI signals from the receiver’s HDMI TV OUT jack. Sony recommends this setting if you use a “BRAVIA” Sync compatible Sony TV. This setting saves power in the standby mode when compared with the “ON”... -
Page 61: Using The Remote Control
Notes • This function does not work when TUNER input is selected. • If you use the Auto standby mode and the Sleep Timer at the same time, the Sleep Timer has priority. x NAME IN Lets you set the name of inputs. For details, see “Naming inputs”... -
Page 62: Resetting The Input Buttons
Sony DVD recorders are operated with a DVD1 or DVD3 setting. For details, refer to the operating instructions supplied with the DVD recorders. Sony VCRs are operated with a VTR 3 setting which corresponds to VHS. Resetting the input buttons... -
Page 63: Additional Information
Do not use any type of abrasive pad, scouring powder, or solvent, such as alcohol or benzine. If you have any questions or problems concerning your receiver, please consult your nearest Sony dealer. -
Page 64: Troubleshooting
Should any problem persist, consult your nearest Sony dealer. Note that if service personnel changes some parts during repair, these parts may be retained. Power The receiver is turned off automatically. - Page 65 There is no sound from a specific equipment. • Check that the equipment is connected correctly to the audio input jacks for that equipment. • Check that the cord(s) used for the connection is (are) fully inserted into the jacks on both the receiver and the equipment.
- Page 66 No sound is output from the receiver and TV speaker. • Check the setting of “AUDIO.OUT” in the HDMI menu (page 60). • Check that the equipment is connected correctly to the HDMI jack for that equipment. • You cannot listen to the Super Audio CD by connecting HDMI.
-
Page 67: Remote Control
When the receiver is in standby mode, there is no image output from the TV. • When the receiver enters into standby mode, image are from the last HDMI equipment selection before you turned off the receiver. If you are enjoying other equipment, play the equipment and perform the One-Touch Play operation, or turn on the receiver to select the HDMI... -
Page 68: Error Messages
If there is a malfunction, a message appears on the display panel. You can check the condition of the system by the message. If any problem persists, consult your nearest Sony dealer. If an error message appears while you perform Auto Calibration, see “When error codes appear”... -
Page 69: Specifications
Specifications AUDIO POWER SPECIFICATIONS POWER OUTPUT AND TOTAL HARMONIC DISTORTION: (USA model only) With 8 ohm loads, both channels driven, from 20 – 20,000 Hz; rated 90 watts per channel minimum RMS power, with no more than 0.09% total harmonic distortion from 250 milliwatts to rated output. - Page 70 Video section Inputs/Outputs Video: 1 Vp-p, 75 ohms COMPONENT VIDEO: Y: 1 Vp-p, 75 ohms : 0.7 Vp-p, 75 ohms : 0.7 Vp-p, 75 ohms 80 MHz HD Pass Through General Power requirements Area Power requirements USA, Canada, 120 V AC, 60 Hz Taiwan Europe, Australia 230 V AC, 50/60 Hz...
-
Page 71: Index
Index Numerics 2 channel 43 5.1 channel 17 7.1 channel 17 A.F.D. mode 43 Analog Direct 43 AUTO CALIBRATION 31 Blu-ray Disc player connecting 24 Cable TV tuner connecting 26 Clear memory 29 remote control 62 Dolby Digital EX 46 DVD player connecting 24 DVD recorder 27... - Page 72 Sony Corporation Printed in Malaysia...