
Related Manuals for Sapphire Sleep 200


Summary of Contents for Sapphire Sleep 200
- Page 1 Model 200 Adjustable Base User's Manual P/N SS200-XX THIS MANUAL CONTAINS IMPORTANT SAFETY INFORMATION. PLEASE READ AND KEEP FOR FUTURE REFERENCE Serial Number: REV: 04/16/19...
-
Page 2: Table Of Contents
TABLE OF CONTENTS Cover Table of Contents Limited Warranty Features of the Adjustable Base Important Safety Information Quick Assembly Guide Quick Assembly Guide (continued) 8. Components for Assembly Operation Power Cord Setup with Master Control Attaching Adjustable Legs Joining Adjustable Bases 12. -
Page 3: Limited Warranty
10 Year Limited Warranty FULL 1-YEAR WARRANTY: The SS200 Adjustable Base is warranted against defects in materials or workmanship for a period of one year from the date of purchase to the original purchaser. During the first year, South Bay International will repair or replace, at no cost to the original purchaser, any defective part This includes all authorized labor and transportation costs incurred with the repair or replacement of any parts found to be defective. -
Page 4: Features Of The Adjustable Base
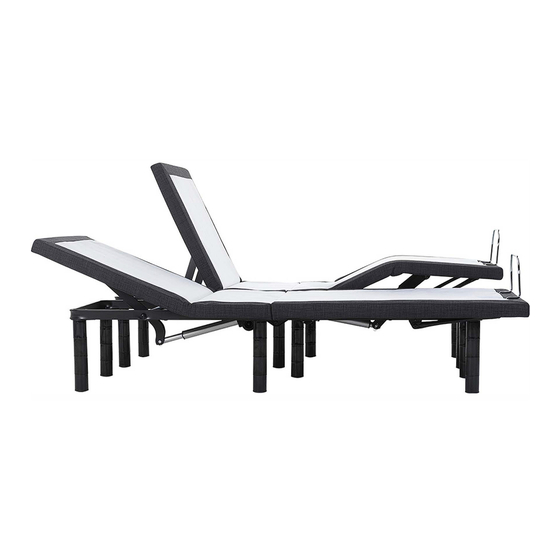
Features of the SS200 Adjustable Base Head and foot up/down positions 5 button wireless remote control Pre-programmed flat position Six legs with customizable heights Undercarriage is made with reinforced steel components for strength and durability Emergency backup battery box Mattress foot retainer bar Notes: This base is designed to fit within a standard bedframe. -
Page 5: Important Safety Information
Important Safety Information PLEASE READ ALL INSTRUCTIONS AND SAFETY INFORMATION CAREFULLY BEFORE USE AND ASSEMBLY Safety Information: Only use the adjustable bed base for its intended described in this manual. Follow guidelines below your safety, safety of others avoid risk electrical shock, fire,... -
Page 6: Quick Assembly Guide
Quick Assembly Guide NO TOOLS REQUIRED FOR ASSEMBLY STEP 1: Unpack adjustable base by carefully cutting plastic bag to remove adjustable base. Unfold base carefully as parts for assembly may have shifted during shipping. Remove silver retainer bar and cardboard boxes attached the base. -
Page 7: Quick Assembly Guide (Continued)
Quick Assembly Guide STEP 4a: Locate the wireless remote control and insert 3 AAA batteries (included). The remote control pre-programmed to work with the adjustable bed. have more than adjustable bed, each remote control adjustable bed set should be pre-programmed to work separately. This will prevent both beds from being controlled by wireless... -
Page 8: Components For Assembly And Operation
Components for Assembly and Operation Four-piece adjustable legs B: (1) Wireless back-lit remote with (3) AAA batteries included per base C: (1) Foot retainer bar with wing-nuts per base D: (1) Simultaneous Synchronization Cable (Only included with Twin XL/CKS bases) Back-up battery pack AC/DC power... -
Page 9: Power Cord Setup With Master Control Box
Power Cord Set Up with Master Controller Power Cord Input Voltage 100-240V Battery Back Master Control Box... -
Page 10: Attaching Adjustable Legs
Attaching Adjustable Legs All 6 legs must be installed onto the adjustable base and they must be resting on floor; the base will operate properly without them. Legs MUST be a MINIMUM of 6" allow for articulating clearance. IMPORTANT: Using ONLY 3"... -
Page 11: Joining Two Adjustable Bases
Joining Two Adjustable Bases... -
Page 12: Mattress Retainer Bar
Mattress Retainer Bar To Install the mattress retainer bar: STEP 1: Locate the chrome mattress retainer bar the packaging. STEP At the foot of base, there are two openings to insert mattress retainer bar. Slide the large retainer into the opening at the foot of the bed. -
Page 13: Remote Control Frequency Setup
Remote Control Frequency Set-up This process is used when the remote control is not communicating with the (the base not responding moving when remote control activated). STEP 1: Unplug the adjustable base that is not being programmed. STEP While the bed that being programmed plugged... -
Page 14: Synchronizing Two Adjustable Bases
Synchronizing Two Adjustable Bases This process programs two adjustable bases controlled at the same time by either remote control. This allows synchronized control of the two bases. STEP Unplug base from power source STEP 2: Connect the male end of the simultaneous synchronization cable each control STEP 3:... -
Page 15: Remote Control Features
Remote Control Features... -
Page 16: Test All Functions
Test All Functions • Head up/down positions • Foot up/down positions • Pre-programmed flat position... -
Page 17: Emergency Battery Back Up
Emergency Battery Back Up In case of a power failure, the SS200 Adjustable Base features an emergency backup feature that allows you to return the bed to the flat position without power. Step 1: Unplug the adjustable base. Step 2: Locate the Emergency Battery Back Up Box that is attached to the power cord. Step 3: Insert four 9 Volt alkaline batteries (not included) into the battery box. -
Page 18: Weight Recommendations And Limits
Weight Recommendations and Limits The recommended weight restriction for the SS200 Adjustable Base is 750 pounds, which is calculated to include the weight of the mattress. In order to calculate the weight limit, subtract the weight of the mattress from 750 pounds. The bed will support the recommended weight limits if distributed evenly across the base. -
Page 19: Operating Noises
Operating Noises During typical operation, wheels, which allow the bed to articulate, will make contact with the steel platform supports base creating a contact noise. When entering, exiting or shifting weight on base, this contact noise may audible as wheels make contact with steel platform supports of base. -
Page 20: Troubleshooting Guide
Troubleshooting Guide If one or more functions on the base have stopped operating: • Check under bed base to verify that the wired connections are secure and that there are no cords or bedding obstructing the movement of base. Check that power cord is assembled properly and that the connections are secure. -
Page 21: Troubleshooting Component Guide
Troubleshooting Component Guide Foot Actuator Master Control Box Head Actuator...
Need help?
Do you have a question about the 200 and is the answer not in the manual?
Questions and answers