Table of Contents
Advertisement
Advertisement
Table of Contents

Summary of Contents for AJS Motorcycles DN-3000
- Page 1 MOTOR OBD DIAGNOSTIC DN-3000 EFI-SCANNER...
-
Page 2: Table Of Contents
Table of contents 1. Safety Precautions and Warnings 2. Using the Scan Tool 2.1 Tool Description DN-3000 2.2 Specifications 2.3 Included 2.4 MOTOR OBD 2.5 DTC Dictionary 2.6 Review 2.7 Units diagnostic 2.8 Tool setup 2.9 Tool information 3. MOTOR OBD Diagnostics... -
Page 4: Safety Precautions And Warnings
1 . Safety Precautions and Warnings To prevent personal injury or damage to vehicles and/or the scan tool, read this instruction manual first and observe the following safety precautions at a minimum whenever working on a vehicle: Always perform automotive testing in a safe environment. ●... -
Page 5: Using The Scan Tool
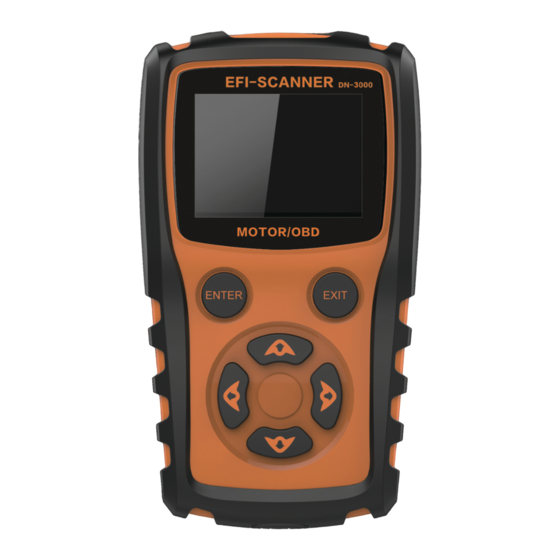
2 . Using the Scan Tool 2 .1 Tool Description - DN-3000 1. LCD DISPLAY – Indicates test results.2.8’’TFT 262k true color. ENTER BUTTON – Confirms a selection (or action) from a menu. ENTER EXIT BUTTON – Cancels a selection (or action) from a menu or returns to EXIT the menu. -
Page 6: Specifications
3. Storage Temperature: -20 to 70°C ( -4 to 158 F°) 4. External Power: 8.0 to 18.0 V power provided via vehicle battery 2 .3 Included 1. DN-3000 Scan Tool main unit 2. CD drives 3. USB upData cable 2 .4 MOTOR OBD 1. -
Page 7: Dtc Dictionary
5. Press ENTER to confirm. A sequence of messages displaying the MOTOR protocols will be observed on the display until the vehicle protocol is detected. If the scan tool fails to communicate with the vehicle's ECU (Engine Control Unit), a "LINKING ERROR!" message shows up on the display. -
Page 8: Review
2 .6 Review This function is used to review the recorded data streams,DTC,and Freeze frame,select review in the main menu and press enter and the screen will display the interface as shown below: MOTOR OBD Review DTC Dictionary Units diagnostic Tool Setup Tool information 2 .7 Units diagnostic... -
Page 9: Tool Information
2 .8 System Setup MOTOR OBD Review DTC Dictionary Units diagnostic Tool Setup Tool information The scan tool allows you to make the following adjustments and settings: 1. Language: Selects the desired language. 2. Contrast: Adjusts the contrast of the LCD display. 3. -
Page 10: Motor Obd Diagnostics
3 . MOTOR OBD Diagnostic The devices is smart reading ECU protocol information, enter the relevant menu Diagnostic Menu 1 1 Read Codes 1.1 Use the UP/DOWN scroll button to select Read Codes from the MOTOR Diagnostic and press ENTER. Diagnostic Menu Read Codes Erase Codes... - Page 11 2 Erase Codes Notes: This function is performed with key on engine off . Do not start the engine. After clearing, you should retrieve trouble codes once more or turn ignition on and retrieve codes again. If there is still some trouble codes for hard troubles, please find the reason caused the trouble code firstly, and then solve the problem.
- Page 12 2.3 Press ENTER to confirm. If the codes are cleared successfully, an "Erase Done!" confirmation message is displayed. Erase Codes Erase Done! Press any key to con. If the codes are not cleared, then an "Erase Failure. Turn Key on with Engine off!" message is displayed. Erase Codes Erase Failure.
-
Page 13: Data Stream
3 Data Stream 3.1 Use the UP/DOWN scroll buttons to select Data Stream from the MOTOR Diagnostic and press ENTER. Diagnostic Menu Read Codes Erase Codes Data Stream Status Stream Data record Data graphical display ECU Information 3.2 Data Stream will be displayed ,FE Page Turn via UP/ DOWN. -
Page 14: Data Graphical Display
5 Data graphical display 5.1 Use the UP/DOWN scroll buttons to select Data graphical display from the MOTOR Diagnostic and press ENTER. Diagnostic Menu Read Codes Erase Codes Data Stream Status Stream Data record Data graphical display ECU Information 5.2 Data graphical display will be displayed, FE Page Turn via UP/ DOWN. - Page 15 Diagnostics Menu 2 1 Read Codes 1.1 Use the UP/DOWN scroll button to select Read Codes from the Diagnostic Menu and press ENTER. Diagnostic Menu Read Codes Erase Codes Data Stream Data record Data graphical display ECU Information Freeze Frame I/M Readiness 1.2 Use the UP/DOWN scroll button to select Stored Codes or Pending Codes from the Trouble Codes menu and press...
-
Page 16: Erase Codes
2 Erase Codes Notes : This function is performed with key on engine off . Do not start the engine. After clearing, you should retrieve trouble codes once more or turn ignition on and retrieve codes again. If there is still some trouble codes for hard troubles, please find the reason caused the trouble code firstly, and then solve the problem. -
Page 17: Data Stream
3 Data Stream 3.1 Use the UP/DOWN scroll buttons to select Data Stream from the MOTOR Diagnostic and press ENTER. Diagnostic Menu Read Codes Erase Codes Data Stream Data record Data graphical display ECU Information Freeze Frame I/M Readiness 3.2 Data Stream will be displayed ,FE Page Turn via UP/ DOWN. - Page 18 5 Data graphical display 5.1 Use the UP/DOWN scroll buttons to select Data graphical display from the MOTOR Diagnostic and press ENTER. Diagnostic Menu Read Codes Erase Codes Data Stream Data record Data graphical display ECU Information Freeze Frame I/M Readiness 5.2 Data graphical display will be displayed, FE Page Turn via UP/ DOWN.
- Page 19 7 View Freeze Frame Diagnostic Menu Read Codes Erase Codes Data Stream Data record Data graphical display ECU Information Freeze Frame I/M Readiness if DTCs were erased, View Freeze Data may not be stored in vehicle memory depending on vehicle. Select [View Freeze Frame], the screen will display the interface as shown below: Use the UP/DOWN scroll button for more PIDs if an or arrow...
-
Page 20: M Readiness
8 I/M Readiness The I/M Readiness Monitor Status function also can be used (after repair of a fault has been performed) to confirm that the repair has been performed correctly, and/or to check for Monitor Run Status. Select [I/M Readiness Test] and Press [ENTER], the screen will display the interface as shown below: Diagnostic Menu Read Codes... -
Page 21: Evap System Test
10 Evap System Test Diagnostic Menu O2 Sensor Test Evap System Test On-Board Monitoring Select EVAP system test and press enter,the screen will display the relative information about EVAP system.some vehicle manufacturers do not allow external devices to control vehicle system.if the car supports this fuction,it will display as below 11 On-Board Monitoring 11.1 Use the UP/DOWN scroll button to select On-Board... -
Page 22: Warranty And Service
The exclusive remedy for any automotive meter found to be defective is repair or replacement, and DN-3000 shall not be liable for any consequential or incidental damages. 4.2 Service Procedures If it becomes necessary to return the scan tool for repair, contact your local distributor for more information.
Need help?
Do you have a question about the DN-3000 and is the answer not in the manual?
Questions and answers
Where is the DLC connecter on a hisun 700 utv