Advertisement
Table of Contents
- 1 Table of Contents
- 2 Register Your TV
- 3 Packaged Contents
- 4 Buttons and Ports on the TV
- 5 Attach the TV Stand or Wall Mount Bracket
- 6 Connect Devices to Your TV
- 7 Establish a Network Connection
- 8 Buttons on Your TV Remote
- 9 Begin Using Your Remote
- 10 Power on the TV
- 11 Complete the First-Time Setup Menu
- 12 Begin to Enjoy Your TV
- 13 Product Specifications
- 14 Quick Problem-Solving Tips
- 15 Certification and Compliance
- Download this manual
Advertisement
Table of Contents

Subscribe to Our Youtube Channel
Related Manuals for Sharp LC-40N5004U


Summary of Contents for Sharp LC-40N5004U
- Page 1 FHD Smart TV Quick Start Guide Help SHARP improve the environment by reducing paper waste. For detailed instructions and feature descriptions, access the full User Manual online. Before using the TV, please read this guide carefully and keep it for future reference.
- Page 2 Hisense Company Ltd. and its subsidiaries. This product is sold to you under one or more license agreements between Sharp Corporation and Hisense International (Hong Kong) America Investment Co. Ltd. All other trademarks are the property of their respective holders.
- Page 3 This Quick Setup Guide supports the following models: LC-40N5004U...
-
Page 4: Table Of Contents
Table of Contents Register Your TV! ................................. 2 Packaged Contents ..............................3 Buttons and Ports on the TV ............................ 4 Attach the TV Stand or Wall Mount Bracket ......................5 Connect Devices to your TV ............................ .7 Establish a Network Connection ..........................9 Buttons on your TV Remote............................11 Begin Using your Remote ............................12 Power on the TV .................................13... -
Page 5: Register Your Tv
TV. For detailed instructions, access the User Manual on the support pages listed below. Because we value your business, we want to keep you in the know of 'all things SHARP'. Using your mobile phone, scan the Registration page QR code to register your TV. Depending on the make and model of your phone, you may need to download a QR code scanning app. -
Page 6: Packaged Contents
Packaged Contents Your package in which you purchased your new TV contains the following items: Quick Setup Guide (this document) Important Safety Information and Warranty Card Remote Control 2 AAA batteries A left and right leg that forms the TV stand 4 screws (M4×30) AV Input Cable IMPORTANT:... -
Page 7: Buttons And Ports On The Tv
Buttons and Ports on the TV TV Side View Back View of the TV (40") STANDBY / INPUT... -
Page 8: Attach The Tv Stand Or Wall Mount Bracket
STEP 1. Attach the TV Stand or Wall Mount Bracket (not included) Attach the TV Stand (For steps to attach the wall mount see page 6) CAUTION: Be sure to disconnect the A/C power cord before installing a stand or Wall-Mount brackets. The LED display is very fragile and must be protected at all times when installing the legs that form the stand. - Page 9 Attach the Wall Mount Bracket (not included) • To prevent internal damage to the TV and ensure it is Before you begin the third-party manufacturer instructions, be sure to mounted securely, be sure to use fixing screws (not do the following things: provided) that are 8.0 - 10.0 mm in length when measured 1.
-
Page 10: Connect Devices To Your Tv
STEP 2. Connect Devices to your TV Check to ensure that you have selected the right cables for the ports and that they are connected securely. Loose connections can affect the quality of the picture image and color. TV label Port Cable External Equipment Brief Description VHF/UHF Antenna ANT/CABLE Connect an outdoor VHF/UHF antenna. - Page 11 TV label Port Cable External Equipment Brief Description Connect headphones to hear audio from the TV. HEADPHONE Headphones with microphones are not supported. Connect an Ethernet cable to access a network or the Internet. The TV also has a wireless connectivity feature.
-
Page 12: Establish A Network Connection
STEP 3. Establish a Network Connection ˅ 1. Press the [ ] button on the remote control, press[ ] button to select Settings and then press [OK] to enter the Settings menu. 2. Select Network → Network Configuration. TV JACK IP Sharer (Router) External Modem (with DHCP server) (ADSL / VDSL / Cable TV) - Page 13 Establish a wireless network connection Wireless router with DHCP Wireless LAN Adapter LAN Cable built-in TV set The TV can directly receive network signals via wireless router 1. Select Wireless. The list of networks will be displayed automatically. 2. Select a wireless network from the list, input the password and select Connect. 3.
-
Page 14: Buttons On Your Tv Remote
Buttons on your TV Remote BUTTON DESCRIPTION BUTTON DESCRIPTION Power on / off Volume (up/down) Change TV input source Channel (up/down) INPUT Enter Channels / input numbers Mute and restore sound Number Turn Closed Captioning On/Off and CC On When Set the audio language (Multi Track Sound) Mute Media content control function buttons Dash button / Select a digital sub-channel... -
Page 15: Begin Using Your Remote
STEP 4. Begin Using your Remote the TV set. It can work at a 30 degree horizontal or vertical angle. 1. Slide the back cover to open the battery compartment of the remote control. Program Your Universal Cable or Satellite Remote Control to Operate Your New Television (only for USA) If you would like to program your other household remote controls to your new television, please refer to the User's Manual supplied by... -
Page 16: Power On The Tv
Press the Power button on the remote to turn on the TV. A splash Remote as a ‘Universal’ Remote screen that shows the logo appears. Next, the First-Time Setup Menu If you prefer to use your Cable Set-top Box or Satellite Receiver begins by prompting you to choose your Language, Region, and Remote as a ‘Universal Remote’, then visit the Support page to view a Time Zone. -
Page 17: Complete The First-Time Setup Menu
STEP 6. Complete the First-Time Setup Menu Screen Task Product Registration • Register to stay up-to-date with news and updates After the splash screen that shows the logo appears, begin the first- about your TV. time setup menu. Last step of TV setup • You are at the last step of TV setup. If you have Language Region Time Zone... -
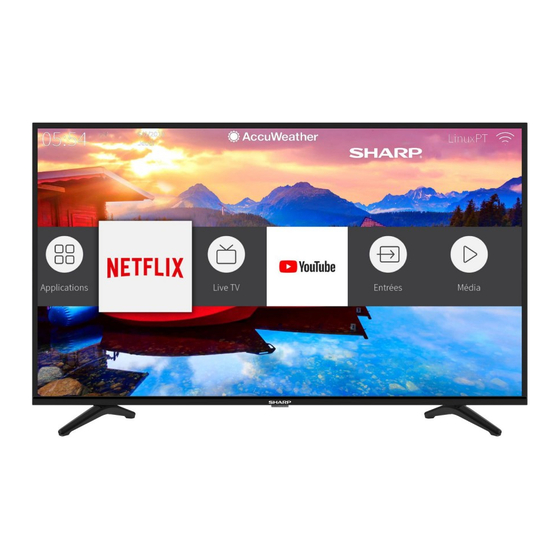
Page 18: Begin To Enjoy Your Tv
Some or all of 1. Press the speech button to access the Menu. the included or downloaded application services in this Sharp, 2. Next, select Settings to enter the Settings Menu. Aquos or Quattron device may not function depending on the 3. -
Page 19: Product Specifications
Product Specifications Model Name LC-40N5004U Dimension Without Stand 35.6 × 20.4 × 3.2 inches (W × H × D) (904 × 519 × 81.6 mm) With Stand 35.6 × 22.1 × 8.5 inches (904 × 562 × 215 mm) Weight Without Stand 12.8 lbs (5.8 kg) - Page 20 Operating Temperature 5°C - 35°C(41°F - 95°F) Operating Humidity 20% to 80% non-condensing Storage Temperature -15°C to 45°C(5°F to 113°F) Storage Humidity 10% to 70%, non-condensing Disclaimer: All products, product specifications, and data are subject to change without notice to improve reliability, function, design or other aspects.
-
Page 21: Quick Problem-Solving Tips
Quick Problem-Solving Tips When you experience an issue with your TV, turn it off and on again. If this does not resolve the problem, then refer to the ti ps below. If the problem is still not resolved, then contact us at one of the phone numbers on Page 2. ISSUES POSSIBLE SOLUTIONS •... -
Page 22: Certification And Compliance
The Wi-Fi Module complies with FCC radiation exposure limits set forth for an uncontrolled environment. This device should be ©2019. All rights reserved. SHARP and the SHARP logo are registered installed and operated with a minimum distance of 20 centimeters trademarks of SHARP.
Need help?
Do you have a question about the LC-40N5004U and is the answer not in the manual?
Questions and answers
I downloaded the paramount T.V app and it's not working. It also stops everything else from working.
How to change volume without the remote