
Related Manuals for PNI House WiFi 400


Summary of Contents for PNI House WiFi 400
- Page 1 Video surveillance kit PNI House WiFi 400 NVR and 4 wireless cameras USER MANUAL NVR menu (Android / iOS) app Software HCMS (Windows)
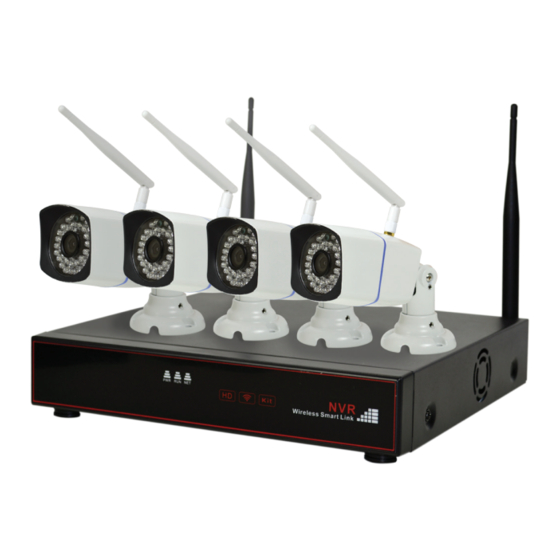
- Page 2 IP CAMERA: NVR: 1 - Antenna 1 - Antenna connector 2 - Mounting bracket 2 - Network Interface 3 - Adjust camera inclination angle 3 - VGA Interface 4 - Network Interface 4 - HDMI Interface 5 - Power port 12V 5 - USB port 6 - Power port 12V IP CAMERA TECHNICAL SPECIFICATIONS:...
- Page 3 TCP/IP HTTP, NTP, IGMP, DHCP, UDP, SMTP, RTP, Protocol RTSP, ARP, DDNS, DNS, HTTPS 802.1XP2P Network Interface 1x10/100 Mbps RJ45 WIFI 2.4G WIFI distance up to 100m (depending on the obstacles) Power voltage 12V / 1A Working temperature -25°C ~ +60°C Working humidity 0% - 90% RH (without condensation) TECHNICAL SPECIFICATIONS FOR NVR:...
-
Page 4: Nvr Installation
NVR INSTALLATION: • Open the NVR casing and install the hard drive (not included). Connect the data and power cables. Close the casing and fasten the screws. • Connect the mouse to the USB port • Connect a monitor to the NVR via an HDMI or VGA cable •... - Page 5 After the wireless connection between NVR and cameras is established (the operation may take a few minutes), the image captured by camcorders will be displayed on the monitor. AUTHENTICATION: Right click on the screen. Select any menu from the list. A pop-up with authentication interface will appear.
-
Page 6: Network Configuration
Go to the Main menu - System - Users Please enter the old password. If it is the first login in the system, the default user is not protected by any password; leave blank field. Enter your new password, confirm your password, click OK. NETWORK CONFIGURATION: You can remotely control the NVR only after you have correctly configured the network parameters:... - Page 7 OTHER OPTIONS: PLAYBACK: Go to Main menu - Playback Select channel and date. Double-click to play the record. BACKUP: Connect a USB stick to the USB port Go to Main menu - Backup Select channel, record type and time. Click Search. In the interface that opens, select the desired file.
-
Page 8: Hdd Format
HDD FORMAT Note: The hard disk is not included in the package. Right click on the screen. Go to Main menu - HD manager. Select the hard disk and click on Initialize. After finishing the formatting (which may take several minutes depending on the size), the NVR can start the recording operation. - Page 9 CHANNEL: Add camera Note: The NVR supports up to 8 cameras and is only compatible with PNI IP11MP 720p wireless video surveillance cameras If you want to replace or add a camera to your system, follow the steps below: •...
- Page 10 OSD display Set the camera name on a particular channel. Encode setting: Set the video parameters for each channel, such as: resolution, frames per second, bit rates, etc. for primary and secondary flow. Motion detection: Enable or disable this function, set the detection area and the degree of sensitivity on a particular channel.
- Page 11 Image effects: You can change the image parameters such as brightness, saturation, contrast. SYSTEM: General: You can change the menu language, display resolution, time, date, and mouse speed. Network: You can manually set network parameters or obtain them automatically by clicking “Obtain an IP address automatically”...
-
Page 12: Maintenance
Users: You can add users or change the password. MAINTENANCE: System information: Provides information about version, status and P2P ID. Log information: Select the period of time to view the history of system activities: operation, registration, configuration etc. Auto maintenance: At the scheduled time, the system restarts automatically. - Page 13 Version upgrade: Save the upgrade file to a USB stick in its root. Plug the stick into the USB port of the NVR. In the Maintenance interface, select the source and click Upgrade: Default configure: The system will automatically restart to reconfigure the factory settings.
-
Page 14: Add Camera
REMOTE MONITORING VIA MOBILE PHONE INSTALL “CLOUDLENS2” APP Method 1: scan below QR code Method 2: Search CloudLens2 APP in Google Play or App Store. Once you’ve found the app, install it. ADD CAMERA: Once you’ve logged into your app, click the “plus” button on the main interface:... - Page 15 There are three ways to add a camera: 1. Add camera by scanning the QR code. Click .Scan the QR code from the NVR menu. Go to the Maintenance menu - System information. 2. Manually add: manually enter all the information of the room to be added: DeviceName: name the camera.
- Page 16 By clicking the Help button in the Extra Settings menu, you will access a user interface / buttons / function guide in the application. Note: Not all features offered by the application are active for the kit PNI House WiFi400.
-
Page 17: Main Interface
MONITORING VIA HCMS PC SOFTWARE: INSTALLATION: The installation file can be found on the CD included in the package. AUTHENTICATION: Default username - admin, default password - admin. To change the default password, go to Config manager - User manager. MAIN INTERFACE: 1. - Page 18 In the Device list area, double-click on the channel you want to watch. By right clicking on the window of the selected camera, you have a number of options: Start play, Stop play, Quality first, Speed first, Stop all channels. Preview images: The user can choose how to view the channels (single channel or multiple channels): Full screen view mode...
- Page 19 View 25 channels simultaneously View 36 channels simultaneously View 49 channels simultaneously View 64 channels simultaneously 2. PTZ direction, PTZ advanced (Control PTZ): The user can control the rotation of the camera (the camera must have PTZ function to benefit from these settings), such as: vertical and horizontal motion, zoom, focus, speed etc..
- Page 20 The cruise route is the user-defined movement between two areas (preset points) with a PTZ camera. The move allows the user to monitor a larger area. Horizontal scanning allows you to move the camera vertically to monitor the area vertically, using a camera that has the PTZ function.
- Page 21 Set up the registration plan according to time and day of the week. User administration: Config manager User manager Go to Add users and assign rights. Device manager: Add camera to system: Automatically add: Click the Search device button to search for a camera. The rooms you find will be listed.
- Page 22 Adding manually: Click the Add manually button. Fill in the required data: Notes: The UID of the kit can be found in the NVR menu. Go to the Maintenance menu - System information. Use the same username and password to login to the NVR menu. The default username is „admin”...
- Page 23 The added cameras can be found in the Device list. You can change the name of a room by right clicking on a camera - Update name. Configurare sistem: In this interface there are 4 sections you can customize: System basic setup, Basic setup setup, Sync setup time, Alarm basic record setup.
Need help?
Do you have a question about the House WiFi 400 and is the answer not in the manual?
Questions and answers