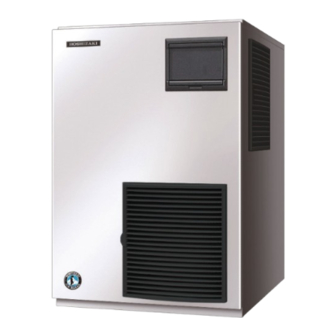
Hoshizaki FM-1000AKE Instruction Manual
Modular ice maker
Hide thumbs
Also See for FM-1000AKE:
- Instruction manual (78 pages) ,
- Installation manual (44 pages) ,
- Service manual (163 pages)
Table of Contents
Advertisement
Quick Links
Advertisement
Table of Contents

Summary of Contents for Hoshizaki FM-1000AKE
- Page 1 MODULAR ICE MAKER FM-1000AKE FM-1000AKE-N FM-750AKE FM-750AKE-N FM-600AKE FM-600AKE-N INSTRUCTION MANUAL FM-480AKE FM-480AKE-N FM-300AKE FM-300AKE-N FM-170AKE FM-170AKE-N FM-480AKE Telford 70 Stafford Park 7, Telford, Shropshire TF3 3BQ UK L1F054114 (050818)
-
Page 2: Table Of Contents
IMPORTANT SAFETY INFORMATION ............................1 I. INSTALLATION INSTRUCTIONS ..............................3 1. CONSTRUCTION ................................3 2. ACCESSORIES ...................................3 3. UNPACKING ..................................3 4. LOCATION ...................................4 5. INSTALLATION ..................................4 6. ELECTRICAL CONNECTIONS ............................5 7. WATER SUPPLY AND DRAIN CONNECTIONS .........................5 II. OPERATING INSTRUCTIONS ..............................6 1. START UP ....................................7 2. -
Page 3: Important Safety Information
ENGLISH IMPORTANT SAFETY INFORMATION Throughout this manual, notices appear to bring your attention to situations which could result in death, serious injury, or damage to the unit. Indicates a hazardous situation which, if not avoided, could result in death or WARNING serious injury. - Page 4 [FM-750, 480, 300, 170] If the supply cord is damaged, it must be replaced by a replacement cord available from Hoshizaki Parts/Service Centres. * Do not touch the electrical parts or operate the switches with damp hands. * This appliance is not intended for use by persons (including children) with reduced physical,...
-
Page 5: Installation Instructions
Remove shipping carton, tape(s) and packing. If packing material is left in the icemaker, it will not work properly. Top Panel This icemaker needs a storage bin. The recommended storage bin is HOSHIZAKI ICE STORAGE BIN, Model B-300SD(PD) or B-500SD(PD) with top kit - 8C, B-700SD(PD) with top kit - 22C, or B-900SD(PD) with top kit - 22C and top kit -8C. -
Page 6: Location
ENGLISH 5) Remove the protective plastic film from the panels. If the icemaker is exposed to the sun or to heat, remove the film after the icemaker cools. 4. LOCATION WARNING This icemaker is not intended for outdoor use. The icemaker should not be located next to ovens, grills or other high heat producing equipment. This appliance is not suitable for installation in an area where a water jet could be used. -
Page 7: Electrical Connections
* Icemaking water must be potable water. Where scaling can be caused by water quality, installation of an external filter or softener is recommended. Contact your local water treatment professional or Hoshizaki service agent. * Water supply pressure should be minimum 0.05 MPa (0.5 bar) and maximum 0.8 MPa (8 bar). If the pressure exceeds 0.8 MPa (8 bar), use a proper pressure reducing valve. -
Page 8: Operating Instructions
ENGLISH Water Supply Inlet G3/4 Inlet Hose Drain Outlet R3/4 Outlet Hose Water Supply Tap Inlet Hose [Connection to the drain] * Hand tighten grey flexible outlet hose (accessory) onto the R3/4 fitting on the rear of the icemaker as indicated, ensuring rubber washer is correctly positioned to obtain a leak free joint. -
Page 9: Start Up
ENGLISH 1. START UP Operation Panel The installer will normally commission the icemaker to start the Ice Button Display Stop Button automatic icemaking process. To ensure continuous operation, make sure that: * The water supply tap is on, and * The icemaker is connected to the power supply. To start the icemaking process, check the position of the operation switch on the operation panel: “OFF”... - Page 10 [c] Storage Bin Interior Cleaning/Sanitisation (Weekly) Thumbscrew 1) Open the storage bin door, and remove all ice. Note: Hoshizaki recommends various types of storage bin for the icemaker which vary in size and design. The following instructions are therefore for general guidance only.
-
Page 11: Inspection And Maintenance
Once the unit shuts down after 500 hours, the operation can be resumed by turning off the operation switch and turning it back on. But the unit shuts down again after 500 hours. To resume the operation, contact your local Hoshizaki service agent for the required replacement. -
Page 12: Disposal
5. WARRANTY Hoshizaki warrants to the original owner/user that all Hoshizaki branded products shall be free of defects in material and/or workmanship for the duration of the “warranty period”. The warranty shall be effective for two years from the date of installation. -
Page 13: Specifications
ENGLISH SPECIFICATIONS Model FM-1000AKE FM-1000AKE-N Type Air-cooled, flake ice Air-cooled, nugget ice Power Supply 1 phase 220-240V 50Hz 1 phase 220-240V 50Hz Electric Consumption 2490W 2550W Ice Production per 24h 1030kg (ambient 10°C, water 10°C) 860kg (ambient 10°C, water 10°C) - Page 14 ENGLISH Model FM-480AKE FM-480AKE-N Type Air-cooled, flake ice Air-cooled, nugget ice Power Supply 1 phase 220-240V 50Hz 1 phase 220-240V 50Hz Electric Consumption 1650W 1650W Ice Production per 24h 500kg (ambient 10°C, water 10°C) 430kg (ambient 10°C, water 10°C) Dimensions 560mm(W) x 700mm(D) x 780mm(H) 560mm(W) x 700mm(D) x 780mm(H) Refrigerant...


Need help?
Do you have a question about the FM-1000AKE and is the answer not in the manual?
Questions and answers