Table of Contents
Advertisement
Quick Links
Installation
Instructions
Questions? Call 1-800-GE-CARES (1-800-432-2737)
READ ALL INSTRUCTIONS BEFORE INSTALLING THE ICEMAKER OR ACCESSORIES
To reduce the risk of fire, explosion, electric shock, or injury when using your refrigerator,
WARNING
follow these basic safety precautions:
of your refrigerator before installing or operating
CAUTION
Tools Needed
Flatblade screwdriver
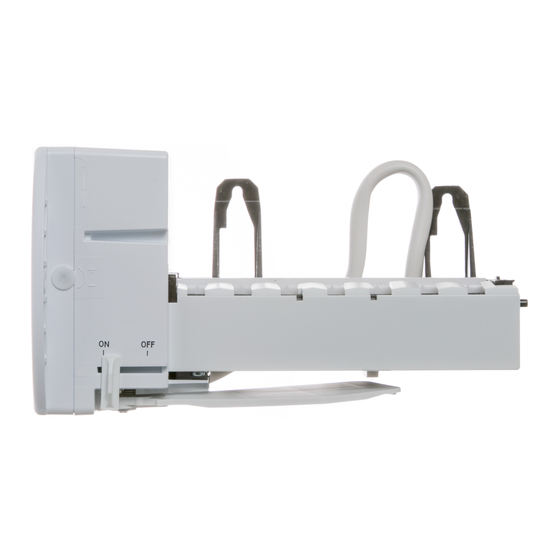
WR30X10093, WR30X10102 & WR30X30972
IMPORTANT SAFETY INFORMATION
Phillips head screwdriver
Bracket Mount Instructions
cord.
before operating.
1/4" Hex head driver
31-49143 Rev. 2
11-18 GEA
Advertisement
Table of Contents

Related Manuals for GE WR30X10093


Summary of Contents for GE WR30X10093
-
Page 1: Important Safety Information
Installation Bracket Mount Instructions Instructions WR30X10093, WR30X10102 & WR30X30972 Questions? Call 1-800-GE-CARES (1-800-432-2737) IMPORTANT SAFETY INFORMATION READ ALL INSTRUCTIONS BEFORE INSTALLING THE ICEMAKER OR ACCESSORIES To reduce the risk of fire, explosion, electric shock, or injury when using your refrigerator,... - Page 2 SIDE-BY-SIDE REFRIGERATORS ONLY Installation Bracket Mount Instructions Instructions WR30X10093, WR30X10102 & WR30X30972 These instructions apply to metal interior lined side-by- STEP 2 REMOVE THE EXISTING side refrigerators only. For Plastic interior lined side- by-side refrigerators refer to page 4. For top-freezer ICEMAKER refrigerators refer to page 6.
- Page 3 Make sure the restraints click into place. Hook Congratulations! Tabs 1-800-GE-CARES (1-800-432-2737) for additional help Thank you for choosing GE Appliances. NOTE: 31-49143 Rev. 2...
- Page 4 USE THESE INSTRUCTIONS FOR PLASTIC INTERIOR LINED SIDE-BY-SIDE REFRIGERATORS ONLY Installation Bracket Mount Instructions Instructions WR30X10093, WR30X10102 & WR30X30972 These instructions apply to plastic interior lined side- STEP 3 REMOVE FILL CUP, ICEMAKER by-side refrigerators only. For Metal interior lined side- INSERT AND PLASTIC STRIPPER PLATE by-side units refer to page 2.
- Page 5 Tabs plugged in. It may take several hours for the freezer to reach the selected temperature and for ice production to begin. NOTE: Make Sure: Congratulations! 1-800-GE-CARES (1-800-432-2737) for additional help Thank you for choosing GE Appliances. 31-49143 Rev. 2...
- Page 6 USE THESE INSTRUCTIONS FOR TOP-FREEZER REFRIGERATORS ONLY Installation Bracket Mount Instructions Instructions WR30X10093, WR30X10102 & WR30X30972 These instructions apply to top-freezer refrigerators only. For metal interior lined side-by-side refrigerators refer to page 2. For plastic interior lined side-by-side refrigerators refer to page 4.
- Page 7 NOTE: If the plug is located on the back wall of the 1-800-GE-CARES (1-800-432-2737) for additional help freezer, the power cord SHOULD NOT be placed in the hook on the back of the icemaker. Thank you for choosing GE Appliances. NOTE: Mounting Tabs Fill Tube...
- Page 8 Notes 31-49143 Rev. 2...
Need help?
Do you have a question about the WR30X10093 and is the answer not in the manual?
Questions and answers