Table of Contents
Advertisement
Quick Links
Advertisement
Table of Contents

Related Manuals for Manson Engineering Industrial NEP-8323


Summary of Contents for Manson Engineering Industrial NEP-8323
- Page 1 NEP-8323, NEP-8186 user manual Copyright © 2018 by Manson. All Rights Reserved.
-
Page 2: Table Of Contents
NEP-8323, NEP-8186 user manual Table of contents Precautions ...................... 3 Copyright ......................3 Accessories ....................... 5 Introduction ...................... 6 Specifications ....................7 Operation video ....................7 Indications ......................8 Front Panel ....................8 Back Panel ....................9 AC Voltage Selection ..................10 Operation Procedures .................. -
Page 3: Precautions
No part of this publication may be reproduced,or transmitted in any form or by any means without the written permission from Manson Engineering Industrial Ltd. Changes in the manual. Manson Engineering Industrial Ltd. has the right to update and change the content of this manual without any prior notice and obligation. 3 / 21... - Page 4 NEP-8323, NEP-8186 user manual Disclaimer Exclusions for documentation, Indemnity and Product application. Manson Engineering Industrial Ltd. (Manson) Assumes no warranty to the accuracy, suitability of technical information given in the user manuals or other documentation. Undertakes no responsibility or liability of losses, damages and related expenses whether specific, direct, indirect consequential or accidental which might result from the use of information given in this manual.
-
Page 5: Accessories
NEP-8323, NEP-8186 user manual Accessories 5 / 21... -
Page 6: Introduction
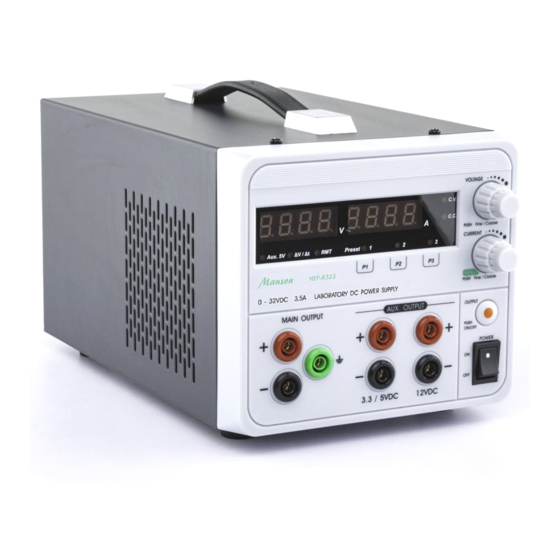
NEP-8323, NEP-8186 user manual 1. AC Power Cord 2. USB cable 3. Output cable with crocodile clip Introduction This new series of low noise, good voltage & current regulation precision laboratory grade linear supply merges with the advanced MCU control and PC interface via USB and optional Ethernet . -
Page 7: Specifications
NEP-8323, NEP-8186 user manual Specifications Models NEP-8186 NEP-8323 Variable Output Voltage 0.1 - 18VDC 0.1 - 32VDC Variable Output Current 0 - 6A 0 - 3.5A Voltage Regulation £10mV Load (10-90% Rated Current) £ 5mV Line ( ± 10% Variation) Current Regulation £... -
Page 8: Indications
NEP-8323, NEP-8186 user manual dvdt Waveform Generation setting Run & Stop dvdt waveform Factory reset Indications Front Panel Main Power Switch Output ON/OFF button Preset 1/2/3 selection and LED indication Main output Current limit adjust knob Menu entry Main output Voltage limit adjust knob C.V./C.C. -
Page 9: Back Panel
NEP-8323, NEP-8186 user manual 13 - Auxiliary output 1 for 3.3V/5V 14 - Auxiliary output 2 for 12V Back Panel 1 - Auxiliary 1 3.3V/5V selection 2 - USB Remote Control port 3 - Cooling Fan 4 - Ethernet port (Ethernet model only) -
Page 10: Ac Voltage Selection
NEP-8323, NEP-8186 user manual AC Voltage Selection The AC selection switch is location on the bottom of power supply. Use a pen to switch AC voltage between 115VAC and 230VAC. Select 115 for AC voltage range from 100VAC to 126VAC... -
Page 11: Operation Procedures
NEP-8323, NEP-8186 user manual Warning : Please mark sure you correctly select the voltage of your range. Incorrectly selected the voltage will cause damage on power supply. Operation Procedures Basic operation Switching on the power supply Double check the AC Voltage Selection for the AC Mains with the rating label , the power supply can be set to either 115V or 230V AC. -
Page 12: Connection And Operation
NEP-8323, NEP-8186 user manual Aux. output 1 voltage selection (3.3/5V) Move the switch at the back of power supply for selection of 3.3 or 5 VDC. At 3.3VDC setting, indicator (10) is Off and at 5VDC setting indicator (10) is On. -
Page 13: Connect 3 Outputs In Series
NEP-8323, NEP-8186 user manual Connect 3 outputs in series Connecting outputs in series (using NEP-8323 as an example) You can have a 17V fixed output by connecting the 5V in series with the 12V outputs. The 2 outputs (Aux.1) can be connected in series to make a variable 5V to 37V with maximum current (Fig. -
Page 14: Remote Programmable Control
NEP-8323, NEP-8186 user manual Fig.3 MANSON NEP-8323 three outputs in series Remote Programmable control The NEP can be interfaced with PC via the built in USB port or the optional factory installed Ethernet port.. Drivers for the USB, Labview & SCPI Command Sets are provided in addition to the Mansonʼs proprietary programmable control software of timed cyclic operations &... -
Page 15: Front Panel Menu
NEP-8323, NEP-8186 user manual The network connected power supply can be remote controlled by tablet/iPhone with Manson apps. Please download driver from Manson website www.manson.com.hk For the detail usage of driver and PC software. Please refer to PC software manual. - Page 16 NEP-8323, NEP-8186 user manual 1. Upper Voltage Limit.( UVL Set ) 2. Upper Current Limit (UCL Set ) 3. Programming( dv/dt Set) & operation (dv/dt Run) of waveform generation. 4 Power Up output off or output as the last shut down.(Pu Set) 5.
-
Page 17: Wave Form Generation
NEP-8323, NEP-8186 user manual 2. Turn Voltage Knob until [ UCL SEt] appears. 3. Short press Voltage Knob to get into the selected UCL setting and the original upper current limit appears. 4. Turn the Current Knob to adjust the Upper Current Limit setting . - Page 18 NEP-8323, NEP-8186 user manual Principle of waveform generation : Point 1 [ 2.1V; 1A; T=8 sec to Point 2] Point 2 [ 25.4V; 2.75A; T=4 sec to Point 3] Point 3 [ 5.0V ; 1.0A ; T =0 sec to Point 4] Point 4 [11V ;2.75A ;...
- Page 19 NEP-8323, NEP-8186 user manual desired number of points (2 to 10) to run the waveform generation . 4. After selection of number of points then turn the voltage knob to go to the [rUNC] for number of cycles to run the waveform generation . In this example 5 cycles is set by turning the current knob.
- Page 20 NEP-8323, NEP-8186 user manual 9. Confirm all the settings and exit by long push of current knob . Running of dv/dt (Example video) After setting of the parameters of the required points and number of cycles , you can run the waveform generation as following : 1.
- Page 21 NEP-8323, NEP-8186 user manual 2. exit from the waveform generation by repeating the above procedure and set to NO . REV.0. 08/2018 7673-8186-0000 21 / 21...
Need help?
Do you have a question about the NEP-8323 and is the answer not in the manual?
Questions and answers