
Summary of Contents for GEOCOOL GCHP Series
- Page 1 T wo-Speed Geothermal Heat Pump Series Installation and Operation Manual May 2019 Rev.1...
- Page 2 Page 2...
-
Page 3: Table Of Contents
Table of Contents Contact Information Model Nomenclature Technical Data Transportation and Storage Electrical Hazards System Installation Ductwork Considerations Ground Loop System Open Loop System Condensate Considerations DHW PLumbing High and Low Voltage Wiring Dallas Microprocessor DEC Star Blower Start Up Procedures Preventive Maintenance Troubleshooting Wiring Diagram... -
Page 4: Contact Information
Geocool® has compiled this manual with care; however Geocool does not warrant that the information in this manual is free of errors. Geocool reserves the right to change any portion of this manual without notice. The appearance of any technical data or editorial material in this manual does not constitute endorsement, warranty, or guarantee by Geocool of any product, service, process, procedure, design, or the like. -
Page 5: Model Nomenclature
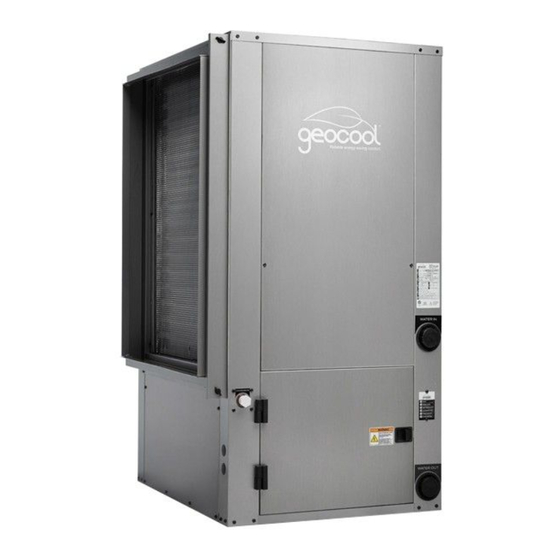
MODEL NOMENCLATURE Page 5... -
Page 6: Technical Data
1.0 Technical Data Page 6... - Page 7 1.0 Technical Data (cont.) Page 7...
-
Page 8: Transportation And Storage
2.0 Transportation & Storage Page 8... - Page 9 Move and store units in an upright position. Do not stack units. Inspect shipment for shipping damage and check packing slips for accuracy. Any equipment or cartons in question should be removed from the packing and physically inspected. If any damage is detected, the carrier should make a note on the delivery slip acknowledging the damage.
-
Page 10: System Installation
*All breakers/fuses supplying power to this equipment should be clearly labeled at time of installation. *All wiring and plumbing should be done in strict accordance with local and national codes and ordinances 4.0 Geocool System Installation Page 10... -
Page 11: Ductwork Considerations
Locate the unit in an indoor area that allows for easy servicing (see image below). Make sure that the air filter access and unit access panels are easily accessible. Provide sufficient room to make all ground loop, well water, DHW, condensate, and electrical connections. If the unit is placed in a closet, make provision for adequate service access and proper return air flow to the unit. - Page 12 Caution: Observe the location where your ductwork is being attached to the unit. Ensure that drilling and screws do not penetrate and damage the air coil. 5.1 Geocool System Noise and Vibration Isolation A quality installation should be one where noise is not a complaint. A number of inexpensive features can be added to reduce noise and also aid in installation and maintenance.
-
Page 13: Ground Loop System
6.0 The Ground Loop System 6.1 Closed Loop Systems Plumbing IMPORTANT! Do N OT use PVC or CPVC piping on any connections to your Geocool unit. The only exception where PVC or CPVC piping may be used is on the condensate lines. - Page 14 Purging of the closed loop and unit should only be done after it has passed the air pressure check and all leaks have been repaired. Purging requires a high velocity pump and should only be done by the installing dealer or sub-contractor. See drawing below for piping example. Page 14...
-
Page 15: Open Loop System
Geocool units use a cupro nickel heat exchanger which has an increased resistance to ground water chemicals which can cause build up and corrosion. The water source must be tested and treated before the installation of the Geocool unit. Failure to do so will void the warranty of the unit. - Page 16 7.3 Coil Flushing Ports It is recommended when installing your Geocool unit to have a “Tee” on the discharge water line and the incoming water line from the well with a boiler type drain/hose bib on it between the unit and the main isolation ball valves.
-
Page 17: Condensate Considerations
The Freeze stat helps protect the liquid to refrigerant heat exchanger from freezing internally. Freeze protection is accomplished by measuring the refrigerant temperature exiting the water coil in the heating mode. If this temperature drops below the freeze set point temperature, the unit will then lock out until manually reset. - Page 18 It’s common practice to install extra tees near the Geocool unit to allow access for pouring drain cleaner down the condensate drain. Insure all extra openings are capped off or are plugged.
- Page 19 “ C ONDENSATE FAULT ” will show up on the front panel display. The compressor will remain off and the light illuminated until the condensate clog has been cleared. 9.0 DHW Tank Preparation The DHW coil is a vented double-wall copper heat exchanger and is suitable for potable water. The DHW pump is installed inside the unit and connected to a fused terminal...
- Page 20 Close boiler drain valves and the isolation valves to the Geocool system. Open the cold water supply feeding the DHW tank. Open a hot water tap in the building and allow air to bleed out of the tank. Alternatively you can depress lever on the tank relief valve to remove air trapped in the tank.
-
Page 21: Dallas Microprocessor
Size all wire in accordance to local electrical code. Main power will land on top of the contactor, labeled “ L1 and L2” . A green ground lug will also be provided for the ground wire. 10.2 Pump outputs A terminal strip will be provided for each pump or water valve output that applies. - Page 22 11.1 System Safeties The Dallas board has multiple built-in safety inputs that allows multiple levels of protection on the Geocool unit. 11.1.1 Dip-Switch Settings The Dallas board has a set of 4 dip-switches that allow a range of features included in the board to be accessed.
- Page 23 The Dallas board has independent inputs for low limit and high limit switches. The auto-reset h igh limit switch is designed to trip at 550 psi and will shut the compressor down for 5 minutes after the switch resets. A ED...
- Page 24 The unit is equipped with a normally closed (N/C) float switch, factory installed in the unit’s internal drain pan. If the condensate line clogs, the float switch will be activated, shutting the l ight labeled “ C ONDENSATE FAULT ” will be illuminated on the compressor down and a ...
- Page 25 On the front post of the Geocool unit, there is an LED indicator which relays unit information to the homeowner or technician. The board has a B LUE light for unit power, a G REEN light to indicate the compressor is running, and 4 different ...
-
Page 26: Dec Star Blower
12.0 Dec-Star ECM Blower Variable Speed Blower: Geocool redefines comfort and efficiency by incorporating the new Dec-Star EMM Blower Motor Technology in our equipment. The variable speed blower coupled with the Dallas microprocessor provide: even temperatures throughout the space, better indoor air quality, precise humidity control, quieter operation and lower utility bills. - Page 27 13.0 Recommended Geocool Start-Up Procedure 13.1 Startup Checklist Verify the following items are addressed before starting the unit: • If closed loop system, loop and unit are purged of air and all valves are open. • Ensure a minimum of 20% methanol or 25% Propylene glycol is purged into the loop and properly mixed.
-
Page 28: Preventive Maintenance
• Open loop systems require well water to be pumped through the unit. In this application Geocool recommends the use of an isolation valve on the entering water line feeding water to the Geocool unit. It is recommended that in open loop systems the electronic water control valve be placed in the discharge line to prevent loss of pressure during off cycles. - Page 29 Simply place a cover (tarp, etc.) over the unit when construction or any other dust producing job is being done in the area of the Geocool unit. N ever run the system during construction. Not only will sheetrock dust plug up and cause damage to the air coil but it will also accumulate in the duct system and slowly be blown out over many years.
- Page 30 15.0 Basic Troubleshooting for the Geocool unit If an issue with your units occurs, refer to the following list for possible symptoms and corrective actions. Water around base of unit: 1. Water leak. Find and repair leak. 2. Condensation pan not draining. Check for restriction, clean pan and blow out pipe.
-
Page 31: Wiring Diagram
Reversing valve won’t switch 1. Thermostat not calling for cooling. Check thermostat wiring and programming. Repair/replace if necessary. 2. No voltage to solenoid. Correct voltage issue. 3. Bad solenoid coil. Replace coil. Refrigerant pressure operating too high or locking out on high limit Unit running in cooling...
Need help?
Do you have a question about the GCHP Series and is the answer not in the manual?
Questions and answers