Table of Contents
Advertisement
Quick Links
Advertisement
Table of Contents

Summary of Contents for Inovonics INOmini 661
- Page 1 June, 2019 - Rev. 1.0.0.0 Firmware...
-
Page 2: Table Of Contents
The Front-Panel Display and Menu Knob ... 7 Headphone Jack ..........7 Rear Panel Connections ........8 Section III - OPERATING THE INOmini 661 Hey, why is the screen flashing? ....... 10 Menu Navigation Basics ........10 Locked Menus ............. 11 Tuning the Receiver .......... -
Page 3: Section I - Introduction
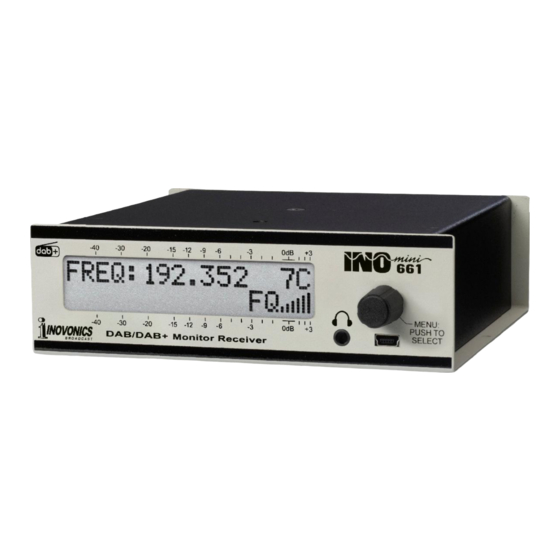
(Blocks 5-12, A-D) plus Block 13 A-F. INTRODUCTION Antenna Input: 75-ohm (BNC). Sensitivity: 10µV for error-free reception. Product Description The INOmini 661 is Inovonics’ second-generation, small Audio Codecs: MPEG-1, Audio Layer 2 (MP2); HE-AAC form-factor off-air monitoring receiver for EBU-specified (AAC+). -
Page 4: Section Ii - Installation And Connection
Mounting Options: An optional rack adapter accepts up to three INOmini modules in a 1U, 19-inch rack space. The INSTALLATION AND CONNECTION INOmini 661 may also be fastened to any convenient surface with two small screws. Unpacking and Inspection Size and Weight: 4.6cm H x 14cm W x 14cm D; 1.8kg ship- ping weight. -
Page 5: Ac Mains Power
Battery Operation Designations noted on the rear panel The INOmini 661 may optionally be powered by either a wet stand for Ground, Digital Loss, Low Sig- or a sealed (gel) 12-volt lead/acid battery. The nominal in- nal and Audio Loss. -
Page 6: Section Iii - Operating The Inomini 661
Menu Navigation Basics By the time you’ve read this, you’ve probably already fig- ured out the INOmini 661 menu for yourself, as intuitive as it is. Quite simply: 1) turn the knob to navigate from one menu to the next, 2) push the knob to enter any menu asso- ciated with setup, 3) turn the knob to make a selection or to —... -
Page 7: Locked Menus
Tuning the Receiver (Menu Screen 1) When power is applied to the INOmini 661, a ‘splash screen’ Identifiers (Menu Screen 4) with the product ID pops up immediately on the LCD. With-... -
Page 8: Carrier Strength And Alarm
tors that involve multiple channels and other interference Carrier Strength and Alarm (Menu Screen 5) factors. The metered range is 0dB to 20dB. The upper line of this screen displays signal CN: is the OFDM carrier-to-noise ratio. This defines the dy- strength of the RF carri- namics of the OFDM subcarrier group signal level between The RF numerical... -
Page 9: The Dab Loss Alarm
lay interval to trigger an Audio Loss alarm. Because the Audio Output Levels (Menu Screen 10) alarm is peak-sensing, even lightly-processed programming will have frequent peaks approaching 0dB. A setting of Audio output levels may -10dB will probably suffice for nearly any programming be set independently for format. -
Page 10: Sample Rate
You will need to refer to the appropriate DAB Standard if you need to verify the The INOmini 661 has a large, easy-to-read, backlit LCD dis- codes against the lists in each case. play. A Digital Loss Alarm, Low Signal or Audio Loss condi- tion will cause the display to flash the alarm notification —... -
Page 11: Loading Factory Defaults
With this menu selected, push the knob and turn it from No Next, place the INOmini 661 in its ready-state to accept to Yes. Push the knob again to reboot the INOmini 661 with firmware updates. Just unplug the 12VDC power connector factory defaults. -
Page 12: Under The Hood
‘Under the Hood’ The INOmini 661 DAB/DAB+ Monitor Receiver is very com- pact, utilizing mostly surface-mounted (SMD) components. Many of these are application-specific and may be pre- programmed at the factory, but all of them are impossibly tiny. - Page 13 (This is a blank page.) (This is a blank page.) — 23 — — 24 —...
- Page 14 INOVONICS WARRANTY TERMS OF SALE: Inovonics products are sold with an under- standing of “full satisfaction”; that is, full credit or refund will be is- sued for products sold as new if returned to the point of purchase within 30 days following their receipt, provided that they are re- turned complete, and in “as received”...


Need help?
Do you have a question about the INOmini 661 and is the answer not in the manual?
Questions and answers