
Related Manuals for Grunkel LED-55 SMT


Summary of Contents for Grunkel LED-55 SMT
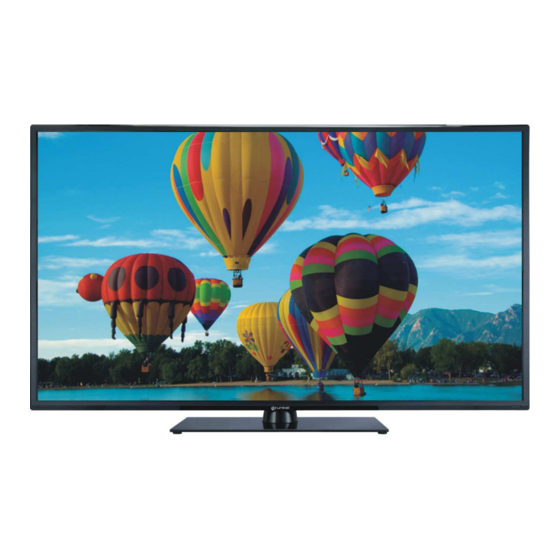
- Page 1 55” LED Smart TV MODEL NO.: LED-55 SMT USER MANUAL Please read this manual carefully before using, and keep it for future reference.
-
Page 2: Important Instructions
IMPORTANT INSTRUCTIONS SAFETY INSTRUCTIONS The lightning flash and CAUTION: TO REDUCE THE RISK The exclamation arrow head within the OF ELECTRIC SHOCK. DO NOT point within the triangle is a warning REMOVE COVER (OR BACK). triangle is a warning sign alerting you of NO USER SERVICEABLE PARTS sign alerting you of “dangerous voltage”... - Page 3 ● Do not operate this product under the following conditions. - When the power-supply cord or plug is damaged. - If liquid has been spilled into or objects have fallen into the product. - If the product has been exposed to rain or water. - If the product does not operate when used according to the operating instructions.
-
Page 4: Accessories
DISPOSAL OF OLD ELECTRICAL APPLIANCES The European directive 2002/96/EC on Waste Electrical and Electronic Equipment (WEEE), requires that old household electrical appliances must not be disposed of in the normal unsorted municipal waste stream. Old appliances must be collected separately in order to optimize the recovery and recycling of the materials they contain, and reduce the impact on human health and the environment. -
Page 5: Table Of Contents
TABLE OF CONTENTS GETTING STARTED IMPORTANT INSTRUCTIONS ACCESSORIES FEATURES GENERAL PARTS REMOTE CONTROL REMOTE CONTROL PREPARATION BASIC CONNECTION OPERATIONS TV OPERATIONS SMART TV FIRST USE SMART TV OPERATIONS TV MAIN MENU FIRST TIME INSTALLATION DTV MODE ATV AND OTHER MODES PC/VGA MODE FOR REFERENCE MAINTENANCE... -
Page 6: Features
FEATURES 55" LED Display This unit has a built-in LED display window to provide clear vision and low radiation. With Hotel Lock Support Auto TV Scanning Support Digital Broadcasting Reception Support USB Multimedia Playback Support TELETEXT (Europe) Function Support Multi-languages On Screen Display Support Full Function Remote Control Support HDMI, SCART, YPBPR, AV, VGA, PC AUDIO and CI Input Support EARPHONE and COAXIAL Output... -
Page 7: General Parts
GENERAL PARTS MAIN UNIT 1. LED display screen 2. Remote control sensor / Power indicator- In standby mode the indicator light will display red color; when switching on the unit the indicator light will display blue color. 3. Stand holder 4. - Page 8 GENERAL PARTS Back View 1. Power input 2. EARPHONE output terminal 3. PC AUDIO input terminal 4. VGA input terminal 5. HDMI 2 input terminal 6. SCART input terminal 7. USB 1/2 input terminal (TV) 8. CI+ input terminal 9. Mini AV input terminal 10.
-
Page 9: Remote Control
REMOTE CONTROL 1 POWER: Set the unit in standby mode; press it again to switch it on. 2 MUTE: Mute the sound. 3 RED button 4 GREEN button 5 BLUE button 6 YELLOW button 7 FAV / HOME: Display the favorite channels list (TV); Display the Home page (Smart TV). - Page 10 REMOTE CONTROL : Play the next file. : Play the previous file. 23 SOURCE: Select desired input source. 24 DISPLAY: Display the available program information. 25 OK: Confirm selection. 26 ▲/▼/◄/►: Navigation buttons 27 MENU: Display the main menu or return to previous menu.
-
Page 11: Remote Control Preparation
REMOTE CONTROL PREPARATION BATTERY INSTALLATION Install the batteries as the following pictures. Be sure + and – terminals are positioned as indicated in the battery compartment (Fig1). SERVICE LIFE OF BATTERIES - The batteries normally last for one year although this depends on how often the remote control is used. -
Page 12: Basic Connection
BASIC CONNECTION ● Ensure all the cables are disconnected from the main unit before connecting to AC power source. ● Read through the instructions before connecting other equipments. CONNECTING TO AC POWER SOURCE To power outlet CONNECT EXTERNAL ANTENNA TO UNIT Install external antenna into antenna jack for best picture. - Page 13 HDMI CONNECTION Use HDMI cable to connect the unit with HDMI cable other devices to receive high-definition (Not included) multimedia signal. Back of DVD/VCR PC/VGA CONNECTION Audio cable VGA cable (Not included) (Not included) Use VGA cable and Audio cable to Back of PC connect the unit with TV or PC, and use this product as a monitor.
- Page 14 SCART CONNECTION SCART cable (Not included) Back of DVD/VCR AV (COMPOSITE VIDEO) CONNECTION For basic connection, use the composite Audio AV cable L/R (white/red) and CVBS (yellow) cable to (Not included) connect the unit with other devices. Back of DVD/VCR...
- Page 15 YPBPR CONNECTION AUDIO cable (Not included) YPbPr cable (Not included) Back of DVD/VCR COAXIAL CONNECTION Use coaxial cable (not included) to connect the unit with amplifier or other audio decoding devices for coaxial audio signal output.
- Page 16 USB CONNECTION USB Memory Device (Not included) EARPHONE CONNECTION Earphone cable (Not included)
-
Page 17: Tv Operations
MAKE SURE ALL THE EQUIPMENTS AND POWER CORD ARE CONNECTED PROPERLY AND THE UNIT IS SET IN CORRECT MODE BEFORE KINDS OF OPERATIONS. TV Operations - Press POWER button on the unit or remote control to power ON the unit (indicator will glow blue);... - Page 18 SLEEP TIME SETTING - Press SLEEP button on remote control repeatedly to select SLEEP TIME directly. Available options: Off, 10min, 20min, 30min, 60min, 90min, 120min, 180min, 240min. VIDEO SIZE SETTING - Press ASPECT button on remote control repeatedly to select VIDEO SIZE directly. Available options: Auto, 4:3, 16:9, Zoom1, Zoom2.
- Page 19 FAVORITE LIST When viewing an available channel, press FAV button on remote control to enter Favorite List menu page. - Press UP or DOWN navigation button to select preferred channel. - Press OK button to confirm selection. Note: To add a favorite channel, please refer to the operations of “Channel>Programme Edit”.
- Page 20 RECORDER (FOR DTV MODE ONLY) - Insert your USB memory device into USB 1/2 slot first. - When watching digital programs, press button on remote control and below tool bar ● will appear on the screen: - Press LEFT or RIGHT navigation button to select desired option. Press OK button to confirm selection.
- Page 21 MEDIA PLAYBACK - Press SOURCE button on the unit or remote control to switch the unit to USB 1/2 mode. - Insert a USB memory device into USB slot before following operations. - Press UP/DOWN/LEFT/RIGHT navigation button to move the cursor. - Press EXIT button to return to previous menu page.
- Page 22 - Use navigation buttons to select desired option and press OK to confirm it. - Press EXIT button to return. 3. MOVIE - Press LEFT/RIGHT navigation button to select Movie in the main menu and press OK button to enter it. - Use navigation buttons to select desired folder or file.
- Page 23 4. TEXT - Press LEFT/RIGHT navigation button to select Text in the main menu and press OK button to enter it. - Use navigation buttons to select desired folder or file. - When selecting files, press RED button to enter submenu and you can delete a file accordingly.
-
Page 24: Smart Tv First Use
Smart TV First Use - Press SOURCE button on the unit or remote control to switch the unit to Smart TV mode. When turning to Smart TV mode for the first time, below menu will appear on the screen: 1. Welcome page - Press navigation buttons to highlight “Next”. - Page 25 4. Time Zone - Use navigation buttons to select the time zone and press OK button confirm it. - Use navigation buttons to highlight “Next”. Then press OK button to enter next page. 5. Network - Select Wi-Fi or Ethernet according to your network connecting method.
-
Page 26: Smart Tv Operations
Smart TV Operations ● Press HOME button on remote control to display the home page. ● Press LEFT/RIGHT/UP/DOWN navigation buttons to select desired option, and press OK button to confirm selection. ● Press BACK button to return to previous page. Add desired applications to desk: - Use navigation buttons to highlight the last icon, which has a “+”... - Page 27 1. Browser - Use navigation buttons to highlight “ ” on the upper right corner of HOME page and press OK button to display some famous websites (such as Google, Yahoo, eBay etc.) which can be accessed directly. - Use navigation buttons to select desired website and press OK button to open it. Then the users can enjoy amazing internet experience.
- Page 28 2. Applications - Use navigation buttons to highlight “ ” on the upper right corner of HOME page and press OK button to display all available applications. Note: - Insert your USB memory device into USB 3 or USB 4 slot before downloading. - When an application is selected, press MENU (Smart TV) button on remote control to manage and the users can uninstall, show details or clean data accordingly.
- Page 29 3. Explorer - Use navigation buttons to highlight “ ” on the upper right corner of HOME page and press OK button to enter it. - Use navigation buttons to select desired option/folder/file and press OK button to confirm selection. - When a file is highlighted, press MENU (Smart TV) button on remote control to manage it.
- Page 30 4. Search - Use navigation buttons to highlight “ ”on the upper right corner of HOME page and press OK button enter it. - When the cursor is in Searching Input Field, press OK button to display the on-screen keyboard. - Then use navigation buttons to select desired option and press OK button to confirm input.
- Page 31 5. Settings - Use navigation buttons to highlight “ ”on the upper right corner of HOME page and press OK button enter it. Basic Operations: - Press UP/DOWN navigation button to highlight desired option. - Press OK button to enter submenu. - Press LEFT/RIGHT navigation button to move the cursor to left/right column.
- Page 32 ● WiFi Turn on/off Wi-Fi and connect to a WiFi ID following on-screen instructions. Note: A private password may be required for some Wi-Fi points. ● Ethernet Turn on/off Ethernet and set IP settings, IP Address, Gateway and so on information. Note: Connect your LAN cable to this TV first before using Ethernet.
- Page 33 5.3 Time settings - Press OK button to enter submenu when highlighted. ● Time settings The users can set date, time, time zone, time format and date format here. 5.4 Display settings - Press OK button to enter submenu when highlighted. ●...
- Page 34 5.5 Sound settings - Press OK button to enter submenu when highlighted. ● Sound settings Select desired sound output mode. 5.6 Memory clear - Press OK button to enter submenu when highlighted. ● Memory clear Clear the memory to make this machine working more efficiently. 5.7 Upgrade - Press OK button to enter submenu when highlighted.
- Page 35 5.8 System information - Press OK button to enter submenu when highlighted. ● System information Show model, Android version, MAC address and so on system information. ● Memory information Show the used / unused memory space. ● Advanced settings The users can set network, language, date & time and so on information. ●...
-
Page 36: Tv Main Menu
TV Main Menu ● The unit contains different setting menus. Once the initial programming is entered, it will be remained in the memory until change, and the unit can always be operated under the same conditions. ● The settings will be remained in the memory until the settings are changed, even after setting the player to standby mode. -
Page 37: Dtv Mode
DTV MODE - Press the SOURCE button on the unit or remote control to select DTV input source. 1. CHANNEL 1.1 Antenna - Press OK or RIGHT navigation button to enter it. - Use navigation buttons to select DVB-T or DVB-C. 1.2 Auto Tuning - Press OK or RIGHT navigation button to enter it. - Page 38 When “Antenna” is DVB-T: 1.4 DTV Manual Tuning - Press OK or RIGHT navigation button to enter it. - Use LEFT/RIGHT navigation button to select the channel. Then press OK button to start searching. When “Antenna” is DVB-C: 1.4 CADTV Manual Tuning - Press OK or RIGHT navigation button to enter it.
- Page 39 1.6 Schedule List - Press the UP or DOWN navigation button to select this item, and press the OK or RIGHT button to enter it. If any programs were scheduled the below menu will appear. - Press the UP/DOWN navigation button to switch between Schedule List and Recorded List.
- Page 40 2. PICTURE 2.1 Picture Mode - Press UP/DOWN/LEFT/RIGHT navigation buttons to select an option. Picture Mode: available options: Standard, Mild, Personal, Dynamic. Contrast / Brightness / Colour / Tint / Sharpness: adjustable value: 0-100. NOTE: Contrast, Brightness, Colour and Sharpness are adjustable only when Picture Mode is “User”.
- Page 41 3. SOUND 3.1 Sound Mode - Press UP/DOWN/LEFT/RIGHT navigation buttons to select an option. Sound Mode: available options: Standard, Music, Movie, Sports, Personal. Treble / Bass: adjustable value: 0-100. NOTE: Treble and Bass are adjustable only when Sound Mode is “User”. 3.2 Balance This item is used to adjust the audio output between left and right speaker from -50 to 50.
- Page 42 4. TIME 4.1 Clock It displays current system time when an available channel was saved. 4.2 Time Zone This item is used to select desired time zone. 4.3 Off Time Off Time: available options: Off / Once / Every Day / Mon~Fri / Mon.~Sat / Sat.~Sun / Sun. Hour / Minute: use navigation buttons to adjust the Hour / Minute when Off Time is not “Off”.
- Page 43 4.7 OSD Timer This item is used to select desired OSD menu duration. Available options: Off, 5/10/15/20/25/30/35 seconds. 5. LOCK - Press RIGHT navigation button and input the factory default password “0000” using number buttons on remote control. - Press UP/DOWN navigation button to select preferred item. NOTE: If you forget the password, please use the universal password “8899”.
- Page 44 6. SETUP 6.1 Language This item is used to select desired on-screen display language. 6.2 TT Language This item is used to select desired teletext language. 6.3 Audio Language - Press RIGHT navigation button to enter it. - Then you can select desired primary audio language and secondary audio Language. 6.4 Subtitle Language - Press RIGHT navigation button to enter it.
-
Page 45: Atv And Other Modes
6.7 PVR File System - Press RIGHT navigation button to enter it. - Press UP/DOWN navigation button to select desired option and press LEFT/RIGHT navigation button to adjust - Press OK button to enter submenu or confirm setting. In this part, you can select desired disk, check PVR File System, format your USB memory device and set desired Free Record Limit time. -
Page 46: Pc/Vga Mode
PC/VGA MODE - Connect a personal computer to this unit. - Power on your computer and this unit. - Press SOURCE button on the unit or remote control to select PC-RGB (VGA) input source. - Press MENU button to display the main menu and select “PICTURE” using LEFT/RIGHT navigation button. -
Page 47: Maintenance
MAINTENANCE ● Be sure to press POWER button to set the player to the standby mode and disconnect the power plug before maintaining the player. ● Wipe the player with a dry, soft cloth. ● If the surface is extremely dirty, wipe clean with a cloth which has been dipped in a weak soap-water solution and wrung out thoroughly, and then wipe again with a dry cloth. - Page 48 GENERAL TROUBLESHOOTING Check the following points before assuming malfunctions of this unit: Symptom[COMMON] Remedy No power. Insert the power plug securely into the power outlet. No picture. Ensure that the equipment is connected properly. ● Ensure that the equipment is connected properly. ●...
- Page 49 & " & & " & & & & & $ & & " & & & " 3 & ! 7 8 ' & $ & &-$ & & & / :;<=.6=>1 3 & $ " & & & 2 ?=>...
- Page 50 !" #$% #"% &' ( ( )( + , # "# -.
Need help?
Do you have a question about the LED-55 SMT and is the answer not in the manual?
Questions and answers