LG WM5000H A Series Owner's Manual
Hide thumbs
Also See for WM5000H A Series:
- Owner's manual (96 pages) ,
- Owner's manual (92 pages) ,
- Owner's manual (92 pages)

Related Manuals for LG WM5000H A Series


Summary of Contents for LG WM5000H A Series
- Page 1 OWNER’S MANUAL WASHING MACHINE Please read this owner's manual thoroughly before operating and keep it handy for reference at all times. WM5000H*A www.lg.com MFL69306208...
-
Page 2: Table Of Contents
SMART APPLIANCE CONNECTIVITY Display Connectivity Overview INSTALLATION INSTRUCTIONS Connectivity Setup - Install LG Smart Laundry application Preview installation order - Profile Setup (ID and Password setup) Checking and choosing the proper location - Product Registration and Wi-Fi Setup Unpacking and removing shipping bolts... -
Page 3: Important Safety Instructions
IMPORTANT SAFETY INSTRUCTIONS IMPORTANT SAFETY INSTRUCTIONS READ ALL INSTRUCTIONS BEFORE USE WARNING For your safety, the information in this manual must be followed to minimize the risk of fire or explosion, electric shock, or to prevent property damage, injury to persons, or death. Your safety and the safety of others are very important. -
Page 4: Grounding Instructions
IMPORTANT SAFETY INSTRUCTIONS IMPORTANT SAFETY INSTRUCTIONS READ ALL INSTRUCTIONS BEFORE USE WARNING For your safety, the information in this manual must be followed to minimize the risk of fire or explosion, electric shock, or to prevent property damage, injury to persons, or death. GROUNDING INSTRUCTIONS This appliance must be grounded. -
Page 5: Safety Instructions For Installation
IMPORTANT SAFETY INSTRUCTIONS IMPORTANT SAFETY INSTRUCTIONS READ ALL INSTRUCTIONS BEFORE USE WARNING For your safety, the information in this manual must be followed to minimize the risk of fire or explosion, electric shock, or to prevent property damage, injury to persons, or death. SAFETY INSTRUCTIONS FOR INSTALLATION WARNING To reduce the risk of fire, electric shock, or injury to persons when using this appliance, follow basic... -
Page 6: Safety Instructions For Use, Care, Cleaning, And Disposal
IMPORTANT SAFETY INSTRUCTIONS IMPORTANT SAFETY INSTRUCTIONS READ ALL INSTRUCTIONS BEFORE USE WARNING For your safety, the information in this manual must be followed to minimize the risk of fire or explosion, electric shock, or to prevent property damage, injury to persons, or death. SAFETY INSTRUCTIONS FOR USE, CARE, CLEANING, AND DISPOSAL WARNING To reduce the risk of fire, electric shock, or injury to persons when using this appliance, follow basic... -
Page 7: Regulation Notice For Transmitter Module Contained In Washing Machine
Responsible Party: This equipment has been tested and found to LG Electronic USA, Inc. comply with the limits for a Class B digital device, 1000 Sylvan Avenue Englewood Cliffs, NJ 07632 pursuant to part 15 of the FCC Rules. These limits are TEL. -
Page 8: Product Specifications
In addition to the source code, all referred license terms, warranty disclaimers and copyright notices are available for download. LG Electronics will also provide open source code to you on CD-ROM for a charge covering the cost of performing such distribution (such as the cost of media, shipping, and handling) upon email request to opensource@lge.com. -
Page 9: Product Features
The four-compartment dispenser makes it easy to separate the pre-wash detergent, the main laundry detergent, liquid bleach, and fabric softener into different compartments. HIGH TEMPERATURE STEAM CYCLES During LG's unique high-temperature steam cycles, the hot steam helps to remove tough stains. -
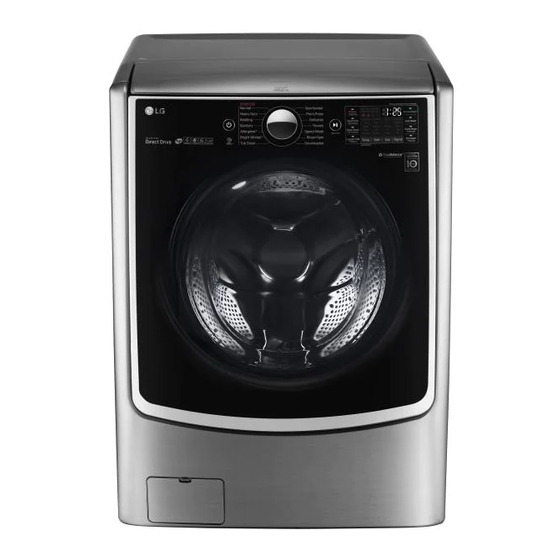
Page 10: Introducing Your Washing Machine
(for securing drain hose) NOTE y Contact LG Customer Service at 1-800-243-0000 (1-888-542-2623 in Canada) if any accessories are missing. y For your safety and for extended product life, use only authorized components. The manufacturer is not responsible for product malfunction or accidents caused by the use of separately purchased unauthorized components or parts. -
Page 11: Control Panel Features
INTRODUCING YOUR WASHING MACHINE Control Panel Features Cycle selector Operation Display Power Start/ Water Spin Soil Signal Button Pause Temperature Speed Level Sound Button Selection Selection Selection Selection Button Button Button Button Operation Button Description y Turns the washing machine on and off. y (During the wash cycle) stops operation, and cancels the settings. -
Page 12: Display
INTRODUCING YOUR WASHING MACHINE Operation (continued) Button Description y (Press before starting wash cycle) Use Steam option for extra cleaning power (See page 28). y (Press and hold 3 seconds) Fresh Care tumbles clothes to prevent wrinkles (See page 30). y Use Smart Grid to lower your energy costs by avoiding peak usage times (See page 28). -
Page 13: Installation Instructions
INSTALLATION INSTRUCTIONS INSTALLATION INSTRUCTIONS Preview installation order Checking and choosing Unpacking and Connecting the water line the proper location removing shipping bolts Connecting the drain line Leveling the washing Plugging in the power machine cord and grounding Test run WARNING y Washer is heavy! Two or more people are required when moving and unpacking the washer. -
Page 14: Checking And Choosing The Proper Location
INSTALLATION INSTRUCTIONS Checking and choosing the proper NOTE location y The floor must be strong and rigid enough to support the weight of the washer, when fully Install the washing machine on a solid floor that is loaded, without flexing or bouncing. If your strong and rigid enough to support the weight of the floor has too much flex, you may need to washing machine, even when fully loaded, without... -
Page 15: Unpacking And Removing Shipping Bolts
INSTALLATION INSTRUCTIONS Unpacking and removing shipping bolts NOTE y Save the bolt assemblies for future use. To When removing the washer from the carton base, be prevent damage to internal components, DO sure to remove the foam drum support in the middle of NOT transport the washer without reinstalling the carton base. -
Page 16: Connecting The Water Lines
Use new hoses when you install the washing machine. Do not reuse old hoses. Use only the inlet hoses provided with the washer. LG does not recommend the use of aftermarket WARNING hoses. -
Page 17: Connecting The Drain Line
INSTALLATION INSTRUCTIONS Using a laundry tub Connecting the drain line Clip the end of the hose into the elbow bracket. Secure the drain hose in place to prevent moving - Connect the elbow bracket within 4 inches (10 and leaking. cm) from the end of the drain hose. -
Page 18: Leveling The Washing Machine
INSTALLATION INSTRUCTIONS Leveling the washing machine Check the washing machine’s level again. - Push or rock the top edges of the washing The washer tub of your new washing machine spins machine gently to make sure that the washing at very high speeds. To minimize vibration, noise, machine does not rock. -
Page 19: Plugging In The Power Cord And Grounding
INSTALLATION INSTRUCTIONS Plugging in the power cord and Test run grounding Check if the washing machine is properly installed and run a test cycle. Make sure to ground the washing machine to prevent a short circuit or an electric shock when Load the washing machine with 6 pounds of plugging in. -
Page 20: Preparation
PREPARATION PREPARATION Sorting wash loads Precautions for fabric care before wash cycle Read and observe the following to prevent shrinkage or damage to clothes. Check all pockets to make sure that they are Brush heavy soil, dust, or hair off fabrics before empty. -
Page 21: Fabric Care Labels
PREPARATION Fabric care labels Using the detergent dispenser lid Opening the lid Most articles of clothing feature fabric care labels that include instructions for proper care. - Push the front handle to slide the lid open. Category Label Directions Hand Wash Machine Wash, Normal Cycle Use Permanent Press/Wrinkle Resistant washing machine... -
Page 22: Using Detergent/Fabric Softener
PREPARATION Using detergent/fabric softener Loading the dispenser The detergent dispenser of the washing machine has Recommended detergent a dispenser compartment for each detergent type. Add each detergent to its appropriate compartment. Make sure to use HE (High-Efficiency) detergent for front-loading washing machines. HE detergents Slide the detergent dispenser lid open. - Page 23 PREPARATION Pre-Wash Detergent Compartment Liquid Bleach Compartment Add liquid or powdered detergent to this This compartment holds liquid chlorine bleach, compartment when using the pre-wash option. which will be dispensed automatically at the proper Always use HE (High-Efficiency) detergent with your time during the wash cycle.
-
Page 24: Using Your Washing Machine
USING YOUR WASHING MACHINE USING YOUR WASHING MACHINE Basic operation Load the laundry into the washing machine and close the door. Press - The lights around the cycle selector knob will illuminate and a chime will sound. Turn to the desired cycle. - The proper default option is automatically set according to the wash cycle. -
Page 25: Cycle Guide
USING YOUR WASHING MACHINE Cycle guide The cycle guide below shows the options and recommended fabric types for each cycle. = Available option Basic Option ( =Default) Display Additional Options Time(min) Cycle Fabric Type Wash Spin Soil Cold Delay Extra Turbo... -
Page 26: Main Cycle
USING YOUR WASHING MACHINE Main cycle Normal items, Normal Use this cycle to wash all normal items, except You can wash laundry items more thoroughly by delicate fabrics such as wool or silk. selecting the wash cycle that best suits the type of items to be washed. -
Page 27: Cycle Modifier Buttons
USING YOUR WASHING MACHINE Cycle modifier buttons Setting spin speed, Spin You can set the desired spin speed. Each cycle has preset settings that are selected Use this feature properly according to the automatically. You may also customize the settings characteristics of the load. -
Page 28: Adjusts The Melody And Button Tones, Signal
USING YOUR WASHING MACHINE Adjusts the melody and button tones, Setting options before cycle Signal You can select and add the desired optional functions The washing machine plays a melody when the before you start the washing machine. wash cycle is finished. The buttons make a sound High temperature, Steam each time a button is pressed. -
Page 29: Presetting The Start Time, Delay Wash
USING YOUR WASHING MACHINE Presetting the start time, Delay Wash Saving energy, Cold Wash Set the desired start time. Adding the Cold Wash option reduces energy usage Press and turn to the desired cycle. and provides the same washing performance as a warm water wash. -
Page 30: Setting The Options During Cycle
USING YOUR WASHING MACHINE Setting the options during cycle Drum Lighting, Drum Light The drum is equipped with a white LED light that Add the desired options during the wash cycle. illuminates when the washer is turned on. This light automatically turns off when the door is closed and Tumble clothes to prevent wrinkles, the cycle starts. -
Page 31: Smart Appliance Connectivity
This smart appliance offers options for doing laundry. Once it is connected to the internet through a home Wi- Fi network, it can check the progress of a cycle and control the appliance remotely with the LG Smart Laundry application for the smart phone. -
Page 32: Smart Thinq
SMART APPLIANCE CONNECTIVITY Smart ThinQ 9. If the application successfully connects to the home network, turn on the washer and then press and hold the Wi-Fi Connect button on the Remote Start washer for three seconds. Use a smart phone to control the appliance After powering on the washer, do not press remotely. -
Page 33: Download Cycle
SMART APPLIANCE CONNECTIVITY Download Cycle Smart Diagnosis™ The Download Cycle features of this appliance Use your phone to record the Smart Diagnosis™ allow you to download new and special cycles signal if you have problems with your appliance. that are not included in the basic cycles on the The application can analyze the signal and help appliance. -
Page 34: Using Smart Diagnosis
Should you experience any problems with your washer, it has the capability of transmitting data to a smart phone using the LG Smart Laundry Application or via a telephone to the LG call center. Smart Diagnosis™ cannot be activated unless the washer is turned on by pressing the POWER button. -
Page 35: Maintenance Care
MAINTENANCE MAINTENANCE Care Press to turn off the washing machine and pull out the power plug. Care after wash Dry the tub interior of the washer tub with a soft cloth, and close the door. After the cycle is finished, wipe the door and the inside of the door seal to remove any moisture. -
Page 36: Cleaning
MAINTENANCE When the Drain Line is Frozen Cleaning Pour hot water in the washer tub and close the Periodically clean the washing machine to help door. maintain its performance and to minimize the chance of malfunction. - Leave it for 10 minutes. Press after 10 minutes. -
Page 37: Cleaning The Detergent Dispenser
MAINTENANCE Automatic alert for cleaning washing machine Cleaning the detergent dispenser When the power is on and the message Leaving detergent in the detergent dispenser for blinks, it means the washer tub needs cleaning. Use an extended period of time or using the washing Tub Clean to clean the washer tub. -
Page 38: Cleaning The Water Inlet Filters
If you use the washing machine in an area with hard water, the inlet filter may clog due to lime Turn off the faucets connected with the water buildup. Contact your nearest LG customer inlets. service center if the inlet filter is not clean or is missing. -
Page 39: Cleaning The Drain Pump Filter
MAINTENANCE Cleaning the drain pump filter Recap the plug onto the drain hose and reattach the drain hose. The washing machine fails to drain if the drain pump filter is clogged. Periodically clean the drain filter to prevent clogging with foreign objects. Press to turn off the washing machine and pull out the plug. -
Page 40: Cleaning The Door Seal
MAINTENANCE Cleaning the door seal Clean the door seal once a month to prevent build- up of dirt in the door seal. Wear rubber gloves and protective goggles. Dilute 3/4 cup (177 ml) of liquid chlorine bleach in 1 gallon (3.8 L) of water. Soak a sponge or a soft cloth in this diluted solution and wipe down all around the door seal. -
Page 41: Troubleshooting
Allow the washing machine to stand for a while and restart the cycle. Unplug the power cord and contact your nearest LG service center if the same error message appears. y Time to run the Tub Clean cycle. -
Page 42: Before Calling For Service
Unplug the power cord and contact your nearest LG service center if the noise persists. y Is the washing machine overloaded? y This sound is normal and occurs... -
Page 43: Specifications
SPECIFICATIONS Problem Possible Causes Solutions y Did you remove the load immediately y Remove the load immediately after it Wrinkling after it finished? finishes. y Did you overload the tub? y Do not overload the tub. y Did you reverse the hot and cold water y Hot water rinse can cause garments inlets? to wrinkle. - Page 44 (90) days, whichever is longer. Please retain dated receipt or delivery ticket as evidence of the Date of Purchase for proof of warranty (you may be required to submit a copy to LG or authorized representative).
-
Page 45: Warranty
Canada. LG Canada does not authorize any person to create or assume for it any other warranty obligation or liability in connection with the product. To the extent that any warranty or condition is implied by law, it is limited to the express warranty period above. LG... - Page 46 FOLLOWING CASES With regard to damages or failures resulting from misuse, improper installation, maintenance, natural disaster or repair (unauthorized technician or parts, as specified by LG), Customer will be charged for the repair. Strange vibration or noise Remove the transit bolts caused by not removing &...
- Page 47 WARRANTY Service trips to deliver, The warranty covers Level pick up, install the product manufacturing defects or for instruction on only. Service resulting product use. The removal from improper and reinstallation of the Installation is not Product. covered. 1° If all screws are not Install 4 screws at each installed properly, it may corner (Total 16EA).
- Page 49 MANUEL D’UTILISATION Laveuse Veuillez lire ce manuel attentivement avant l’utilisation et conservez-le pour référence en tout temps. WM5000H*A www.lg.com...
- Page 50 Aperçu de la connectivité Réglage de la connectivité Tri des charges de lessivage - Installer l’application Smart Laundry de LG - Précautions à prendre pour les vêtements - Configuration du profil (nom d’utilisateur et mot avant le cycle de lavage de passe) - Étiquettes d’entretien des tissus...
- Page 51 - Nettoyage du filtre de la pompe de vidange - Nettoyage du joint d’étanchéité DÉPANNAGE Vérification des messages d’erreurs Avant d’appeler le service d’entretien CARACTÉRISTIQUES GARANTIE LIMITÉE POUR LA LAVEUSE LG (CANADA) CETTE GRANTIE LIMITÉE NE COUVRE PAS LES CAS SUIVANTS...
-
Page 52: Instructions Importantes De Sécurité
INSTRUCTIONS IMPORTANTES DE SÉCURITÉ INSTRUCTIONS IMPORTANTES DE SÉCURITÉ LISEZ TOUTES LES DIRECTIVES AVANT D’UTILISER L’APPAREIL AVERTISSEMENT Pour votre sécurité, vous devez suivre l’information contenue dans ce manuel afin de réduire les risques d’incendie et d’explosion, de choc électrique ainsi que pour éviter les dommages matériels, les blessures corporelles ou un décès. -
Page 53: Précautions De Sécurité De Base
INSTRUCTIONS IMPORTANTES DE SÉCURITÉ INSTRUCTIONS IMPORTANTES DE SÉCURITÉ LISEZ TOUTES LES DIRECTIVES AVANT D’UTILISER L’APPAREIL AVERTISSEMENT Pour votre sécurité, vous devez suivre l’information contenue dans ce manuel afin de réduire les risques d’incendie et d’explosion, de choc électrique ainsi que pour éviter les dommages matériels, les blessures corporelles ou un décès. -
Page 54: Précautions De Sécurité Pour L'installation
INSTRUCTIONS IMPORTANTES DE SÉCURITÉ INSTRUCTIONS IMPORTANTES DE SÉCURITÉ LISEZ TOUTES LES DIRECTIVES AVANT D’UTILISER L’APPAREIL AVERTISSEMENT Pour votre sécurité, vous devez suivre l’information contenue dans ce manuel afin de reduire les risques d’incendie et d’explosion, de choc electrique ainsi que pour éviter les dommages matériels, les blessures corporelles ou un décès. -
Page 55: Précautions De Sécurité Pour L'utilisation, L'entretien, Le Nettoyage Et La Mise Au Rebut
INSTRUCTIONS IMPORTANTES DE SÉCURITÉ INSTRUCTIONS IMPORTANTES DE SÉCURITÉ LISEZ TOUTES LES DIRECTIVES AVANT D’UTILISER L’APPAREIL AVERTISSEMENT Pour votre sécurité, vous devez suivre l’information contenue dans ce manuel afin de réduire les risques d’incendie et d’explosion, de choc électrique ainsi que pour éviter les dommages matériels, les blessures corporelles ou un décès. -
Page 56: Avis De Régulation Pour Le Module De Transmetteur Se Trouvant Dans La Laveuse
Partie responsable : Cet appareil a été testé et jugé conforme aux limites LG Electronic USA, Inc. imposées par la section 15 des règles de la FCC 1000 Sylvan Avenue Englewood Cliffs, NJ 07632 concernant un appareil numérique de classe B. Ces TÉL. - Page 57 être téléchargés. LG Electronics mettra également à votre disposition le code source libre sur CD-ROM pour un prix couvrant le coût de la distribution (coût du support, de l’expédition et de la manutention) sur simple demande par courriel à...
-
Page 58: Caractéristiques Du Produit
Javel liquide et l’assouplisseur de tissus dans les différents compartiments. CYCLES DE VAPEUR À TEMPÉRATURE ÉLEVÉE Lors des lavages à la vapeur, seulement offerts par LG, la vapeur à haute température contribue à éliminer les taches tenaces. -
Page 59: Présentation De La Laveuse
(vendu séparement) REMARQUES y Contactez le service à la clientèle LG au 1-800-243-0000 (1-888-542-2623 au Canada) si un accessoire quelconque est manquant. y Pour votre sécurité et la longévité du produit, utilisez uniquement des composants autorisés. Le fabricant décline toute responsabilité... -
Page 60: Caractéristiques Du Panneau De Configuration
PRÉSENTATION DE LA LAVEUSE Caractéristiques du panneau de configuration Fonctionnement Sélecteur de cycle Affichage Bouton Bouton Bouton de Bouton de Bouton de Bouton de d’alimentation Marche/ sélection de la sélection sélection sélection Pause température la vitesse du niveau de signal de l’eau d’essorage de saleté... -
Page 61: Affichage
PRÉSENTATION DE LA LAVEUSE Fonctionnement (suite) Bouton Description y (Appuyer avant de commencer le cycle de lavage) Utilisez cette option pour ajouter la vapeur pour plus de puissance de nettoyage (voir page 29) y (Appuyer et maintenir avant de commencer le cycle de nettoyage) Permet de culbuter les vêtements pour éviter les plis (voir page 31) y Utilisez la fonction de réseau intelligent pour réduire les coûts de votre consommation d’énergie en évitant les périodes de pointe (voir page 29). -
Page 62: Consignes Relatives À L'installation
CONSIGNES RELATIVES À L’INSTALLATION CONSIGNES RELATIVES À L’INSTALLATION Aperçu de l’ordre d’installation Vérification et sélection de Déballage et retrait Raccordement de la l’emplacement approprié des boulons d’expédition conduite d’eau Raccordement de la Stabilisation de la Branchement du cordon conduite d’évacuation laveuse d’alimentation et mise à... - Page 63 CONSIGNES RELATIVES À L’INSTALLATION Vérification et sélection de REMARQUES l’emplacement approprié y Le plancher doit être suffisament dur et rigide pour supporter le poids de la laveuse lorsqu’elle est Installez la laveuse sur un sol ferme, suffisamment entièrement chargée, sans flexion, ni rebond. résistant et dur pour supporter son poids même y Si votre sol est trop souple, vous devrez peut- lorsqu’elle est entièrement chargée, sans flexion, ni...
- Page 64 CONSIGNES RELATIVES À L’INSTALLATION Déballage et retrait des boulons REMARQUES d’expédition y Conserver les pièces pour une utilisation future. Pour éviter d’endommager les composants internes Lorsque vous retirez la laveuse de sa base de carton, de la laveuse, NE PAS la transporter sans avoir au assurez-vous de retirer le soutien de tambour en mousse préalable réinstaller les boulons.
-
Page 65: Raccordement Des Conduites D'eau
Utilisez de nouveaux tuyaux lorsque vous installez la laveuse. Évitez de réutiliser des tuyaux usés. Utilisez uniquement les tuyaux d’alimentation AVERTISSEMENT fournis avec la laveuse. LG ne recommande pas y Ne pas serrer trop fort. Vous risquez d’endommager l’utilisation de tuyaux de seconde main. le raccordement. -
Page 66: Raccordement De La Conduite D'évacuation
CONSIGNES RELATIVES À L’INSTALLATION Raccordement de la conduite Utilisation de la cuve de lavage d’évacuation Fixez l’extrémité du tuyau sur le support du coude. - Raccordez le support du coude à 10 cm (4 pouces) à Fixez et sécurisez le tuyau d’évacuation pour éviter le partir de l’extrémité... -
Page 67: Stabilisation De La Laveuse
CONSIGNES RELATIVES À L’INSTALLATION Stabilisation de la laveuse AVERTISSEMENTS y Le fait d’utiliser la laveuse sans la stabiliser peut La cuve de lavage de votre nouvelle machine tourne à entraîner une production excessive de vibrations et grande vitesse. Pour réduire les vibrations, les bruits et de bruits causant des dysfonctionnements. -
Page 68: Branchement Du Cordon D'alimentation Et Mise À La Terre
CONSIGNES RELATIVES À L’INSTALLATION Branchement du cordon d’alimentation Test de fonctionnement et mise à la terre Vérifiez si la machine est correctement installée et exécutez un cycle test. Veillez à ce que la laveuse soit mise à la terre pour éviter un court-circuit ou un choc électrique lorsque vous la Chargez la laveuse avec 6 livres/2,7 kg de vêtements. -
Page 69: Préparation
PRÉPARATION PRÉPARATION Tri des charges de lessivage Précautions à prendre pour les vêtements avant le cycle de lavage Lisez et respectez les instructions suivantes pour éviter d’endommager ou de rétrécir les vêtements. Vérifiez toutes les poches pour vous assurer qu’elles ... -
Page 70: Étiquettes D'entretien Des Tissus
PRÉPARATION Étiquettes d’entretien des tissus Utilisation du couvercle du distributeur de détergent La plupart des vêtements possèdent des étiquettes d’entretien des tissus qui affichent les directives pour Ouverture du couvercle un soin approprié. Étiquette Directives - Pour ouvrir le couvercle coulissant, poussez sur la poignée avant. -
Page 71: Utilisation De Détergent/D'assouplisseur De Tissus
PRÉPARATION Utilisation de détergent/ Chargement du distributeur d’assouplisseur de tissus Le bac de distribution du détergent de la laveuse est doté d’un compartiment pour chaque type de Détergent recommandé détergent. Versez les détergents appropriés dans leurs compartiments respectifs. Assurez-vous que vous utilisez un détergent HE pour Ouvrez le couvercle coulissant du distributeur de les laveuses à... - Page 72 PRÉPARATION Compartiment à détergent de prélavage Compartiment à javellisant liquide Ajoutez du détergent liquide ou en poudre à ce Ce compartiment contient l’eau de Javel chlorée, qui compartiment pour distribution automatique lorsque sera distribuée automatiquement au bon moment durant vous utilisez l’option de prélavage. le cycle de lavage.
-
Page 73: Utilisation De Votre Laveuse
UTILISATION DE VOTRE LAVEUSE UTILISATION DE VOTRE LAVEUSE Fonctionnement élémentaire Chargez les vêtements dans la laveuse et fermez la porte. Appuyez sur - Les voyants placés autour du bouton de sélection des cycles s’allument et un son se fait entendre. Tournez en fonction du cycle souhaité. -
Page 74: Guide Sur Les Cycles De Lavage
UTILISATION DE VOTRE LAVEUSE Guide sur les cycles de lavage Le guide de cycles ci-dessous montre les options et les types de tissus recommandés pour chaque cycle. = Option disponible Affichage Option de base ( = par défaut) Options supplémentaires temps (Min.) çage... -
Page 75: Cycle Principal
UTILISATION DE VOTRE LAVEUSE Cycle principal Normal Articles ordinaires, Utilisez ce cycle de lavage pour laver des articles Vous pouvez laver des vêtements plus efficacement ordinaires, sauf des tissus délicats comme la laine ou la en sélectionnant le cycle de lavage qui correspond soie. -
Page 76: Boutons De Configuration De Cycle
UTILISATION DE VOTRE LAVEUSE Boutons de configuration de cycle Réglage de la vitesse d’essorage, Spin Vous pouvez choisir la vitesse d’essorage. Chaque cycle possède des réglages préprogrammés qui se Utilisez cette fonctionnalité correctement en fonction sélectionnent automatiquement. Vous pouvez également des caractéristiques de la charge. -
Page 77: Boutons, Signal
UTILISATION DE VOTRE LAVEUSE Régler la mélodie et le signal sonore des Configuration des options avant le cycle boutons, Signal Vous pouvez sélectionner et ajouter les fonctions La laveuse joue une musique lorsque le cycle de lavage facultatives souhaitées avant de démarrer la laveuse. est terminé. -
Page 78: Préréglage De L'heure De Début, Delay Wash
UTILISATION DE VOTRE LAVEUSE Préréglage de l’heure de début, Delay Wash Pour économiser de l’énergie, Cold Wash Vous pouvez régler l’heure de début à votre convenance. Ajouter l’option Cold Wash à ces cycles permet de réduire l’utilisation d’énergie et d’obtenir le même Appuyez sur et tournez en fonction du cycle... -
Page 79: Configuration Des Options Pendant Le Cycle
UTILISATION DE VOTRE LAVEUSE Configuration des options pendant Éclairage intérieur, Drum Light le cycle Le tambour est équipé d’un éclairage à LED blanc qui s’allume lorsque la laveuse est mise en marche. Cet éclairage s’éteint automatiquement lorsque la porte Ajoutez les options désirées pendant le cycle de lavage. est fermée et que le cycle commence. -
Page 80: Connectivité Intelligente De L'appareil
Wi-Fi domestique, vous pouvez suivre la progression d’un cycle et contrôler l’appareil à distance grâce à l’application Lavage intelligent de LG conçue pour les téléphones intelligents. L’application peut être configurée pour envoyer des notifications lorsque le cycle est terminé ou que l’appareil éprouve un problème. -
Page 81: Smart Thinq
CONNECTIVITÉ INTELLIGENTE DE L’APPAREIL Smart ThinQ 9. Si l’application réussit à se connecter au réseau domestique, mettez la laveuse sous tension, puis appuyez sur le bouton Connexion Wi-Fi qui Démarrage à distance se trouve sur la laveuse et maintenez-le enfoncé Utilisez votre téléphone intelligent pour contrôler pendant trois secondes. -
Page 82: Téléchargement De Cycles
CONNECTIVITÉ INTELLIGENTE DE L’APPAREIL Téléchargement de cycles Smart Diagnosis La fonction de téléchargement de cycles vous Utilisez votre téléphone pour enregistrer le signal permet de télécharger de nouveaux cycles ainsi que Smart Diagnosis si vous éprouvez des problèmes des cycles spéciaux qui ne font pas partie des cycles avec votre appareil. -
Page 83: Utilisation De Smart Diagnosis
UTILISATION DE Smart Diagnosis Si vous éprouvez un problème avec votre laveuse, vous pouvez transmettre des renseignements sur votre téléphone intelligent à l’aide de l’application LG Smart Laundry ou par téléphone en contactant le centre d’appels LG. La fonction Smart Diagnosis ne peut être activée que si vous mettez votre... -
Page 84: Entretien
ENTRETIEN ENTRETIEN Entretien Appuyez sur pour mettre la laveuse hors tension et débranchez la fiche d’alimentation. Entretien après le lavage Séchez l’intérieur de la cuve de la laveuse avec un tissu doux et fermez la porte. À la fin du cycle, essuyez la porte et l’intérieur du joint d’étanchéité... -
Page 85: Nettoyage
ENTRETIEN Lorsque la conduite d’évacuation est gelée Nettoyage Versez de l’eau chaude dans la cuve de la laveuse et Lavez périodiquement la laveuse pour maintenir fermez la porte. Patientez pendant 10 minutes. son rendement et minimiser les risques de dysfonctionnement. Appuyez sur après 10 minutes. -
Page 86: Nettoyage Du Distributeur À Détergent
ENTRETIEN Alarme automatique pour le nettoyage de la laveuse Nettoyage du distributeur à détergent Lorsque le système est sous tension et si le message Le fait de laisser le détergent pendant une période clignote, cela signifie que la laveuse doit être prolongée à... -
Page 87: Nettoyage Des Filtres De L'orifice D'entrée D'eau
à cause de l’accumulation de tartre. Appuyez sur pour mettre la laveuse hors tension Contactez le centre de services à la clientèle de LG et débranchez la fiche d’alimentation. le plus proche si le filtre d’entrée n’est pas nettoyé... -
Page 88: Nettoyage Du Filtre De La Pompe De Vidange
ENTRETIEN Nettoyage du filtre de la pompe de Replacez la fiche sur le tuyau de vidange et insérez-le vidange dans l’agrafe. Il est impossible de vidanger la laveuse si le filtre de la pompe de vidange est bouché. Nettoyez régulièrement le filtre d’entrée d’eau pour éviter qu’il soit bouché... -
Page 89: Nettoyage Du Joint D'étanchéité
ENTRETIEN Nettoyage du joint d’étanchéité Nettoyez le joint d’étanchéité une fois par mois pour éviter l’accumulation de la saleté. Mettez des gants en caoutchouc et des lunettes de sécurité. Diluez 3/4 de tasse (177 ml) d’eau de Javel liquide avec chlore dans 3,8 L (1 gallon) d’eau. Trempez une éponge ou un tissu doux dans la solution diluée et essuyez le pourtour du joint d’étanchéité. -
Page 90: 42 Dépannage
à cause de la surchauffe du moteur. Laissez la machine pendant quelques instants et redémarrez le cycle. Débranchez le cordon d’alimentation et contactez votre centre de services LG le plus proche si le même message d’erreur s’affiche. y Indique que le moment est venu de sélectionner le y Videz la cuve et mettez l’eau de Javel dans le distributeur du... -
Page 91: Avant D'appeler Le Service D'entretien
Débranchez le cordon d’alimentation et la cuve ou dans le filtre de vidange? contactez votre centre de services LG le plus proche si le bruit persiste. y La laveuse est-elle surchargée? -
Page 92: Caractéristiques
CARACTÉRISTIQUES Problème Causes probables Solutions y Avez-vous enlevé la charge immédiatement y Retirez la charge immédiatement dès qu’elle Froissement après la fin du cycle? est finie. y Avez-vous surchargé la cuve? y Ne surchargez pas la cuve. y Avez-vous inversé les entrées d’eau chaude et y Le rinçage à... -
Page 93: Garantie Limitée Pour La Laveuse Lg (Canada)
Cette période de garantie est valide uniquement pour l’acheteur initial du produit au détail et s’applique exclusivement à un produit distribué au Canada par LG Canada ou un représentant agréé de celui-ci au Canada. -
Page 94: Cette Grantie Limitée Ne Couvre Pas Les Cas Suivants
SUIVANTS Si les dommages ou bris résultent d’une mauvaise utilisation, installation, d’un mauvais entretien ou d’une réparation fautive (technicien ou pièces non autorisés comme précisé par LG), des frais de réparation vous seront demandés. Vibration étrange ou bruit Retirez les boulons de causé... - Page 95 GARANTIE Les déplacements de La garantie couvre les Niveau Niveau service pour livrer, défauts de fabrication. ramasser, installer le produit Les réparations résultant ou pour des instructions d’une mauvaise installation sur l’utilisation du produit. ne sont pas couvertes. L’enlèvement et la réinstallation du produit.
- Page 96 LG Customer Information Center 1-800-243-0000 1-888-542-2623 CANADA This product qualifies for ENERGY STAR in the “factory default (Home Use)” setting. Register your product Online! Changing the factory default settings or enabling other features may increase power consumption that could www.lg.com...
Need help?
Do you have a question about the WM5000H A Series and is the answer not in the manual?
Questions and answers