Table of Contents
Advertisement
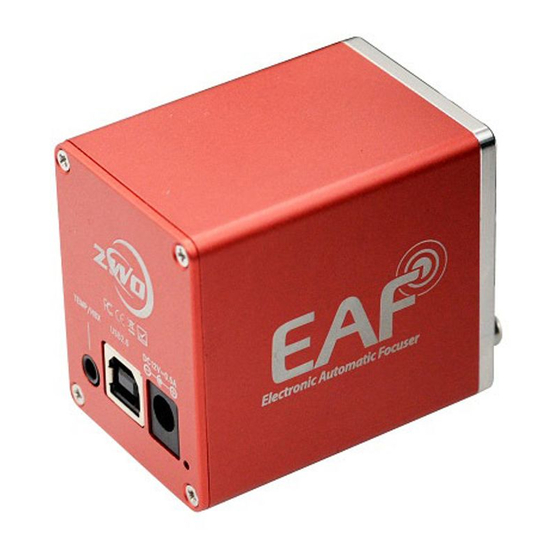
Electronic Automatic Focuser
Detailed Installation and
Operations Manual
苏州振旺光电有限公司
Suzhou ZWO Co.,Ltd.
Thank you for purchasing the ZWO EAF. This guide will give you a brief introduction to the installation of
your new Electronic Automatic Focuser. Please take the time to read it thoroughly and if you have any
other questions, feel free to contact our support team at
info@zwoptical.com
1
Advertisement
Table of Contents

Related Manuals for ZWO EAF


Summary of Contents for ZWO EAF
- Page 1 Suzhou ZWO Co.,Ltd. Thank you for purchasing the ZWO EAF. This guide will give you a brief introduction to the installation of your new Electronic Automatic Focuser. Please take the time to read it thoroughly and if you have any other questions, feel free to contact our support team at info@zwoptical.com...
-
Page 2: Product Description
Product Description The ZWO EAF is an all metal bodied electronic focus drive system designed for installation across a wide range of Optical Tube Assemblies. The flexible mounting system allows installation across refractors, Newtonians, Cassegrain and many other telescope designs. - Page 3 • ASCOM/INDI compatible drivers available for download – interfaces with many well-known astronomy software packages. • ASICAP support built in. • Native support in ASIAIR Version 1.1 onwards. • Integrated USB interface. • Powered by 12V DC 0.5A. EAF Manual EN V1.0.doc Version 1.0...
-
Page 4: Supplied Accessories
• Temperature sensor • Hand controller Supplied Accessories 1. EAF Body contains the focuser motor and controller. 2. Motor Bracket for attaching the body to the OTA focuser assembly. 3. Flexible Coupling to attach the focus motor shaft to the OTA focuser drive shaft. - Page 5 SkyX, Sequence Generator Pro, Nebulosity and many more. Third party focus software such as FocusMax, is also supported. Your EAF is also fitted with a small multi-function interface that supports a temperature sensor or external hand controller. A dedicated temperature sensor can be connected to collect temperature data and allow focuser control from your chosen EAF Manual EN V1.0.doc Version 1.0...
- Page 6 The hand controller allows for manual control of focuser position and focus motor speed. Installation Your EAF is supplied with a bracket for connection to a wide variety of focusers. The L shaped bracket supports: SkyWatcher Astrophotography Reflectors, SkyWatcher Black Diam ond, SkyWatcher Dobsonians, SkyWatcher Maksutov-Newtonians.
- Page 7 EAF Manual Dimensions EAF Manual EN V1.0.doc Version 1.0...
- Page 8 Attach the focuser body to the flexible Secure the EAF body to the bracket and coupler and tighten the lock screw the bracket to the matching mounting holes using the supplied wrench...
- Page 9 For curved focusing seats, such as those on the Sharpstar and the Feathertouch focusers, you only need use the original locking screws and 3 spacers to fix the EAF. There are grooves on the bottom of the EAF connecting plate, and the single screw provides sufficient stability.
- Page 10 EAF Manual 1.Connect your EAF to either a PC or ASIAIR using the USB port. 2.Attach an optional temperature probe or hand controller as required. 3.Connect 12V DC to the power socket. 4.Install ASCOM drivers as required. Software Installation and Configuration ASCOM Installation The latest version of ASICAP has native support for the EAF.
- Page 11 EAF Manual Connecting EAF to your Astronomy Software ASICAP 1.Open the focuser control panel. EAF Manual EN V1.0.doc Version 1.0...
- Page 12 EAF Manual 2. choose the focuser that you connected. 3. Set suitable settings for your EAF. ASIAIR 1.On the ASIAIR main screen find the icon for the EAF. EAF Manual EN V1.0.doc Version 1.0...
- Page 13 EAF Manual 2. Click the icon and enter the EAF settings page. 3. EAF Advanced Settings . Sharpcap 1.Open Sharpcap settings. EAF Manual EN V1.0.doc Version 1.0...
- Page 14 EAF Manual 2.Choose ZWO focuser. FireCapture 1.Open the focuser panel in settings menu. 2.Check ”Use ASCOM Focuser” EAF Manual EN V1.0.doc Version 1.0...
- Page 15 EAF Manual 3. Choose ZWO Focuser in ASCOM panel. Sequence Generator Pro Maxim DL Pro 1.Open “Observatory panel”, in “Focuser 1” option, click “Choose…”. EAF Manual EN V1.0.doc Version 1.0...
- Page 16 EAF Manual 2. Choose ZWO Focuser in ASCOM panel. Nebulosity To be added EAF Manual EN V1.0.doc Version 1.0...
- Page 17 EAF Manual The SkyX 1.Open “Telescope” menu, and select “Telescope Setup” 2.Select “Focuser Setup” 3. select ASCOM Focuser EAF Manual EN V1.0.doc Version 1.0...
- Page 18 4. Setup the settings of ASCOM focuser. 5.Choose ZWO Focuser Additional Installation Information There is significant torque from the EAF stepper motor. We recommended setting the 0 position and the maximum number of steps as a first step to prevent possible damage to the focuser.
- Page 19 Manual Focus Control Your EAF is able to be manually controlled and there are two ways to achieve this. One is via the optional hand controller and secondly via the astronomy software package in use.
- Page 20 EAF Manual ASICAP 1. When the image looks very fuzzy, use “coarse” button. 2. When the image looks slightly blurred, use “fine” button. EAF Manual EN V1.0.doc Version 1.0...
- Page 21 EAF Manual 3.Done 4. Goto ZERO position. EAF Manual EN V1.0.doc Version 1.0...
- Page 22 EAF Manual ASIAIR 1. When the image looks very fuzzy, use “coarse” button. 2. When the image looks slightly blurred, use “fine” button. EAF Manual EN V1.0.doc Version 1.0...
- Page 23 EAF Manual 3. Done 4. Goto ZERO position EAF Manual EN V1.0.doc Version 1.0...
- Page 24 ASCOM driver to 0 to avoid affecting the focusing speed. 1. Open the focus control dialog box 2. Enter the settings menu by clicking the setting icon Set the Auto Focus parameters as below EAF Manual EN V1.0.doc Version 1.0...
- Page 25 EAF Manual 4. Set the focuser backlash settings 5. With the telescope roughly in focus before you start, click the run button to start the autofocus procedure EAF Manual EN V1.0.doc Version 1.0...
- Page 26 SGP will automatically take exposures and move the focuser steps drawing a V curve tracking the stars HFR value. Once the curve is complete SGP will drive the focuser to the best measured value. EAF Manual EN V1.0.doc Version 1.0...
- Page 27 Step 1: Set up the camera. Open the software, click System to enter the settings interface. Click the button 2 as shown below, click Choose to enter the EAF settings menu. Step 2: Select the ZWO Focuser in the dialog and click OK. EAF Manual EN V1.0.doc Version 1.0...
- Page 28 EAF Manual Step 3: Next, connect the EAF. Click the Connect button and wait for the connection to be made Step 4: Next set the Backlash Compensation and Camera Control EAF Manual EN V1.0.doc Version 1.0...
- Page 29 EAF Manual Step 5: Set the Exposure and Focus Mode Step 6: Open the Vcurve dialog box and set the number of steps per move (generally set to -10). Run the autofocus routine: EAF Manual EN V1.0.doc Version 1.0...
- Page 30 EAF Manual After the V curve is drawn the focuser will be driven to the optimal focus position. EAF Manual EN V1.0.doc Version 1.0...
- Page 31 Measuring the Focuser Backlash It is relatively easy to measure the focuser backlash. The following example uses ASICAP as the software application driving the EAF: Set the coarse step size to 1000 and the fine step size to 10. Click the Coarse Button and move the focuser out by 1000 steps.
- Page 32 Click the fine adjustment button that moves the focuser inwards and click once. Observing the focuser knob on the opposite side to the EAF note how many steps the EAF moved before the knob moves. The number of times you click x 10 is the number of steps measured as backlash.
- Page 33 The customer must pay for shipping when shipping the EAF back for repair or replacement. If you get a faulty EAF, please contact us as soon as possible through email: info@zwoptical.com. Please describe the problem in detail, and we will do our best to solve the problem. Most instances are perceived problems which are caused by a bad driver install or software configuration.
Need help?
Do you have a question about the EAF and is the answer not in the manual?
Questions and answers