Table of Contents
Advertisement
m
Installation and Operation Manual
Wireless Monitor Kit
Pages 2-5 and 10-12
Option 1 and Option 2
Pages 2 and 7-12
Option 1 and Option 2
Option 1
Two fresh AA 1.5V batteries are
required. Batteries not included.
Note: Grommet is not used on every assembly.
Control Panel is equipped with an ON BOARD
RADIO.
Copyright © Briggs & Stratton Corporation
Milwaukee, WI USA. All Rights Reserve.
Questions?
Help is just a moment away!
Call: Technical Services 800-743-4115
Monday-Friday 8:00 AM to 5:00 PM Central Time
Option 2
Two fresh AA 1.5V batteries are
required. Batteries not included.
Note: Grommet is not used on every
assembly.
OFF BOARD RADIO to be installed on
Control Panel.
en
es
fr
en
80005284 Rev. B
Advertisement
Table of Contents

Subscribe to Our Youtube Channel
Related Manuals for Briggs & Stratton Wireless Monitor Kit


Summary of Contents for Briggs & Stratton Wireless Monitor Kit
- Page 1 Installation and Operation Manual Questions? Wireless Monitor Kit Help is just a moment away! Call: Technical Services 800-743-4115 Monday-Friday 8:00 AM to 5:00 PM Central Time Option 2 Pages 2-5 and 10-12 Option 1 and Option 2 Pages 2 and 7-12 Two fresh AA 1.5V batteries are...
- Page 2 WARNING accessory. When installed in accordance with the Failure to read and follow the safety warnings and instructions that follow, this Wireless Monitor Kit will instructions in this document and in the operator’s provide years of dependable service. After installation...
- Page 3 Installation 1 Remove the five screws and roof. 2 Assemble antenna piece to base. 3 Install grommet on antenna wire. 4 Insert grommet and wire into slot on rear panel. 5 Attach antenna (temporarily) onto the back panel. Preparation Before performing any generator maintenance, always perform the following steps: 1 Set the generator’s circuit breaker to its OFF position.
- Page 4 Option 1 7 Insert the antenna wire to the ON BOARD RADIO wire until it clicks. Route wire away from sharp Control Panel is equipped with an ON BOARD objects and secure with ties. RADIO. A wire connection is available at the inside cabinet electrical harness hole.
- Page 5 Option 2 OFF BOARD RADIO to be installed. 6 Remove screws on control panel and tilt panel forward. 7 Prepare the OFF BOARD RADIO mounting surface by cleaning with an alcohol wipe or other cleaning solution. Make sure surface is dry before proceeding to Step 8.
- Page 6 Notes...
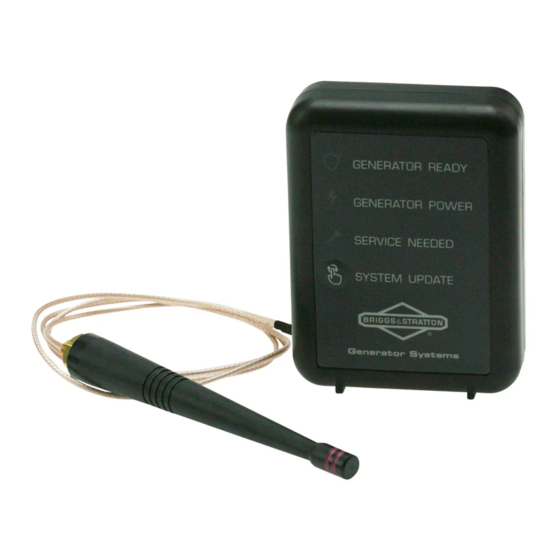
- Page 7 Installation Option 1 Control Panel is equipped with an ON BOARD RADIO Kit parts required: Preparation GENERATOR READY Before performing any generator maintenance, always GENERATOR POWER perform the following steps: SERVICE NEEDED SYSTEM UPDATE Generator Systems 1 Set the generator’s circuit breaker to its OFF position.
- Page 8 After installation has been completed, replace fuses in 3 Insert the antenna wire through inside cabinet hole transfer switch, replace 15 Amp fuse in control panel, and around the backside as shown. and set generator circuit breaker to its ON position. 4 Fasten the four screws attaching the control panel Go to: LINK MONITOR WITH GENERATOR.
- Page 9 3 Remove RED plastic from adhesive on OFF 7 Assemble antenna piece to base. BOARD RADIO. Attach radio to inside wall under 8 Loosen inside roof bolt in corner. control panel. Press down firmly. 9 Mount the antenna to the top of the roof. While 4 Insert the antenna wire through inside cabinet hole lifting roof in corner, lay antenna wire in space and around the backside as shown.
- Page 10 Link Monitor with Generator Press AUTO mode. AUTO auto The REMOTE WIRELESS MONITOR • Is for indoor use ONLY. • Communicates with the generator Install batteries correctly. control panel. • Has a range of up to 200 feet line of sight. COLOR / ICON green GENERATOR READY...
- Page 11 Monitor/Generator • Wireless Communication Lost - the wrench icon will flash 20 fast pulses, then pause for 5 seconds, Status Codes and repeat the sequence until communication has been restored. Communication lost issues can typically be resolved by moving the wireless monitor closer, within the home, to the standby generator.
- Page 12 BRIGGS & STRATTON PRODUCTS WARRANTY POLICY January 2014 LIMITED WARRANTY Briggs & Stratton warrants that, during the warranty period specified below, it will repair or replace, free of charge, any part that is defective in material or workmanship or both. Transportation charges on product submitted for repair or replacement under this warranty must be borne by purchaser.
Need help?
Do you have a question about the Wireless Monitor Kit and is the answer not in the manual?
Questions and answers