Table of Contents
Advertisement
Advertisement
Table of Contents
Troubleshooting

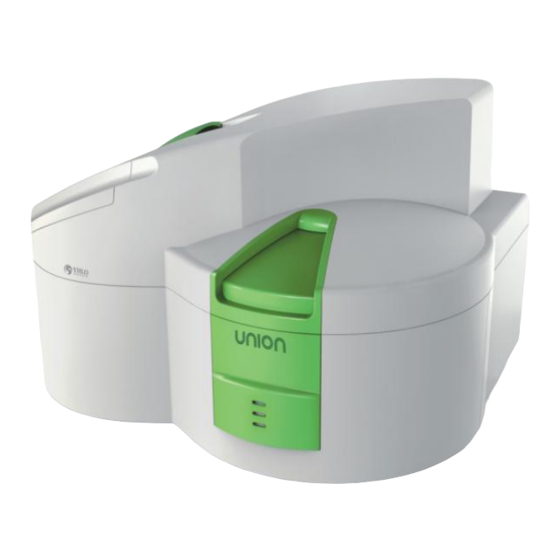
Related Manuals for YHLO BIOTECH UNION

Summary of Contents for YHLO BIOTECH UNION
- Page 1 UNION Immune Analyzer Operation Manual Released Software V2.3.0 SHENZHEN YHLO BIOTECH CO., LTD No.5 Building, Lishan Industrial Area, Xinghai Road, Nanshan District 518054 Shenzhen, P.R.China Tel : +86-755-26473359 Fax: +86-755-26473319 Web: www.szyhlo.com...
- Page 3 ©2011-2015 SHENZHEN YHLO BIOTECH CO., LTD. All rights Reserved. For this Operation Manual, the issue date is 15 April 2015. Customer service department Manufacturer: SHENZHEN YHLO BIOTECH CO.,LTD Headquarter Address: 13th Floor, Building A1, Kexing Science Park, No.15 Keyuan Rd., Nanshan District, 518057 Shenzhen, P.R.China Production Address: No.5 Building, Lishan Industrial Area, Xinghai Road, Nanshan...
- Page 4 Contents of this manual are subject to change without prior notice. All information contained in this manual is believed to be correct. SHENZHEN YHLO BIOTECH CO., LTD. (hereinafter called YHLO) shall not be liable for errors contained herein or for incidental or consequential damages in connection with the furnishing, performance, or use of this manual.
- Page 5 Others not caused by instrument or part itself. Intellectual Property Statement SHENZHEN YHLO BIOTECH CO., LTD. owns the intellectual property rights to this YHLO product and this manual. This manual may refer to information protected by copyright or patents and does not convey any license under the patent rights or copyright of YHLO, or of others.
- Page 6 UNION is designed to be used exclusively with the reagents and methods established by YHLO that are pre-stored in the memory of the analyzer, and customer should only use reagents and consumables manufactured by YHLO.
- Page 7 Personal Safety Operators must treat all samples as biological hazardous materials and should pay special cautions during the following operations: When pipetting samples into the sample well of the cartridge. When loading cartridges into the carousel. When removing the cartridges from the carousel. ...
- Page 8 Biological Hazard All patient samples must be treated as biological hazardous material and should be handled with care. All samples and waste material must be processed following the guidelines set forth by the Medical Service Authority in their own region or country. It is mandatory to sanitize the instrument every 7 days using the “Sanitization Program”...
- Page 9 The device is fully in conformance with the Council Directive Concerning In Vitro Diagnostic Devices 98/79/EC Biohazard Warning: risk of potentially biohazardous infection Warning: risk of personal injury or equipment damage Warning: risk of sharp object Warning: risk of moving parts Warning: risk of high temperature Warning: risk of electrical hazard...
-
Page 11: Table Of Contents
Contents System Description ......................1 1.1. Hardware introduction .................... 2 1.1.1. Analyzing Unit ......................2 1.1.2. Operation Unit ......................5 1.1.3. Output Unit ......................6 1.2. Software introduction ..................... 6 1.2.1 Software Interface ....................6 1.2.2 Status Bar ......................6 1.2.3 Menu Bar ....................... - Page 12 Appendix .......................... 38 Operation Accessories ..................38 Technical Data ..................... 39 Requirements for Installation ................40 Quick Guide for UNION ..................41 Daily Maintenance Procedure ................43 Configuration of Barcode Scanner ............... 45 Bi-directional Communication ................46 Contact information ....................47...
-
Page 13: System Description
1 System Description UNION Immune Analyzer is an automated instrument for performing special single tests in Enzyme Immuno Assay (EIA) format. It is designed to carry out in vitro diagnostic tests in Clinical Laboratories for autoimmune antibodies, infectious diseases, hormones, tumor markers, viral antigens and sample types are using serum, plasma, stool and other biological samples. -
Page 14: Hardware Introduction
XP SP3 or above) can connect and control up to 10 units. Fig.1-2 UNION connection UNION consists of the analyzing unit, operation unit, output unit, replacing parts and consumables. Analyzing Unit 1.1.1. Analyzing unit is in modular design with high-performance components purchased around the world. - Page 15 The reagent carousel can be rotated freely by hand and up to 30 different cartridges can be loaded for each analysis cycle. Each position of the tray is numbered in sequence from 1 to 30. Fig 1-4 UNION Carousel 1.1.1.2. Dispensers and Punchers The Dispenser and Punchers are coated with high-tech nano ceramic to prevent cross contamination effectively.
- Page 16 Fig.1-5 Dispensers and Punchers 1.1.1.3. Washers The washers adopt the double-placement design with the residual liquid less than 5ul. Two different washers used for different washing buffers in the same cycle. Fig. 1-6 Washers V2.3.0 OM-UNN valid from 15 April 2015...
-
Page 17: Operation Unit
The solution tanks using load cell for performing real-time monitoring of liquid flow. Fig.1-8 Solution Tanks 1.1.2. Operation Unit The operation unit is a computer with the operating software of UNION analyzer installed. It manages running of the analyzing unit, as well as operation and data processing. Note ®... -
Page 18: Output Unit
1.1.3. Output Unit The output unit is a printer that prints out the test results and other data. 1.2. Software introduction Note In this manual, “click” refers to moving the pointer of the mouse to the desired item and click the left button of the mouse. -
Page 19: Menu Bar
1.2.3 Menu Bar The “B” area located at the right side of the screen as shown in Fig. 1-9 displays the Menu Bar. The following command icon buttons are shown: WAITING LIST: for Laboratory Information System test request METHODS: edit the methods of test ... -
Page 20: Cartridges
The type of Buffer is filled in the AWB fluidic path. ( AWS or CS) The type of liquid is filled in the IWB fluidic path. ( IWB or CS ) Time to the next Self-Check or if the Self-Check is overdue. ... - Page 21 Description of cartridge wells: There are 8 reagent wells, and different wells have different material and functions. Fig. 1-12 Cartridges Description Wells and area Film Volume (μl) Description Sample well, used to contain sample, No. 1 open calibrator or control. Sorbent well, used to put sorbent, some of No.
-
Page 22: Installation
Customer Service Department or local distributor. After opening the package, check the delivered goods against the packing list as well as the appearance of the system. Fig.2-1 Package of UNION Analyzer Caution The instrument must be unpacked and installed by trained personnel only. -
Page 23: Installation Requirements
2.2. Installation Requirements Caution Make sure the system is installed in a place meeting the following requirements. Otherwise, it will not perform as promised. 2.2.1 Installation Environment Requirements Instrument must be placed on top of a leveled bench that is: ... -
Page 24: Washing Solution
Yellow (Cleaning solution) Orange (Sanitizing solution) Red (Waste tank) Fig. 2-2 Solution Tanks Note During Cycle, all 3 solutions (Washing Buffer A, Washing Buffer B and Cleaning solution are used. For Sanitizing procedure, Cleaning solution is replaced by the Sanitation solution. Both Cleaning and Sanitizing Solution share the same position. -
Page 25: Cleaning Solution
The Instrument performs a system check during start-up to ensure the reagent tanks are properly connected as well as a volume check. In case of connection error or low volume, there will be an audio alarm and an error message will appear on the main window. 2.3.2 Cleaning solution The cap of the Cleaning solution tank is color coded YELLOW and holds up to 4 liters in capacity. -
Page 26: Connecting To The Waste Tank
2.5. Electrical Connection The power plug is located at the back of the instrument. The instrument must be connected to a power socket as specified in this operating manual and follow the safety requirements. Fig. 2-3 Backside of UNION Description Description... -
Page 27: Connection To The Computer
The user must only connect the instrument to a grounded socket which meets the requirements as specified in this operation manual. 2.6. Connection to the Computer Install UNION operation software in the computer, connect the computer and analyzer with the regular USB cable which provided by the YHLO. External Computer (Minimum Specifications) ®... -
Page 28: Operation
3 Operation 3.1 Switch On the Analyzer Power on the analyzer by pressing the on-off switch located at the back of the instrument to “ ” position as marked. Once the analyzer is powered on, there is a prompt from the Front Cover which is a GREEN Led powered. -
Page 29: Procedure For Performing A Self-Check
line, and give warning and more detail of solution to solve it. Fig. 3-2 Self-check Window 3.4 Procedure for performing a self-check Click the Self Check button, the operator will be asked to: Insert a SERVICE cartridge in position 1, clear position 2 and select START. Click the START button, the analyzer will close the lid and start the self-check procedure which verifies the followings: ... -
Page 30: Handling Samples
3.5 Handling Samples Users may dispense serum into the sample well on the cartridge either before or after inserting the cartridge into the carousel. In either case, safety practices should be followed. Biohazard The samples potentially have biohazardous condition; please follow the standard operation and safety practices. -
Page 31: Quality Control
3.5.2 Quality Control Each quality control provided in the kit is identified by a barcode with the following information: Test identification code; Lot number; Min acceptable OD; Max acceptable OD Note To run a quality control, its test identification code, and lot number must be the same as those on the corresponding test cartridges. -
Page 32: Loading And Removing Of Cartridges
3.6 Loading and Removing of Cartridges The cartridge is held in place by the cartridge holder carousel with a spring that pushes it into its slot to keep it tightly fixed. When inserting the cartridge, it is necessary to push the cartridge inward and then leave the spring to push back the cartridge into the retaining edges at the end of the slot. -
Page 33: Processing
3.7 Processing The processing window manages all the operations concerning the set up and running of the cycle. SCAN START Fig.3-5 Scanning Window 3.8 Identification Pressing the SCAN command icon button, a 30 rows table will appear in the middle of the window. The identification process will begin by the carousel turning and reading the presence of the cartridge(s) and its barcode(s). -
Page 34: Calibration
3.8.1 Calibration In case of a new test or a test of a new lot, calibration must be performed. Only Calibrator of the same lot as the cartridge should be used, and the calibration procedure is as follows: Edit/Scan the calibrator barcode on the tube containing the calibrator. ... - Page 35 Fig.3-6 Cartridges Scanning Window To update the test method, locate the 2D barcode in the box containing the reagent barcode and scan the 2D barcode. Fig.3-7 Method Updating Window Once the new method is updated, CAL/ QC/ Sample can be run as previously described. V2.3.0 OM-UNN valid from 15 April 2015...
-
Page 36: Run
Fig.3-8 Cartridges Identified 3.11 When the calibrator(s), QC(s), patient samples and cartridges barcode are read, and there is no error message on the right hand side of the test table, click the RUN icon button to initiate the run cycle. The lid of the cartridge loading area will close automatically, and the test cycle will start. -
Page 37: Pre-Run Check
Note Important *Indicate that the solution A/B will only be consumed simultaneously if they are both used in the same test cycle. Normally, if washing buffer A is used in one cycle, washing buffer B will not be consumed in this cycle. -
Page 38: Duration Of Analysis
3.11.3 Duration of Analysis The Instrument is able to calculate the time needed to complete the analysis cycle in a run. The total processing time is displayed in a status bar in minutes and it is calculated as follows: Sample incubation time + Conjugate Incubation time + TMB incubation time + STOP SOLUTION incubation time + 0.5 minutes for each sample Incubation Time The instrument allows tests with different incubation time to be ran in the same test cycle, but it will be... -
Page 39: Results And Reports
4 Results and Reports 4.1 Principle of Analysis The analyzer reads absorbance of all the reaction well at 450nm and 630nm, then calculate the actual absorbance using the following formula: = OD – OD 4.1.1 Qualitative Tests 4.1.1.1 Calibration During the qualitative tests, the optical density (OD) of the calibrator for each lot should be carried out. The code of calibrator has two parameters: ... -
Page 40: Quantitative Tests
-20% +20% Fig.4-1 Doubt Range 4.1.1.3 Quality Control The routine QC check involves processing of the QC material as a sample corresponding to the cartridge of the same lot number in a run cycle, and its optical density is determined as follows: = OD –... - Page 41 C1 C2 C3 Fig.4-2 Calibration Curve C1 C2 C3 Fig. 4-3 Curve Correction The procedure to re-calibrating the Calibration Curve(Point-to-Point) is as follows: The optical density of the calibrator OD will be calculated by the formula OD = OD - OD 630;...
-
Page 42: Units Of Measurement
Fig. 4-4 4PL Curve The optical density of the calibrator OD will be calculated by the formula OD = OD - OD The mode of 4PL calibration can do Single-Point and two-Points. The mode of Two-Points has two methods: Method 1: Test only one cartridge for every calibrator on the same cycle. -
Page 43: Final Report
4.3 Final Report After the analysis cycle is completed, the final report is displayed as shown in Fig. 4-5. Fig.4-5 Final Report The report consists of the following information: Name of the test Lot number of the cartridges ... -
Page 44: Maintenance And Troubleshooting
5.2 Periodic Maintenance To ensure proper functioning, periodic maintenance must be scheduled for the instrument. If user wants to know the detail, please refer to <UNION Maintenance Manual>. Caution Important This process should be carried out by YHLO engineers or trained personnel with certification issued by YHLO. -
Page 45: Troubleshooting
5.3.1 Start-up Errors Type of error Description Corrective action Turn on the power switch; Connect UNION to No action, no movement, no light No power supply the power supply; Check the electrical power in front of the cover. - Page 46 be aborted. And one of the following system error messages will be printed at the end: Session aborted due to hardware failure Session aborted by user Session aborted (washing buffer exhausted) Session aborted (Cleaning solution/ DI Water exhausted) ...
- Page 47 Syringe Assembly Syringe motor moves wrongly. Disp. Assembly Dispensing motor moves or dispense wrongly. Puncher. Assembly Puncher motor moves or perforates wrongly. Washer 1 Assembly Washer motor 1 moves wrongly. Washer 2 Assembly Washer motor 2 moves wrongly. A generic error has been found at the start of the hydraulic check, it could be possible damage to the waste circuit or to the result of a defective function of Waste Undefined Error a sensor.
- Page 48 Error message and Description Corrective action The validity of the cartridge has expired. Use a valid cartridge or proceed at your own risk. The cartridge bar code is illegible. Type the code manually using the keyboard on the display. The test code of the cartridge is not Update the Methods File with the 2D barcode on reagent kit.
- Page 49 Check the USB connection. Check if the instrument is still working. If yes, reconnect the USB cable and the instrument will reconnect itself, once the run cycle Connection Lost is completed, the result will be displayed in the reporting window.
-
Page 50: Appendix
6. Appendix 6.1 Operation Accessories Operation Accessories are supplied with the instrument: Name Specification Quantity UNION analyzer with the firmware installed UNION-C Waste tank 10 L Drainage tube with standard cap UNION-C Flexible tubing (for spare use) 1/16 RFID reader and connecting cable Power cable for analyzer 1.5 m... -
Page 51: Technical Data
6.2 Technical Data Index Performance Sample Positions Modular Control 1 to 10 analyzers can be connected to a single computer. Minimum 20μL (check instruction for use of each individual kit for the Sample volume proper amount of sample to be used) Reaction Temperature 25℃... -
Page 52: Requirements For Installation
6.3 Requirements for Installation Computer Requirements (minimum specifications) ® Operating System Windows XP SP3 or above Internal Memory 2G Bytes Hard Disc Storage 120G Bytes Communication connector Minimum 4USB port Resolution 1440 x 900 Display Recommend Touch Screen Printer Other Hardware Requirements USB Cable Environmental Requirements Operating Temperature... -
Page 53: Quick Guide For Union
6.4 Quick Guide for UNION 6.4.1 Switch on Check and ensure all the solutions (Washing Buffers and cleaning solution) has sufficient volume. Check the waste tank and ensure the tubing is well connected. Check and ensure the USB cable and the power cord are well connected. Switch on the Instrument by means of the power switch on its back. - Page 54 Review the results Click and select or review the results according to your needs. 3)Data Transfer The test data and results can be transferred to LIS automatically. 6.4.4 Switch off After all the running cycles,Click to clean liquid circuit . Please wait for the completion of the maintenance.
-
Page 55: Daily Maintenance Procedure
6.5 Daily Maintenance Procedure 6.5.1 Instruction After every cycle of tests, needles should be cleaned as follows: icon will be shown in RUN page and HOME page after one cycle of tests (See Fig.6-1 and Fig.6-2). And the boxes in the left side will give red prompts to remind the user to clean needles. Fig.6-1 Fig.6-2 6.5.2 Daily Cleaning Procedure... - Page 56 After inserting the service cartridge, click icon to automatically clean needles (See Fig.6-4). Fig.6-4 icon will not disappear until the cleaning procedure is complete. If this icon is disappeared, it means UNION is already clean. V2.3.0 OM-UNN valid from 15 April 2015...
-
Page 57: Configuration Of Barcode Scanner
6.6 Configuration of Barcode Scanner Caution If the external 2D barcode scanner is unable to read the barcode normally for the first time, please follow the instructions below: Step: Overview and select the keyboard mode you need, then scan the 2D barcode below it with the barcode scanner, after two beeps from the scanner, it will be done automatically. -
Page 58: Bi-Directional Communication
Fig.6-5 Bi-directional Communication Communication Introduction The UNION hosting module is a framework designed to connect the Instrument with a centralized PIMS/LIS (Host). It offers the basic infrastructure required to manage the connection between these entities in an easy and flexible way. -
Page 59: Contact Information
6.8 Contact information Please do not hesitate to contact us in case of any question. Customer Service Department SHENZHEN YHLO BIOTECH CO., LTD. Floor, Building A1, Kexing Science Park, Keyuan Road, Nanshan District, Shenzhen 518057, P.R. China Tel.: +86-755-26473359 Fax: +86-755-26473319 Service line: +86 400 166 0755 Email: service@szyhlo.com...
Need help?
Do you have a question about the UNION and is the answer not in the manual?
Questions and answers