
Related Manuals for Miller WP Series


Summary of Contents for Miller WP Series
- Page 1 OM-251981C 2018-02 Processes TIG (GTAW) Welding Description Hand-Held Water-Cooled TIG (GTAW) Torches Hand-Held Air-Cooled TIG (GTAW) Torches WP And CS Series Torches File: TIG (GTAW)
- Page 2 From Miller to You Thank you and congratulations on choosing Miller. Now you can get the job done and get it done right. We know you don’t have time to do it any other way. That’s why when Niels Miller first started building arc welders in 1929, he made sure his products offered long-lasting value and superior quality.
-
Page 3: Table Of Contents
......4-2. Required Torch Parts And Torch Assembly − WP Series Water-Cooled Torches . -
Page 5: Section 1 −Safety Precautions For Gtaw Torches − Read Before Using
SECTION 1 −SAFETY PRECAUTIONS FOR GTAW TORCHES − READ BEFORE USING SR6 (TIG) 2018-01 Protect yourself and others from injury — read, follow, and save these important safety precautions and operating instructions. 1-1. Symbol Usage DANGER! − Indicates a hazardous situation which, if Indicates special instructions. -
Page 6: Proposition 65 Warnings
D Use only genuine replacement parts from the manufacturer. READ INSTRUCTIONS. D Perform installation, maintenance, and service according to the Owner’s Manuals, industry standards, and national, state, and loc- al codes. D Read and follow all labels and the Owner’s Manual carefully before installing, operating, or servicing unit. -
Page 7: Section 2 −Definitions
SECTION 2 −DEFINITIONS Warning! Watch Out! There are possible hazards as shown by the symbols. Safe1 2012−05 Do not discard product (where applicable) with general waste. Reuse or recycle Waste Electrical and Electronic Equipment (WEEE) by disposing at a designated collection facility. -
Page 8: Section 3 − Specifications
SECTION 3 − SPECIFICATIONS 3-1. Specifications Table OM-251981 Page 4... -
Page 9: Duty Cycle
3-2. Duty Cycle NOTICE − Do not exceed rated amperage or duty cycle (see Section 3-1). Ex- ceeding rated amperage or duty cycle can damage torch and void warranty. 100% Duty Cycle Examples: Definition: Duty Cycle is percentage of 10 minutes that torch can weld at rated load without overheating. -
Page 10: Required Torch Parts And Torch Assembly − Wp Series Water-Cooled Torches
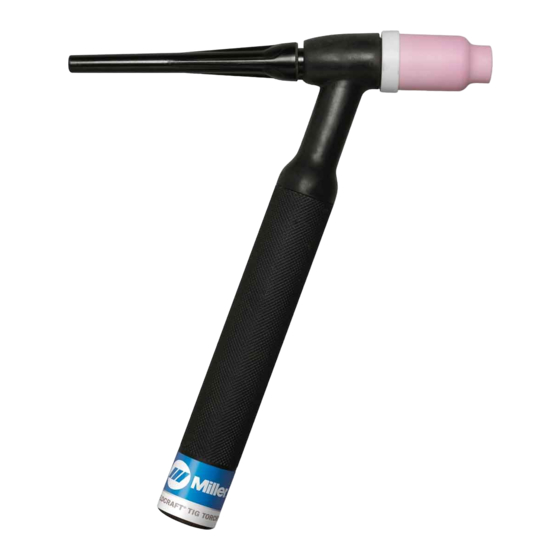
4-2. Required Torch Parts And Torch Assembly − WP Series Water-Cooled Torches Backcap Assembling Torch Parts O-Ring Collet Torch Body (Standard) 4A Torch Body (Pencil) 4B Torch Body (w/Gas Valve) Heat Shield Collet Body Gas Lens Gas Lens Nozzle 10 Handle... -
Page 11: Remote 6 Receptacle Information For 15 Volts Dc
4-4. Remote 6 Receptacle Information For 15 Volts DC Socket Socket Information Contactor control +15 volts DC. 15 VOLTS DC Contact closure to 1 completes contactor control OUTPUT circuit and enables output when Lift-Arc TIG re- CONTACTOR mote is selected. Output to remote control;... -
Page 12: Connecting Torch
4-7. Connecting Torch A. Connecting Water-Cooled Torch When Using A Freestanding Coolant System Tools Needed: 5/8, 7/8, 1-1/8 in. 802560 Obtain correct length with 5/8-18 right-hand Connect coolant-out of torch/power cable Turn Off welding power source and fittings. to power cable adapter, and connect adapt- cooling system power before in- er to weld output terminal. - Page 13 B. Connecting Air-Cooled Torch With Two-Piece Cable Turn Off welding power source power before installing torch. If applicable, install high-frequen- cy unit. Obtain the following hose: Torch Without Gas Valve Gas Hose With 5/8-18 Right- Hand Fittings Connections: Regulator/Flowmeter Gas Cylinder Welding Power Source Torch Gas-In Hose Torch Power Cable...
-
Page 14: Section 5 − Maintenance & Troubleshooting
SECTION 5 − MAINTENANCE & TROUBLESHOOTING 5-1. Routine Maintenance Disconnect torch before maintaining. 40 Hours Repair or Clean and Replace replace tighten weld unreadable cracked terminals. labels. weld cable. Replace cracked parts Torch Body Torch Cable 5-2. Troubleshooting Before using troubleshooting table, check selection and preparation of tungsten electrode according to Section 7. Trouble Remedy Arc will not start. -
Page 15: Section 6 − Electrical Diagrams
Trouble Remedy Erratic arc When using DC, check polarity, and/or polarity of welding cables. When using AC, check welding power source High Frequency control setting, and be sure it is operating continuously. Select proper size and type tungsten. Properly prepare tungsten according to Section 7. Use proper arc length. -
Page 16: Machine Welding
SECTION 7 − SELECTING AND PREPARING A TUNGSTEN FOR DC OR AC PHASE MACHINE WELDING Ref. gtaw_Phase_2018−01 Whenever possible and practical, use DC weld output instead of AC weld output. 7-1. Selecting Tungsten Electrode ( Wear Clean Gloves To Prevent Contamination Of Tungsten A. -
Page 17: Section 8 − Guidelines For Tig Welding (Gtaw)
SECTION 8 − GUIDELINES FOR TIG WELDING (GTAW) 8-1. Positioning The Torch Grinding the tungsten elec- trode produces dust and fly- ing sparks which can cause injury and start fires. Use lo- cal exhaust (forced ventila- tion) at the grinder or wear an approved respirator. -
Page 18: Torch Movement During Welding
8-2. Torch Movement During Welding Tungsten Without Filler Rod ° Welding direction Form pool Tilt torch Move torch to front of pool. Repeat process. Tungsten With Filler Rod ° ° Welding direction Form pool Tilt torch Add filler metal Remove rod Move torch to front of pool. - Page 19 Effective January 1, 2018 (Equipment with a serial number preface of MJ or newer) This limited warranty supersedes all previous Miller warranties and is exclusive with no other guarantees or warranties expressed or implied. LIMITED WARRANTY − Subject to the terms and conditions 90 Days —...
- Page 20 Contact the Delivering Carrier to: File a claim for loss or damage during shipment. For assistance in filing or settling claims, contact your distributor and/or equipment manufacturer’s Transportation Department. © ORIGINAL INSTRUCTIONS − PRINTED IN USA 2018 Miller Electric Mfg. LLC 2018−01...
Need help?
Do you have a question about the WP Series and is the answer not in the manual?
Questions and answers