Table of Contents
Advertisement
Advertisement
Table of Contents

Related Manuals for Kiwi Technics Kiwi-30


Summary of Contents for Kiwi Technics Kiwi-30
-
Page 2: Table Of Contents
Portamento.......................14 Display........................15 Factory Presets......................15 Midi Received......................15 Midi Panic.........................16 Note Hold........................16 Edit Buffer Compare....................16 LFO Generators......................17 Envelopes.........................17 Write Protect......................17 Master Tune......................17 Sequencer...............18 Sequencer Writing / Editing..................19 C) Playing.........................21 Arpeggiator..............22 Chord Mode..............23 Parameter Editing............24 DCO Parameters.......................24 www.kiwitechnics.com Kiwi-30 Upgrade User Manual v121... - Page 3 Midi Out Channel......................30 Seq Midi Out Channel....................30 Enable MidiCC......................30 Enable Midi Sysex....................30 Enable Program Change..................30 Midi Soft Through.....................30 Midi Clock Gen......................30 Master Clock Source....................30 Master Clock Rate....................30 Master Fine Tune......................30 Clock Display......................30 Guitar Mode......................31 www.kiwitechnics.com Kiwi-30 Upgrade User Manual v121...
- Page 4 Tone Dump Importing.............32 Setting up with External Devices........33 Using the PG-200............34 Firmware Updates............35 Test Mode................36 Upgrade install..............37 Midi Data.................46 Continuous Controllers....................47 Real Time Commands....................51 Midi Sysex Support............52 Midi Sysex Data......................53 www.kiwitechnics.com Kiwi-30 Upgrade User Manual v121...
-
Page 5: Kiwi-30 Features
Note, 1/8 Note Half Swing, 1/8 Note Full Swing, 1/8 Note Triplets, 1/16 Note, 1/16 Note Half Swing, 1/16 Note Full Swing, 1/16 Note Triplets, 1/32 Note, 1/32 Note Triplets, 1/64 Note. • Sequencer will Output Midi Data www.kiwitechnics.com Kiwi-30 Upgrade User Manual v121... -
Page 6: Kiwi 30 Flow Chart
Kiwi 30 Flow Chart... -
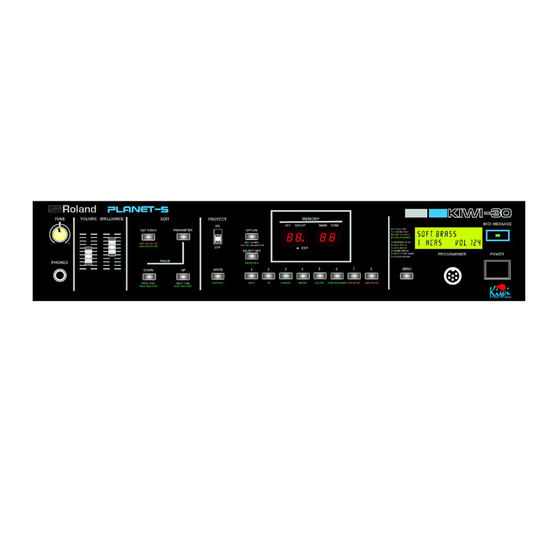
Page 7: Kiwi 30 Front Panel
Kiwi 30 Front Panel... -
Page 8: Kiwi 30 Parameter Edit Map
Kiwi 30 Parameter Edit Map... -
Page 9: Front Panel Description
Front Panel Description The Kiwi-30 front panel differs from the original MKS-30 and the Kiwi-30 Upgrade redefines many of the buttons on the Roland MKS-30. Many of the buttons have been assigned new or multiple functions and others now operate differently. -
Page 10: Kiwi-30 Buttons
ARP playing. has six modes of operation. The Tone Button '7' sets Arp Mode Mode the Kiwi-30 is currently in is Tone Button '8' sets Arp Range shown on the left of the bottom line of the display on the front panel (1 to... -
Page 11: Parameter Button
While in SEQ Mode the 'CARTRIDGE' different operations depending on button will start and stop the SEQ the mode the Kiwi-30 is currently in. playing. While the SEQ is playing 'S' will show on the display in Mode 1 While... -
Page 12: Kiwi-30 Buttons
Kiwi-30 BUTTONS WRITE BUTTON The 'WRITE' button has different When the Kiwi-30 is in DUMP mode a operations depending on the mode press of the 'WRITE' button is used to the Kiwi-30 is currently in. start a dump after the dump type has been selected using the '1-5' buttons. -
Page 13: Buttons '1' To '8
The buttons '1-8' have different SEQ MODE (Menu 3) operations depending on the mode The buttons '1-8' will load a sequence the Kiwi-30 is currently in. from memory to the seq edit buffer. TONE MODE (Menu 1) SEQ ERASE The '1-8' buttons are used to select a The BANK (SET) button is used to Tone to Load. -
Page 14: Kiwi-30 Upgrade Notes
DCO wave voice start frequency and the faster the points and change the sound. change the worse the problem. This is a hardware problem and cannot be addressed. Portamento Portamento is available in all playing modes. www.kiwitechnics.com Kiwi-30 Upgrade User Manual v121... -
Page 15: Display
'blank' Tones and Erased Seqs. This will also reset all the Global parameters to there default settings. Midi Received Midi data received will flash the MIDI Led if it is recognized by the Kiwi-30. www.kiwitechnics.com Kiwi-30 Upgrade User Manual v121... -
Page 16: Midi Panic
Note Hold The MKS-30 has no Note Hold except when using a hold pedal. In the Kiwi-30 while in Menu Level 1 'H' will show on the display when Hold mode is on. Edit Buffer Compare Whenever the edit buffer does not... -
Page 17: Lfo Generators
Each of the will only move the base level up. LFOs have their own sync divider Each section of the Kiwi-30 that with 16 possible divide ratios. uses LFO input can select from one of the 3 LFOs. -
Page 18: Sequencer
Sequencer The Kiwi-30 Upgrade contains a SEQ SELECT polyphonic 6 track sequencer that capacity step While in SEQ MODE a Tone button '1- automatic playing. 8' can be used to select and load a sequence. The clock for the Sequencer is... -
Page 19: Sequencer Writing / Editing
If the Seq is not written to memory the sequence will be lost if the e.g. if the existing sequence is C, D, Kiwi-30 is powered off or another E, F, G in 5 steps and you step to the sequence is loaded. Pressing the... - Page 20 Button 'UP' – Step Forward When the 'UP' button is pressed while in edit mode the sequence will step forward position possible and sound the step. www.kiwitechnics.com Kiwi-30 Upgrade User Manual v121...
-
Page 21: C) Playing
A Sequence can be loaded into It is possible to play along with the memory while in SEQ MODE by sequencer. The Kiwi-30 has 6 voices pressing one of the 8 Tone buttons '1- in total and if not enough voices 8'. -
Page 22: Arpeggiator
1, 2, 3 or 4 octaves. These are displayed and saved with the Tone. Note - If the Master clock source is set to the Midi Clock the Arp will not play if the midi clock is not present. www.kiwitechnics.com Kiwi-30 Upgrade User Manual v121... -
Page 23: Chord Mode
When a Chord is set the center digit Canceling Chord Mode. decimal point will flash. To cancel chord mode press and release the CART Button in TONE MODE (Menu Level 1) with no notes pressed. www.kiwitechnics.com Kiwi-30 Upgrade User Manual v121... -
Page 24: Parameter Editing
Options are LFO1, 2 or 3 216 – VCF Envelope Level Range is 0-127 217 – VCF Envelope Select Options are ENV1,2 or 3 218 – VCF Key Range is 0-127 221 – VCF Dynamics Range is 0-127 www.kiwitechnics.com Kiwi-30 Upgrade User Manual v121... -
Page 25: Lfo Parameters
235 – LFO 3 Rate Range is 0-127 236 – LFO 3 Delay Options are Normal or Plus 237 – LFO 3 Mode Options are the same as LFO1 238 – LFO 3 Sync www.kiwitechnics.com Kiwi-30 Upgrade User Manual v121... -
Page 26: Modulation Matrix
14=Port Rate 15=LFO1 Rate 16=LFO2 Rate 17=LFO3 Rate 18=ENV1 Attack Rate 19=ENV1 Decay Rate 20=ENV1 Release Rate 21=ENV2 Attack Rate 22=ENV2 Decay Rate 23=ENV2 Release Rate 24=ENV3 Attack Rate 25=ENV3 Decay Rate 26=ENV3 Release Rate www.kiwitechnics.com Kiwi-30 Upgrade User Manual v121... -
Page 27: Vca Output Level
Quietest – The note with the lowest volume is selected. Note – If Voice Assign mode is Unison or Solo or Chord Mode or Arp are on then voices are not Stolen and this option is disabled www.kiwitechnics.com Kiwi-30 Upgrade User Manual v121... -
Page 28: Voice Mode Staccato
Complete is Off the sequence will stop immediately when the key is lifted. When SC is set on the Sequence will run to the point where it loops back to the start and then finish. www.kiwitechnics.com Kiwi-30 Upgrade User Manual v121... -
Page 29: Seq Step Timing
13=64th note triplets (1 Clocks/Step) ENV ADSR 411 – 414 Env 1 ADSR Range is 0-127 415 – 418 Env 2 ADSR 421 – 424 Env 3 ADSR Chorus 441 – Chorus Mode Options are Off, On www.kiwitechnics.com Kiwi-30 Upgrade User Manual v121... -
Page 30: Global Parameters Edit
3 – Stop Only used MidiCC Midi Clock Gen 518 Midi Clock Generation Options are Off, On The Kiwi-30 will output a midi clock which is set by the internal clock rate when this parameter is set On Master Clock Source 521 Master Clock Source Options are Internal or Midi. -
Page 31: Guitar Mode
Guitar Mode 525 Guitar Mode Options are Off, On When Guitar mode is on midi notes and midi bend on channels 1-6 only will sound voices 1-6. www.kiwitechnics.com Kiwi-30 Upgrade User Manual v121... -
Page 32: Tone Dump Importing
Make sure you have tones you wish similar ways. A Roland tone would to keep backed up before importing be (Group x 64) + (Bank x 8) + tone dumps. Tone. www.kiwitechnics.com Kiwi-30 Upgrade User Manual v121... -
Page 33: Setting Up With External Devices
Upgrade Notes with the DCO frequency dividers getting audible steps as the frequencies get higher. None of this is a problem though when the Bend Range parameter is turned down for small bend ranges. www.kiwitechnics.com Kiwi-30 Upgrade User Manual v121... -
Page 34: Using The Pg-200
PG200 panel. The DCO LFO & ENV controls will only control DCO1 and the DCO1 & 2 LFO, ENV and invert switches will have no effect. All the other controls will work correctly. www.kiwitechnics.com Kiwi-30 Upgrade User Manual v121... -
Page 35: Firmware Updates
Note – During update all activity in the voice board is stopped. This can cause random noise to sound out the output The Kiwi-30 is put into update mode as the MUX is no longer being updated by pressing and holding the MIDI and this can get quite loud. -
Page 36: Test Mode
Test Mode Test Mode 2 This is similar to test mode one but also turns on DCO2. Tune L1 near The Kiwi-30 is put into TEST mode the rear next to the battery until pressing holding minimal beating can be heard. It will... -
Page 37: Upgrade Install
If you are in any doubt at all or do not understand any part of this document then have this work done by a professional. The KiwiTechnics Kiwi-30 Upgrade must be installed by a competent technician with the correct tools or damage to your Kiwi-30 can occur. - Page 38 On the main board one 40 pin chip and one capacitor and one resistor need to be removed and replaced with a 40 pin socket and a link which are supplied with the KiwiTechnics Kiwi-30 Upgrade. There is also a display board to fit into the CART slot. These instructions are supplied as a guide for your technician only and it is your responsibility to have this done professionally.
- Page 39 Step 2) Remove the main board. Remove all the cables that are plugged into the board and the 9 screws (marked with yellow arrows in the photo) holding the board into the MKS-30. Lift out the main board. The Blue and Purple arrows are used in the next section for removing the Jack Board. www.kiwitechnics.com Kiwi-30 Upgrade User Manual v121...
- Page 40 The ROM IC46 is also not required and can be removed if it is in a socket otherwise it can be left as it is ignored by the Kiwi30. The battery is also no longer required and can be removed to prevent any danger of leaking in the future. www.kiwitechnics.com Kiwi-30 Upgrade User Manual v121...
- Page 41 Bend C148 so that it is a low as possible. Step 5) Remove R99 and fit the wire provided between the R99 hole and the Ground point marked C120 as shown in the photos. www.kiwitechnics.com Kiwi-30 Upgrade User Manual v121...
- Page 42 Step 8) Refit the main board using the 9 screws removed in step 2. Refit all the cables except for the cables plugged into CN4 through CN8 as these need to be removed to fit the display board. www.kiwitechnics.com Kiwi-30 Upgrade User Manual v121...
- Page 43 Step 3) Remove the Midi light board. This is held on by a single screw. Unsolder the red and green wires from this board marked 'A' and 'K'. Step 4) Desolder and remove one of the two wire looms from the Cart board. These are both the same and either one will do. Solder this into the Kiwi-30 Display board taking note of the orientation.
- Page 44 Step 8) Remount the front panel making sure that the green midi LED fits into the hole in the front panel. This may need to be bent a little off center as the midi hole does not perfectly line up with the display board. Fit the top and bottom screws and refit the knobs. Step 9) Plug the cable from the new display board into CN5. www.kiwitechnics.com Kiwi-30 Upgrade User Manual v121...
- Page 45 Once the install is finished the MKS-30 should be tuned. Leave turned on for 30 mins to let the electronics stabilise and then follow the instructions for TEST MODE on Page The last step is to replace the top cover and rack mounts if fitted. www.kiwitechnics.com Kiwi-30 Upgrade User Manual v121...
-
Page 46: Midi Data
Pitch Bend $en (224-239) 0-15 midi channel Least Significant 7 bits Most Significant 7 bits Note - Internal hardware can only support 12 bits so the 2 LSB are dropped Note $xx = hex number www.kiwitechnics.com Kiwi-30 Upgrade User Manual v121... -
Page 47: Continuous Controllers
ENV 2 Sustain $2a (42) $00-$7f (0-127) ENV 2 Release $2b (43) $00-$7f (0-127) LFO 1 Rate $2c (44) $00-$7f (0-127) LFO 1 Delay $2d (45) $00-$7f (0-127) LFO 2 Rate $2e (46) $00-$7f (0-127) www.kiwitechnics.com Kiwi-30 Upgrade User Manual v121... - Page 48 $00-$7f (0-127) 0-127=5-299 BPM Matrix Midi CC #1 $34 (52) $00-$7f (0-127) Source Input for Matrix - Use Sysex or Kiwi-30 Edit for Matrix Control Matrix Midi CC #2 $35 (53) $00-$7f (0-127) Source Input for Matrix Matrix Midi CC #3...
- Page 49 $10-$1f (16-31) Down $20-$2f (32-47) Up & Down $30-$3f (48-63) Random $40-$7f (64-127) As Played Arpeggiator Range $57 (87) $00-$1f (0-31) 1 Octave $20-$3f (32-63) 2 Octaves $40-$5f (64-95) 3 Octaves $60-$7f (96-127) 4 Octaves www.kiwitechnics.com Kiwi-30 Upgrade User Manual v121...
- Page 50 $5f (95) $00-$0f(0-15) Steal Oldest $10-$1f(16-31) Steal Newest $20-$2f(32-47) Steal Highest $30-$3f(48-63) Steal Lowest $40-$4f(64-79) Steal Quietest $50-$7f(80-127) Do Not Steal NRPN Data Plus $60 (96) Not Supported NRPN Data Minus $61 (97) Not Supported www.kiwitechnics.com Kiwi-30 Upgrade User Manual v121...
-
Page 51: Real Time Commands
$7b (123) Stops all output immediately Real Time Commands Midi Clock $f8 (248) Midi Timing Clock Start $fa (250) Start Arp/Sequence Play Stop $fc (252) Stop Arp/Sequence Play Continue $fb (251) Continue Arp/Sequence Play www.kiwitechnics.com Kiwi-30 Upgrade User Manual v121... -
Page 52: Midi Sysex Support
Kiwitechnics Family ID Product Family ID (Kiwi-30) Product ID Major Program Version Byte Minor Program Version Byte Major BootLoader Version Byte Minor BootLoader Version Byte Build Number Device ID (Global Parameter) End of Sysex www.kiwitechnics.com Kiwi-30 Upgrade User Manual v121... -
Page 53: Midi Sysex Data
WARNING! Sysex dumps have the ability to put non valid settings into memory and few checks are made for validity. If the Kiwi-30 becomes unusable due to non valid data you may need to do a full restore of the Kiwi-30 which will lose all saved memory. - Page 54 01=Pass all 10=Pass only nonCC 11=Stop only CC we have used Note - SysEx intended for the Kiwi-30 will not be passed Note – Active Sensing commands are suppressed within the Kiwi-30 and are not passed on $07 (7) = Enable Midi Clock Gen...
- Page 55 $16 (22)=DCO2 Wave/Range 0000yyxx xx = DCO 2 Range 00=16' 01=8' 10=4' yy = DCO 2 Wave 00=Saw 01=Pulse 10=Sqr 11=Noise $17 (23)=DCO2 Coarse Tune 0xxxxxxx x=0-48 (-12 → +12 notes in half semitone steps) www.kiwitechnics.com Kiwi-30 Upgrade User Manual v121...
- Page 56 = Range $00-$7f (0-127) $2a (42)=VCF DYN Amount 0xxxxxxx x = Range $00-$7f (0-127) $2b (43)=VCF Control 000xyyzz zz = VCFEnv(00=Env1,01=Env2,10=Env3) yy = VCFLFO(00=LFO1,01=LFO2,10=LFO3) VCFEnv Pol(0=Norm,1=Inverted) $2c (44)=VCA Level 0xxxxxxx x = Range $00-$7f (0-127) www.kiwitechnics.com Kiwi-30 Upgrade User Manual v121...
- Page 57 $47 (71)=Matrix 7 Level 0xxxxxxx x = Range $00-$7f (0-127) $48 (72)=Matrix 7 Destination 000xxxxx x = 0-26 – See Table 3 $49 (73)=Matrix 8 Source 000xxxxx x = 0-23 – See Table 1 www.kiwitechnics.com Kiwi-30 Upgrade User Manual v121...
- Page 58 $5b (91)=LFO 1 Wave 000000xxx xxx = 000=Sine 001=Triangle 010=Square 011=Saw 100=Reverse Saw 101=Random 110=Fast Random $5c (92)=LFO 1 Rate 0xxxxxxx x = Range $00-$7f (0-127) $5d (93)=LFO 1 Delay 0xxxxxxx x = Range $00-$7f (0-127) www.kiwitechnics.com Kiwi-30 Upgrade User Manual v121...
- Page 59 $5f (95)=LFO 2 Wave 000000xxx xxx = 000=Sine 001=Triangle 010=Square 011=Saw 100=Reverse Saw 101=Random 110=Fast Random $60 (96)=LFO 2 Rate 0xxxxxxx x = Range $00-$7f (0-127) $61 (97)=LFO 2 Delay 0xxxxxxx x = Range $00-$7f (0-127) www.kiwitechnics.com Kiwi-30 Upgrade User Manual v121...
- Page 60 $63 (99)=LFO 3 Wave 000000xxx xxx = 000=Sine 001=Triangle 010=Square 011=Saw 100=Reverse Saw 101=Random 110=Fast Random $64 (100)=LFO 3 Rate 0xxxxxxx x = Range $00-$7f (0-127) $65 (101)=LFO 3 Delay 0xxxxxxx x = Range $00-$7f (0-127) www.kiwitechnics.com Kiwi-30 Upgrade User Manual v121...
- Page 61 000=Up,001=Dn,010=U/D,011=Rndm,100=As Played $6c (108)=AT Control 0000wxyz DCO1 LFO (1=on) DCO2 LFO (1=on) VCF Cutoff (1=on) VCA Level (1=on) $6d (109)=MW Control 0000wxyz DCO1 LFO (1=on) DCO2 LFO (1=on) VCF Cutoff (1=on) VCA Level (1=on) www.kiwitechnics.com Kiwi-30 Upgrade User Manual v121...
- Page 62 $75 (117) Analog Feel Level 0xxxxxxx x = Range $00-$7f (0-127) $76 (118) Bend Range 0xxxxxxx x = Range $00-$7f (0-127) (127=±1 Octave) $77 (119) Chorus Control 0000000z 0 = Off, 1=On $78-$7f (120-127) Not Used www.kiwitechnics.com Kiwi-30 Upgrade User Manual v121...
- Page 63 0xxxxxxx 0-127 for Tone 1-128 sounding Tone with the Tone selected Kiwi-30 transmits data in the same format as the $04 Command $01 (1) - Sequence Number 000xxxxx $09 (9) Request Seq Dump Kiwi-30 transmits a $0a (10) command with 1659 data bytes...
- Page 64 Use Data Position for Parameter Number Parameter Parameter Number is Data Posn e.g. $1f=DCO12Mix Voice Number + Param Number Kiwi-30 transmits a $0e (14) command $0e (14) Transmit / Receive Edit Buffer $01 (1) - Tone Parameter Number 0xxxxxxx Data Offset...
- Page 65 Note – This byte is $00 for all non 12 bit parameters $02 (2) - Parameter Value (Lo) 0yyyyyyy Hi & Lo are combined to make single 12 bit command. 000xxxxx + 0yyyyyyy = 0000xxxx xyyyyyyy www.kiwitechnics.com Kiwi-30 Upgrade User Manual v121...
- Page 66 Midi Note After Touch ENV2 Release Rate ENV3 Attack Rate ENV3 Decay Rate ENV3 Release Rate ¹ = Source is per voice = Destination is per voice = Destination is used in all voices www.kiwitechnics.com Kiwi-30 Upgrade User Manual v121...
Need help?
Do you have a question about the Kiwi-30 and is the answer not in the manual?
Questions and answers