Advertisement
Quick Links
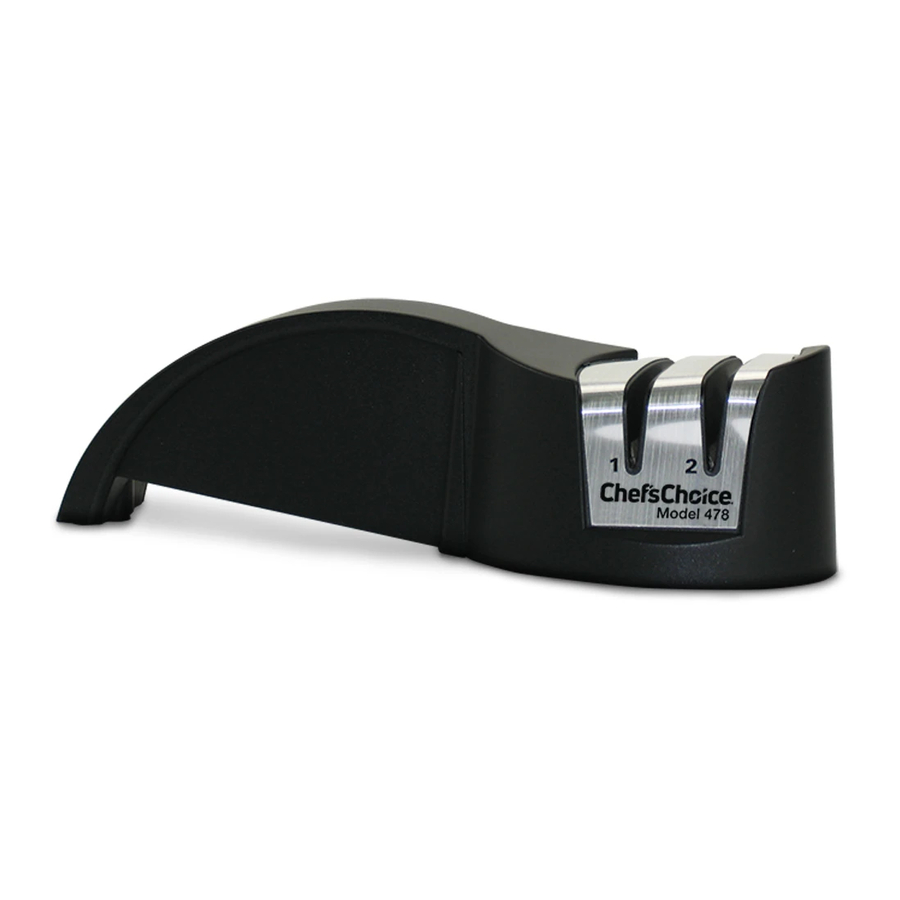
Diamond Hone
Knife Sharpener 2 Stage
Model 478
INSTRUCTIONS
Congratulations! By selecting the innovative
Chef'sChoice
Manual Diamond Hone
®
sharpener, you will be able to enjoy the
pleasure of knives that are sharper and stay
sharp longer than those you may have sharp-
ened using conventional manual sharpeners.
Before you begin . . .
The Chef'sChoice
®
sharpener is "ambidextrous" - extremely easy
to use whether you are a right- or left-handed
person. Stages 1 and 2 are marked on both
sides of the sharpener for your convenience.
Place the sharpener on a level surface about
waist high. Hold the handle with your left hand
(if right-handed) making certain that your left
index finger and thumb remain safely in the
recessed area of the handle. (If left-handed,
see Suggestions on other side of sheet.)
CAUTION! Keep all fingers clear of the
knife blade at all times.
Make certain the blade is clean, then
proceed as follows:
Manual
®
Manual Diamond Hone
1. Sharpening - Stage 1
Holding the knife in the right hand, place the
blade in the first slot (marked number 1) and
center the blade left to right in the slot. While
continuing to keep the blade centered in the
slot, move the blade back and forth in the
slot along the entire blade length.
It is unnecessary to lift the blade after
every stroke. Apply only light downward pres-
sure on the blade and continue the back and
forth action until the blade is sharp. Stage 1
creates a first bevel along the edge. Unless the
knife is very dull, it will take less than 25 full
back-and-forth strokes to sharpen in Stage
1. Do not proceed to Stage 2 until the edge
is very sharp. It should for example, be sharp
enough now to cut paper well (see Testing).
®
2. Honing - Stage 2
To hone the sharpened edge to razor
sharpness, move the blade to the slot of
Stage 2. This hones by creating a second
"micro-bevel" along the edge. Maintaining
the blade centered left to right in the slot,
move the blade back and forth. Apply little
to no downward pressure on the blade. If
the blade is sharpened adequately in Stage
1, only a few, (less than 10), strokes will be
necessary in Stage 2.
Testing for sharpness
Try slicing a tomato or other food before
you sharpen your knife. Then test the knife
periodically during sharpening until you
achieve the sharpness you desire. Ideally,
a well sharpened knife should slice cleanly
through food without excessive force and
without crushing it.
* To test periodically for sharpness, hold a sheet of paper by
its edge and carefully slice through it, making sure you cut
a short but safe distance from your fingers. A sharp blade
will cut smoothly without tearing the paper.
Advertisement

Related Manuals for Chef'sChoice Diamond Hone 478


Summary of Contents for Chef'sChoice Diamond Hone 478
- Page 1 1. Sharpening - Stage 1 Diamond Hone Manual ® Holding the knife in the right hand, place the blade in the first slot (marked number 1) and Knife Sharpener 2 Stage center the blade left to right in the slot. While Model 478 continuing to keep the blade centered in the slot, move the blade back and forth in the...
- Page 2 Suggestions ening, sharpening and honing angles are • If left-handed, turn the sharpener around, totally compatible for all models of the hold the handle with your right hand and Chef’sChoice knife sharpeners. ® the knife with your left, and follow sharpen- ing and honing instructions above. Limited Warranty: Used with normal care for family or house- hold purposes only, this EdgeCraft product is guaranteed • With thick blades, it is sometimes useful...
Need help?
Do you have a question about the Diamond Hone 478 and is the answer not in the manual?
Questions and answers