Table of Contents
Advertisement
Instructions for
installation and use
EN
AR
English,1
, 15
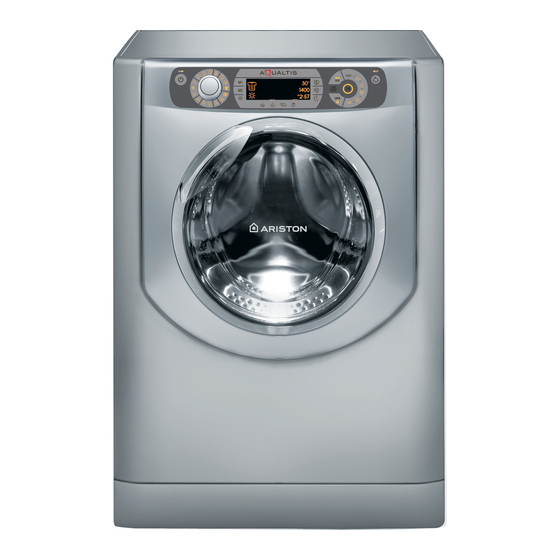
AQUALTIS
AQD1170D 49X
!
This symbol reminds you to read this
instruction manual.
Contents
Installation, 2-3-4
Assistance, 5
cycle, 10
Trouble shooting, 13
WASHER-DRYER
1
EN
Advertisement
Table of Contents

Subscribe to Our Youtube Channel
Related Manuals for Ariston AQUALTIS AQD1170D 49X


Summary of Contents for Ariston AQUALTIS AQD1170D 49X
-
Page 1: Table Of Contents
Instructions for installation and use WASHER-DRYER This symbol reminds you to read this instruction manual. Contents English,1 , 15 Installation, 2-3-4 Unpacking and levelling Connecting the electricity and water supplies Technical data Assistance, 5 Care and maintenance, 6 Cutting off the water and electricity supplies Cleaning the machine Cleaning the detergent dispenser drawer Caring for your appliance drum... -
Page 2: Installation
Installation ! This instruction manual should be kept in a ! If the appliance is levelled correctly, it will safe place for future reference. If the Washer- be more stable and much less likely to cause dryer is sold, given away or moved, please vibrations and noise while it is operating, ensure the manual is kept with the machine, particularly during the spin cycle. - Page 3 WARNING - THIS APPLIANCE MUST BE Connecting the drain hose EARTHED. Connect the drain THE FOLLOWING OPERATIONS SHOULD hose, without bending BE CARRIED OUT BY A QUALIFIED it, to a drainage duct ELECTRICIAN. or a wall drain located at a height between Replacing the fuse: 65 and 100 cm from When replacing a faulty fuse, a 13 amp ASTA...
-
Page 4: Technical Data
As the colours of the wires in the lead may ! The power supply cable must never be bent not correspond with the coloured markings or dangerously compressed. identifying the terminals in your plug, proceed as follows: ! The power supply cable must only be Connect Green &... -
Page 5: Assistance
Assistance Before calling for Assistance: • Check whether you can solve the problem by yourself (see “Trouble shooting”); • Restart the wash cycle to check whether the problem has been solved; • If it has not, contact the Authorised Technical Assistance Service. ! If the Washer-dryer has been installed or used incorrectly, you will have to pay for the call-out service. -
Page 6: Care And Maintenance
Care and maintenance Cutting off the water and To access the pre-chamber: electricity supplies • Turn off the water tap after every wash cycle. This will limit wear on the hydraulic system in the machine and help to prevent leaks. •... -
Page 7: Precautions And Advice
Precautions and tips ! The machine was designed and constructed in • Do not use the appliance to dry foam rubber accordance with international safety regulations. The or similar elastomers. following information is provided for safety reasons and • Make sure that the water tap is turned on during must therefore be read carefully. -
Page 8: Description Of The Machine
Description of the machine CONTROL PANEL PORTHOLE DOOR PORTHOLE DOOR HANDLE KICK STRIP ADJUSTABLE FEET PORTHOLE DOOR Always use the handle to TOUCH CONTROL PANEL To adjust the settings, gently open the porthole door (see press the icon inside the figure). -
Page 9: Touch Control Panel
START/PAUSE button Touch control panel with indicator light SPIN WASH button CYCLE WASH CYCLE PHASE TEMPERATURE SELECTOR knob indicator light button icons DISPLAY CONTROL PANEL LOCK OPTION ON/OFF Button with DELAYED START button with indicator light DRYING buttons indicator light button button LOCK... -
Page 10: How To Run A Wash Cycle Or A Drying Cycle
How to run a wash cycle or a drying cycle WARNING: before you use the Washer-dryer for the first time, Drying only Use the cycle selector knob to select a drying cycle ( - - ) run a wash cycle with detergent and no laundry, using the 90° cottons cycle without pre-wash. -
Page 11: Wash Cycles And Options
Wash cycles and options Table of wash cycles Detergent and ad- Max. Max. ditives Max. temp. Cycle Icon Description of the wash cycle speed Drying load (°C) Pre- Fabric duration Wash (rpm) (kg) wash softener Cotton Coloureds: lightly soiled whites and delicate colours. 40°... -
Page 12: Detergents And Laundry
Detergents and laundry Wool - Woolmark Apparel Care - Green: Detergent the wool wash cycle of this machine has been approved by The type and quantity of detergent required depend on The Woolmark Company for the washing of wool garments the type of fabric you are washing (cotton, wool, silk, etc.), labelled as “hand wash”... -
Page 13: Trouble Shooting
Trouble shooting Your Washer-dryer could occasionally fail to work. Before contacting the Technical Assistance Centre (see “Assistance”), make sure that the problem cannot be solved easily using the following list. Problem: Possible causes / Solutions: • The appliance is not plugged into the socket fully, or not enough to make The Washer-dryer does not switch contact. -
Page 14: Instruction Sheet
Instruction Sheet Manufacturer’s name Whirlpool EMEA S.p.A. - Socio Unico via Carlo Pisacane n.1 - 20016 Pero (MI) - Italy Description model AQD1170D 49X Country of production Italy Rated Voltage (V) 220/240 V Rated Frequency (Hz) 60 Hz Rated Power (W) 1850 W Net Weight (kg) 75.8 kg...
Need help?
Do you have a question about the AQUALTIS AQD1170D 49X and is the answer not in the manual?
Questions and answers