Table of Contents
Advertisement
Available languages
Available languages
Advertisement
Table of Contents

Related Manuals for Ruizu X02


Summary of Contents for Ruizu X02
- Page 1 RUIZU X02 USER MAUNAL Customer Service :ruizuservice@hotmail.com...
- Page 2 Language English -------------------------------------- 01/07 Deutsch------------------------------------- 08/15 Italiano-------------------------------------- 16/23 Español-------------------------------------- 24/31 Francais------------------------------------- 32/39 日本------------------------------------------ 40/47...
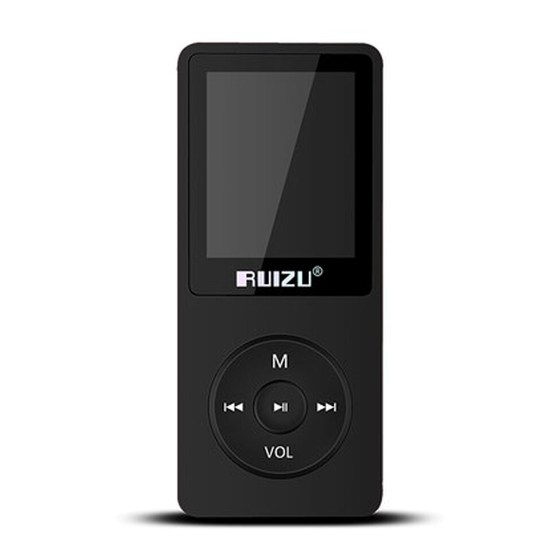
- Page 3 Buttons & Controls 1. Menu button/Scroll up/Volume + 2. Previous / Rewind / Back button 3. Back button/Scroll down/Volume - 4. Play/Pause/Enter/Power on/off 5. Next/Fast forward 6. Card slot 7. Ear phone jack 8. Power slider 9. USB port Charge the Player 1.By USB cable The USB cable can both be used for data transfer and charging the player.
- Page 4 2.By connecting to a computer or charger(Not included) Please note: The specifications of the charger must meet the following requirements or any accident or failure happened will be regarded as man-made damage. Input: AC110-240V 50/60Hz Max:100mA Output: DC5.0-5.5V 500mA-800mA Power On/Off Slide the power switch to "Right"...
- Page 5 or the internal memory of the player. Volume Adjustment Press and hold the "VOL" button. When you see the volume icon, press "M" to increase or "VOL" button to lower the volume. Return When the player is on music playing interfaces, press the button VOL to return, then press the button continually to return to the main interface.
- Page 6 repeated automatically. The icon for A-B indication will appear on the screen. 3)Click button again to back to normal playback FM Radio Select "FM Radio" on main menu, click button to access to its function. A related list will show including "Station list", "Manual tune", "Auto tune"...
- Page 7 (seconds)/Always on. Date and Time: Click button to switch. Click button M/VOL to set. Click button to save your settings. Recordings Select "Record" on main interface, click button to access to its function, then a related list will show as "Start Voice Recording", "Recordings library", "Storage"(only available with card inserted), "Record Format"...
- Page 8 2)Slide the power switch to the “Left” side to turn off the player, then hold the play button for 10 seconds to reset the player. Update the firmware. Please email to RUIZU service we will teach you how to update a new firmware. Email address : ruizuservice@hotmail.com (you could see this email address on...
- Page 9 WAV:Bitrate:32Kbps~384Kbps, Sampling rate:8MHz~48MHz; FLAC:Bitrate:1000Kbps~1200Kbps(L0~L8), Sampling rate:8MHz~48MHz Specification Screen 1.8’’ TFT screen Weight 29 g Dimension 39mm*7.8mm*90mm Flash Memory 8GB/16GB/32GB/64GB Audio Format MP3/WAV/APE/WMA/FLAC etc. Video format 128*160 AMV (converted video ) Recording format MP3/WAV/ACT Recording distance 5~8 meters Playing time 80h at medium volume by earphone Battery 3.7V/460 mAh Charging time...
- Page 10 Tasten und Bedienelemente 1. MenüTaste/NachOben/Volumen+ 2.Vorherig/Schnaller Rücklauf/Zurück Taste 3.Zurück Taste/ Nach Unten/Volumen - 4.Spielen/Pause/BestimmenTaste/Ein&Ausschalten 5.SchnellerVorlauf/Nächst 6.Karte Buchse 7.Kopfhörerbuchse 8.Ein/Ausschalter 9. USB-Anschluss Aufladen Sie können das Gerät über Computer oder ein Ladegerät per USB-Kabel aufladen. (Ladegerät nicht enthalten)
- Page 11 Hinweis:Um Unfall oder Fehler zu vermeiden, die Spezifikationen des Ladegerätes müssen die folgenden Anforderungen erfüllen: Eingang: AC110-240V 50 / 60Hz Max: 100mA Ausgang: DC5.0-5.5V 500mA-800mA Ein/Ausschalten Schieben Sie bitte den Netzschalter auf „Rechts“ Seite um das Gerät einzuschalten. Wiederholen Sie auf „Links“ Seite um das Gerät auszuschalten.
- Page 12 2Wiedergabelistenaktualisieren: aktualisieren Sie alle Songs auf der externen Micro SD Karte oder den internen Speicher des Players. Volumen Einstellen Halten Sie die "VOL" Taste gedrückt. Wenn Sie ein Volume-icon sehen, drücken Sie die "M" Taste um die Volumen zu erhöhen oder die "VOL"...
- Page 13 Wiederholungsintervallein. "Wiederholungsmodus(A-B)" (Nur verfügbar, wenn die Musik spielt) 1)Wählen Sie"Wiederholungsmodus(A-B)" mit die Taste um die Startzeit A zu bestätigen (A blinkt). 2)Klicken Sie dann auf die Taste , um die Endzeit B einzustellen (B blinkt). Klicken Sie zur Bestätigung erneut auf die Taste .
- Page 14 2."Bandsbstimmung", wählen ausNormalfrequenzzone/JapanischeFrequenzzone /Europäische Frequenzzone. 3."UKW-Aufnahme",findenSiediegespeicherte FM-Aufnahme im Ordner Aufnahme unter FOLDER. Hinweis: Sie können nur Mono-Radiosender auf diesem Spieler hören. Einstellen Sleep-Timer: wählen Sie "Sleep Timer", um diese Funktion auszuschalten oder den Sleep Timer zwischen 1-99 (Minuten) einzustellen. Bildschrim einstellen: Stellen Helligkeit,...
- Page 15 Einstellungen"auszuwählen. Werkzeug Wählen Sie " Werkzeug" auf der Hauptschnittstelle, klicken Sie die Taste um zum Untermenü zu sein. Da gibt es "Kalender", "Sekundenuhr" und "Alarm" auszuwählen. Video Dieser Spieler kann nur das .amv-Format in 160 * 128 unterstützen. Bevor Video sehen, müssen Sie die Videodateien durch Formatumwandlungs software umwandeln.
- Page 16 1)Schalten Sie den Player aus. Dann machen Sie bitte den Player Neustart. 2)Schieben Sie bitte den „on/off“ Schalter auf „Links“ Seite, halten Sie dann die Taste 10 Sekunden gedrückt, um den Mp3 Player rückzusetzen. 3)Machen Sie bitte die Firmware. Sie können die Firmware auf diese Webseite herunterladen, um den MP3 Player Update zu machen.
- Page 17 FLAC: Bitrate:1000Kbps~1200Kbps(L0~L8), Sampling rate:8MHz~48MHz; Technische Daten Bildschirm 1.8” TFT Bildschirm Gewicht Größe 39*7.8*90mm Kapazität 8G/16G/32GB/64GB Musik Format MP3/WMA/WAV/APE/FLAC etc. Video Format AMV(128*160 Konvertiertes) AufnahmeFormat MP3/WAV/ACT Aufnahme Distanz 5~8 Meter Spielzeit(Stunden) 80 Stunden bei mittlerer Lautstärkeper Kopfhörer Akku 3.7V/460 mAh Ladezeit 2~3 Stunden SD Karte Expansion Bis zu 128G Für weitere Fragen stehen wir Ihnen sehr gerne per Email zur...
- Page 18 Pulsanti & controlli 1. Menu button/ Scorrisu/Volume+ 2.Precedente/Riavvolgi/Pulsanteindietro 3.Pulsanteindietro/Scorrereversoilbasso/Volume- 4.Play/Pausa/Enter/accensione/spegnimento 5.Successivo/avanti veloce6.Slot schede 7.Jackauricolari8.Cursoredialimentazione 9.PortaUSB Carica il lettore 1. Con cavo USB Il cavo USB può essere utilizzato sia per il trasferimento dei dati...
- Page 19 che per la ricarica del lettore. 2.Collegandosi ad un calcolatore o ad un caricatore (non incluso) Si prega di notare: le specifiche del caricabatterie devono soddisfare i seguenti requisiti o qualsiasi incidente o guasto accaduto sarà considerato come danni causati dall'uomo. Ingresso: AC110-240V 50/60Hz Max: 100 v Uscita: CC 5.0-5.5V 500mA-800mA Accensione/spegnimento...
- Page 20 -Resume ~ vi porterà di nuovo alla canzone o file audio che si sta giocando ora. - Aggiornare i dati della scheda ~ aggiornare tutte le canzoni nella scheda esterna di mirco SD o la memoria interna del lettore. Regolazione del volume Premere e tenere premuto il tasto "Vol".
- Page 21 riproduzione. "A-B riproduzione"(only available when the music is playing) 1) Scegliere l'opzione "Modalità di ripetizione" con il tasto per confermare l'ora di avvio A (A lampeggia). 2) Quindi fare clic nuovamente sul pulsante per impostare l'ora finale B (B lampeggia). Fare nuovamente clic sul pulsante e il passaggio dal tempo A alla B verrà...
- Page 22 3. "Registrazioni FM", tutte le registrazioni salvate saranno elencate qui. Si prega di notare: è possibile ascoltare solo la stazione radio mono su questo lettore. Imposta Timer spegnimento: scegliere "Timer spegnimento" per disattivare questa funzione o impostare il timer di spegnimento tra 1 e 99 (minuti).
- Page 23 Strumenti Selezionare "strumenti" sull'interfaccia principale, fare clic sul pulsante per accedere alla sua funzione. Un elenco correlato mostrerà "calendario", "cronometro" e "allarme". Video Questo lettore può supportare solo il formato. AMV in 160 * 128, si dovrebbe convertire i file video per formato software di conversione prima .
- Page 24 1) Spegnere il lettore e riprovare. 2) Far scorrere l'interruttore di alimentazione sul lato "sinistro" per spegnere il lettore, quindi tenere premuto il tasto Play per 10 secondi per azzerare il lettore. 3) Aggiornare il firmware. Si prega di visitare www.ruizutek.com per scaricare il firmware e l'aggiornamento.
- Page 25 Specifiche Schermo 1.8" TFT schermo Peso Dimensioni 39*7.8*90mm Flash memoria 8G/16G/32GB/64GB Audio formato MP3/WAV/APE/WMA/FLAC etc. Video formato 128*160 AMV(video convertito) Registrazioniformato MP3/WAV/ACT Distanza diregistrazione 5-8 metri Tempo diriproduzione 80 ore in volume medio perauricolare Batteria 3.7V/460 mAh Tempo di ricarica 2~3 ore Espansione SD card Fino a 128G...
- Page 26 Buttons & Controls 1. Botóndemenú/desplazaarriba/Volumen+ 2.Anterior/Retroceso/Botón de vuelva 3.Botón de vuelva/Desplace debajo /Volumen - 4.Reproducir/Pausar/Entrar/Encendido/Apagado 5.Canción siguiente/Avance rápido 6.Ranura para tarjeta 7.Jack de auriculares 8.El interruptor 9.Puerto de USB Carga al reproductor 1. Por el cable del USB El cable USB se puede utilizar para la transferencia de datos y la...
- Page 27 carga del reproductor. 2. Por conectándose a un ordenador o cargador (no incluido) Por favor observe: las especificaciones del cargador deben cumplir los requisitos siguientes o cualquier accidente o la falta ocurrida será considerada como daño causado por el hombre. Entrada: AC110-240V 50/60Hz Máximo: 100mA Salida: C.C 5.0-5.5V 500mA-800mA Encendido/apagado...
- Page 28 que está reproducido ahora. - Actualizar datos de tarjeta ~ actualizar todas las canciones en la tarjeta externa de Mirco SD o la memoria interna del reproductor. Ajusta volumen Mantenga pulsado el botón "VOL". Cuando vea el icono de volumen, pulse "M" para aumentar o el botón "VOL" para bajar el volumen.
- Page 29 "A-B Repite"((sólo disponible cuando la música se está reproduciendo)) 1) Seleccione la opción "Mode de repetición" con el botón para confirmar la hora de inicio A (A está parpadeando). (2) Luego haga clic de nuevo para ajustar el tiempo de finalización B (B está...
- Page 30 mostrará aquí. Por favor atención: sólo puede escuchar la estación de radio mono en este reproductor. Establecer Temporizador de apagado: elija "Temporizador de apagado" para desactivar esta función o ajuste el tiempo de apagado auto entre 1-99 (minutos). Ajustes pantalla: ajusta temporizador retroiluminación y el protector de pantalla de su...
- Page 31 Herramientas Seleccione "Herramientas" en la interfaz principal, haga clic en el botón para acceder a su función. Una lista relacionada mostrará "Calendar", "cronómetro" y "Alarma". Video Este reproductor sólo puede apoya el formato. AMV en 160 * 128, debe convertir los archivos de vídeo por el software de conversión de formato.
- Page 32 (2) Deslice el interruptor de alimentación a la parte "izquierda" para apagar el reproductor, luego mantenga pulsado el botón reproduir por 10 segundos para restablecer el reproductor. (3) Actualice el firmware. Por favor, visitewww.ruizutek.com para descargar el firmware y la actualización. c.
- Page 33 Especificaciónes Pantalle 1.8" TFT pantalla Peso Dimensión 39*7.8*90mm Flash memoría 8G/16G/23GB/64GB Audio formato MP3/WAV/APE/WMA/FLAC etc. Video formato 128*160 AMV(converted video) Grabar formato MP3/WAV/ACT Distancia degrabación 5-8 metros Tiempo dereproducir 80 horas en medio volumen porauriculares Batería 3.7V/460 mAh Tiempo de carga 2~3 horas Expansión detarjetas SD Hasta a 128G Si tiene cualquiera duda, por favor contact nosotros con...
- Page 34 Boutons & Contrôles 1. Menubouton/Sélectionup/Volume+ 2.Précédent/Rembobiner/Boutonrentrer 3.Boutonrentrer/Sélectiondown/Volume- 4.Jouer/Pauser/Entrer/Allumer/Eteindre 5.Suivant /AvanceRapide 6.Cran de carte 7.Jack ecouteurs8.Interrupteurd'alimentation 9.PortUSB Chargement du lecteur 1.Chargez par câble USB Le câble USB peut être utilisé pour le transfert de données et le chargement du lecteur.
- Page 35 2.Par connecter à un ordinateur ou à un chargeur (non inclus) Remarque: les spécifications du chargeur doivent satisfaire aux exigences suivantes ou tout accident ou défaillance qui se produira sera considéré comme un dommage causé par l'homme. Entrée: AC110-240V 50/60Hz Max:100mA Sortie: DC5.0-5.5V 500mA-800mA Allumer/Fermer Glissez l'interrupteur d'alimentation sur le côté...
- Page 36 - Reprendre la musique ~ vous ramène à la chanson ou au fichier audio que vous jouez maintenant. - Télécharger les données de la carte ~ télécharger toutes les chansons de la carte Mirco SD externe ou de la mémoire interne du lecteur Réglage du volume Appuyez et maintenez sur le bouton "VOL".
- Page 37 4.Mode lecture, pour faire mode de répétition, nombre de fois de repetition , intervalle Re-lecture. "Nombre de fois de repetition "( uniquement disponible lorsque la musique est en cours de lecture) 1) Choisissez l'option "nombre de fois de repetition " avec le bouton pour confirmer l'heure de début A (A clignote).
- Page 38 enregistrer la radio que vous souhaitez enregistrer, trouvez les enregistrements enregistrés dans "enregistrement FM". 2. "Réglage manuel", choisissez Commun / Japan / European Band. 3. " Enregistrement FM", tous les enregistrements enregistrés seront listés ici. Remarque: vous ne écoutez que la station de radio mono sur ce lecteur.
- Page 39 cliquez sur le bouton pour accéder à sa fonction, puis une liste associée s'affiche comme "Démarrer l'enregistrement vocal", "Bibliothèque d'enregistrements", "Storage"(uniquement disponible avec la carte insérée), "Enreg Format" et "Config d’Enreg". Outil Sélectionnez "Outils" sur l'interface principale, cliquez sur le bouton pour accéder à...
- Page 40 pouvez ensuite choisir la langue. b.Ne peut pas allumer le lecteur; L'écran du lecteur est blanc / noir; Le lecteur est écrasé ou a un bug de microprogramme 1)Éteignez le lecteur et réessayez. 2)Glissez l'interrupteur d'alimentation sur le côté "gauche" pour éteindre le lecteur, puis maintenez le bouton de lecture pendant 10 secondes pour réinitialiser le lecteur.
- Page 41 compressé), Fréquence d'échantillonnage:8MHz~48MHz; WAV: Débit binaire:32Kbps~384Kbps, Fréquence d'échantillonnage:8MHz~48MHz; FLAC: Débit binaire:1000Kbps~1200Kbps(L0~L8), Fréquence d'échantillonnage:8MHz~48MHz; Spécialisations Ecran Ecran 1.8" TFT Poids Dimension 39*7.8*90mm Mémoire flash 8G/16G/32GB/64GB Formats audio MP3/WAV/APE/WMA/FLAC etc. Formats vidéo 128*160 AMV(Conversion devidéo) Formatd'enregistrement MP3/WAV/ACT Enregistrement 5-8 mètres Autonomie 80 heures au volume médium. Batterie 3.7V/460 mAh Temps de chargement...
- Page 42 各部名前 1. メニューボタン/上へ移動/ 音量上げ 2.前/巻き戻し/戻るボタン 3.戻るボタン/下へ移動/音量下げ 4.再生/一時停止/確認/電源のオン/オフ 5.次へ/早送り 6.マイクロ SD カード端子 7.イヤホンジャック 8.電源スイッチ 9.USB ポート 充電について 1.USB ケーブルは、データの転送やプレーヤーの充電に使 用できます。...
- Page 43 2.パソコンまたは充電器に接続して充電できます(別売) ご注意:充電器の仕様は、以下の条件を満たす必要があり ます。 お客様は充電器の誤利用による損傷場合、 無料修理、 交換、返品等対応不可です。予めご了承ください。 入力: AC110-240V 50/60Hz 最大:100mA 出力: DC5.0-5.5V 500mA-800mA 電源オン/オフ 使用開始と終了する時は電源スイッチをオン/オフにしま す。 待機状態:再生ボタンを 3 秒間押し続けると、電源がオ ン/オフになります。 スクリーンロック/ロック解除 任意画面でも、 と「M」ボタンを同時に押すと、画面を ロック/ロック解除できます。 メイン界面 ボタンを押すたびに、9 つの機能のうちの 1 つ に移動し、音楽、FM ラジオ、フォルダビュー、設定、録音、 ツール、画像、電子ブック、動画などが含まれます。 音楽再生 - 再生中-今再生している曲や音楽ファイルに戻ります。 - プレイリストを更新- 外部の Micro SD カードまたはプレー ヤーの内蔵メモリにあるすべての曲を更新する...
- Page 44 音量の調整(VOL ボタン) "VOL"ボタンを長押します。音量アイコンが表示されたら、 "M"を押して音量を上げ、 "VOL"ボタンを押して音量を下 げます。 戻るボタン 音楽再生中の場合は、VOL ボタンを押して戻ります。 他の界面では、 ボタンを押して戻ります。 ボ タンを押し続け てメイン界面に戻ります 。 サブメニュー 音楽再生中は、M ボタンを押してサブメニューに入ります。 1.シャッフル、シャッフルモードのオン/オフを選択します。 2.ブックマークは、追加、削除、またはブックマークへの移動 を選 択します。 3.シフト配信(再生速度)は-8(最小)から+8(最大)に 速度を調整します。 4.言語学習は、再生モード下のリピートモード(A-B リピート)、 再読回数、再生間隔を設定可能です。 "A-B リピート"(音楽が再生中のみ使用可能) 1) ボタンで「A-B リピート」を選択し、開始時刻 A を確 認し...
- Page 45 ます(A が点滅しています) 。 2) ボタンをもう一度クリックして終了時刻 B を設定しま す (B が点滅しています) 。 ボタンをもう一度クリックする と、時 間 A から B の間が自動的に再生します。 A-B 表示のアイコ ン が画面に表示されます。 3)もう一度 ボタンをクリックすると、通常再生に戻り ます。 FM ラジオ メインメニューで「FM ラジオ」を選択し、 ボタンを クリックして機 能に入ります。 「プリセット」 、 「手動チューンニング」 、 「自動チュ ーンニング」 、 「FM 録音」 などの選択肢があります。 M/ VOL ボタ...
- Page 46 ジオを 保存し、保存した録音を「FM 録音」で探します。 2.「周波数範囲」では、普通周波段/日本周波段/ヨーロッ パ 周波数範囲から選択します。 3. "FM 録音"では、 すべての録音がここにリストされます。 設定 1、 スリープタイマー: この機能をオフにするには 「Shut down sleep timer」を選択する、または、スリープタイマーを 1〜99 (分)に設定します。 2、表示設定:本製品のバックライトタイマーとスクリーンセ ーバ ーを設定します。 3、バックライト時間:10(秒)/ 20(秒)/ 30(秒)/常 にオンに設定します。 4、日時: ボタンをクリックして、選択対象が切り 替えます。M / VOL ボタンをクリックして設定します。 ボタンをクリックして設定を保存します。 録音 メインメニューで「録音」を選択し、 ボタンをクリ ックして機能に入ると、 「音声録音を開始」 、 「録音ライブ ラリ」...
- Page 47 つの選択肢があります 。 ツール メインメニューで「ツール」を選択し、 ボタンをクリッ クしてその機 能に入ります。 「カレンダー」 、 「ストップ ウオッチ」 、 「アラーム」から 選択できます。 動画 本製品は 160 * 128 の.amv 形式のみをサポートしていま すので、まずフォーマット変換ソフトでビデオファイルを 変換してくださ い。 故障排除 a.言語を再選択する方法 「設定」の中で、 「言語/Language」を見つけて、 ボタ ンをクリックしてその機能に入ります。 M/ VOL ボタンを クリックして言語を選定し、 もう一回 ボタンを押す るより、設定完了。 b.本製品は電源が入らなくなり、プレーヤーの画面は白/ 黒になり,クラッシュしたり、ファームウェアのバグの場 合が会います。まず下記の方法をお試してください。 1、本製品の電源を切り、もう一度オンしてください。...
- Page 48 再生ボタンを 10 秒間押し続けると、プレーヤーがリセッ トされます。 3、ファームウェアのアップデート www.ruizutek.com にアクセスし、ファームウェア をダウンロードしてアップデートしてください。 c.ディスクエラー 画面に「ディスクエラー」と表示された場合は、プレーヤ ーをフォーマットしてください。[設定]中には[デバイスを フォーマット]を選択してください。 d.曲をプレイヤーに認識されません 曲のフォーマットが間違ったか、暗号化されているか、こ の曲がサポートされていないかどうかを確認してくださ い。下記はサポートされているオーディオフォーマット MP3: ビ ッ ト レ ー ト :8Kbps~320Kbps, サ ン プ リ ン グ レ ー ト:8MHz~48MHz; WMA: ビットレート:5Kbps~384Kbps, サンプリングレー ト:8MHz~48MHz; APE: ビ ッ ト レ ー ト :800Kbps~1000Kbps(FAST normal compressed), サンプリングレート:8MHz~48MHz;...
- Page 49 FLAC: ビットレート:1000Kbps~1200Kbps(L0~L8), サンプリ ングレート:8MHz~48MHz; 仕様 1.8 "TFT スクリーン スクリーン 重量 39*7.8*90mm 寸法 8G/16G/32GB/64GB 内蔵容量 MP3/WAV/APE/WMA/FLAC 等. オーディオフォーマット 128*160 AMV(変換されたビデオ) ビデオフォーマット MP3/WAV/ACT 録音フォーマット 5-8 m 録音距離 再生時間 イヤホンを中等音量で再生する場 合、80 時間を再生可能。 3.7V/460 mAh 電池 2~3 時間 充電時間 マイクロ Sd カード拡張 128G(最大) 本製品についてのご質問は、ruizuservice@hotmail.com ま...
Need help?
Do you have a question about the X02 and is the answer not in the manual?
Questions and answers
ПОСЛЕ ЗАРЯДКИ ПОЯВИЛАСЬ ПРЕДУПРЕЖДЕНИЕ НЕ ВЫКЛЮЧАТЬ И ОБОЗНАЧЕНИЕ ШТЕККЕРА. НИ НА КАКИЕ ДЕЙСТВИЯ РЕАКЦИИ НЕТ. Даже на выключение.
If the Ruizu X02 shows a warning after charging and does not respond to any actions, follow these steps:
1. Turn off the player by sliding the power switch to the "left" side.
2. Hold the Play button for 10 seconds to reset the player.
3. Update the firmware by downloading it from the official Ruizu website.
This answer is automatically generated